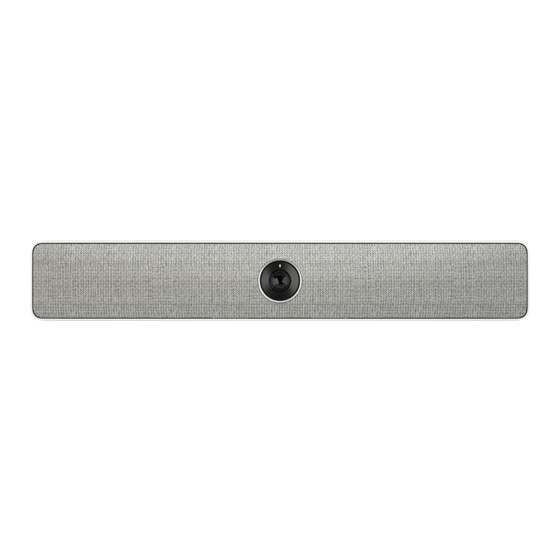
Resumen de contenidos para Cisco WEBEX ROOM KIT MINI
- Página 1 Cisco Webex Room Kit Mini Installation Guide Guide d’installation Installationshandbuch Guida per l’installazione Guía de instalación Manual de Instalação...
- Página 2 Mounting Recommendations Conseils pour le montage / Montage-Empfehlungen / Consigli di montaggio / Recomendaciones de montaje / Recomendações de montagem The Room Kit Mini is made for huddle spaces and You can mount the Room Kit Mini above or below small rooms.
-
Página 3: What's In The Box
4. Network cable 5 m / 16.4 ft 2. Controlador Touch, transformador e cabo de rede 8. Suporte de ecrã 11. Cisco Table Multi-Connector 4K 9 m / 29.5 ft 3. Cabo HDMI 1.5 m 9. Cabo HDMI para apresentações com 8 m 5. -
Página 4: Wall Mounting
2.a Wall mounting Fasten the wall mount Fixation murale / Wandhalterung / Montaggio a parete / Fixez le support mural / Befestigen der Wandhalterung / Fissare il supporto a parete / Fije el Montaje en pared / Montaje en pared soporte de montaje en pared / Apertar o suporte de parede Due to the size and mass of this product, it is important Le mur et le matériel de montage doivent pouvoir supporter... - Página 5 Adjust the position and tighten the screw on the top. Place the mediabar. Ajustez la position et serrez la vis du dessus. / Passen Sie die Position an und ziehen Sie die Placez la barre multimédia. / Platzieren Sie die Medienleiste. / Posizionare la barra Schraube oben fest.
- Página 6 2. b Screen Mounting Attach the horizontal piece to your screen and tighten the bolts. Fixer l’écran / Bildschirm-Montage / Montaggio dello schermo / Soporte de Fixez la pièce horizontale sur votre écran et serrez les vis. / Befestigen Sie das horizontale la pantalla / Montagem no ecrã...
- Página 7 Attach top part to vertical part. Finger tighten the screw so that you can adjust Place the vertical part on the screen and adjust the position. the mounting position. Placez la partie verticale sur l’écran et ajustez la position. / Befestigen Sie den vertikalen Teil am Bildschirm, und passen Sie die Position an.
- Página 8 Fasten the screen mount. Tighten the screw on the top. Fixez le support de l’écran. / Befestigen Sie die Bildschirmhalterung. / Fissare il supporto dello Serrez la vis du haut. / Ziehen Sie die Schraube oben fest. / Serrare la vite nella parte schermo.
- Página 9 Place the mediabar. Placez la barre multimédia. / Platzieren Sie die Medienleiste. / Posizionare la barra multimediale. / Coloque la barra multimedia. / Coloque a barra multimédia. Flip to place below the screen. Faites pivoter la barre pour la faire passer sous l’écran. / Zur Platzierung unterhalb des Bildschirms drehen Sie sie um.
- Página 10 3. Connect the mediabar to the screen, Touch 10 controller, Make sure to connect the network cables to the Vergewissern Sie sich, dass die Netzwerkkabel an den richtigen Ports angeschlossen sind, und verwenden Sie correct ports, and use the flat network cable for network, and power das flache Netzwerkkabel für den Touch-Controller.
- Página 11 4. Adjust the camera tilt angle to optimize the view Release the mediabar Ajustez l’inclinaison de la caméra / Anpassen des Neigungswinkels Libérer la barre multimédia / Lösen der Medienleiste / Rimuovere la barra der Kamera zur Optimierung der Anzeige / Regolare l’angolo di multimediale / Retire la barra multimedia / Retirar a barra multimédia inclinazione della videocamera per ottimizzare la visualizzazione / Ajuste el ángulo de inclinación de la cámara para optimizar la visión / Ajuste...
- Página 12 Privacy cover Place the magnetic privacy cover. Cache d’obstruction / Datenschutz-Abdeckung / Copertura per la privacy / Apposez le cache magnétique. / Befestigen Sie die magnetische Datenschutz-Abdeckung. / Cubierta de privacidad / Cobertura de privacidade Posizionare la copertura magnetica per la privacy. / Coloque la cubierta de privacidad magnética.
-
Página 13: Connector Panel
Power 40 VAC, 50/60 Hz) Connector panel Troubleshooting Panneau de connexion / Anschlussfeld / Pannello del connettore / Panel Dépannage / Fehlerbehebung / Risoluzione dei problemi / conector / Painel de conectores Solución de problemas / Solução de problemas • If you don’t see the on-screen display, check •... - Página 14 Visit one of these websites to find out more about setup, management, and use of this product. Use the first link if your device is registered to the Cisco Webex service and the second link if the device is registered to another service.
- Página 15 Begriffs „Partner“ impliziert keine gesellschaftsrechtliche Beziehung zwischen Cisco und anderen Unternehmen. (1110R) Cisco e il logo Cisco sono marchi o marchi registrati di Cisco e/o dei relativi affiliati negli Stati Uniti e in altri paesi. Per visualizzare l’elenco di marchi Cisco, visitare il sito Web all’indirizzo: www.cisco.com/go/trademarks. I marchi commerciali di terze parti citati sono proprietà...


