Tabla de contenido
Publicidad
Idiomas disponibles
Idiomas disponibles
Enlaces rápidos
FR
GB
NL
NL
ES
Ne pas refermer l'écran manuellement / Scherm niet manueel sluiten
No cerrar la pantalla manualmente / Non chiudere lo schemo manualmente
Não feche o monitor manualmente / Nie zamykać ręcznie ekranu
Nu închideţi ecranul manual
* Ecouter de la musique trop fort peut entraîner une baisse des capacités auditives.
-
ART:698359
1
IT
55
PL
109
PT
167
26
83
139
Publicidad
Capítulos
Tabla de contenido
Solución de problemas

Manuales relacionados para NORAUTO NS-411 BT


Resumen de contenidos para NORAUTO NS-411 BT
- Página 1 ART:698359 Ne pas refermer l’écran manuellement / Scherm niet manueel sluiten No cerrar la pantalla manualmente / Non chiudere lo schemo manualmente Não feche o monitor manualmente / Nie zamykać ręcznie ekranu Nu închideţi ecranul manual * Ecouter de la musique trop fort peut entraîner une baisse des capacités auditives.
- Página 2 Félicitations pour votre nouvel achat ! Ce produit est un autoradio/station multimédia de la marque Norauto sound. Cet appareil permet la lecture de plusieurs sources medias : - Lecture de la radio - Lecture de CD et DVD - Lecture de clés USB et cartes SD...
-
Página 3: Tabla De Contenido
SOMMAIRE 1. CONSIGNES DE SECURITE……………………………………………………………....……3 2. PRESENTATION DE L’APPAREIL…………………………………… …………………....…...5 A. Informations techniques……………………………………………………………………....5 B. Description de l’appareil…………………………………………………………………....….6 1) Unité………………………………………………………………………………………....6 2) Télécommande………………………………………………………........…...7 C. Commandes………………………………………………………………………………....….8 3. INSTALLATION……………………………………………………………………......…9 4. UTILISATION ……………………………………………… ……………...........11 A. Démarrage…………………………………………………………… ……………......…...11 1) Réglage de la date et de l’heure ……………………..……..........11 2) Réglages sonores…......................12 B. -
Página 4: Consignes De Securite
CONSIGNES DE SECURITE - Avant d’utiliser votre appareil, veuillez lire attentivement ces précautions de sécurité et gardez- les pour les futures références. Si vous donnez cet appareil à des tiers, veuillez aussi leur donner ces consignes de sécurité. - Utilisez l’appareil comme décrit dans la notice d’emploi. Toute mauvaise manipulation et toute autre utilisation que celle prévue dans la notice d’emploi, n’engagera en aucun cas la responsabilité... - Página 5 CONSIGNES DE SECURITE - N’utilisez pas la fonction vidéo lorsque vous conduisez , les lois locales peuvent restreindre l’utilisation de cette fonction lors de la conduite (sauf pour l’utilisation de la camera). De plus, la vidéo peut affecter votre attention et votre concentration et avoir comme conséquence une perte de contrôle du véhicule et un accident.
-
Página 6: Presentation De L'APpareil
PRESENTATION DE L’APPAREIL A. Spécifications techniques Spécifications techniques générales Modèle NS-411 BT Tension 12V DC Gamme de tension 10,5-15.8V DC Courant Dimensions 178X100X166.8mm Poids 2,0Kg Système Batterie sous pôle négatif Radio Signal ≥55dB Sensibilité: (S/N=30dB) 18dBμ Réponse de fréquence (±3dB) -
Página 7: Informations Techniques
PRESENTATION DE L’APPAREIL Formats MP3 supportés ISO9660, Joliet- Fréquences d’échantillonnage 32kHz, 44.1kHz, 48kHz Débit binaire 32-320Kbps et débits variables Formats vidéo supportés DVD, MP4, Xvid (optionnel) Dossiers vides (albums sans fichiers mp3/WMA) Fichiers audio AAC, WMV, PCM Formats non supportés Fichiers Word Fichiers protégés DRM Toutes extensions non prises en charge par la... -
Página 8: Unité
PRESENTATION DE L’APPAREIL Télécommande Sélection de la source musicale Ouverture/fermeture du compartiment CD Menu du disque EJECT Menu des titres du disque Zoom +/- Bande radio Equaliseur Réglage du contraste du panneau d’affichage Sélection automatique d’une station de radio rechercher une piste ou un disque Retour/avance rapide Appel entrant Entrée... -
Página 9: Informacje Techniczne
PRESENTATION DE L’APPAREIL Insertion des piles dans la télécommande : Appuyez sur le couvercle du compartiment puis faites glisser le couvercle vers l’extérieur. Installez 1 pile CR2025 (3V) dans la télécommande tout en respectant les polarités (+ & -). Seul ce type de pile devra être utilisé. -
Página 10: Important
INSTALLATION Avant l’installation, coupez l’électricité et enlevez le câble de batterie (négatif -) afin d’éviter un choc électrique. Attention : si cet appareil doit être installé dans une voiture équipée d’un lecteur embarqué ou d’un ordinateur de bord, il faut dans ce cas laisser brancher le câble de batterie : Débrancher le câble pourrait effacer la mémoire de l’ordinateur. -
Página 11: Installation
INSTALLATION Schéma de câblage YELLOW VIDEO OUT BLACK Rear display WHITE YELLOW WHITE BLACK WHITE BLUE SUB OUT TEL。 MUTE CAMERA IN YELLOW... -
Página 12: Réglage De La Date Et De L'hEure
UTILISATION A. Démarrage Selon les opérations, vous pourrez soit utiliser les touches de l’appareil soit la télécommande pour effectuer des opérations. Appuyez sur le bouton POWER de la télécommande ou sur la touche de l’appareil. Appuyez sur la touche MENU de l’appareil ou sur le bouton SRC de la télécommande. L’écran MENU s’affiche sur l’écran. -
Página 13: Funcionamento Básico
Funcionamento Básico Inibição do Travão de Mão • Se o cabo “BRAKE” estiver ligado ao interruptor do travão, o monitor TFT apenas exibirá um vídeo quando o veículo estiver imobilizado. • A função do travão de mão é ignorada sempre que a fonte de vídeo estiver definida para REVERSE. -
Página 14: Réglages Sonores
UTILISATION 2) Réglages sonores - Réglages du volume Pour modifier le volume, utilisez le bouton de l’appareil pour baisser ou augmenter le volume sonore ou utilisez la télécommande avec les touches VOL +/-. - Equaliseur Appuyez sur la touche de l’appareil le menu de l’équaliseur apparaîtra. Sélectionnez un mode d’équaliseur : USER, FLAT, POP, TECHNO, ROCK, CLASSIC, JAZZ, OPTIMAL. - Página 15 UTILISATION Appuyez pour voir le MENU SOURCE et sélectionner une nouvelle source Indicateur de la distance du signal d’émission Indicateur de la bande radio actuelle Horloge Informations stockées lors du préréglage Sélection d’autres modes Précédent Recherches de stations préréglées Suivant Choix de la bande (AM/FM) Informations sur la radio actuelle Options...
- Página 16 UTILISATION - Enregistrement manuel Cherchez une station de radio. Appuyez sur pour afficher le second menu. Appuyez sur . Sélectionnez sur l’un des canaux disponibles (P1 à P6) pour enregistrer la radio selectionnée. Pour jouer une radio sélectionnée, sélectionnez le menu RADIO, et sélectionnez une des radios enregistrées.
-
Página 17: Lire Un Disque
UTILISATION - Fonction TA (traffic Announcement) La fonction TA permet de recevoir des informations routières, quelque soit le média. Lorsque la fonction TA est activée : une information routière est reçue, la source qui est en train d’être jouée est remplacée par information routière si la bande de radio est FM. L’appareil revient à... -
Página 18: Lire Une Clé Usb Et Une Carte Sd
UTILISATION 3) Lecture d’une clé USB et d’une carte SD Ouvrez le compartiment de l’appareil ou se trouvent les ports de branchement. Insérez la clé USB ou la carte SD dans le port adéquat. La lecture est automatique. Pour enlever la clé USB ou la carte SD, sortez du menu pour une autre source. Ensuite : - Pour la clé... -
Página 19: Fonctions
UTILISATION D. Fonctions 1) Fonction REPEAT Pour les DVD : Si nécessaire, touchez l’écran pour afficher le menu. Appuyez sur pour ouvrir le second menu. Touchez l’icone répétitivement pour sélectionner le type de répétition : Pour les CD Répétition du chapitre. Le chapitre joué sera répété. Répétion T: Tous les chapitres seront répétés. -
Página 20: Réglage De La Vidéo
UTILISATION 6) Réglage de la vidéo Appuyez sur pour activer ce mode. Vous pouvez régler le contraste, la luminosité et la saturation. Utilsez les touches pour modifier ces effets. 7) Sélectionner directement une piste Pour sélectionner directement une piste, touchez Sélectionnez la piste désirée avec le clavier et appuyez sur OK pour confirmer votre choix. -
Página 21: Déonnexion Des Dispositifs Bluetooth
UTILISATION 2) Déconnexion du dispositif Bluetooth Touchez l’icone pour déconnecter le Bluetooth. Si vous souhaitez déconnecter définitivement le dispositif Bluetooth ( le dispositif ne sera plus connectee automatiquement), Appuyez sur la touche (reglages Bluetooth) et mettez le réglage sur OFF. Note: Des interférences peuvent altérer la connexion Bluetooth. -
Página 22: Mode Musique
UTILISATION 6) Mode musique Les dispositifs Bluetooth transmettront seulement un son mono. Cependant, si le dispositif possède la fonction A2DP, les appareils pourront transmettre un son stéréo. Vérifiez si votre dispositif Bluetooth possède cette fonction. Les dispositifs Bluetooth qui possèdent la fonction AVRCP peuvent contrôler la lecture d’un lecteur Bluetooth. -
Página 23: Calibrage
UTILISATION 1) Calibrage Lorsque vous appuyez sur l’écran mais qu’il n’y a pas de réponses, il se peut que l’écran soit mal calibré. Il faut donc recalibrer l’écran. Dans le menu REGLAGES, sélectionnez l’option CALIBRAGE. Appuyez Start pour commencer : Maintenez le enfoncé... -
Página 24: Réglage Par Defaut (Réglage Usine)
UTILISATION 3) Réglage par défaut (réglage usine) Pour rétablir les réglages d’origine, appuyez sur RESET. Appuyez sur les options disponibles pour remettre les réglages par defaut. Réglages Description Réglages usine Remet l’option au réglage usine d’origine Volume par défaut Vidéo par défaut Appuyez sur le coin gauche de l’écran pour sortir du menu. -
Página 25: Nettoyage, Maintenance Et Rangement
NETTOYAGE, MAINTENANCE ET RANGEMENT Suivez ces instructions pour garder votre appareil dans un bon état de propreté. Un appareil propre et en bon état de marche amènent de meilleurs résultats et préservent la durée de vie de l’appareil. A. Nettoyage ATTENTION ! N’utilisez pas de produits qui peuvent endommager l’appareil ( produits abrasifs, corrosifs, alcools, nettoyants vapeur, chiffons rêches, grattoirs, etc.). -
Página 26: Guide Depannage
GUIDE DEPANNAGE Si vous rencontrez des problèmes avec l’autoradio, le tableau ci-dessous peut vous aider à régler votre problème. Si les solutions ci-dessous ne résolvent pas votre problème, veuillez rapporter l’appareil à votre agent de service pour inspection. Ne portez aucune réparation ou maintenance par vous-même. -
Página 27: Mise En Rebut
GUIDE DEPANNAGE PROBLEMES CAUSES POSSIBLES SOLUTIONS Les disques sont sales Manipulez et nettoyez correctement les disques (voir section nettoyage) Les disques sont rayés ou N’utilisez pas de disques rayés ou endommagés endommagés Les CD, DVD ou N’utilisez pas ces disques et utilisez VCD ne Les disques sont vides des disques pouvant être lus... - Página 28 PRECAUZIONI D’USO Grazie per aver acquistato questo prodotto. Non esporre mai il prodotto, amplificatori e Leggete attentamente le istruzioni per capire altoparlanti a umidità o acqua per prevenire bene come funziona il vostro prodotto. Dopo scintille o incendi. aver letto le istruzioni, conservate questo manuale per future esigenze.
- Página 29 PRECAUZIONI D’USO 1. Non smontare o aggiustare il prodotto senza l’aiuto di un professionista.Per dettagli e domande, consultare professionisti dell’auto o il venditore. 2. Se il pannello frontale o monitor TFT è sporco, usare un panno pulente in silicone e detergente naturale per togliere lo sporco.
- Página 30 Contenuti Precauzioni d’uso..........26 Play/Pause............39 Sistemi opzionali..........27 Precedente/Successivo........39 Ricerca di una cartella........39 Contenuti............28 Ripetizione............39 Ripetizione A-B..........40 Prima dell’uso..........29 Riproduzione casuale........40 Pannello frontale..........29 Selezionare modalità Audio......40 Telecomando............30 Selezionare lingua sottotitoli......40 Note sull’uso del telecomando......31 Cambiare angolo di visuale......40 Togliere la batteria..........31 Impostazioni Video...........41 Inserire la batteria..........31 Informazioni di riproduzione......41...
-
Página 31: Prima Dell'USo
PRIMA DELL’USO Pannello frontale Istruzioni: Le immagini di questo manuale sono solo di riferimento e possono essere diverse dal prodotto a vostre mani. 1. Pulsante [ Rilascio pannello pulsanti. 2. Pulsante [ Premere per togliere il disco. 3. Pulsante [ Premere per entrare in modalità... - Página 32 PRIMA DELL’USO Telecomando 1. Selezionare modalità di riproduzione 2. Togliere il disco 3. Entrare nel menu principale del disco EJECT 4. Enter nel menu titoli del disco 5. Ingrandire/Ridurre un’ immagine 6. Selezionare una banda radio 7. Impostazione EQ 8. Regolazione Luminosità 9.
- Página 33 PRIMA DELL’USO Annotazioni sull’uso del telecomando 1. Dirigere il telecomando verso il sensore del prodotto. 2. Sostituire la batteria del telecomando o inserire un isolante se la batteria non è stata usata per oltre un mese. 3. NON LASCIARE il telecomando alla luce diretta del sole o ad alte temperature perchè potrebbe non funzionare più...
-
Página 34: Operazioni Di Base
OPERAZIONI DI BASE Inibizione visione video con freno a mano inserito • Quando il cavo del freno a mano è collegato al commutatore, lo schermo mostra video solo quando il veicolo è fermo. • La funzione freno a mano è ignorata quando la sorgente video è impostata su REVERSE. •... - Página 35 OPERAZIONI DI BASE Selezionare Equalizzatore preimpostato 1. Entrare in modalità Impostazioni EQ Toccare l’icona [ ] sull’interfaccia utente e l’interfaccia di impostazioni EQ appare sullo schermo. 2. Selezionare la modalità EQ · [User] [Flat] · [POP] [Techno] · [Rock] [Class] ·...
- Página 36 OPERAZIONI DI BASE Impostare Data / Ora 1. Toccare [ 2. Toccare [ Ora ]. Il menù di impostazione data/ora viene visualizzato. Impostare Data 1. Toccare [ Date ]. 2. Toccare l’informazione Data sullo schermo. Viene visualizzato un sottomenù. 3. Toccare [ ] o [ ] per impostare anno, mese e giorno.
-
Página 37: Modalità Radio
MODALITÀ RADIO Visualizzazione del Sintonizzatore sullo schermo 1. Toccare per vedere il MENU SORGENTE e selezionare una nuova sorgente di riproduzione. 2. Indicatore di segnale radio distante 3. Indicatore banda della radio corrente 4. Orologio 5. Frequenze radio memorizzate 6. Toccare per vedere più icone sullo schermo 7. - Página 38 MODALITÀ RADIO Stazioni memorizzate L’unità ha 5 bande, che sono FM1, FM2, FM3, AM1, AM2, e ogni banda può memorizzare 6 stazioni. Quindi si possono memorizzare in totale 30 stazioni. Introduzione/Esplorazione Premere l’icona [ ] per l’introduzione di ogni stazione. Ogni stazione memorizzata viene riprodotta automaticamente per 5 secondi.Tenere premuta l’icona [ ] per la ricerca.
- Página 39 MODALITÀ RADIO RDS ( Radio Data System ) Il prodotto fornisce le funzioni base dell’RDS. Funzione AF La Lista di Frequenze Alternative utilizza lo stesso programma insieme al codice PI (codice di identificazione programma) per assistere la sintonizzazione automatica. Usando questa informazione, una radio può ricercare automaticamente un’altra stazione radio che sta riproducendo la stessa cosa.
-
Página 40: Modalità Riproduzione
MODALITÀ RIPRODUZIONE Caricare un disco E’ possibile riprodurre video, audio o immagini presenti nei seguenti dischi: • DVD Video, DVD-R, DVD-RW • VCD • Audio CD, CD-R, CD-RW Nota: Assicurarsi che i dischi contengano contenuti riproducibili. Togliere un Disco Premere il pulsante [ ] sul pannello frontale o telecomando per togliere un disco. - Página 41 MODALITÀ RIPRODUZIONE riproduzione comincia automaticamente. Per film su DVD, se appare un menu, premere [ ] per cominciare la riproduzione. 2. Per mettere in pausa, toccare [ Per tornare alla riproduzione, toccare [ Per andare alla traccia / capitolo precedente/successiva, premere i pulsanti [ ] / [ Precedente / Successivo...
- Página 42 MODALITÀ RIPRODUZIONE Per files CD/MP3/WMA: 1. Toccare ovunque eccetto l’angolo in alto a sinistra per visualizzare il menu sullo schermo, se necessario. 2. Toccare [ ] ripetutamente: ] Ripetizione singolo: Riproduce il singolo corrente ripetutamente. ] Ripetizione tutti: Riproduce tutto il disco ripetutamente. ] Ripetizione cartella: riproduce tutta la cartella corrente.
- Página 43 MODALITÀ RIPRODUZIONE Impostazioni Video Toccare [ ] per accedere alla modalità di impostazioni video, toccare [ ] o [ ] per impostare l’effetto desiderato.E’ possibile impostare luminosità, contrasto e saturazione dell’uscita video da 0 a 16. ] Luminosità: livello da 0 a 16. ] Contrasto: livello da 0 a 16.
-
Página 44: Modalità Bluetooth
MODALITÀ BLUETOOTH E’ possibile fare o ricevere chiamate con il sistema Bluetooth tramite il prodotto. E’ anche possibile ascoltare la musica tramite un dispositivo Bluetooth abilitato. Accoppiamento Bluetooth – Dispositivo abilitato Per collegare il dispositivo Bluetooth al prodotto, è necessario accoppiare il dispositivo al prodotto. - Página 45 MODALITÀ BLUETOOTH Rispondere ad una chiamata entrante Di default, una chiamate entrante viene accettata automaticamente. 1. Se c’è una chiamata entrante, sullo schermo appare “Incoming”. 2. E’ possibile toccare lo schermo per selezionare [ Hang up ] o [ Answer ].Parlare nel microfono Bluetooth. ·...
- Página 46 IMPOSTAZIONI Visualizzazione Sistema 1. Toccare l’angolo in alto a sinistra per visualizzare il menu principale. 2. Toccare [ Settings ]. Il menu impostazioni viene visualizzato. Regolazione impostazioni generali 1. Toccare [ General ], se necessario. 2. Toccare per selezionare un’impostazione. 3.
- Página 47 IMPOSTAZIONI Impostazioni ora Opzioni Descrizione Date Anno/Mese/Giorno Toccare [ ] o [ ] per impostare anno, mese e giorno Time Mode 12H/24H Toccare[12H] o [24H] per scegliere la modalità di visualizzazione Time Toccare [ ] o [ ] per impostare ora e minuti Desk Timer Toccare per selezionare [ Simulate Timer] o [ Numeral Timer ] Time Zone...
- Página 48 IMPOSTAZIONI Regolazione impostazioni disco 1. Toccare [Disc]. 2. Toccare ripetutamente un’opzione per selezionare. 3. Toccare l’angolo in alto a sinistra dello schermo per uscire. DVD rating Opzioni Descrizione Impostare la password per restringere la possibilità di Set password visionare il disco ad alcune persone. La password di default è...
-
Página 49: Altre Modalità
ALTRE MODALITÀ Ascoltare altri dispositivi E’ possibile collegare al prodotto un dispositivo audio/video esterno. 1. Collegare un dispositivo esterno con il cavo AV fornito. 2. Toccare l’angolo in alto a sinistra dello schermo per visualizzare il menu principale. 3. Toccare [AV-IN 2] per collegare il dispositivo all’Aux frontale. Toccare [AV-IN 1] per collegare il dispositivo all’Aux posteriore. - Página 50 SPECIFICHE Generali Modello NS-411 BT Voltaggio richiesto 12V DC Range di voltaggio 10,5-15.8V DC Potenza massima Dimensioni(WxHxD) 178X100X166.8mm Peso (unità centrale) 2,0Kg Sistema terra Batteria Auto Polo Negativo Radio Segnale rumore ≥55dB Sensibilità rumore residuo (S/N=30dB) 18dBμ Frequenza (±3dB). 20Hz~7KHz Livello Ricerca stazioni 20~28dBμV...
- Página 51 SPECIFICHE Formato supportati dischi MP3 ISO9660, Joliet- Esempi di Frequenze supportate 32kHz, 44.1kHz, 48kHz Bit-rates supportati 32-320Kbps e bit rate variabili Formati Video supportati DVD, MP4, Xvid (opzionale) Album vuoti: un album vuoto è un album che non contiene file MP3/WMA e non viene mostrato sullo schermo.
-
Página 52: Soluzione Problemi
SOLUZIONE PROBLEMI Quello che appare come un problema, non sempre è serio. Prima di chiamare un professionista, leggere l’elenco di problemi seguente con le possibili soluzioni. PROBLEMA CAUSA SOLUZIONE Fusibile prodotto bruciato Sostituire il fusibile con uno nuovo dello stesso amperaggio Il prodotto non Sostituire il fusibile con uno nuovo Fusibile della batteria auto bruciato... - Página 53 SOLUZIONE PROBLEMI PROBLEMES CAUSES POSSIBLES SOLUTIONS Collegamento freno a mano non Controllare collegamento e correggere Vengono sempre corretto visualizzate informazioni sbagliate Il sistema di colore del DVD non è Regolare il sistema di colore del DVD Immagini compatibile con lo schermo in accordo con il monitor lampeggianti o Si sta usando un disco pirata...
- Página 54 INSTALLAZIONE Disconnessione della Batteria Per prevenire un corto circuito, occorre essere certi, prima dell’installazione, di aver spento l’igniezione e tolto il cavo negativo (-) della batteria. Nota:Se l’unità deve essere installata su un’auto dotata di un computer di bordo o sistema di navigazione, non disconnettere il cavo batteria.
- Página 55 INSTALLAZIONE...
-
Página 56: Wire Connections
WIRE CONNECTIONS YELLOW VIDEO OUT BLACK Rear display WHITE YELLOW WHITE BLACK WHITE BLUE SUB OUT TEL。 MUTE CAMERA IN YELLOW... -
Página 57: Safety Precautions
Safety Precautions Thank you for purchasing this product. P l e a s e d o n ' t c h a n g e t h e f u s e o n Please read through these operating the power cord without professional instructions so you will know how to guidance, using improper fuse may operate your model properly. -
Página 58: Expanding Systems
Safety Precautions 1. Never disassemble or adjust the unit without any professional guidance. For details, please consult any professional car shop / dealer for inquiry. 2. If the front panel or TFT monitor is dirty, please use a clean silicone cloth and neutral detergent to wipe off the spot. - Página 59 Contents Safety Precautions .........55 Remove a USB Device ......67 Insert a SD Card ........67 Before Using ...........58 Remove a SD Card.......67 Front Panel ...........58 Play/Pause..........67 Remote Control........59 Previous/Next ........68 Notes on Remote Control Usage ..60 Search for a Folder .......68 Uninstall Battery........60 Repeat ..........68 Install Battery ........60...
-
Página 60: Before Using
Before Using Front Panel Notice: The graphic in this manual is for reference only, and may be different from the actual unit. Reference to actual unit is suggested. 1. [ ] Button Open front panel button combination. 2. [ ] Button Press to eject a disc. -
Página 61: Remote Control
Before Using Remote Control 1. Select playing mode 2. Eject the disc 3. Enter the main menu of the disc EJECT 4. Enter the title menu of the disc 5. Zoom in /out on an image 6. Select radio band 7. -
Página 62: Notes On Remote Control Usage
Before Using Notes on Remote Control Usage 1. Aim the remote control at the remote sensor on the unit. 2. Replace the battery from the remote control or insert a battery insulator if the battery has not been used for a month or longer. 3. -
Página 63: Basic Operations
Basic Operations Parking Brake Inhibit • When the “BRAKE” cable is connected to the brake switch, the display on the TFT monitor will display video only when the vehicle is applied. • Parking brake function is overridden when the video source is set to REVERSE. •... -
Página 64: Select Preset Equalizer
Basic Operations Select Preset Equalizer 1. Enter the EQ setup mode Touch the [ ] icon in the user interface and the EQ setup interface will display on the screen. 2. Select EQ mode ∙ [User] [Flat ∙ [POP] [Techno] ∙... -
Página 65: Set Date /Time
Basic Operations Set Date /Time 1. Touch [ 2. Touch [ Time ]. The date/time setup menu is displayed. Set Date 1. Touch [ Date ]. 2. Touch the date informationon on the screen . A submenu is displayed. 3. Touch [ ] or [ ] to set year, month and day. -
Página 66: Radio Mode
Radio Mode Tuner TFT Display 1. Touch to view the SOURCE MENU and select a new playback source 2. Distant signal broadcasting indicator 3. Current radio band indicator 4. Clock 5. Broadcaster information stored at the preset 6. Touch to view more on-screen buttons 7. -
Página 67: Preset Station
Radio Mode Preset Station The unit has 5 bands, such as FM1, FM2, FM3, AM1, AM2, and each band can store 6 stations; hence the unit can store 30 stations in total. Intro/Scan Press the [ ] icon to intro. Each stored station will play for 5 seconds automatically. -
Página 68: Rds ( Radio Data System )
Radio Mode RDS ( Radio Data System ) The unit provides basic functions of RDS. AF Function Alternative Frequencies Lists are used for the same program service and used in conjunction with the PI code (Program Identification code)to assist automatic tuning. Using this information, a radio can automatically search out another station that is playing the same material. -
Página 69: Playback Mode
Playback Mode Load a Disc You can play video, audio or images stored on the following discs: • DVD Video, DVD-R, DVD-RW • VCD • Audio CD, CD-R, CD-RW Note: Ensure that the disc contains playable content. Eject a Disc Press the [ ] key on the front panel or remote control to eject the disc. -
Página 70: Play/Pause
Playback Mode Play/Pause 1. Once a disc, USB or SD card is inserted, play starts automatically. For DVD movie, if a menu appears, press [ ] to start play. 2. To pause, touch [ To resume play, touch [ 3. Skip to previous / next track / chapter, press [ ] / [ ] key. -
Página 71: Repeat A-B
Playback Mode For CD/MP3/WMA files: 1. Touch anywhere except the upper left corner to display menu on the screen, if necessary. 2. Touch [ ] repeatedly: ] Repeat single: Play the current single repeatedly. ] Repeat all: Play all in the disc repeatedly. ] Repeat folder: Play all in the current folder. -
Página 72: Video Setup
Playback Mode Video Setup Touch [ ] to access video setup mode, touch [ ] or [ to set the desired effect. You may set the brightness, contrast, and saturation of the video output from 0 to 16. ] Brightness: range for 0 to 16. ] Contrast: range for 0 to 16. -
Página 73: Bluetooth Mode
Bluetooth Mode You can make or receive phone calls with Bluetooth-enabled phones through the unit. You can also listen to music from a Bluetooth- enabled device. Pair the Bluetooth-enabled Devices To connect your Bluetooth device to the unit, you need to pair the device to the unit. -
Página 74: Answer An Incoming Call
Bluetooth Mode Answer an Incoming Call By default, all incoming calls are received automaticaly. 1. If there is an incoming call, the screen will appear “Incoming”. 2. You may touch the screen to select [ Hang up ] or [ Answer ]. Speak into the Bluetooth microphone. -
Página 75: Settings
Settings Display System 1. Touch the upper left corner to display main menu. 2. Touch [ Settings ]. The settings menu is displayed. Adjust General Settings 1. Touch [ General ], if necessary. 2. Touch to select a setting. 3. Touch on the option to display/select an option. 4. -
Página 76: Adjust Sound Settings
Settings Adjust Sound Settings 1. Touch [Sound]. 2. Touch an option repeatedly to select. 3. Touch the upper left corner of the screen to exit. Sound settings Options Description Flat 80Hz Sub Woofer Filter Touch to select a crossover frequency. 120Hz 160Hz When listening to music at low volumes, this feature will selectively boost certain... -
Página 77: Adjust Volume Settings
Settings Adjust Volume Settings You can set different volume for different modes. 1. Touch [Volume]. The volume setting sub-menu is displayed. 2. Touch on a source. ∙ [Media] ∙ [Radio] ∙ [Bluetooth] ∙ [AV-IN1] ∙ [AV-IN2] 3. Touch [ ] or [ ] to assign value: 0 to 12. -
Página 78: Other Modes
Other Modes Listen to Other Devices You can connect an external audio/video device to the unit. 1. Connect the external device with the supplied AV cable. 2. Touch the upper left corner to display the main menu. 3. Touch [AV-IN 2] to access front auxiliary device. Touch [AV-IN 1] to access rear auxiliary device. -
Página 79: Specifications
Specifications General Reference Supply Voltage ..............12V(DC) Operating Voltage Range ............10.5 - 15.8V(DC) Grounding System ............ Car Battery Negative Pole Dimensions(WXHXD) ............178X100X166.8mm Weight(main unit) ..................2.0kg Signal Noise Ratio ................≥55dB Residual Noise Sensitivity (S/N=30dB) ..........18dBμV Frequency Response (±3dB) ............20Hz~7KHz Station Seeking Level .............. -
Página 80: Region Code
Supported Formats: ·Mp3 bit rate(date rate): 32-320 Kbps and variable bit rate ·WMA v9 or earlier ·Directory nesting up to a maximum of 8 levels ·Number of albums/folders: maximum 99 ·Number of tracks/titles: maximum 999 ·ID3 tag v2.0 or later ·File name in Unicode UTF8(maximum length:128 bytes) Unsupported Formates: shown in the display. -
Página 81: Troubleshooting
Troubleshooting What appears to be trouble is not always serious. Please check the following points before calling a service center. Problem Cause Corrective action General Unit fuse blown. Install new fuse with correct rating. Car battery fuse blown. Install new fuse with correct rating. Unit can not power on Illegal operation Reset the unit. -
Página 82: Installation
Installation Disconnecting the Battery To prevent a short circuit, be sure to turn off the ignition and remove the negative (-) battery cable prior to installation. Note: If the unit is to be installed in a car equipped with an on-board drive or navigation computer, do not disconnect the battery cable. - Página 83 Installation Using the Cosmetic Trim Ring One cosmetic trim rings is packaged with the head unit for installation flexibility. This unit will fit into most import dashes with little or no modification to the dash board/cavity. Some US domestic vehicle dashes will accept a Double-DIN chassis, but there is usually a small gap between the radio and dash piece after installation is complete.
-
Página 84: Wire Connections
Wire Connections YELLOW VIDEO OUT BLACK Rear display WHITE YELLOW WHITE BLACK WHITE BLUE SUB OUT TEL。 MUTE CAMERA IN YELLOW... - Página 85 WSTĘP Zapraszamy do uważnego i całkowitego zapoznania się z poniższą instrukcją w celu poprawnego i skutecznego użytkowania. Gratulujemy zakupu! Ten produkt to radio / stacja multimedialna marki Norauto. To urządzenie umożliwia odtwarzanie różnych źródeł medialnych: - Słuchanie radia - Odtwarzanie płyt CD i DVD - Odczytywanie pamięci USB i kart SD...
- Página 86 SPIS TREŚCI 1. ZALECENIA BEZPIECZEŃSTWA ......................2. PREZENTACJA URZĄDZENIA ......................... A. Informacje techniczne .......................... . B. Opis urządzenia ............................. a) Urządzenie ............................b) Pilot ..............................3. INSTALACJA............................4. KORZYSTANIE ............................A. Uruchamianie a) Ustawianie daty i godziny .......................
-
Página 87: Zalecenia Bezpieczeństwa
ZALECENIA BEZPIECZEŃSTWA Przed rozpoczęciem użytkowania urządzenia należy uważnie przeczytać te środki ostrożności i zachować je na przyszłość. Jeśli przekażesz ten produkt osobom trzecim, należy również przekazać im instrukcję obsługi. - Należy używać urządzenia w sposób opisany w instrukcji. Niewłaściwa obsługa oraz inne zastoso wanie niż... - Página 88 ZALECENIA BEZPIECZEŃSTWA używanie kamery).Co więcej wideo może pogorszyć Państwa uwagę i w konsekwencji spowodować utratę kontroli nad pojazdem oraz wypadek. Wideo może być używane podczas postojów lub, gdy ruch jest bardzo mały. Gdy kabel BRAKE (hamulec) jest podłączony do przełącznika blokującego, urządzenie powinno emitować wideo tylko, gdy pojazd jest zatrzymany.
-
Página 89: Prezentacja Urządzenia
PREZENTACJA URZĄDZENIA A. Specyfikacja teczniczna Ogólna specyfikacja techniczna Model NS-41 BT Napięcie 12Vdc Zakres napięcia 10,5-15.8Vdc Prąd Rozmiary 178X100X166.8mm Ciężar 2,0Kg System Bateria z biegunem ujemnym Radio Sygnał ≥55dB Czułość : (S/N=30dB) 18dBμ Pasmo przenoszenia (±3dB) 20Hz~7KHz Poziom szukania stacji 20~28dBμV Zakłócenia ≤1.0%... -
Página 90: Opis Urządzenia
PREZENTACJA URZĄDZENIA Formaty MP3 obsługiwane ISO9660, Joliet- Częstotliwość próby 2kHz, 44.1kHz, 48kHz Określona prędkość 32-320Kbps et débits variables Obsługiwane formaty wideo •DVD, MP4, Xvid (optionnel) Dokumenty puste (albumy bez pliki mp3/WMA) Pliki audio AAC, WMV, PCM Formaty nieobsługiwane Pliki Word Pliki chronione DRM Wszystkie rozszerzenia nieobsługiwane przez urządzenie (.wav, .m4a, .m4p, .mp4, .aac) -
Página 91: B) Pilot
PREZENTACJA URZĄDZENIA Télécommande b) Pilot Wybór ścieżki Otwieranie/zamykanie przegrody na CD Menu płyty EJECT Menu tytułu płyty Zoom +/- Bande radio Equaliseur Ustawienia kontrastu panelu wyświetlacza Automatyczny wybór stacji radiowej Wyszukaj ścieżkę lub płytę Powrót/szybkie przewijanie Połączenie przychodzące Wejście Kursor : Wybór następnej/poprzedniej ścieżki Tryb tunera : wybór ręczny stacji radiowych Menu : nawigacja w menu... - Página 92 PREZENTACJA URZĄDZENIA Umieszczanie baterii w pilocie : Naciśnij na pokrywę i wysuń ją do zewnątrz. Włóż baterię CR2025 (3V) do pilota uwzględniając biegunowość (+ & -). Tylko jeden typ baterii powinien być używany . Włóż na miejsce pokrywę wsuwając do wewnątrz. Pokrywa jest dobrze umieszczona jeśli usłyszycie charakterystyczny dźwięk «klic».
- Página 93 MONTAŹ Przed montażem, wyłącz zasilanie i wyjmij kabel z baterii (negatywny-) aby uniknąć porażenia prądem. Uwaga : jeśli to urządzenie jest zamontowane w samochodzie wyposażonym w wbudowany odtwarzacz lub komputer pokładowy należy pozostawić podłączony kabel baterii: odłączenie kabla może spowodować wymazanie pamięci komputera. W takim przypadku zamontuj całe wyposażenie unikając spięć...
-
Página 94: Schemat Okablowania
MONTAŹ Schemat okablowania YELLOW VIDEO OUT BLACK Rear display WHITE YELLOW WHITE BLACK WHITE BLUE SUB OUT TEL。 MUTE CAMERA IN YELLOW... -
Página 95: Korzystanie
OBSŁUGA A. Uruchamianie W zależności od operacji możecie używać do ich wykowanania przycisków urządzenia lub pilota. Naciśnij na przycisk POWER lub na przycisk urządzenia. Naciśnij na przycisk MENU urządzenia lub na przycisk SRC pilota. Na ekranie wyświetli się MENU. FUNKCJE Tryb daty i godziny : wybierz tryb w celu ustawienia godziny i daty Tryb radia Naciśnij na strzałki żeby nawigować... -
Página 96: B) Ustawienie Dźwięku
OBSŁUGA 2) Ustawienia dźwięku - Ustawienia głośności Żeby zmienić głośność użyj przycisku urządzenia żeby ściszyć lub zgłośnić lub użyj pilota naciskając na przyciski VOL +/-. - Equalizer Naciśnij na przycisk urządzenia wyświetli się menu equalizera. Wybierz tryb equalizera : USER, FLAT, POP, TECHNO, ROCK, CLASSIC, JAZZ, OPTIMAL. Możesz również... - Página 97 OBSŁUGA Naciśnij aby zobaczyć MENU SOURCE i wybierz nowe źródło Wskaźnik odległości przesyłu sygnału Wskaźnik aktualnego pasma radiowego Zegar Informacje przechowywane w ustawieniach Wybór innego trybu Poprzedni Wyszukiwanie domyślnych stacji Następny Wybór pasma (AM/FM) Informacje o aktualnym radiu Opcje Zapisane stacje radiowe Przełączanie pomiędzy lokalnym a zdalnym Ręczna regulacja częstotliwości Ustawienia equalisatora...
- Página 98 OBSŁUGA - Zapisywanie ręczne Znajdź stację radiową. Naciśnij na żeby wyświetlić drugie menu. Naciśnij na . Wybierz z jednego z dostępnych kanałów (P1 à P6) żeby zapisać wybrane radio. Żeby włączyć dane radio wybierz w menu RADIO i wybierz jedno z zapisanych radiów. - Wyszukiwanie lokalne Naciśnij na i wybierz lokalne lub odległe radio.
-
Página 99: B) Odtwarzanie Płyty
OBSŁUGA - Funkcja TA (traffic Announcement) Funkcja TA pozwala na odbieranie informacji o ruchu drogowym, niezależnie od jej nośnika . Kiedy TA jest aktywna: otrzymywana jest informacja o ruchu drogowym, źródło , które jest odtwarzane otrzymuje informacje o ruchu drogowym, jeśli pasmem wybranym jest FM Radio. Urządzenie powraca do pierwotnego źródła po zakończeniu przesyłania informacji drogowej. -
Página 100: C) Odczyt Pamięci Usb I Karty Sd
OBSŁUGA 3) Odtwarzanie z klucza USB lub karty SD Otwórz przegródkę gdzie znajdują się porty. Włóż pamięć USB lub kartę SD do odpowiedniego portu. Odtwarzanie jest automatyczne. Wyjmij pamięć USB lub kartę SD, wyjdź z menu do innego źródła. Następnie : - Dla pamięci USB : wyjmij USB bezpośrednio. -
Página 101: Funkcje
OBSŁUGA D. Funkcje 1) Funkcja REPEAT Dla DVD : Jeśli konieczne dotknij ekranu żeby wyświetlić menu. Naciśnij na żeby otworzyć drugie menu. Dotknij ikonki kilkakrotnie żeby wybrać tryb powtórek : Dla CD Powtarzanie rozdziału. Rozdział odgrywany będzie odtwarzany. Powtarzanie T: Wszystkie rozdziały będą odtwarzane. Powtarzanie A: Każda płyta będzie powtarzana./anuluj powtarzanie. -
Página 102: F) Ustawienia Wideo
OBSŁUGA 6) Ustawienia wideo Naciśnij na żeby aktywować tryb. Można również ustawić kontrast, jasność i nasycenie. Używaj przycisków żeby zmienić efekty. 7) Wybór bezpośrednio ścieżki Żeby wybrać bezpośrednio ścieżkę naciśnij Wybierz ścieżkę za pomocą klawiatury i naciśnij OK żeby potwierdzić. 8) Obracanie obrazów Jeśli to konieczne otwórz menu Otwórz drugie menu z... -
Página 103: B) Rozłączanie Urządzeń Bluetooth
OBSŁUGA 2) Odłączanie nośnika Bluetooth Naciśnij na ikonkę aby odłączyć Bluetooth. Jeśli chcą Państwo odłączyć definitywnie Bluetooth (nośnik nie będzie podłączany automatycznie), Naciśnij na przycisk (ustawienia Bluetooth) i wyłącz Blutetooth za pomocą ustawienia OFF. Uwaga: Zakłócenia mogą wpływać na połączenie Bluetooth.Jednostka traci połączenie, gdy urządzenie jest z niego usuwane. -
Página 104: F) Tryb Muzyki
OBSŁUGA 6) Tryb muzyki Urządzenia Bluetooth przesyła tylko dźwięk mono. Jednakże, jeśli urządzenie ma funkcję A2DP, może przekazywać dźwięk stereo. Sprawdź, czy urządzenie Bluetooth ma tę funkcję. Urządzenia Bluetooth może posiadać funkcję AVRCP służącą do odczytywania. Gdy włączony jest tryb dźwięku i chcesz zadzwonić, można bezpośrednio wprowadzić... -
Página 105: A) Skalibrowanie
OBSŁUGA 1) Kalibracja Jeśli po dotknięciu ekranu, nie ma odpowiedzi, możliwe jest, że ekran nie jest skalibrowany. Konieczna jest zatem ponowna kalibracja ekranu. W menu Ustawienia wybierz opcję kalibracji. Naciśnij przycisk Start, aby rozpocząć: Przytrzymaj przez 2 sekundy, "+" poruszają się automatycznie. Od centrum, podążaj ścieżką, jak pokazano na rysunku poniżej (do 5). -
Página 106: C) Ustawienie Domyślne (Ustawienia Fabryczne)
OBSŁUGA 3) Ustawienia domyślne (ustawienia użytkowe) Aby przywrócić oryginalne ustawienia, naciśnij przycisk RESET. Naciśnij na jedną z dostępnych opcji, aby przywrócić ustawienia domyślne. Ustawienia Opis Ustawienia użytkowe Daje możliwość powrotu do oryginalnych Głośność domyślna ustawień fabrycznych Wideo domyślne Naciśnij lewy róg ekranu, aby wyjść. Po zablokowaniu urządzenia, należy zresetować, aby włączyło się... -
Página 107: Czyszczenie, Konserwacja I Przechowywanie
CZYSZCZENIE KONSERWACJA PRZECHOWYWANIE Postępuj zgodnie z poniższymi instrukcjami, aby utrzymać urządzenie w czystości. Urządzenie w czystości i dobrym stanie przyniesie lepsze wyniki i przedłuży jego żywotność. A. Czyszczenie UWAGA! Nie używaj produktów, które mogą uszkodzić urządzenie ( ścierne, korozyjne, alkohole, środki czyszczące parowe, tkaniny ścierne, zgarniarki, itd.) Nie wolno instalować... - Página 108 CZYSZCZENIE KONSERWACJA PRZECHOWYWANIE A. Czyszczenie Uwaga ! Nie używać produktów, które mogą uszkodzić urządzenie (ścierne, korozyjne, alkohole, środki czyszczące parowe, tkaniny ścierne, zgarniarki, itd..). Nie wolno instalować urządzenia w zmywarce do czyszczenia! Do czyszczenia urządzenia, wytrzeć miękką, suchą szmatką. B. Obsługa i czyszczenie płyty Podczas obsługi, zalecamy przestrzegać...
-
Página 109: Rozwiązywanie Problemów
ROZWIĄZYWANIE PROBLEMÓW Jeśli wystąpią problemy z radiem samochodowym, poniższa tabela może pomóc w rozwiązaniu problemu. Jeżeli rozwiązanie nie rozwiąże problemu, należy zwrócić urządzenie do pracownika obsługi. Nie wykonywać jakichkolwiek napraw lub czynności samodzielnie. PROBLEMY ROZWIĄZANIA MOŻLIWE POWODY Urządzenie nie jest podłączone lub Sprawdź... -
Página 110: Utylizacja
ROZWIĄZYWANIE PROBLEMÓW PROBLEMY ROZWIĄZANIA MOŻLIWE POWODY Płyty są brudne Prawidłowo wyjąć i oczyścić płyty (patrz rozdział Czyszczenie) Płyty są porysowane lub Nie używać porysowanych lub uszkodzone uszkodzonych płyt CD, DVD lub VCD Nie należy używać tych płyt i używać nie działa Płyty są... -
Página 111: Veiligheidsvoorzorgen
Veiligheidsvoorzorgen Dank u voor de aankoop van dit product. Lees Stel dit toestel, zijn versterker en luidsprek- deze gebruiksinstructies aandachtig om te weten ers nooit bloot aan vochtigheid of water om hoe u dit model op correcte wijze kunt bedienen. elektrische vonken of brand te voorkomen. -
Página 112: Uitbreidingssystemen
Veiligheidsvoorzorgen 1. Demonteer het toestel niet en voer er ook geen aanpassingen aan uit zonder professionele hulp. Voor verdere details kunt u best raad vragen aan een autoshop/dealer. 2. Als het frontpaneel of de TFT-monitor vuil is, gebruik dan een schone siliconendoek en neutraal detergent om de vlek schoon te vegen. -
Página 113: Inhoud
Inhoud Veiligheidsvoorzorgen......... 109 Weergave/Pauze..........Uitbreidingssystemen......... Vorige/Volgende..........Een map zoeken..........Inhoud..............Herhalen............A-B herhalen............ Voor ingebruikname..........Shuffle (in willekeurige volgorde) afspelen..Frontpaneel............Audiomodus selecteren........Afstandsbediening..........Ondertitelstaal selecteren......... Nota’s over gebruik afstandsbediening....Kijkhoek aanpassen......... Batterij uitnemen..........Video-instelling..........Batterij inzetten..........Weergave-informatie........Directe trackinvoer........... Basisbedieningselementen......... -
Página 114: Voor Ingebruikname
Voor ingebruikname Frontpaneel Mededeling: De grafische weergave in deze handleiding dient alleen ter referentie en kan verschillen van de werkelijke eenheid. De verwijzingen naar het werkelijke toestel zijn slechts een suggestie. 1. [ ] -knop Knop voor openen van het frontpaneel. 2. -
Página 115: Afstandsbediening
Voor ingebruikname Afstandsbediening 1. Selecteer afspeelmodus 2. De disk uitwerpen 3. Naar het hoofdmenu van de disk gaan EJECT 4. Naar het titelmenu van de disk gaan 5. In/uitzoomen op een afbeelding 6. Radioband selecteren 7. EQ-instelling 8. Dimmerregeling 9. Versnelde weergave voor/achteruit 10. -
Página 116: Nota's Over Gebruik Afstandsbediening
Voor ingebruikname Nota’s over het gebruik van de afstandsbediening 1. Richt de afstandsbediening naar de afstandsbedieningssensor op het toestel. 2. Vervang de batterij van de afstandsbediening of zet een batterij-isolator in als de batterij een maand of nog langer niet werd gebruikt. 3. -
Página 117: Basisbedieningselementen
Basisbedieningen Parkeerremverbod • Als de “BRAKE” (rem)-kabel is aangesloten op de remschakelaar, zal het display op de TFT-monitor alleen video weergeven als de handrem is aangetrokken. • Parkeerremfunctie wordt uitgeschakeld als de videobron op REVERSE wordt ingesteld. • Als het parkeerremverbod actief is, geeft de frontmonitor “WARNING Do not watch video while driving!”... -
Página 118: Voorkeuze Equalizer Selecteren
Basisbedieningen Voorkeuze van equalizer selecteren 1. Ga naar de EQ-instellingsmodus Raak het [ ]-icoontje in de gebruikerinterface aan en de EQ-instellingsinterface zal worden weerge- geven op het scherm. 2. Selecteer EQ-modus ∙ [User] [Flat] ∙ [POP] [Techno] ∙ [Rock] [Class] ∙... -
Página 119: Datum/Tijd Instellen
Basisbedieningen Datum/Tijd instellen 1. Raak [ ] aan. 2. Raak [ Time ] aan. Het datum/tijdinstelmenu wordt weergegeven. Datum instellen 1. Raak [ Date ] aan. 2. Raak de datuminformatie op het scherm aan. Een submenu wordt weergegeven. 3. Raak [ ] of [ ] om jaar, maand en dag in te stellen. -
Página 120: Radiomodus
Radiomodus Tuner TFT-display 1. Aanraken om het SOURCE MENU (bronmenu) te bekijken en een nieuwe weergavebron te selecteren 2. Indicator zendsignaal op afstand 3. Indicator huidige radioband 4. KIok 5. Zenderinformatie bewaard onder voorkeuzeknop 6. Raak aan om meer schermknoppen te zien 7. -
Página 121: Zenders Voorkiezen
Radiomodus Zenders voorkiezen Het toestel heeft 5 frequentiebanden, zijnde FM1, FM2, FM3, AM1, AM2, en elke band kan 6 zenders opslaan; het toestel kan in totaal dan ook 30 zenders bewaren. Intro/Scan Druk op het [ ]-icoontje om naar intro te gaan. Elke opgeslagen zender wordt automatisch 5 seconden afgespeeld. -
Página 122: Rds (Radio Data System)
Radiomodus RDS (Radio Data System) Het toestel verschaft basisfuncties van RDS. AF-functie Alternatieve-frequentieslijsten worden gebruikt voor dezelfde programmaservice en gebruikt in combinatie met de PI code (Program Identification code) ter ondersteuning van automatische afstemming.Met behulp van deze informatie kan een radio automatisch een andere zener zoeken die hetzelfde materiaal afspeelt. -
Página 123: Weergavemodus
Weergavemodus Een disk inzetten U kunt video, audio of beelden opgeslagen op de volgende disks afspelen: • DVD Video, DVD-R, DVD-RW • VCD • Audio CD, CD-R, CD-RW Nota: Zorg dat de disk afspeelbare inhoud bevat. Een disk uitwerpen Druk op de [ ] - toets op het frontpaneel of afstandsbediening om te disk uit te werpen. -
Página 124: Vorige/Volgende
Weergavemodus ingestoken, start het afspelen automatisch. Voor DVD-film, als een menu verschijnt, druk dan op [ om weergave te starten. 2. Om te pauseren [ ] aanraken. Om weergave te hernemen [ ] aanraken. Overspringen naar vorige / volgende track / hoofdstuk, druk op [ ] / [ ]-toets. -
Página 125: A-B Herhalen
Weergavemodus Voor CD/MP3/WMA-bestanden: 1. Op willekeurige plaats scherm aanraken behalve linker bovenhoek om menu op het scherm weer te geven, indien nodig. 2. Raak [ ] meermaals aan. ] Single herhalen: De huidige single meermaals afspelen. ] Alles herhalen: Alles op de disk herhaald afspelen. ] Hoofdstuk herhalen: Alles in de huidige map afspelen. -
Página 126: Video-Instelling
Weergavemodus Video-instelling ] aanraken om toegang te krijgen tot video-instellingsmodus, ] of [ ] aanraken om het gewenste effect in te stellen. U kunt de helderheid, het contrast en de intensiteit van de videoweer- gave instellen van 0 tot 16. ] Helderheid: bereik voor 0 tot 16. -
Página 127: Bluetooth-Modus
Bluetooth-modus U kunt bellen of gebeld worden met Bluetooth-geactiveerde telefoons via dit toestel. U kunt ook muziek beluisteren van een Bluetooth- geactiveerd toestel. De Bluetooth-geactiveerde toestellen koppelen Om uw Bluetooth-toestel op het toestel aan te sluiten moet u dit koppelen aan het toestel. Het koppelen hoeft slechts één maal te gebeuren. -
Página 128: Een Inkomende Oproep Beantwoorden
Bluetooth-modus Een inkomende oproep beantwoorden Standaard worden alle inkomende oproepen automatisch ontvangen. 1. Als er een inkomende oproep is, zal op het scherm “Incoming” (inkomend) verschijnen. 2. U kunt het scherm aanraken om [ Hang up ] (ophangen) of [ Answer ] (beantwoorden) te selecteren. Spreek in de Bluetooth-microfoon. -
Página 129: Instellinge
INSTELLINGEN Displaysysteem 1. Raak de linker bovenhoek aan om het hoofdmenu weer te geven. 2. [ Settings ] aanraken. Het instellingenmenu wordt weergegeven. Algemene instellingen aanpassen 1. [ General ] aanraken, indien nodig. 2. Aanraken om een instelling te selecteren. 3. -
Página 130: Geluidsinstellingen Aanpassen
INSTELLINGEN Tijdinstellingen Opties Beschrijving Datum Jaar/Maand/Dag Raak [ ] of [ ] om jaar, maand en dag in te stellen. Tijdmodus 12u/24u Raak [12H] of [24H] aan om de tijdmodus om te schakelen. Tijd Raak [ ] of [ ] om uur en minuten in te stellen. Desktimer Raak [ Simulate Timer ] of [ Numeral Timer ] aan om deze functie te selecteren. -
Página 131: Diskrating Aanpassen
INSTELLINGEN Diskrating aanpassen 1. [Disc] aanraken. 2. Raak een optie meermaals aan om deze te selecteren. 3. Raak de linker bovenhoek van het scherm aan om de optie te verlaten. DVD rating Opties Beschrijving Wachtwoord Wachtwoord instellen om de weergave van disks te beperken. instellen Het standaard wachtwoord is 0000. -
Página 132: Andere Modi
ANDERE MODI Andere toestellen beluisteren U kunt een extern audio/videotoestel aansluiten op het toestel. 1. Sluit het externe toestel aan met de meegeleverde A/V-kabel. 2. Raak de linker bovenhoek aan om het hoofdmenu weer te geven. 3. [AV-IN 2] aanraken om toegang te krijgen tot het aux-toestel vooraan. [AV-IN 1] aanraken om toegang te krijgen tot het aux-toestel achteraan. -
Página 133: Specificaties
SPECIFICATIES Algemeen Type NS-411 BT Referentievoedingsspanning 12V DC Bedrijfsspanningsbereik. 10,5-15.8V DC Max bedrijfsstroom. Afmetingen(BxHxD) 178X100X166.8mm Gewicht (hoofdeenheid) 2,0Kg Aardingssysteem Negatieve pool aan autobatterij Radio Signaal/ruisverhouding ≥55dB Restruisgevoeligheid (S/R=30dB). 18dBμV Frequentiekarakteristiek (±3dB). 20Hz~7KHz Zenderzoekniveau 20~28dBμV Vervorming ≤1.0% Stereoscheiding (1KHz) ≥25dB Antenne-iImpedantie 75Ω... -
Página 134: Regiocode
SPECIFICATIES Ondersteunde formaten USB of geheugenbestandsformaat FAT16, FAT32 Mp3 bit rate(datasnelheid) 32-320 Kbps en variabele bitrate v9 of vroegere versie v2.0 of later ID3 tag Bestandsnaam in Unicode UTF8(maximum lengte:128 bytes) Aantal albums/mappen maximum 99 Aantal tracks/titels maximum 999 Ondersteund MP3-diskformaat ISO9660,Joliet Ondersteunde samplingfrequenties 32kHz, 44.1kHz, 48kHz... -
Página 135: Problemen Verhelpen
PROBLEMEN VERHELPEN Wat er uitziet als een probleem is niet altijd ernstig. Controleer de volgende punten vooraleer u naar een service center belt. PROBLEEM OORZAAK CORRIGERENDE ACTIE Toestelzekering doorgebrand. Installeer nieuwe zekering met correcte stroomsterkte. Toestel kan Installeer nieuwe zekering met Autobatterijzekering doorgebrand. - Página 136 PROBLEMEN VERHELPEN PROBLEEM OORZAAK CORRIGERENDE ACTIE Controleer bedrading en corrigeer. Waarschuwingsin Parkeerrembedrading is niet -formatie wordt correct. voortdurend getoond Het kleursysteem van DVD-disk is Pas het kleursysteem aan van de DVD-disk Knipperend beeld niet geschikt voor de monitor. die op de gebruikte monitor wordt afgespeeld. of interferentie verschijnt op Piraatdisk wordt gebruikt.
-
Página 137: Installatie
INSTALLATIE De batterij loskoppelen Om een kortsluiting te voorkomen moet u de ontsteking uitzetten en de negatieve (-) batterijkabel verwijderen vooraleer u installatie uitvoert. Nota:Als het toestel moet worden geïnstalleerd in een auto uitgerust met een drive aan boord of een navigatiecomputer, koppel de batterijkabel dan niet los. -
Página 138: De Sierafwerkingsrand Gebruiken
INSTALLATIE a. Sluit de bedradingsadaptor aan op de bestaande bedrading. b. Sluit antennedraad aan. c. Schuif de radio voorzichtig in de halve huls en zorg ervoor dat de juiste kant naar boven zit. Gebruik de meegeleverde schroeven om de radio vast te maken op de halve toestelhuls. De sierafwerkingsrand gebruiken Het hoofdtoestel wordt geleverd met een sierafwerkingsrand in de verpakking voor de nodige installatieflexibiliteit. - Página 139 INSTALLATIE...
-
Página 140: Draadverbindingen
DRAADVERBINDINGEN YELLOW VIDEO OUT BLACK Rear display WHITE YELLOW WHITE BLACK WHITE BLUE SUB OUT TEL。 MUTE CAMERA IN YELLOW... -
Página 141: Precauções De Segurança
Precauções de segurança Agradecemos a sua preferência por O fusível do cabo de ligação deve ser este produto. Leia atentamente este substituído por um técnico qualificado. manual de instruções para saber utilizar A utilização de fusíveis não adequados corretamente o equipamento. O manual pode provocar danos na unidade ou deve ser guardado para possíveis mesmo um incêndio. - Página 142 Precauções de segurança 1. A unidade deve ser sempre desmontada ou reparada por um profissional. Para mais informações, consulte uma loja ou técnico especializado. 2. Para limpar o painel frontal ou o monitor TFT, use um pano com silicone limpo e um detergente neutro.
- Página 143 Índice Precauções de segurança ....139 Repetir ..........152 Repetir A-B .........153 Antes da utilização .......142 Reprodução Aleatória ......153 Painel Frontal........142 Selecionar Modo Áudio.......153 Controlo Remoto.........143 Selecionar Idioma das Legendas ..153 Notas sobre a utilização do Controlo Configurar Ângulo de Visão ....153 Remoto ..........144 Configurar Vídeo.........154 Retirar a pilha ........144...
-
Página 144: Antes Da Utilização
Antes da utilização Painel Frontal Observação: As imagens deste manual são apenas uma referência e podem diferir das da unidade em questão. O cliente deve utilizar a unidade adquirida como referência. 1. [ Botão de abertura do painel frontal. 2. [ Pressionar para ejetar o disco. -
Página 145: Controlo Remoto
Antes da utilização Controlo Remoto 1. Seleção modo de reprodução 2. Ejeção do disco 3. Menu principal do disco EJECT 4. Menu de raiz do disco 5. Zoom in /out de imagem 6. Seleção estações de rádio 7. Configuração do EQ 8. -
Página 146: Retirar A Pilha
Antes da utilização Notas sobre a utilização do Controlo Remoto 1. Apontar o controlo remoto para o sensor remoto da unidade. 2. Substituir a pilha do controlo remoto, se a pilha não tiver sido usada durante um mês ou mais. 3. -
Página 147: Funcionamento Básico
Funcionamento Básico Selecionar Equalizador Pré-definido 1. Entrar no modo de configuração do EQ Tocar no ícone [ ] no interface do utilizador e o interface de configuração do EQ surge no ecrã. 2. Selecionar modo EQ ∙ [User] [Flat ∙ [POP] [Techno] ∙... - Página 148 Funcionamento Básico Configurar Data /Hora 1. Tocar em [ 2. Tocar em [ Time ]. Surge no ecrã o menu de configuração de data/hora. Configurar a Data 1. Tocar em [ Date ]. 2. Tocar na informação sobre a data presente no ecrã; surge um submenu. 3.
-
Página 149: Modo De Rádio
Modo de Rádio Configurar o ecrã TFT 1 . T o c a r p a r a v i s u a l i z a r S O U R C E M E N U e selecionar uma nova fonte de reprodução 2. -
Página 150: Estação Predefinida
Modo de Rádio Estação Predefinida A unidade tem 5 bandas, por exemplo FM1, FM2, FM3, AM1, AM2, e cada banda permite memorizar 6 estações; pelo que a unidade permite memorizar um total de 30 estações. Introdução/Busca Pressionar [ ] para introdução. Cada estação memorizada toca automaticamente durante 5 segundos. -
Página 151: Função Pty
Modo de Rádio RDS ( Radio Data System ) A unidade inclui funções básicas de RDS. Função AF As Listas de Frequências Alternativas são usadas para o mesmo programa e em conjugação com o código PI (Program Identification code) para facilitar a sintonização automática. Ao usar esta informação, um rádio pode procurar automaticamente outra estação que esteja a emitir o mesmo material. -
Página 152: Modo De Reprodução
Modo de Reprodução Inserir um Disco É possível reproduzir vídeos, áudio ou imagens armazenadas nos seguintes discos: vídeo DVD, DVD-R, DVD-RW • VCD • Áudio CD, CD-R, CD-RW Nota: É importante verificar se o disco contém conteúdos que possam ser reproduzidos. Ejetar um Disco Pressionar[ ] no painel frontal ou no controlo remoto para ejetar... -
Página 153: Procurar Uma Pasta
Modo de Reprodução Play/Pausa 1. Após a inserção de um disco, USB ou cartão SD/MMC, a reprodução inicia-se automaticamente. No caso de um filme em DVD, após a visualização do menu, pressionar [ ] para iniciar a reprodução. 2. Para parar, tocar em [ Para retomar a reprodução, tocar em [ 3. -
Página 154: Reprodução Aleatória
Modo de Reprodução Ficheiros CD/MP3/WMA: 1. Tocar em qualquer zona do ecrã exceto no canto superior esquerdo para visualizar o menu, se necessário. 2. Tocar em [ ] repetidamente: ] Repetir uma vez: Reproduzir novamente a música actual. ] Repetir tudo: Reproduzir novamente todo o disco. ] Repetir pasta: Reproduzir toda a atual pasta. -
Página 155: Informação De Reprodução
Modo de Reprodução Configurar Vídeo Tocar em [ ] para aceder ao modo de configuração vídeo, tocar em [ ] ou em [ ] para definir o efeito desejado. É possível definir o brilho, o contraste e a saturação de cor (variação 0 a 16) ] Brilho: variação entre 0 e 16. -
Página 156: Modo Bluetooth
Modo Bluetooth É possível fazer ou receber chamadas por Bluetooth através da unidade. É igualmente possível ouvir música a partir de um dispositivo equipado com Bluetooth. Emparelhar dispositivos com Bluetooth Para ligar um dispositivo com Bluetooth à unidade, é necessário emparelhar o dispositivo e a unidade. -
Página 157: Atender Uma Chamada
Modo Bluetooth Atender uma Chamada Por predefinição, todas as chamadas são automaticamente recebidas. 1. Se entrar uma chamada, aparece a indicação “Incoming” no ecrã. 2. É possível tocar no ecrã para selecionar [ Hang up ] ou [ Answer ]. Falar para o microfone Bluetooth. -
Página 158: Visualizar O Sistema
Configurações Visualizar o Sistema 1. Tocar no canto superior esquerdo para visualizar o menu principal. 2. Tocar em [ Settings ]. O menu de configurações torna-se visível. Configurações Gerais 1. Tocar em [ General ], se necessário. 2. Tocar para selecionar uma configuração. 3. -
Página 159: Configurar Som
Configurações Configurar Som 1. Tocar em [Sound]. 2. Tocar numa opção repetidamente para a selecionar. 3. Tocar no canto superior esquerdo do ecrã para sair. Configurar Som Opções Opções Flat 80Hz Sub Woofer Filter Tocar para selecionar a frequência de crossover. 120Hz 160Hz Sempre que estiver a ouvir música num volume baixo, esta característica vai... -
Página 160: Configurar Volume
Configurações Configurar Volume É possível configurar diferentes volumes para diferentes modos. 1. Tocar em [Volume]. É exibido o submenu de configuração do volume. 2. Tocar numa fonte. ∙ [Media] ∙ [Radio] ∙ [Bluetooth] ∙ [AV-IN1] ∙ [AV-IN2] 3. Tocar em [ ] ou [ ] para atribuir um valor: 0 a 12. -
Página 161: Outros Modos
Outros Modos Ouvir Outros Dispositivos YA unidade pode ser ligada a um dispositivo áudio/vídeo externo. 1. Ligar o dispositivo externo com o cabo AV fornecido. 2. Tocar no canto superior esquerdo para visualizar o menu principal. 3. Tocar em [AV-IN 2] para aceder ao dispositivo dianteiro auxiliar. Tocar em [AV-IN 1] para aceder ao dispositivo traseiro auxiliar. - Página 162 Especificações Geral Tensão de Alimentação de Referência ...............12V(DC) Amplitude de Tensão de Funcionamento............10.5 - 15.8V(DC) Corrente Máxima de Funcionamento..................15A Ligação à Terra..............Pólo Negativo da Bateria do Carro Dimensões (LxAxC)..................178X100X166,8 mm Peso (unidade principal)....................1,9kg Relação Sinal Ruído .....................≥55dB Sensibilidade ao Ruído Residual (S/R=30dB).............. 18dBìV Frequência de Resposta (±3dB)...............20Hz~12.5KHz Nível de Pesquisa de Estações................
-
Página 163: Especificações
Especificações Supported Formats: ·USB ou formato de ficheiro de memória: FAT16, FAT32 ·Débito de bits Mp3 (taxa de débito de dados): 32-320 Kbps e débito variável de bits ·WMA v9 ou anterior ·Directório que pode alojar até 8 níveis ·Número de álbuns/pastas: máximo 99 ·Números de faixas/títulos: máximo 999 ·ID3 tag v2.0 ou posterior ·Nome do ficheiro em Unicode UTF8 (máximo:128 bytes) -
Página 164: Resolução De Problemas
Resolução de Problemas O que parece ser um problema nem sempre é grave. Por favor verifique os seguintes pontos antes de recorrer à assistência. Problema Possível causa Solução Geral Fusível da unidade queimado. Instalar novo fusível com a amperagem certa. Fusível da bateria do veículo queimado. -
Página 165: Instalação
Instalação Desligar a Bateria Para evitar um curto-circuito, desligue a ignição e retire o cabo do pólo negativo (-) da bateria antes da instalação. Nota: Se a unidade se destinar a um veículo equipado com sistema de navegação, não desligue o cabo da bateria. -
Página 166: Utilizar A Moldura
Instalação Utilizar a Moldura A embalagem da unidade inclui uma moldura para maior flexibilidade de instalação. A moldura encaixa na maioria dos tabliers, exigindo muito poucas ou nenhumas modificações. Alguns tabliers norte-americanos permitem um módulo Double-DIN, mas é normal existir um pequeno espaço entre o rádio e o tablier após a conclusão da instalação. - Página 167 Ligações YELLOW VIDEO OUT BLACK Rear display WHITE YELLOW WHITE BLACK WHITE BLUE SUB OUT TEL。 MUTE CAMERA IN YELLOW...
- Página 168 Le invitamos a leer en su totalidad estas instrucciones para un uso y mantenimiento correctos del producto. ¡Felicidades por su nueva compra! Este producto es un autorradio/estación multimedia de la marca Norauto sound. Este aparato permite leer varias fuentes: -Lectura de la radio -Lectura de CD y DVD...
- Página 169 ÍNDICE 1. INFORMACIÓN DE SEGURIDAD.................169 2. PRESENTACIÓN DEL APARATO.................171 A. Informaciones técnicas..................... 171 B. Descripción del aparato ..................173 1) Unidad........................173 2) Mando........................174 3. INSTALACIÓN ......................176 4. UTILIZACIÓN .........................178 A. Puesta en marcha......................178 1) Ajuste de fecha y hora ....................178 2) Ajuste sonoros ......................179 B.
-
Página 170: Información De Seguridad
INFORMACIÓN DE SEGURIDAD -Antes de utilizar el aparato, lea atentamente estas instrucciones de seguridad y guárdelas para futuras consultas. Si le da este aparato a alguien, entréguele también las instrucciones. -Utilice el aparato siguiendo las instrucciones. El fabricante no se hace responsable de un uso incorrecto o de una manipulación errónea. - Página 171 INFORMACIÓN DE SEGURIDAD del vídeo y aparece un mensaje en la pantalla, de tipo: «¡No mire el vídeo cuando está conduciendo!». Esto no afecta a la función «vídeo trasero». No está activada cuando la fuente vídeo está ajustada en REVERSE (para ver la parte trasera del vehículo). -No utilice el aparato cuando no se reúnen las condiciones de seguridad para la conducción.
-
Página 172: Presentación Del Aparato
PRESENTACIÓN DEL APARATO A. Especificaciones técnicas Especificaciones técnicas generales Modelo NS-411 BT Tensión 12V DC Gama de tensión 10,5-15.8V DC Corriente Medidas 178X100X166.8mm Peso 1,9 Kg Sistema Batería a polo negativo Radio Señal ≥ 55dB Sensibilidad: (S/N=30dB) 18dBµ Respuesta de frecuencia (±3dB) 20Hz~12.5KHz Nivel de Búsqueda de emisora... - Página 173 PRESENTACIÓN DEL APARATO Formatos soportados USB/Disco duro externo FAT16, FAT32 32-320 Kbps y débito variable V9 y más recientes ID3 tag V2.0 o más antiguos Nombre de los ficheros Unicode UTF8 (tamaño máximo 128 bits) Número de carpetas/álbums Máximo 99 Número de pistas/títulos Máximo 999 Formatos MP3 soportados...
-
Página 174: Descripción Del Aparato
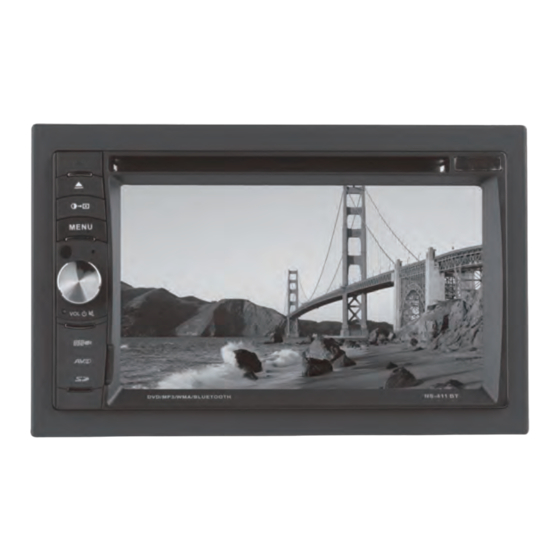
PRESENTACIÓN DEL APARATO B. Descripción del aparato Apertura frontal Eject Ajuste de contraste y luminosidad Menú Sensor para el mando a distancia Volumen Reset Puerto USB Entrada A/V Ranura para tarjeta SD Ranura del lector... -
Página 175: Mando
PRESENTACIÓN DEL APARATO Mando a distancia 1.Selección de la fuente musical 2. Apertura/cierre del compartimento CD 3. Menú del disco EJECT 4.Menú de los títulos del disco 5. Zoom +/- 6. Banda de radio 7. Ecualizador 8. Ajuste del contraste de la pantalla 9. -
Página 176: Poner Las Pilas Al Mando
PRESENTACIÓN DEL APARATO Poner las pilas al mando: Presione la tapa del compartimento y deslícela hacia el exterior. Ponga 1 pila CR2025 (3V) en el mando respetando las polaridades (+ & -). Sólo se puede utilizar este tipo de pila. Vuelva a colocar la tapa en su sitio, presionando sobre ella y deslizándola hacia el interior. -
Página 177: Instalación
INSTALACIÓN Corte la corriente antes de la instalación y quite el cable de batería (negativo -) para evitar una descarga eléctrica. Cuidado: si se instala este aparato en un coche equipado con lector u ordenador de a bordo, en ese caso hay que dejar enchufado el cable de batería: si se desconecta el cable se podría borrar la memoria del ordenador. - Página 178 INSTALACIÓN Esquema de cableado YELLOW VIDEO OUT BLACK Rear display WHITE YELLOW WHITE BLACK WHITE BLUE SUB OUT TEL。 MUTE CAMERA IN YELLOW...
-
Página 179: Utilización
UTILIZACIÓN A. Puesta en marcha Según las operaciones que realice, podrá o bien utilizar las teclas del aparato o bien el mando. Presione la tecla POWER del mando o la tecla del aparato. Presione a tecla MENÚ del aparato o la tecla SRC del mando. La pantalla MENÚ aparece en la pantalla. -
Página 180: Modos De Lectura
UTILIZACIÓN 2) Ajustes de sonido -Ajustes del volumen Para modificar el volumen, utilice el botón del aparato para bajar o subir el volumen sonoro o utilice el mando con las teclas VOL +/-. -Ecualizador Presione la tecla X del aparato y se mostrará el menú del ecualizador. Seleccione un modo de ecualizador: USER, FLAT, POP , TECHNO, ROCK, CLASSIC, JAZZ, OPTIMAL. - Página 181 UTILIZACIÓN 1 Presione para ver el menú FUENTE y seleccionar una nueva fuente 2 Indicador de la distancia de la señal de emisión 3 Indicador de la banda radio actual 4 Reloj 5 Información almacenada durante el preajuste 6 Selección de otros modos 7 Anterior 8 Búsquedas de emisoras predeterminadas 9 Siguiente...
- Página 182 UTILIZACIÓN -Memorización manual Busque una emisora de radio. Toque [ ] para mostrar el segundo menú. Toque [ ].. Seleccione uno de los canales disponibles (P1 a P6) para memorizar la emisora de radio seleccionada. Para escuchar una radio memorizada, hágalo desde el menú RADIO.
-
Página 183: Control
UTILIZACIÓN 2) Lectura de un disco Formatos de disco leídos: DVD, DVD-R, DVD-RW, VCD, CD audio, CD-R y CD-RW audio. A Retorno al menú principal B Se inicia el vídeo y se muestra información C Muestra en pantalla el menú del control D Muestra el tiempo Presione [ ] (mando o aparato) para introducir y sacar un disco. -
Página 184: Funciones
UTILIZACIÓN Búsqueda de una pista Búsqueda de un vídeo: Toque el icono [ ] para ver los vídeos disponibles. Abra una carpeta y toque dos veces sobre el vídeo que se quiere ver. Búsqueda de un fichero de audio Toque el icono [ Abra una carpeta y toque dos veces sobre la canción que desea escuchar. -
Página 185: Lectura Aleatoria
UTILIZACIÓN 2) Lectura aleatoria Toque, si es necesario, [ ] para abrir el segundo menú. Toque [ ] en la pantalla o pulse la tecla RANDOM del mando para activar y desactivar la función lectura aleatoria. 3) Selección del modo audio Durante la lectura de un VCD, puede seleccionar el modo audio (R/L/estéreo). -
Página 186: Información Durante La Lectura
UTILIZACIÓN E. Información durante la lectura Toque la pantalla durante la lectura de un DVD/VCD y aparecerá información en la parte superior de la pantalla. Para DVD -El tipo de disco -Información título: indica el número de títulos y el título en curso. -Información capítulo: indica el número de capítulos y el capítulo en curso. -
Página 187: Contestar A Una Llamada
UTILIZACIÓN ]: Agenda ]: Lista de llamadas Missed calls: Llamadas perdidas Received calls: Llamadas recibidas Dialed calls: Llamadas realizadas 4) Contestar a una llamada Todas las llamadas son contestadas automáticamente. Cuando entra una llamada, la pantalla del aparato muestra un mensaje. Para contestar seleccione Hang up (descolgar) o Answer (contestar). -
Página 188: Calibración
UTILIZACIÓN G. Ajustes generales Toque la pantalla arriba a la izquierda. Seleccione el menú de ajustes «Setting». Se muestra el menú. Presione sobre GENERAL si es necesario. Seleccione la opción que desea modificar. Para salir del menú ajustes, presione en la esquina derecha de la pantalla. Principales ajustes Opciones Descripción... -
Página 189: Ajustes De Las Opciones De Vídeo
UTILIZACIÓN Ajuste de vídeo Opciones Descripción Normal Aparece la imagen en la pantalla cuando se hace marcha atrás Vista trasera Espejo Se muestra la imagen en espejo cuando se hace marcha atrás Noche Oscuro Ajuste de Seleccione para cambiar la luminosidad luminosidad Normal Brillante... -
Página 190: Opción Control Desde El Volante
UTILIZACIÓN Presione la esquina izquierda de la pantalla para salir del menú. Si el aparato se bloquea, hay que ponerlo a cero para que se reinicie. Introduzca un pequeño dispositivo puntiagudo (una aguja o un bolígrafo) en el orificio de la función RESET. -
Página 191: Limpieza, Mantenimiento Y Almacenamiento
LIMPIEZA, MANTENIMIENTO Y ALMACENAMIENTO Siga estas instrucciones para guardar su aparato en buen estado de limpieza. Un aparato limpio y en buen estado de funcionamiento da mejores resultados y dura más tiempo. A. Limpieza ¡CUIDADO! No utilice productos que puedan dañar el aparato (productos abrasivos, corrosivos, alcoholes, limpiadores de vapor, trapos ásperos, rasquetas, etc.). -
Página 192: Solución De Problemas
SOLUCIÓN DE PROBLEMAS Si tiene problemas con el aparato, esta tabla puede ayudarle a solucionarlos. Si estas soluciones no resuelven su problema, lleve el aparato a un especialista. No repare o haga usted mismo el mantenimiento. Problemas Posiblescausas Soluciones Compruebe el cableado y El aparato no estáenchufado o siesnecesariovuelva a montar el está... -
Página 193: Gestión De Residuos
GESTIÓN DE RESIDUOS No se deben desechar en el mismo contenedor los productos eléctricos y los residuos caseros. Según la Directiva Europea 2002/96/EC sobre residuos de aparatos eléctricos y electrónicos, los equipos eléctricos usados se deben llevar a puntos de recogida selectiva para su reciclado. Puede dirigirse a las autoridades locales o a su vendedor para obtener consejos sobre reciclaje. - Página 194 Auto 5 Bld Paepsem 20-1070 ANDERLECHT BELGIQUE Noroto España SAU Centre Comercial Alban Carretera de Ademuz km 2,9 46100 BURJASSOT Norauto Italia SPA Corso Savona 85/110024 MONCALIERI Norauto Portugal LDA Av. dos Cavaleiros, n°49 Alfragide 2794-057 CARNAXIDE Norauto Romania Services srl Str. Batiştei nr.