Honeywell T6 Pro Manual De Instrucciones
Ocultar thumbs
Ver también para T6 Pro:
- Instrucciones de instalación (37 páginas) ,
- Manual del usuario (13 páginas)
Tabla de contenido
Publicidad
Idiomas disponibles
Idiomas disponibles
Enlaces rápidos
T6 Pro
Programmable Thermostat
Installation Instructions
Package Includes:
• T6 Pro Thermostat
• UWP™ Mounting System
• Honeywell Standard Installation
Adapter (J-box adapter)
• Honeywell Decorative Cover Plate –
Small; size 4-49/64 in x 4-49/64 in x
11/32 in (121 mm x 121 mm x 9 mm)
• Screws and anchors
• 2 AA Batteries
• Installation Instructions and User
Guide
Optional Cover Plate installation
NOTE: If Optional Cover Plate is not
required, see "UWP Mounting System
installation" on next page.
Use the Optional Cover Plate when:
• Mounting the thermostat to an
electrical junction box
• Or when you need to cover paint gap
from old thermostat.
1. Separate the Junction Box Adapter
from the Cover Plate. See Figure 1.
2. Mount the Junction Box Adapter to
the wall or an electrical box using any
of the eight screw holes. Insert and
tighten mounting screws supplied with
Cover Plate Kit. Do not overtighten. See
Figure 2. Make sure the Adapter Plate
is level.
3. Attach the UWP by hanging it on the
top hook of the Junction Box Adapter
and then snapping the bottom of the
UWP in place. See Figure 3.
4. Snap the Cover Plate onto the Junction
Box Adapter. See Figure 4.
1
2
Use 2x
supplied
screws #6
5/8"
4
3
Publicidad
Tabla de contenido

Manuales relacionados para Honeywell T6 Pro


Resumen de contenidos para Honeywell T6 Pro
- Página 1 • T6 Pro Thermostat • UWP™ Mounting System • Honeywell Standard Installation Adapter (J-box adapter) • Honeywell Decorative Cover Plate – Small; size 4-49/64 in x 4-49/64 in x 11/32 in (121 mm x 121 mm x 9 mm) • Screws and anchors •...
-
Página 2: Uwp Mounting System Installation
UWP Mounting System installation 5. Before starting, turn the power off at the breaker box or switch. Open package to find the UWP. See Figure 5. 6. Position the UWP on wall. Level and mark hole positions. See Figure 6. Drill holes at marked positions, and then lightly tap supplied wall anchors into the wall using a hammer. -
Página 3: Setting Slider Tabs
Rc terminal, set the slider to the down position (2 wires). NOTE: Slider Tabs for U terminals should be left in place for T6 Pro models. R/Rc slider tab Wiring terminal designations Heat Pump fault input... -
Página 4: Wiring Conventional Systems: Forced Air And Hydronics
Wiring conventional systems: forced air and hydronics Shaded areas below apply only to TH6320U/TH6220U or as otherwise noted. 1H/1C System (1 transformer) 1H/1C System (2 transformers) R Power (heating transformer) [1] Power [1] [R+Rc joined by Slider Tab] [2] Rc Power (cooling transformer) [1] Compressor contactor Compressor contactor 24VAC common [3, 4]... -
Página 5: Wiring Heat Pump Systems
Wiring heat pump systems Shaded areas below apply only to TH6320U/TH6220U or as otherwise noted. 1H/1C Heat Pump System 3H/2C Heat Pump System (TH6320U only) [10] Power [1] Power [1] [R+Rc joined by Slider Tab] [2] [R+Rc joined by Slider Tab] [2] Compressor contactor Compressor contactor (stage 1) 24VAC common [3]... -
Página 6: Thermostat Mounting
Thermostat mounting 1. Push excess wire back into the wall opening. 2. Close the UWP door. It should remain closed without bulging. 3. Align the UWP with the thermostat, and push gently until the thermostat snaps in place. 4. Turn the power on at the breaker box or switch. -
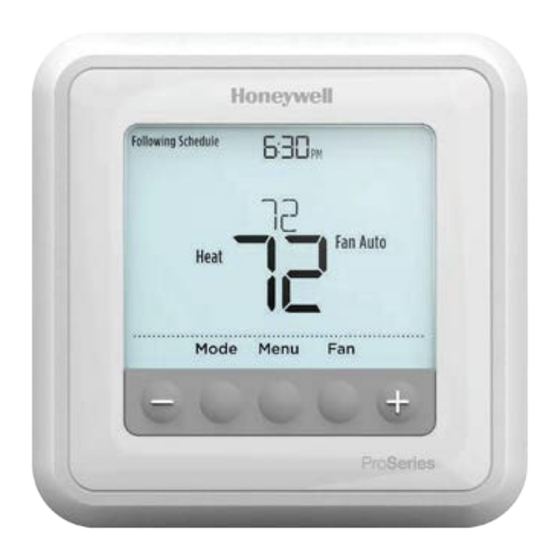
Página 7: System Operation Settings
System operation settings 1 Press the Mode button to cycle to the next available System mode. 2 Cycle through the modes until the required System mode is displayed and leave it to activate. NOTE: Available System modes vary by model and system settings. -
Página 8: Installer Setup (Isu)
Installer setup (ISU) 1 Press and hold CENTER and buttons for approximately 3 seconds to enter advanced menu. 2 Press Select to enter ISU. 3 Press Select to cycle through menu setup options. 4 Press to change values or select from available options. - Página 9 Auto Changeover Differential 0.0 °C to 2.5 °C Note: Differential is NOT deadband. Honeywell uses an advanced algorithm that fixes deadband at 0 °F. The differential setting is the minimum number of degrees from set-point needed to switch from the last mode running (heat or cool) to the opposite mode when the thermostat is in auto-changeover.
- Página 10 Advanced setup options (ISU) # ISU ISU Name ISU Options (factory default in bold) 0 = No Adaptive Intelligent Recovery 1 = Yes Note: Adaptive Intelligent Recovery (AIR) is a comfort setting. Heating or cooling equipment will turn on earlier, ensuring the indoor temperature will match the setpoint at the scheduled time.
-
Página 11: Installer System Test
Installer system test To perform a System Test: 1 Press and hold CENTER and buttons for approximately 3 seconds to enter advanced menu. to go to TEST. Press Select to enter 2 Use System Test. 3 Use to change between Heat, Cool, Fan, Em Heat, or Ver (thermostat version information). - Página 12 Specifications Temperature Ranges Heat: 40 °F to 90 °F (4.5 °C to 32.0 °C) Cool: 50 °F to 99 °F (10.0 °C to 37.0 °C) Working Ambient Temperature 32 °F to 120 °F (0 C° to 48.9 °C) Operating Ambient Temperature 37 °F to 102 °F (2.8 °C to 38.9 °C) Shipping Temperature -20 °F to 120 °F (-28.9 °C to 48.9 °C)
-
Página 13: Customer Assistance
Customer assistance For assistance with this product, please visit customer.honeywell.com. Or call Honeywell Customer Care toll-free at 1-800-468-1502. Pull to remove the thermostat from the UWP. Home and Building Technologies In the U.S.:... -
Página 14: Système De Montage Uwp
Système de montage UWP • Adaptateur d’installation standard Honeywell (adaptateur boîtier de raccordement) • Plaque de couvercle décorative Honeywell – Petite; dimension 4-49/64 in x 4-49/64 in x 11/32 in (121 mm x 121 mm x 9 mm). • Vis et chevilles •... -
Página 15: Installation Du Système De Montage Uwp
Installation du système de montage UWP 5. Avant le démarrage, éteindre l’alimentation au niveau du disjoncteur du circuit ou de l’interrupteur. Ouvrir l’emballage du UWP. Voir la Figure 5. 6. Placer le UWP sur le mur. Le mettre à niveau et marquer les positions des trous. - Página 16 à la borne Rc, régler le curseur sur la position basse (2 fils). REMARQUE : Les curseurs des bornes U doivent être laissés en position pour les modèles T6 Pro. Curseur R/Rc Désignations des bornes de câblage Entrée de faute de Entrées pour capteurs...
- Página 17 Câblage des systèmes conventionnels : air forcé et hydronique Les zones ombrées ci-dessous s’appliquent uniquement aux modèles TH6320U/ TH6220U ou en cas d’indication contraire. Système à 1 étage de chauffage/1 étage de Système à 1 étage de chauffage/1 étage de refroidissement (1 transformateur) refroidissement (2 transformateurs) Alimentation [1]...
-
Página 18: Câblage Des Systèmes À Thermopompe
Câblage des systèmes à thermopompe Les zones ombrées ci-dessous s’appliquent uniquement aux modèles TH6320U/ TH6220U ou en cas d’indication contraire. Système de thermopompe à 3 étages de Système de thermopompe à 1 étage de chauffage/1 étage de refroidissement chauffage/2 étages de refroidissement (TH6320U uniquement) [10] Alimentation [1] Alimentation [1]... -
Página 19: Montage Du Thermostat
Montage du thermostat 1. Repousser le fil en excès dans l’ouverture du mur. 2. Fermer le couvercle du UWP. Elle doit rester fermée sans renflement. 3. Aligner l’UWP sur le thermostat, et appuyer doucement jusqu’à ce que le thermostat s’enclenche en place. 4. -
Página 20: Alertes Ou Rappels
Réglages pour le fonctionnement du système 1 Appuyer sur le bouton Mode pour passer au prochain mode de système disponible. 2 Faire défiler les modes jusqu’à ce que le mode de système requis soit affiché, et le laisser s’activer. REMARQUE : Les modes de système disponibles varient en fonction du modèle et des paramètres du système. -
Página 21: Configuration De L'iNstallateur (Isu)
Configuration de l’installateur (ISU) 1 Appuyer sur CENTER (Centre) et sur les boutons pendant 3 secondes environ pour accéder au menu des réglages avancés. 2 Appuyer sur Select (Sélectionner) pour accéder à ISU (Configuration de l’installateur). 3 Appuyer sur Select (Sélectionner) pour faire défiler les options de configuration du menu. - Página 22 0 °F à 5 °F 0,0 °C à 2,5 °C Remarque : Différentiel et zone morte ne sont PAS synonymes. Honeywell se sert Différentiel de commutation d’un algorithme avancé pour fixer la zone morte à 0 °F (-18 °C). Le différentiel automatique représente le nombre minimum de degrés requis à...
- Página 23 Options de configuration avancées (ISU) (a continué) N° ISU Nom ISU Options ISU (réglage d’usine en gras) 50 °F à 99 °F (50 °F) Point de consigne minimum pour le refroidissement 10,0 °C à 37,0 °C (10,0 °C) 40 °F à 90 °F (90 °F) Point de consigne maximum pour le chauffage 4,5 °C à...
-
Página 24: Test Du Système De L'iNstallateur
Test du système de l’installateur Pour réaliser un test du système : 1 Appuyer sur CENTER (Centre) et sur les boutons pendant 3 secondes environ pour accéder au menu des réglages avancés. 2 Utiliser pour passer à TEST. Appuyer sur Select (Sélectionner) pour accéder au test du système. -
Página 25: Caractéristiques Techniques
Caractéristiques techniques Plages de température Chauffage : 40 °F à 90 °F (4,5 °C à 32,0 °C) Refroidissement : 50 °F à 99 °F (10,0 °C à 37,0 °C) Température de contrôle 32 °F à 120 °F (0 C° à 48,9 °C) Température de service 37 °F à... -
Página 26: Service À La Clientèle
Service à la clientèle Pour obtenir de l’aide avec ce produit, prière de visiter customer.honeywell.com. Ou appeler le numéro gratuit du service à la clientèle de Honeywell en composant le 1-800-468-1502. Tirer pour retirer le thermostat du UWP. Home and Building Technologies Aux États-Unis:... -
Página 27: Termostato Programable
Adaptador de instalación estándar de Honeywell (adaptador para cajetín de empalmes) • Placa de cubierta decorativa Honeywell – pequeña; tamaño 4-49/64 in x 4-49/64 in x 11/32 in (121 mm x 121 mm x 9 mm) • Tornillos y tarugos •... -
Página 28: Instalación Del Sistema De Montaje Con Uwp
Instalación del sistema de montaje con UWP 5. Antes de comenzar, desconecte el suministro de electricidad en la caja de interruptores de circuito o el interruptor. Abra el paquete para encontrar la UWP. Consulte la Figura 1. 6. Coloque la UWP en la pared. Nivele y marque la posición de los tornillos. -
Página 29: Designaciones Del Terminal De Cableado
(2 cables). NOTA: Las lengüetas de los controles deslizantes para terminales U deben dejarse en su lugar en los modelos T6 Pro. Lengüeta del control deslizante R/Rc Designaciones del terminal de cableado Entrada de detección de falla... -
Página 30: Cableado De Sistemas Convencionales: Aire Forzado E Hidrónico
Cableado de sistemas convencionales: aire forzado e hidrónico Las áreas sombreadas siguientes se aplican únicamente a TH6320U/TH6220U o según se indique. Sistema de 1 etapa de calefacción/1 etapa de Sistema de 1 etapa de calefacción/1 etapa de refrigeración (1 transformador) refrigeración (2 transformadores) Alimentación [1] Alimentación (transformador de... -
Página 31: Cableado De Sistemas De Bomba De Calor
Cableado de sistemas de bomba de calor Las áreas sombreadas siguientes se aplican únicamente a TH6320U/TH6220U o según se indique. Sistema de bomba de calor de 1 etapa de calefacción/1 Sistema de bomba de calor de 3 etapas de calefacción/2 etapas de refrigeración etapa de refrigeración (TH6320U únicamente) [10] Alimentación [1]... -
Página 32: Montaje Del Termostato
Montaje del termostato 1. Introduzca el excedente de cable en la abertura de la pared. 2. Cierre la tapa de la placa de la UWP. Debe permanecer cerrada sin quedar protuberante. 3. Alinee la UWP con el termostato y presione suavemente hasta que el termostato calce en su lugar. -
Página 33: Configuraciones Del Sistema Operativo
Configuraciones del sistema operativo 1 Presione el botón Mode (modo) para pasar al siguiente modo disponible en el sistema. 2 Alterne a través de los modos hasta que se muestre el modo de sistema requerido y deje que se active. NOTA: Los modos disponibles del sistema varían según el modelo y las configuraciones del sistema. -
Página 34: Configuración Por El Instalador (Isu)
Configuración por el instalador (ISU) 1 Presione y sostenga CENTER (centro) y los botones durante aproximadamente 3 segundos para ingresar al menú avanzado. 2 Presione Select (seleccionar) para ingresar al ISU. 3 Presione Select (seleccionar) para avanzar a través de las opciones del menú de configuración. 4 Presione para cambiar los valores o seleccionar las opciones disponibles. - Página 35 0 °F a 5 °F de 0.0 °C a 2.5 °C Nota: Diferencial: NO es banda muerta. Honeywell utiliza un algoritmo avanzado que repara la banda muerta en 0 °C. La configuración diferencial es el número Diferencial de conversión automática mínimo de grados del punto de referencia necesario para cambiar del último...
- Página 36 Opciones avanzadas de configuración (ISU) (continuado) N.º del ISU Nombre del ISU Opciones del ISU (las configuraciones predeterminadas de fábrica están en negrita) 50 °F a 99 °F (50 °F) Punto de referencia mínimo de refrigeración 10.0 °C a 37.0 °C (10.0 °C) 40 °F a 90 °F (90 °F) Punto de referencia máximo de calefacción...
-
Página 37: Prueba Del Sistema Por Parte Del Instalador
Prueba del sistema por parte del instalador Para realizar una prueba del sistema: 1 Presione y sostenga CENTER (centro) y los botones durante aproximadamente 3 segundos para ingresar al menú avanzado. 2 Use para ir a TEST (prueba). Presione Select (seleccionar) para iniciar la prueba del sistema. -
Página 38: Especificaciones
Especificaciones Rangos de temperatura Calefacción: de 40 °F a 90 °F (4.5 °C a 32.0 °C) refrigeración : de 50 °F a 99 °F (10.0 °C a 37.0 °C) Temperatura ambiente al inicio de 32 °F a 120 °F (de 0 °C a 48.9 °C) Temperatura ambiente de funcionamiento de 37 °F a 102 °F (de 2.8 °C a 38.9 °C) Temperatura de envío... -
Página 40: Asistencia Al Cliente
UWP. Home and Building Technologies En los EE. UU.: Honeywell 715 Peachtree Street NE Atlanta, GA 30308 customer.honeywell.com ® Marca registrada en los Estados Unidos © 2017 Honeywell International Inc. 33-00181EFS—07 M.S. Rev. 10-17 33-00181EFS-07 Impreso en EE. UU.