
Manuales relacionados para Beninca ONE2 WI


Resumen de contenidos para Beninca ONE2 WI
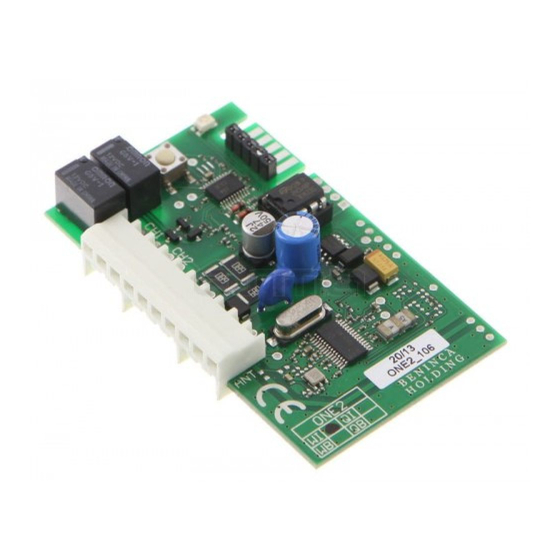
- Página 1 L8542663 A D VAN TA G E 09/2010 rev 0 s y s t e m ONE2 WI ONE2 WB UNIONE NAZIONALE COSTRUTTORI AUTOMATISMI PER CANCELLI, PORTE SERRANDE ED AFFINI...
- Página 2 ONE2 WI ������������� ������� � ������������� ���� ���� ������� ������������ � ������������������� ������������� �������������� � � ���� ��� ���� � � �������� � �������� � � � � ��� ��� �� ���...
- Página 3 ������������� ����� ������������� ONE2 WB ������������� ������� � ����� ������������ ������������� � ������� ���� ������������������� ������������ ���� � ������������������� ���� ������������� ���� � ������������� �������������� �������������� � � � � ��� � ��� � ���� ���� ���� ���� � � �...
-
Página 4: Importante
3 Premere, con il LED Rosso acceso, il pulsante del trasmettitore che si vuole associare al canale 1. Disponibili con innesto molex (ONE2 WI) o in box plastico con 4 Altri trasmettiori possono essere inseriti successivamente morsettiera (ONE2 WB). La memoria standard può contenere premendo un tasto entro 5s dall’inserimento precedente. - Página 5 TABELLA1 Fase Funzione Operazioni Spento Nessuna funzione Stato normale Premere il pulsante P Si accende il LED rosso, attendere 3s, il LED si spegne e si riaccende, Memorizzazione del Rosso premere entro 5s il tasto del trasmettitore che si desidera associare al 1°...
- Página 6 * Dopo la pressione del tasto del 1° trasmettitore, la ricevente dallo spegnimento del LED, e procedere con una nuova resta in attesa per 5s di un altro trasmettitore da memorizzare. programmazione. E’ pertanto possibile inserire in modo sequenziale tutti i Modalità...
- Página 7 TABELLA 3 N° lampeggi Tempo di N° lampeggi Tempo di N° lampeggi Tempo di N° lampeggi Tempo di comm. comm. comm. comm. 3,5m 4,5m 1,5m 2,5m Si entra così nel sottomenu Tempi, descritto nella tabella 2. Caratteristiche Tecniche ONE2 WB/WI Cancellazione completa della memoria Frequenza 433,92 MHz...
-
Página 8: Important
ADVANTAGE system. Memorising a transmitter – Remote self-learning They are available with Molex (ONE2 WI) socket or in a plastic If a transmitter has already been memorised on the receiver the box with terminal board (ONE2 WB). A special version is remote radio self-learning feature can be used (without having available with a memory that can hold 2048 transmitters. - Página 9 TABLE 1 Mode LED Function Operations No function Normal status. Press the button P The red LED will light up, wait 3 secs, the LED will go out and light up Memorise channel 1 again, press within 5 secs the button on the transmitter to associate with channel 1.* Press within 3 secs the button P The green LED will light up, wait 3 secs, the LED will go out and light up...
- Página 10 * After pressing the button on the first transmitter the receiver functions complete one programming sequence, indicated by will wait 5 secs to memorise another transmitter. the LED going out, and restart with a new programming mode. In this way all the transmitters being associated with one Times Mode channel can be recorded in sequence.
- Página 11 TABLE 3 Switching Switching Switching Switching Blinks Time Blinks Time Blinks Time Blinks Time 3,5m 4,5m 1,5m 2,5m Resetting the memory Technical Characteristics ONE2 WB/WI Cut off the power to the receiver. Press and keep pressed the 433,92 MHz Frequency button P.
- Página 12 3 Bei eingeschalteter roter LED die Taste des Senders drücken, der dem Kanal 1 zugeordnet werden soll. Verfügbar mit Molex-Verbindung (ONE2 WI) oder in Plastikbox 4 In der Folge können weitere Sender einspeichert werden, mit Klemmenleiste (ONE2 WB). Der Standardspeicher kann bis indem innerhalb von 5 s nach der vorherigen Eingabe eine zu maximal 512 Rolling-Code-Sender aufnehmen.
- Página 13 TABELLE 1 Phase LED Funktion Operationen Keine Funktion Normaler Status. Die Taste P drücken Die rote LED schaltet sich ein, 3 s warten, die LED schaltet sich aus und Speicherung des 1. Funk- wieder ein, innerhalb von 5 s die Taste des Senders drücken, der dem Kanal 1 kanals zugeordnet werden soll.* Innerhalb von 3 s die Taste P drücken...
- Página 14 NB: Sobald auf eine beliebige der Programmierungsphasen In der Tabelle 1sind die verschiedenen Phasen der Program- zugegriffen wurde, lässt der Empfänger den Übergang auf die mierung beschrieben. folgende Phase nicht mehr zu. * Nachdem die Taste des 1. Senders gedrückt wurde, wartet Falls mehr als eine Funktion programmiert werden soll, das der Empfänger 5 s auf einen weiteren zu speichernden Sender.
- Página 15 TABELLE 3 Zahl der Blink- Zahl der Blink- Zahl der Blink- Zahl der Blink- Umschaltzeit Umschaltzeit Umschaltzeit Umschaltzeit signale LED signale LED signale LED signale LED 3,5m 4,5m 1,5m 2,5m ist als Impulsfunktion eingestellt (1 s Umschaltung). Technische Charakteristiken ONE2 WB/WI Zur Eingabe des Zeit-Modus auf die Phase 4 (für Kanal 1) 433,92 MHz Frequenz...
- Página 16 ADVANTAGE 4 D’autres émetteurs peuvent être mémorisés ensuite en pressant une touche dans les 5 s de la mémorisation Disponibles avec connexion molex (ONE2 WI) ou dans boîtier précédente. plastique avec bornier (ONE2 WB).. La mémoire standard peut 5 À...
- Página 17 TABLEAU 1 Phase LED Fonction Opérations Éteinte. Aucune fonction État normal. Presser la touche P Mémorisation du 1 La LED Rouge s’allume, attendre 3 s, la LED s’éteint et se rallume, presser en- Rouge canal radio core 5 s la touche de l’émetteur que l’on souhaite associer au canal 1.* Presser dans les 3 s qui suivent la touche P Mémorisation du 2 La LED Verte s’allume, attendre 3 s, la LED s’éteint et se rallume, presser encore...
- Página 18 * Après la pression de la touche du 1er émetteur, le récepteur phase successive. reste en attente pendant 5 s d’un autre émetteur à mémoriser. Si l’on souhaite programmer plus d’une fonction, attendre la fin Il est donc possible de mémoriser de manière séquentielle de la programmation en cours, signalée par l’extinction de la tous les émetteurs à...
- Página 19 TABLEAU 3 Nb Clignote- Temps de Nb Clignote- Temps de Nb Clignote- Temps de Nb Clignote- Temps de ments LED commutation ments LED commutation ments LED commutation ments LED commutation 3,5m 4,5m 1,5m 2,5m Pour régler la modalité temps il faut entrer dans la phase 4 (pour Caractéristiques techniques ONE2 WB/WI le canal 1) ou dans la phase 5 (pour le canal 2) et attendre la fin...
- Página 20 1 segundo y se enciende otra vez por 5 segundos. 3 Pulsar, con el LED rojo encendido, el botón del transmisor Disponibles con acoplamiento molex (ONE2 WI) o con caja que se desea asociar al canal 1. de plástico con terminal de bornes (ONE2 WB). La memoria 4 Es posible insertar otros transmisores seguidamente, basta estándar puede contener un máximo de 512 transmisores...
- Página 21 TABLA 1 Fase Función Operaciones Apagado Ninguna función Estado normal. Pulsar el botón P Se enciende el LED rojo, esperar 3 segs., el LED se apaga y se enciende Memorización del 1° Rojo otra vez, pulsar dentro de 5 segs. la tecla del transmisor que se desea canal radio asociar al canal 1.* Pulsar dentro de 3 segs.
- Página 22 Nota: Una vez que el receptor haya entrado en cualquier fase de En la tabla 1 aparecen las diferentes fases de programación. programación, no permite pasar a la fase siguiente. * Después de presionar la tecla del 1° transmisor, el receptor Si se desea programar más de una función, esperar a que queda en espera por 5 segundos para memorizar otro termine la programación en acto, momento en que se apagará...
- Página 23 TABLA 3 N° Destellos Tiempo de N° Destellos Tiempo de N° Destellos Tiempo de N° Destellos Tiempo de conmutación conmutación conmutación conmutación 3,5m 4,5m 1,5m 2,5m impulsos (1 seg. de conmutación). Características técnicas ONE2 WB/WI Para programar la modalidad tiempos, hay que entrar en la fase 433,92 MHz Frecuencia 4 (para el canal 1) o en la fase 5 (para el canal 2) y esperar a que...
- Página 24 2 Zaświeci się na 3sek Czerwony LED, po czym zgaśnie on na kompatybilne z systemem ADVANTAGE 1sek i ponownie zaświeci się na 5sek. Dostępne ze złączem sprzęgającym molex (ONE2 WI) lub w 3 Nacisnąć, podczas świecącego się Czerwonego LEDA, przycisk skrzynce plastykowej z listwą zaciskową (ONE2 WB). Pamięć...
- Página 25 TABELA 1 Faza Funkcja Czynności Zgaszony Bez funkcji Stan normalny. Wcisnąć przycisk Zaświeci się Czerwony LED, odczekać3sek, LED zgaśnie i ponownie się Utrwalanie w pamięci Czerwony zaświeci, nacisnąć w przeciągu5sek przycisk modułu transmisyjnego 1-go kanału radiowego wybranego do zestawienia z kanałem 1.* Nacisnąć...
- Página 26 By przejść z jednej fazy programowania do następnej należy obranym kanałem. Po upływie 5sek oczekiwania odbiornik wyłącza naciskać przycisk P z przerwami nie dłuższymi niż 3sek pomiędzy się z fazy programowania. W przypadku wpisywania do pamięci w/g jednym naciśnięciem a drugim. ustalonej sekwencji zaleca się...
- Página 27 TABELA 3 Ilość Czas Ilość Czas Ilość Czas Ilość Czas Mignięć LED komutacji Mignięć LED komutacji Mignięć LED komutacji Mignięć LED komutacji 3,5m 4,5m 1,5m 2,5m Układ czasowy Dane techniczne ONE2 WB/WI Programowanie tej funkcji jest niezbędne tylko wówczas gdy zamierza się...
- Página 28 AUTOMATISMI BENINCÀ Via Capitello, 45 - 36066 Sandrigo (VI) - Tel. 0444 751030 r.a. - Fax 0444 759728...