
Manuales relacionados para Sauder Litterbox Coffee Oak


Resumen de contenidos para Sauder Litterbox Coffee Oak
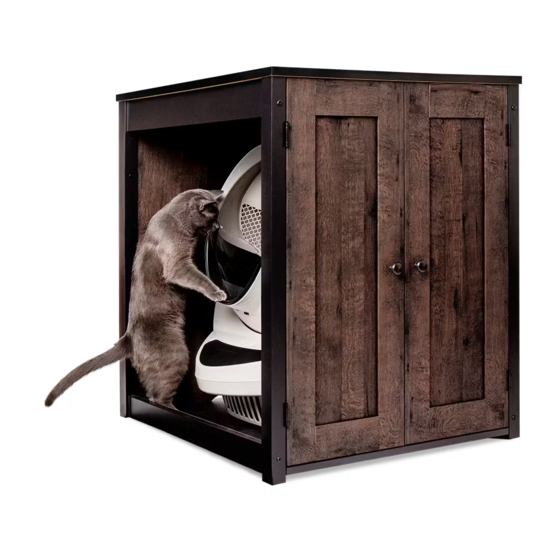
- Página 1 Litter Box STORAGE CABINET - Coffee Oak support@litterbox.com | 1.877.250.7729 | Mon-Fri, 9am-7pm EST...
- Página 2 Thank you for purchasing the Litter Box Storage Cabinet! register your new product online www.sauder.com/service Jacob Zuppke, Founder of Litterbox.com Table of Contents Assembly Tools Required rewdriver Tip Sh Hardwar Assembly Steps 5-23 Hammer Français 24-26 27-29 Skip the p wer trip.
-
Página 3: Part Identification
Now you know Part IdentificaTION our ABCs. While not all parts are labeled, some of the parts will have a label or an inked letter on the edge å to help distinguish similar parts from each other. Use this part identifi cation to help identify similar parts. END PANEL (1) TOP (1) RIGHT FRONT LEG (1) - Página 4 Hardware IdentificATION Screws are shown actual size. You may receive extra hardware with your unit. å 7F TWIST-LOCK ® HIDDEN FOOT - 1 CAM SCREW - 14 WOOD DOWEL - 12 CAM - 14 FASTENER - 11 CROSS SLOTTED MAGNETIC HINGE - 4 STRIKE PLATE - 2 KNOB - 2...
- Página 5 Assemble your unit on a carpeted fl oor or on the empty å carton to avoid scratching your unit or the fl oor. STOP To begin assembly, push eleven SAUDER TWIST-LOCK® å FASTENERS (7F) into the large holes in the UPPER SIDE If you purchased SKIRTS (G), UPPER BRACE (J), and BACK (K).
- Página 6 Step 2 Push fourteen HIDDEN CAMS (1F) into the UPPER å BRACE (J), BACK (K), and BOTTOM (L). Arrow (14 used) Arrow Arrow Hole The arrow in the HIDDEN CAM must point toward the hole in the edge of the board. Page 6 425616 www.litterbox.com/support...
- Página 7 Step 3 Turn fourteen CAM SCREWS (8F) into the exact holes å shown in the LEGS (F and D) and SIDE SKIRTS (G and H). Do not use this hole. Do not use this hole. www.litterbox.com/support 425616 Page 7...
- Página 8 Step 4 Push eight CROSS-SLOTTED DOWELS (24F) into the SIDE å SKIRTS (G and H) as shown. NOTE: The threads in the DOWEL should be pointed toward å the hole in the edge of the SIDE SKIRT. The long slot should face up and be parallel to the long edges of the SIDE SKIRTS.
- Página 9 Step 5 Fasten the FOOT (1E) to the BOTTOM (L). Use one å BLACK 9/16" PAN HEAD SCREW (51S). BLACK 9/16" PAN HEAD SCREW (1 used in this step) www.litterbox.com/support 425616 Page 9...
- Página 10 Step 6 Insert eight WOOD DOWELS (15F) into the SIDE SKIRTS (G and H). å Fasten the LEGS (C, D, E, and F) to the SIDE SKIRTS (G and H) exactly as å shown. Use eight BLACK 2-3/4" FLAT HEAD BOLTS (143S). NOTE: The BOLTS will thread into the DOWELS in the SIDE SKIRTS.
- Página 11 Step 7 Insert one WOOD DOWEL (15F) into the RIGHT REAR LEG (D). å Fasten the BACK (K) to the RIGHT REAR LEG (D). Tighten å three HIDDEN CAMS. NOTE: Be sure the WOOD DOWEL in the LEG inserts into å...
- Página 12 Step 8 Fasten the BOTTOM (L) to the LOWER SIDE SKIRT (H). å Tighten three HIDDEN CAMS. Fasten the BOTTOM (L) to the BACK (K). Use two BLACK å 1-15/16" FLAT HEAD SCREWS (113S). C A M D E N H I D i t h f a c...
- Página 13 Step 9 Insert one WOOD DOWEL (15F) into the UPPER SIDE SKIRT (G). å Fasten the UPPER BRACE (J) to the UPPER SIDE SKIRT (G). å Tighten one HIDDEN CAM. NOTE: Be sure the WOOD DOWEL in the UPPER SIDE SKIRT å...
- Página 14 Step 10 Insert two WOOD DOWELS (15F) into the LEFT REAR LEG (F) and UPPER SIDE SKIRT (G). å Fasten the LEFT REAR LEG (F) to the BACK (K). Tighten three HIDDEN CAMS. å NOTE: Be sure the WOOD DOWEL in the LEG inserts into the BACK. å...
- Página 15 Step 11 NOTE: If you purchased the 425766 Hutch, go to that book now å to prepare the TOP (B) for fastening the Hutch if you have not Thinking outside the already done so. litter box. Push the MAGNETIC CATCHES (3I) into the holes in the TOP (B). å...
- Página 16 Step 12 Carefully stand your assembly upright. å How to use the SAUDER TWIST-LOCK® FASTENER Fasten the TOP (B) to the UPPER SIDE SKIRTS (G), 1. Insert the dowel end of the FASTENER into the å hole of the adjoining part.
- Página 17 Step 13 With a hammer, gently tap four SHELF SNAPS (6R) into the å holes in the END PANEL (A). www.litterbox.com/support 425616 Page 17...
- Página 18 Step 14 You have the option of having the opening for the å litter-robot® on the right or left side of your unit. Opening on the left Opening on the right Page 18 425616 www.litterbox.com/support...
- Página 19 Step 15 Insert four METAL PINS (1R) into the holes in the LEGS (C å and D) or LEGS (E and F) according to your choice for the litter-robot® opening. Set the END PANEL (A) against the METAL PINS so the SHELF SNAPS are resting on the METAL PINS.
- Página 20 Step 16 Fasten the STRIKE PLATES (6I) to the DOORS (M). Use two å BLACK 1/2" FLAT HEAD SCREWS (11S). Almost time to celebrate! Fasten the HINGES (2H) to the DOORS (M) exactly as shown. With a cat nap. å Use eight BLACK 9/16"...
- Página 21 Step 17 Fasten one of the DOORS (M) to the RIGHT FRONT LEG (C). Use four BLACK 9/16" LARGE å HEAD SCREWS (1S). NOTE: Be sure the HINGES are even with the front edge of the LEG. å Fasten one KNOB (5K) to the DOOR (M). Use one GOLD 1" MACHINE SCREW (50S). å...
- Página 22 Step 18 Push four HOLE PLUGS (11P) into the empty holes in the å LEGS (C and D) or (E and F). Using your hammer, gently tap a CAM COVER (12P) onto å each visible HIDDEN CAM in the BACK (K). (6 used) To cover HIDDEN CAMS Page 22...
- Página 23 Step 19 NOTE: Please read the back pages of the instruction booklet for important safety information. å This completes assembly. Clean with a damp cloth. Wipe dry. å And to celebrate, why not share your success story at litterbox.com or www.litterbox.com/support 425616 Page 23...
-
Página 24: Liste De Pièces
REFERENCE DESCRIPTION QUANTITÉ REFERENCE DESCRIPTION QUANTITÉ conserver le livret pour future référence. Pour contacter Sauder en PANNEAU D’EXTRÉMITÉ ........1 PIED ..................1 ce qui concerne cet DESSUS ................1 EXCENTRIQUE ESCAMOTABLE ....14 élément, faire référence PIED AVANT DROIT ............1 FIXATION TWIST-LOCK® ........11 au numéro de lot et... - Página 25 EXCENTRIQUES ESCAMOTABLES. Pour commencer l'assemblage, enfoncer onze FIXATIONS REMARQUE : S'assurer de bien insérer la CHEVILLE EN BOIS située TWIST-LOCK® SAUDER (7F) dans les gros trous dans les sur le PIED dans l' A RRIÈRE. PLINTHES LATÉRALES SUPÉRIEURES (G), l’ENTRETOISE SUPÉRIEURE (J) et l' A RRIÈRE (K).
- Página 26 FIXATIONS TWIST-LOCK®. l'indique le schéma. Utiliser huit VIS TÊTE LARGE 14 mm NOIRES (1S). Utilisation de la FIXATION TWIST-LOCK® SAUDER REMARQUE : Centrer les VIS dans les trous de la CHARNIERE. 1. Insérer l' e xtrémité fi letée de la FIXATION dans le trou de la pièce attenante.
-
Página 27: Almacenamiento
PANEL DEL EXTREMO ..........1 PATA ..................1 su referencia futura. Si necesita ponerse en EXCÉNTRICO ESCONDIDO ......14 PANEL SUPERIOR ............1 contacto con Sauder en SUJETADOR TWIST-LOCK®.......11 PATA DELANTERA DERECHA ......1 cuanto a esta unidad, BIELA DE EXCÉNTRICO ........14 PATA POSTERIOR DERECHA ......1 refi érase al número... - Página 28 Fij e el DORSO (K) a la PATA POSTERIOR DERECHA (D). Apriete tres EXCÉNTRICOS ESCONDIDOS. Para comenzar el ensamblaje, empuje once SUJETADORES TWIST-LOCK® SAUDER (7F) dentro de los agujeros grandes NOTA: Asegúrese de que el PASADOR DE MADERA en la PATA se de los FALDONES LATERALES SUPERIORES (G), de la RIOSTRA inserte en el DORSO.
- Página 29 Utilice ocho TORNILLOS NEGROS DE CABEZA GRANDE de 14 mm (1S). Cómo utilizar el SUJETADOR TWIST-LOCK® SAUDER NOTA: Centre los TORNILLOS en los agujeros de la BISAGRA. 1. Inserte el extremo con cabilla del SUJETADOR en el agujero de la parte adjunta.
- Página 30 WARNING Please use your furniture correctly and safely. Improper use can cause safety hazards, or damage to your furniture or household items. Carefully read the following chart. Look out for: What can happen: How to avoid the problem: • Children climbing on furniture. •...
-
Página 31: Garantía Limitada De 1 Año
à Sauder dans les limites de couverture de la mobilier Sauder. Le mot « défaut », tel qu’il est utilisé sous les termes de la présente garantie. La garantie ne peut pas être transférée à des propriétaires ou utilisateurs garantie, comprend les imperfections des pièces qui empêchent substantiellement... - Página 32 | 1.877.250.7729 | Mon-Fri, 9am-7pm EST (except holidays) Learn more at www.litterbox.com/support General Conformity Certificate This certificate applies to the Sauder Woodworking Product identified by this Instruction Book. This certificate applies to compliance of this product with the CPSC Ban on Lead-Containing Paint (16 CFR 1303).