Tabla de contenido

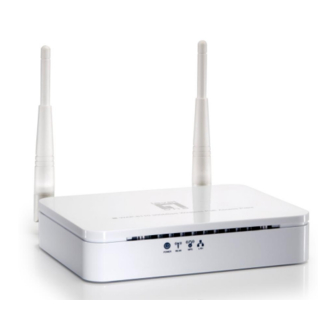
Resumen de contenidos para LevelOne WAP-6110
- Página 1 LevelOne WAP-6110 300Mbps Wireless PoE Access Point Quick Installation Guide English Português Deutsch Svenska Français Slovenščina Español 繁體中文 Nederlands 한국어 Dansk Русский Italiano Polski Ελληνικά...
-
Página 2: Tabla De Contenido
Polski ..................22 Default Settings IP Address 192.168.1.1 User Name admin Password admin AP Mode Enable Wireless SSID LevelOne This Quick Installation Guide only describes the most basic situations and settings. All detailed information is described in the user manual. - Página 3 Package Contents WAP-6110 Power Adapter RJ-45 Cable CD-ROM with Manual and QIG Quick Installation Guide Antenna x2 (for detachable only) If any of the above items are missing, please contact your retailer or distributor.
- Página 4 WPS Button RESET button...
- Página 5 Other LED indicator: Power indicator Wireless Active indicator WPS Active indicator Ethernet Active indicator Label Color Flash Waiting for device Green Ready Power Off ready Transmit / Receive Green WLAN Ready WLAN Off Data Start WPS pairing Green WPS Idle within 2 minutes Transmit / Receive Ethernet...
- Página 6 (Figure 2) (Figure 3)
- Página 7 (Figure 4) (Figure 5)
-
Página 8: English
(Figure 3) 2. When prompted, use the following User Name and password. User Name and Password: admin (Figure 4) 3. The first time you connect to the WAP-6110, you should run the Setup Wireless to configure the Internet Connection. (Figure 5) -
Página 9: Deutsch
2. Wenn Sie dazu aufgefordert werden, Sie den Benutzernamen und das Passwort wie folgt ein: Benutzername und Passwort: admin(Figure 4) 3. Wenn Sie den WAP-6110 zum ersten Mal anschließ en, sollten Sie den Einrichten eines drahtlosen Installation zur Konfiguration der Internetverbindung verwenden. (Figure 5) -
Página 10: Français
Français Installation (Figure 1) Veuillez connecter le WAP-6110 au port RJ-45 Ethernet de votre PC. Enfin, mettez le WAP-6110 sous tension. L'installation est terminée. Vous pouvez maintenant commencer à configurer le périphérique. Vérifier vos paramètres réseau pour accéder à l'interface web... -
Página 11: Españ Ol
2. Cuando se le solicite, use la siguiente Usuario y contraseña. Usuario y contraseña : admin(Figure 4) 3. La primera vez que se conecte a la WAP-6110, debe ejecutar el sans fil de Configuración para configurar la conexión a Internet. (Figure 5) -
Página 12: Nederlands
Nederlands Installatie(Figure 1) Sluit de WAP-6110 aan op de RJ-45 Ethernet poort van uw Zet daarna de WAP-6110 aan. De installatie is nu voltooid. U kunt het apparaat nu configureren. Controleer uw netwerkinstellingen om in te loggen op de gebruikersinterface van het web (Figure 2) -
Página 13: Dansk
2. Når de bliver spurgt, brug fø lgende burger navn og password. burger navn og password: admin(Figure 4) 3. Fø rste gang de forbinder til WAP-6110, bø r de kø re setup Wireless for at konfigurere internet forbindelsen. (Figure 5) -
Página 14: Italiano
2. Quando richiesto, usare la seguente nome utente e password: nome utente e password: admin(Figure 4) 3. La prima volta che si connette al WAP-6110, è necessario eseguire il programma di installazione senza fili per configurare la connessione Internet. (Figure 5) -
Página 15: Ελληνικά
2. Όταν σας ζητηθεί εισάγετε το ακόλουθο όνομα χρήστη και τον κωδικό. όνομα χρήστη και τον κωδικό : admin(Figure 4) 3. Η πρώτη φορά που θα συνδεθείτε με το WAP-6110, θα πρέπει να εκτελέσετε τη ρύθμιση ασύρματης λειτουργίας για να ρυθμίσετε την σύνδεση στο Internet. (Figure 5) -
Página 16: Português
2. Quando alertado, use a seguinte nome de usuário e senha. nome de usuário e senha: admin(Figure 4) 3. A primeira vez em que você conectar-se ao WAP-6110, você deve executar o Setup Wireless para configurar a Conexão a Internet. (Figure 5) -
Página 17: Svenska
Svenska Installation (Figure 1) "Anslut WAP-6110 till RJ-45 Ethernet porten på din dator. Koppla sedan på strömmen." Installationen är nu klar och dui kan börja konfigurera din WAP-6110 Kontrollera nätverksinställningarna fö r att logga in på Webbgränssnittet (Figure 2) Säkerställ att din dator hämtar IP adress automatiskt så att routern kan kommunicera med den under konfigureringen. -
Página 18: Slovenščina
1. Zaženite spletni brskalnik (priporočljiv je Internet Explorer). V naslovno polje vnesite naslednje: http://192.168.1.1 (Figure 3) 2. Ko boste pozvani, uporabniško ime in geslo. uporabniško ime in geslo: admin (Figure 4) 3. Prvič povežete na WAP-6110, bi morali zagnati Setup Wireless nastaviti internetne povezave. (Figure 5) -
Página 19: 繁體中文
繁體中文 硬體安裝 (Figure 1) 請確定您的電腦網路埠接到此路由器的RJ-45 乙太網路埠,然 後將電源打開 硬體安裝完成,開始相關設定 檢查你的網路設定 (Figure 2) 請確定你的電腦可以自動得到 IP 位址使得 WAP-6110 可以和 電腦設定時溝通。 選擇 “控制面板” > “網路連接”。 右點擊 “Local Area Connection” 並選擇“Properties”. 選擇 TCP/IP protocol 給你的網路卡。. 點選 Properties button. 你應該可以看到以下畫面並確定你 已選擇“Obtain IP address automatically”。... -
Página 20: 한국어
한국어 설치(Figure 1) WAP-6110 의 Lan Port 와 사용 컴퓨터의 랜 카드를 랜케이블로 연결하고, 전원을 켜 주십시요 설치가 되면, 네트워크 환경을 설정합니다. 네트워크 설정 Check (Figure 2) 공유기를 설정하는 동안 컴퓨터와 네트워크 통신을 하기 위해, 사용 컴퓨터가 IP 주소 자동받기로 설정되어 있는지... -
Página 21: Русский
В адресной строке введите следующий адрес: http://192.168.1.1(Figure 3) 2. При отображении запроса используйте следующий имя пользователя и пароль. имя пользователя и пароль: admin(Figure 4) 3. При первом подключении к WAP-6110, вы должны запустить установки беспроводной связи для настройки Интернет-соединения.(Figure 5) -
Página 22: Polski
Polski Instalacja (Figure 1) Podłącz WAP-6110 do portu RJ-45 Ethernet komputera PC. Następnie włącz zasilanie WAP-6110. Instalacja została zakończona. Można rozpocząć konfigurację urządzenia. Sprawdź ustawienia sieciowe w celu zalogowania do interfejsu użytkownika sieci web (Figure 2) Upewnij się, że komputer PC może uzyskiwać adres IP automatycznie, aby router mógł...


