Publicidad
Enlaces rápidos
EN User's guide
FR Guide de l'utilisateur
ES Guía del usuario
IT Manuale d'uso
DE Bedienungsanleitung
NL Gebruiksaanwijzing
PT Manual do utilizador
PL Instrukcja obsługi
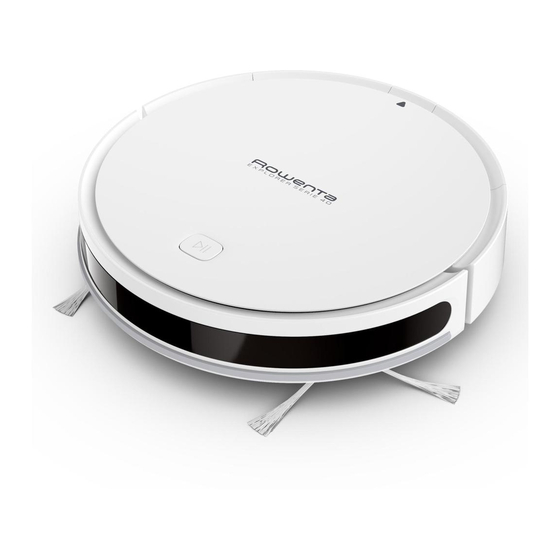
Explorer Serie 40
RU Руководство пользователя
RO Ghidul utilizatorului
BG Ръководство на потребителя
CS Navod k použiti
SK Používateľská príručka
UK Інструкції з експлуатації
EL Οδηγός χρήσης
1.
2.
3.
4.
5.
*
Publicidad

Manuales relacionados para Rowenta Explorer 40 Serie


Resumen de contenidos para Rowenta Explorer 40 Serie
- Página 1 EN User’s guide RU Руководство пользователя FR Guide de l’utilisateur RO Ghidul utilizatorului ES Guía del usuario BG Ръководство на потребителя IT Manuale d’uso CS Navod k použiti DE Bedienungsanleitung SK Používateľská príručka NL Gebruiksaanwijzing UK Інструкції з експлуатації EL Οδηγός χρήσης PT Manual do utilizador PL Instrukcja obsługi Explorer Serie 40...
- Página 3 / RU Для получения дополнительной информации / RO Pentru informaţii suplimentare / BG За повече информация / CS Více informací naleznete zde / SK Pre viac informácií / UK Для отримання детальнішої інформації / EL Για περισσότερες πληροφορίες www.rowenta.com www.tefal.com...
- Página 4 EN Depending on model / FR Selon modèle / ES Según modelo / IT Secondo i modelli / DE nur für Modelle mit Magnetsensor / NL Afhankelijk van het model / PT Consoante o modelo / PL W zaleności od typu / RU В зависимости от модели / RO În funcţie de model / BG В зависимост от модела...
- Página 6 stool obstructions on staircases. cable ex. shoes books bowl liquid kid’s toys EN Your robot may encounter some difficulties on carpets: with fringes, too thick, with long piles, too light (ex: bathroom carpet) / FR Votre robot peut rencontrer des difficultés sur les tapis : s’il a des franges trop épaisses ou de longs poils, s’il est trop léger (ex: tapis de salle de bain) / ES Su robot puede tener problemas con las alfombras: con flecos, demasiado gruesas, de pelo largo, excesivamente ligera (por ejemplo la alfombra de un baño) / IT Il robot potrebbe avere qualche difficoltà...
- Página 7 Plug the adaptor to the power jack on the side of the base. Only use the charger provided with the robot: do not use universal chargers. Connect the power cord plug to the main socket. When the power cord is plugged check the upper side of the base if the green light is shining.
- Página 8 Podłączyć zasilacz do wtyczki zasilania z boku podstawy. Używać tylko ładowarki dostarczonej z robotem: nie używać ładowarek uniwersalnych. Włożyć wtyczkę przewodu zasilającego do gniazdka. Po podłączeniu przewodu zasilającego sprawdzić, czy na górnej części podstawy świeci się zielone światło. Подключите блок питания к разъему питания с боковой стороны зарядной станции.
- Página 9 1m50 1m50 To place the docking station, make sure there is an empty area of 1.5m on each side and 2m in front of the docking station. Do not install the docking station near stairs. The cable must be tight. Always place the docking station on hard floor. Do not place the docking station on carpet.
- Página 10 Aby ustawić stację dokującą, upewnić się, że z każdej strony jest pusty obszar 1,5 m oraz 2 m z przodu. Nie instalować stacji dokującej w pobliżu schodów. Przewód musi być napięty. Zawsze umieszczać stację dokującą na twardej podłodze. Nie instalować stacji dokującej na dywanie. Устанавливая...
- Página 11 To charge the robot turn it on by pushing the on / off button for 3 seconds. Place the robot on the docking station: the charging plates on the robot must touch those on the docking station. Replace the robot on its charging base after use. Pour charger le robot, allumez-le en appuyant sur le bouton marche / arrêt pendant 3 secondes.
- Página 12 Aby naładować robot, włączyć go wciskając przycisk on/off przez 3 sekundy. Ustawić robot na stacji dokującej: płyty ładujące na robocie muszą dotykać płyt na stacji. Po użyciu odstawić robota na stację ładującą. Чтобы зарядить робот, нажмите и удерживайте кнопку включения в течение 3 секунд.
- Página 13 When the on/off button blinks the robot is charging. Once the on / off button stops blinking it is fully charged (6h for the battery to be fully charged). Lorsque le bouton marche / arrêt clignote, le robot se charge. Lorsque le bouton marche / arrêt cesse de clignoter, le robot est complètement chargé...
- Página 14 Когато копчето за вкл./изкл. мига, роботът се зарежда. След като копчето за вкл./ изкл престане да мига, роботът е напълно зареден (6 часа за пълно зареждане на батерията). Pokud bliká tlačítko zap/vyp, robot se nabíjí. Jakmile tlačítko zap/vyp přestane blikat, je baterie plně...
- Página 15 10cm The robot has drop sensors to detect stairs and gaps. The robot will change direction when detecting them. In order to correctly detect the floor level difference, make sure there are no objects (bags, shoes…) on the floor next to gaps, stairs or on the stairs’ steps.
- Página 16 O robot tem sensores de queda que permitem detetar escadas e espaços vazios. O robot muda de direção quando os detetar. De modo a detetar corretamente a diferença nos níveis do piso, certifique-se de que não há objetos (sacos, sapatos...) no chão perto dos espaços vazios, escadas ou nos degraus das escadas.
- Página 17 Робот оснащений датчиками падіння для виявлення сходів і провалів. Робот змінить напрямок у разі їх виявлення. Щоб робот правильно визначав різницю в рівні підлоги, переконайтеся, що на підлозі поруч із перепадами рівня або сходами немає предметів (сумок, взуття тощо). Робот знатний розпізнавати сходинки...
- Página 18 To start the cleaning session, press the start button on the robot. Pour démarrer la session de nettoyage, appuyez sur le bouton de démarrage du robot. Para iniciar la sesión de limpieza, pulse el botón de inicio del robot. Per avviare la sessione di pulizia, premere il pulsante Avvio sul robot. Um den Reinigungsvorgang zu starten, drücken Sie die Ein-/Aus-Taste des Roboters.
- Página 19 Ak chcete spustiť reláciu čistenia, stlačte tlačidlo zapnutia robota. Щоб розпочати цикл прибирання, натисніть на кнопку вмикання робота. Για να ξεκινήσει το σκούπισμα, πατήστε το κουμπί εκκίνησης στο ρομπότ.
- Página 20 To end the cleaning session, press the button on the robot. To send the robot back to its docking station, press twice on the robot’s button. Pour mettre fin à la session de nettoyage, appuyez sur le bouton du robot. Pour renvoyer le robot à...
- Página 21 За да приключите с почистването, натиснете бутона на робота. За да върнете робота към докинг станцията, натиснете бутона на робота два пъти. Pro ukončení úklidu stiskněte tlačítko na robotu. Chcete-li poslat robota zpět do dokovací stanice, stiskněte dvakrát tlačítko robota. Ak chcete ukončiť...
- Página 22 Should you like to restrict access of the robot to some areas, use the magnetic stripe. Put the magnetic stripe on the floor to mark a no-go zone for the robot. You can cut the magnetic stripe in pieces to adjust its length to your need. Please cut it only vertically and never along the stripe.
- Página 23 Se pretende restringir o acesso do robot a algumas áreas, utilize a banda magnética. Coloque a banda magnética no chão para marcar a zona interdita ao robot. Pode cortar a banda magnética para ajustar o comprimento às suas necessidades. Corte-a apenas no sentido vertical e nunca sobre o comprimento. Ustaw magnetyczny pas na podłodze, by oznaczyć...
- Página 24 Використовуйте магнітну стрічку, якщо хочете обмежити доступ робота до деяких зон. Закріпіть магнітну стрічку на підлозі для позначення зони, кордони якої робот не повинен перетинати. Ви можете нарізати магнітну стрічку на відрізки потрібної довжини. Наріжте стрічку вертикально. Не розрізайте її вздовж. Αν...
- Página 25 Do not put anything on top of the magnetic stripe. Ne posez rien sur la bande magnétique. No coloque nada encima de la cinta magnética. Non posizionare alcun oggetto sulla banda magnetica. Stellen Sie nichts auf das Magnetband. Plaats niets op de magneetstrip. Não coloque nada sobre a banda magnética.
- Página 26 Na povrch magnetického prúžku nikdy neklaďte žiadne predmety. Нічого не ставте на магнітну стрічку. Μην τοποθετείτε κανένα αντικείμενο πάνω στη μαγνητική ταινία. EN Depending on model / FR Selon modèle / ES Según modelo / IT Secondo i modelli / DE nur für Modelle mit Magnetsensor / NL Afhankelijk van het model / PT Consoante o modelo / PL W zaleności od typu / RU В...
- Página 27 month The robot must be emptied and cleaned after each use. Push the button on the backside of the robot and pull out the dust container. To empty it, flip off the cover. Le robot doit être vidé et nettoyé après chaque utilisation. Appuyez sur le bouton à l’arrière du robot et sortez le bac à...
- Página 28 month Роботът трябва да се изпразва и почиства след всяка употреба. Натиснете копчето в задната част на робота и издърпайте контейнера за прах. За да го изпразните, отворете капака. Po každém použití musí být robot vyprázdněn a vyčištěn. Stiskněte tlačítko na zadní straně robota a vytáhněte nádobu na prach.
- Página 29 month Clean the filter cover and the filter by tapping the back, holding it above a waste bin. Wash the foam filter, the filter cover and the dust catcher in clean water. Do not wet the fine dust filter (white filter). The filters must be cleaned at least once a week. Nettoyez la grille du filtre et le filtre en tapotant à...
- Página 30 month Limpe a grelha do filtro e o filtro, batendo ligeiramente na parte traseira por cima de um caixote do lixo. Lave o filtro de espuma, grelha do filtro e recipiente de poeiras com água limpa. Não molhe o filtro do pó fino (filtro branco). Os filtros devem ser limpos, pelo menos, uma vez por semana.
- Página 31 month Let all parts dry approximately 12 hours. Do not use wet filter or dust container. When dry put the filters back in the dust container. Laissez toutes les pièces sécher environ 12 heures. N’utilisez pas les filtres ni le bac à...
- Página 32 month Lăsați toate componentele la uscat timp de aproximativ 12 ore. Nu utilizați un filtru sau un colector de praf ud. Când sunt uscate, repuneți filtrele la loc în colectorul pentru praf. Оставете всички части да изсъхнат за около 12 часа. Не използвайте мокър филтър или...
- Página 33 month year Every 6 months replace the fine dust and foam filter with new ones to maintain optimal performance. Tous les 6 mois, remplacez le filtre à poussières fines et le filtre en mousse des filtres neufs afin de maintenir des performances optimales. Cada 6 meses, debe sustituir el filtro fino y el filtro de espuma por unos nuevos para mantener el funcionamiento óptimo.
- Página 34 month Pro zachování optimálního výkonu vyměňujte jemný filtr prachu a pěnový filtr každých 6 měsíců za nový. Aby ste zachovali optimálny výkon, vymeňte každých 6 mesiacov filter na jemný prach a penový filter za nové. Для ефективного прибирання кожні півроку замінюйте фільтр для дрібного пилу й...
- Página 35 month Clean the brush of the robot once a week. To do that turn the robot upside down. To remove the brush, open the brush guard by pushing the 2 snap latches and pull it up. Then pull out the brush from the robot. Nettoyez la brosse du robot une fois par semaine.
- Página 36 month Очищайте щетку робота раз в нелелю. Чтобы извлечь щетку, переверните робот, откройте защелки и выньте крышку щетки. Curățați peria robotului o dată pe săptămână. În acest scop, puneți invers robotul. Pentru a îndepărta peria, desfaceți apărătoarea periei apăsând cele 2 cleme de prindere și ridicând-o.
- Página 37 month To clean the brush, use the cleaning accessory or scissors to cut away any hairs. Clean the robot’s side brushes with a clean, dry cloth at least once a month. Pour nettoyer la brosse, utilisez l’accessoire de nettoyage ou des ciseaux pour couper les poils et cheveux.
- Página 38 month by wyczyścić szczotkę, użyć akcesorium do czyszczenia lub nożyczek, by wyciąć włosy. Czyścic boczne szczotki robota za pomocą czystej, suchej szmatki co najmniej raz w miesiącu. Для очистки щетки от волос, воспользуйтесь специальным инструментом в комплекте или ножницами. Очищайте боковые щетки робота чистой сухой тканью не реже одного раза в месяц.
- Página 39 month To clean the side brush, remove it and use a cleaning brush to clean the side brush and the entanglements in the slot of the side brush. Replace lateral brushes every 6 months. Pour nettoyer la brosse latérale, retirez-la et utilisez une brosse pour nettoyer la brosse latérale et les enchevêtrements dans la fente de la brosse latérale.
- Página 40 month Pentru a curăța peria laterală, scoateți-o și utilizați o perie de curățare pentru a curăța peria laterală și obiectele încurcate în slotul periei laterale. Înlocuiți periile laterale la fiecare 6 luni. За да почистите страничната четка, снемете я и използвайте четка за почистване, за да...
- Página 41 month Replace lateral brushes every 6 months. Throw away the old brushes and replace them with new ones. Screw the new brushes on the robot. Remplacez les brosses latérales tous les 6 mois. Jetez les anciennes brosses et remplacez-les par des brosses neuves. Vissez les nouvelles brosses sur le robot.
- Página 42 month Înlocuiți periile laterale la fiecare 6 luni. Aruncați periile vechi și înlocuiți-le cu unele noi. Înșurubați noile perii pe robot. Сменяйте страничните четки на всеки 6 месеца. Изхвърлете старите четки и ги заменете с нови. Завийте новите четки на робота. Boční...
- Página 43 month To clean the wheels, clean the front, left and right wheels regularly with a cleaning brush. The wheel shaft may be entanglement by hair, cloth strips, etc. so please clean it in time. Pour nettoyer les roues, essuyez régulièrement les roues avant, gauche et droite avec une brosse de nettoyage.
- Página 44 month Pentru a curăța roțile, curățați periodic roțile din față, din stânga și din dreapta cu o perie de curățat. Axul roții poate fi încurcat cu păr, fâșii de pânză etc., așa că vă rugăm să îl curățați la timp. За...
- Página 45 month Attention: Before touching sensitive parts of the robot make sure it is turned off by pressing the on / off button 3 seconds. Attention : Avant de toucher les parties sensibles du robot, assurez-vous qu’il est éteint en appuyant sur le bouton marche / arrêt pendant 3 secondes. Atención: Antes de tocar las partes sensibles del robot, compruebe que está...
- Página 46 month Upozornění: Než se dotknete citlivých částí robota, ujistěte se, že je robot vypnutý stisknutím tlačítka zap/vyp po dobu 3 sekund. Upozornenie: Predtým, ako sa dotknete citlivých častí robota skontrolujte, či je vypnutý, stlačením tlačidla zapnutia/vypnutia po dobu 3 sekúnd. Увага! Перш...
- Página 47 month Once a week, clean the following parts with a clean, dry cloth: the robot’s charge plates, fall sensors, distance sensor, the docking station’s charge plates and the robot’s front wheel. Une fois par semaine, nettoyez les pièces suivantes avec un chiffon doux et sec : plaques de charges du robot, capteurs de chute, capteur de distance, plaques de charge de la station d’accueil et roue avant du robot.
- Página 48 month O dată pe săptămână, curățați următoarele părți cu o cârpă moale și uscată: plăci de încărcare a robotului, senzori de cădere, senzor de distanță, plăcuțe de încărcare de pe stația de andocare și roata din față a robotului. Веднъж седмично почиствайте следните части с мека, суха кърпа: зарядното устройство...
- Página 49 month Component Cleaning the component Replacing the component Dust collector After each use Not applicable Filter Once a week Twice per year Brush Once a week If required Charging base Once a week Not applicable Fall sensors Once a week Not applicable Front wheel Once a week...
- Página 50 month Componente Limpieza del componente Sustitución del componente Depósito de polvo Después de cada uso No aplicable Filtro Una vez a la semana Dos veces al año Cepillo Una vez a la semana Si es necesario Base de carga Una vez a la semana No aplicable Sensores anticaída Una vez a la semana...
- Página 51 month Reinigung des Bestandteil Auswechseln des Bestandteils Bestandteils Staubbehälter Nach jedem Gebrauch Nichtzutreffend Filter Einmal pro Woche Zweimal pro Jahr Bürste Einmal pro Woche Wenn erforderlich Ladekontakte Einmal pro Woche Nichtzutreffend Absturzsensoren Einmal pro Woche Nichtzutreffend Vorderrad Einmal pro Woche Nichtzutreffend Kleine Bürsten Einmal pro Monat...
- Página 52 month Limpeza do Limpeza do componente Substituição do componente componente Recipiente de poeiras Após cada utilização Não aplicável Filtro Uma vez por semana Duas vezes por ano Escova Uma vez por semana Se necessário Placas de carregamento Uma vez por semana Não aplicável Sensores de queda Uma vez por semana...
- Página 53 month Компонент Очистка компонента Замена компонента После каждого Пылесборник Неприменимо использования Фильтр Один раз в неделю Дважды в год Щетка Один раз в неделю При необходимости Зарядная станция Один раз в неделю Неприменимо Датчики падения Один раз в неделю Неприменимо Переднее...
- Página 54 month Почистване на Компонент Подмяна на компонента компоненти Кошче за прах След всяка употреба Не е приложимо Филтър Веднъж седмично Два пъти годишно Четка Веднъж седмично Ако е необходимо Контактни точки за Веднъж седмично Не е приложимо зареждане Падащи сензори Веднъж...
- Página 55 month Čistenie komponentu Čistenie komponentu Výmena komponentu Nádoba na prach Po každom použití Nevzťahuje sa Filter Raz týždenne Dvakrát ročne Kefa Raz týždenne V prípade potreby Nabíjacie kolíky Raz týždenne Nevzťahuje sa Snímače pádu Raz týždenne Nevzťahuje sa Predné koleso Raz týždenne Nevzťahuje sa Kefky...
- Página 56 month Καθαρισμός του Αντικατάσταση του Εξάρτημα εξαρτήματος εξαρτήματος Κουτί σκόνης Μετά από κάθε χρήση Δ/Υ Φίλτρο Μία φορά την εβδομάδα Δύο φορές τον χρόνο Βούρτσα Μία φορά την εβδομάδα Όποτε χρειάζεται Πλάκες φόρτισης Μία φορά την εβδομάδα Δ/Υ Αισθητήρες πτώσης Μία...
- Página 57 Do not throw the robot in the bin. Always wear gloves and protection. Ne jetez pas le robot avec les autres déchets. Portez toujours des gants et une protection. No tire el robot en el cubo de basura. Utilice siempre guantes y protección. Non smaltire il robot insieme ai rifiuti generici.
- Página 58 Robot nehádžte do koša. Použite vždy rukavice a ochranné prvky. Не викидайте робота в смітник. Завжди надягайте рукавички і захисні засоби. Μην απορρίπτετε το ρομπότ μαζί με άλλα απορρίμματα. Να φοράτε πάντα γάντια και κάθε κατάλληλο μέσο προστασίας.
- Página 59 Attention: Before removing the battery turn off the robot. Turn the robot upside down to get access to the battery slot. Remove the battery by pressing snap latches of the battery slot and pull the battery up. Disconnect the battery from the robot. Recycle the battery and robot.
- Página 60 Uwaga: Wyłącz robota zanim wyjmiesz baterie. Obróć robot do góry nogami, by uzyskać dostęp do szczeliny baterii. Wyjąć baterię wciskając zatrzaski szczeliny baterii i wyciągnąć baterię. Odłącz baterie od robota. Wymień baterie i robota. Внимание! Выключите робот перед извлечением аккумулятора. Для доступа к...
- Página 61 In order to extend the battery lifespan, always keep the robot charging on the docking station while not using it. If the robot is stored off/out of the docking station, make sure the robot is OFF and the battery is fully charged. Store the robot in a fresh and dry place. Please charge the robot every 3 months when you are not using it.
- Página 62 Voor een langere levensduur van de batterij, laat de robot altijd op het dockingstation om de batterij op te laden wanneer niet in gebruik. Als de robot uit het dockingstation wordt opgeborgen, zorg dat de robot is uitgeschakeld en de batterij volledig is opgeladen. Berg de robot op in een schone en droge ruimte.
- Página 63 Ak chcete predĺžiť životnosť batérie, vždy nechajte robot nabíjať na dokovacej stanici, kým ho nepoužívate. Ak je robot skladovaný mimo dokovacej stanice, skontrolujte, či je robot vypnutý (OFF) a či je batéria úplne nabitá. Robot skladujte na čistom a suchom mieste. Keď robota nepoužívate, nabíjajte ho každé...
- Página 64 40°C - 104°F 0°C - 32°F...
- Página 65 IS THERE A PROBLEM WITH YOUR APPLIANCE? According to model: • The charger is getting hot: 4 This is perfectly normal. The vacuum cleaner can remain permanently connected to the charger without any risk. • The charger is connected but your appliance is not charging: - The charger is incorrectly attached to the appliance or is faulty.
- Página 66 RR68XX / RG68XX / RR69XX / RG69XX / RR72XX / RG72XX Error Error Error Forms Solutions Indicator Light Designations The red indicator light Failure of the left wheel The left wheel does not Please confirm that the blinks twice and beeps turn and is overloaded.
- Página 67 UN PROBLÈME AVEC VOTRE APPAREIL ? Selon modèle : • Le chargeur chauffe : 4 Il s’agit d’un phénomène tout à fait normal. L’aspirateur peut rester connecté au chargeur en permanence sans aucun risque. • Le chargeur est connecté mais votre appareil ne charge pas : - Le chargeur est mal connecté...
- Página 68 RR68XX / RG68XX / RR69XX / RG69XX / RR72XX / RG72XX Voyant lumi- Dénominations Formes d'erreur Solutions neux d'erreur d'erreur Le voyant rouge clignote Défaillance de la roue La roue gauche ne Veuillez vérifier si la roue deux fois et émet un gauche tourne pas et est en gauche de l'appareil n'est...
- Página 69 ¿SU APARATO TIENE UN PROBLEMA? Según el modelo: • El cargador calienta: 4 Se trata de un fenómeno totalmente normal. La aspiradora puede estar conectada al cargador constantemente sin riesgos. • El cargador está conectado pero el aparato no carga: - El cargador está...
- Página 70 RR68XX / RG68XX / RR69XX / RG69XX / RR72XX / RG72XX Indicador in- Nombre del Descripción del Soluciones termitente de error error errores Luz roja intermitente dos Fallo en la rueda iz- La rueda izquierda no Compruebe que la rueda veces con un solo sonido quierda rota y está...
- Página 71 PROBLEMI CON IL VOSTRO APPARECCHIO? A seconda del modello: • La base di carica si riscalda: 4 Si tratta di un fenomeno assolutamente normale. L’aspirapolvere può rimanere sempre collegato alla base di carica senza alcun rischio. • La base di carica è collegata ma l’apparecchio non ricarica: - La base di carica è...
- Página 72 RR68XX / RG68XX / RR69XX / RG69XX / RR72XX / RG72XX Spia luminosa di Nomi guasto Forme guasto Soluzioni errore La spia rossa lampeggia Guasto ruota sinistra La ruota sinistra non gira Si prega di verificare due volte con un suono o è...
- Página 73 EIN PROBLEM MIT IHREM GERÄT? Je nach Modell: • Das Ladegerät wird heiß: 4 Das ist völlig normal. Der Staubsauger kann problemlos ständig am Ladegerät angeschlossen bleiben. • Das Ladegerät ist angeschlossen, aber Ihr Gerät wird nicht aufgeladen: - Das Ladegerät ist schlecht an das Gerät angeschlossen oder es ist defekt. 4 Prüfen Sie den korrekten Anschluss des Ladegerätes oder wenden Sie sich an ein zugelassenes Kundendienstzentrum, um das Ladegerät austauschen zu lassen.
- Página 74 RR68XX / RG68XX / RR69XX / RG69XX / RR72XX / RG72XX Fehleranzeige Fehlerbezeich- Fehlerbeschrei- Lösungen nungen bungen Rotes Blinklicht 2x und Störung des linken Rades Das linke Rad dreht sich Prüfen Sie das linke Rad des einzelner Ton nicht und ist überlastet. Geräts auf Fremdkörper, die es blockieren.
- Página 75 The languages NL, PT, PL, RU, RO, BG, CS, SK, UK and EL are included in the safety instructions. Les langues NL, PT, PL, RU, RO, BG, CS, SK, UK and EL sont disponibles dans la notice de sécurité . Los idiomas NL, PT, PL, RU, RO, BG, CS, SK, UK y EL están disponibles en el manual de seguridad.
- Página 76 2220003121 - 02...