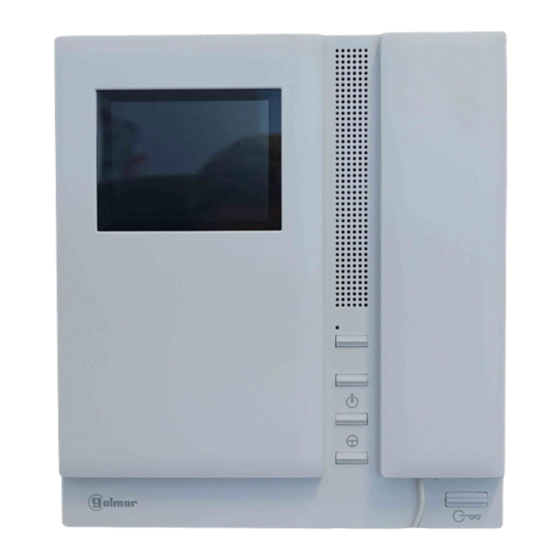
Resumen de contenidos para golmar TEKNA 90
- Página 1 Cód. 50121317 Monitor para reposición del Shiner 90 (11758902 y 11758952) TEKNA 90 Manual de instalación english version (page 6) TTEKNA 90 Rev.0112...
-
Página 2: Introducción
O No bloquee las ranuras de ventilación del monitor para que pueda circular el aire libremente. O Antes de conectar el equipo, verificar el conexionado entre placa y monitor(es). O Tekna 90 sólo sustituye al monitor SH-90 (cód. 11758902) y SH90 Col (cód. 11758952). O Siga en todo momento las instrucciones de este manual. -
Página 3: Descripción Del Monitor
DESCRIPCIÓN DEL MONITOR escripción del monitor Tekna 90. 00000000000 Brazo auricular. Pantalla color. Indicador luminoso de encendido. Pulsador de encendido. Pulsador de activación 2ª cámara. Pulsador de activación dispositivo auxiliar. Pulsador de funciones 'Autoencendido' y 'Video Espía'. Pulsador de apertura de puerta. -
Página 4: Ajustes Del Monitor
AJUSTES DEL MONITOR ódulo EL562 para instalaciones de videoportero con par trenzado. Localizar el conector CN4, ubicado en la parte posterior del monitor. Retirar el puente del conector e insertar el módulo EL562. NOTA: en este tipo de instalaciones, la placa de video de la serie 90 deberá... - Página 5 Pestañas de sujeción del monitor (x2). c. Entrada de cables vertical. d. Pestaña de fijación. e. Entrada de cables central. f. Terminales de conexión (Tekna 90): +, –: positivo, negativo. Vin : entrada señal de vídeo a través de cable coaxial.
- Página 7 Cód. 50121317 Monitor for replacement of Shiner 90 (11758902 and 11758952) TEKNA 90 Instructions manual TTEKNA 90 Rev.0112...
-
Página 8: Safety Precautions
O Do not block ventilation holes of the unit so that air can circulate freely. Before connecting the system's power supply, check the connections between door panel and monitor(s). O Tekna 90 only replacement the SH-90 (cod. 11758902) and SH90 Col (cod. 11758952) monitors. Do always follow the enclosed information... -
Página 9: Monitor Description
MONITOR DESCRIPTION escription of the Tekna 90 monitor. 00000000000 Handset. Color screen. On-off light indicator. On-off switch. Push button to activate a second camera. Push button to activate an optional device. Push button for 'Auto switch-on' and 'Video Spy'. Door release push button. -
Página 10: Monitor Adjustments
MONITOR ADJUSTMENTS L562 module for video installations with twisted pair cable. Locate the CN4 connector, that's placed in the monitor base. Remove the existing jumper and plug the EL562 module. NOTE: on this type of installations the emitter TXTP module must be plugged in the 90 video door panel (see T86 manual), with Stadio video door panel ( see the door panel manual... - Página 11 Wall attachment hole (x6). b. Monitor attachment hook (x2). c. Vertical wiring input. d. Attachment clip. e. Wiring input hole. f. Installation terminals (Tekna 90): +, –: positive, ground. Vin : video signal coaxial input. Malla: coaxial shield.
- Página 12 Golmar se reserva el derecho a cualquier modificación sin previo aviso. Golmar se réserve le droit de toute modification sans préavis. Golmar reserves the right to make any modifications without prior notice.


