Tabla de contenido
Publicidad
Idiomas disponibles
Idiomas disponibles
Enlaces rápidos
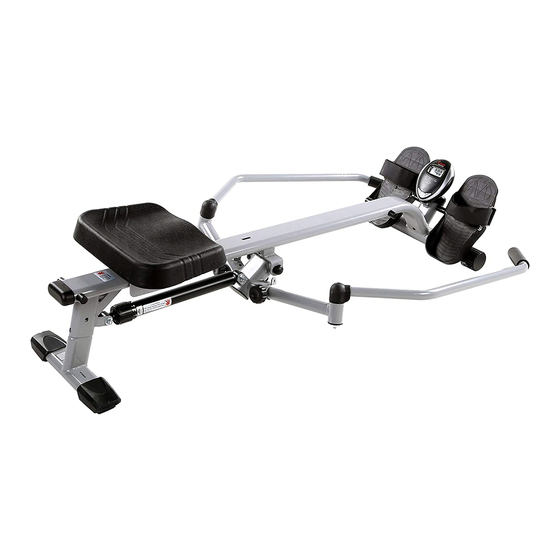
FULL MOTION ROWING MACHINE
English, Page 6 ~ 10
Español, Page 11 ~ 15 ¡IMPORTANTE! Conserve el manual del propietario para las instrucciones de mantenimiento y ajuste.
Français, Page 16 ~19 IMPORTANT! Veuillez conserver le manuel du propriétaire pour les instructions de réglage et d'entretien.
SF-RW5639
USER MANUAL
IMPORTANT! Please retain owner's manual for maintenance and adjustment instructions. Your satisfaction
is very important to us, PLEASE DO NOT RETURN UNTIL YOU HAVE CONTACTED US:
support@sunnyhealthfitness.com or 1-877-90SUNNY (877-907-8669).
satisfacción es muy importante para nosotros, NO DEVUELVA HASTA HABERNOS CONTACTADO:
support@sunnyhealthfitness.com ó 1- 877 - 90SUNNY (877-907-8669).
Votre satisfaction est très importante pour nous, VEUILLEZ NE PAS EFFECTUER DE RETOUR AVANT
DE NOUS AVOIR CONTACTÉ : support@sunnyhealthfitness.com ou 1- 877 – 90SUNNY (877-907-
8669).
Publicidad
Tabla de contenido

Manuales relacionados para Sunny Health & Fitness SF-RW5639


Resumen de contenidos para Sunny Health & Fitness SF-RW5639
- Página 1 FULL MOTION ROWING MACHINE SF-RW5639 USER MANUAL English, Page 6 ~ 10 IMPORTANT! Please retain owner’s manual for maintenance and adjustment instructions. Your satisfaction is very important to us, PLEASE DO NOT RETURN UNTIL YOU HAVE CONTACTED US: support@sunnyhealthfitness.com or 1-877-90SUNNY (877-907-8669).
-
Página 2: Important Safety Information
IMPORTANT SAFETY INFORMATION We thank you for choosing our product. To ensure your safety and health, please use this equipment correctly. It is important to read this entire manual before assembling and using the equipment. Safe and effective use can only be achieved if the equipment is assembled, maintained, and used properly. -
Página 3: Informations De Sécurité Importantes
INFORMATIONS DE SÉCURITÉ IMPORTANTES Nous vous remercions d’avoir choisi notre produit. Pour assurer votre sécurité et votre santé, veuillez utiliser cet é quipement correctement. Il est important de lire entièrement le présent manuel avant d’assembler l’appareil et de l’utiliser. L’utilisation sûre et efficace n’est possible que si l’appareil est correctement assemblé, entretenu et utilisé. -
Página 4: Exploded Diagram
EXPLODED DIAGRAM HARDWARE PACKAGE #42 M8*50 2PCS #40 M8*15 3PCS #38 M8 2PCS #35 M8*60 2PCS #36 M8 2PCS #46 Φ8.4*Φ19*T1.6 4PCS #49 Φ8.4*Φ13.5*T2.5 5PCS #50 Φ8.4*Φ19*T1.5*R20 3PCS #53 S5 2PCS #29 M8 2PCS #52 S13-S17 1PC... -
Página 5: Parts List
PARTS LIST Description Spec. Qty. Description Spec. Qty. Seat Bracket Hydraulic Cylinder Rear Stabilizer Pedal Strap Seat Rail Seat Left Handlebar Foam Grip Right Handlebar Roller Connecting Joint Bolt M8*60 Junction Piece Long Shaft Axle Fixed Plate Phillips Screw M5*12 Handlebar Cover Inner Hex Screw M8*15... - Página 6 LISTE DES ÉLÉMENT N° Description Spéc QTÉ N° Description Spécification QTÉ Support De Siè ge Cylindre Hydraulique Stabilisateur Arrière Courroie De Pédale Rail De Siège Siège Guidon De Gauche Poigné e En Mousse Guidon De Droite Rouleau Joint De Boulon M8*60 Raccordement Pièce De Jonction...
- Página 7 ASSEMBLY INSTRUCTIONS We value your experience using Sunny Health and Fitness products. For assistance with parts or troubleshooting, please contact us at support@sunnyhealthfitness.com or 1-877-90SUNNY (877- 907-8669). STEP 1: Attach Front Stabilizer (No. 21) to Seat Rail (No. 3) with 2 Bolts (No. 35), 2 Arc Washers (No.
- Página 8 We value your experience using Sunny Health and Fitness products. For assistance with parts or troubleshooting, please contact us at support@sunnyhealthfitness.com or 1-877-90SUNNY (877- 907-8669). STEP 3: Attach the Left & Right Handlebar (No. 4 & No. 5) to the Connecting Joint (No.
-
Página 9: Battery Installation & Replacement
BATTERY INSTALLATION & REPLACEMENT Battery Cover Battery BATTERY INSTALLATION: 1. Take out 2 AAA batteries from the meter box. 2. Press the buckle of the battery cover on the back of the Meter (No. 27), then remove battery cover. 3. Install 2 AAA batteries into the battery case on the back of the Meter (No. 27). Pay attention to the battery + and –... - Página 10 ADJUSTING THE RESISTANCE This rowing machine is designed with 12 levels of resistance. Turn the upper ring on the Hydraulic Cylinder (No. 30) so the arrow points to the desired resistance level, as shown on the drawing. NOTE: Please do not adjust the resistance of the hydraulic cylinder during operation to avoid injury and damage to the rowing machine.
- Página 11 EXERCISE COMPUTER SPECIFICATIONS: TIME---------------------------------------00:00-99:59 MIN COUNT -----------------------------------0-9999 TOTAL COUNT--------------------------0-9999 CALORIE ---------------------------------0-9999 KCAL FUNCTIONS: SCAN: Displays the functions automatically in the following order shown repeatedly every 6 seconds: TIME—COUNT—T.COUNT—CAL. MODE: Press MODE to select and set a function. Press and hold for 3 seconds to reset TIME, COUNT, and CALORIES.
-
Página 12: Instrucciones De Armado
INSTRUCCIONES DE ARMADO Valoramos su experiencia con los productos de Sunny Health and Fitness. Para asistencia con repuestos o solución de problemas, contáctenos en support@sunnyhealthfitness.com o al 1-877- 90SUNNY (877-907-8669). PASO 1: Una el Estabilizador Delantero (n.° 21) al Riel de Asiento (n.° 3) con 2 Pernos (n.°... - Página 13 Valoramos su experiencia con los productos de Sunny Health and Fitness. Para asistencia con repuestos o solución de problemas, contáctenos en support@sunnyhealthfitness.com o al 1-877- 90SUNNY (877-907-8669). PASO 3: Conecte los Manubrios Izquierdo y Derecho (n.° 4 y n.° 5) a la Conexión de Unión (n.°...
-
Página 14: Instalación Y Reemplazo De Pilas
INSTALACIÓN Y REEMPLAZO DE PILAS Cubierta de Pila Pila INSTALACIÓN DE LAS PILAS: 1. Saque 2 pilas AAA de la caja del medidor. 2. Presione la hebilla de la tapa de la pila en la parte posterior del Medidor (No. 27), luego retire la tapa de la pila 3. -
Página 15: Ajuste De Resistencia
AJUSTE DE RESISTENCIA Esta máquina de remo está diseñada con 12 niveles de resistencia. La flecha en el Cilindro Hidráulico (n.° 30) indica la configuració n de resistencia. Gire el anillo superior en el Cilindro Hidráulico (n.° 30) para seleccionar el nivel de resistencia deseado. NOTA: No ajuste la resistencia del cilindro hidráulico durante la operación para evitar lesiones y daños a la máquina de remo. -
Página 16: Instrucciones Del Medidor
INSTRUCCIONES DEL MEDIDOR ESPECIFICACIÓN: TIEMPO---------------------------------------00:00~99:59 MIN CONTEO -------------------------------------0~9999 CONTEO TOTAL----------------------------0~9999 CALORÍ AS -----------------------------------0~9999 KCAL FUNCIONES: ESCANEO (SCAN): Muestra las funciones automáticamente en el siguiente orden que se muestra repetidamente durante 6 segundos: TIEMPO (TIME) — CONTEO (COUNT) — CONTEO TOTAL (T.COUNT) —... -
Página 17: Instructions D'ASsemblage
INSTRUCTIONS D’ASSEMBLAGE Nous apprécions votre expérience d'utilisation des produits Sunny Health and Fitness. Pour obtenir l'aide concernant pièces dépannage, veuillez nous contacter à support@sunnyhealthfitness.com ou au 1-877-90SUNNY (877-907-8669). ÉTAPE 1: Fixez le Stabilisateur Avant (n° 21) au Rail De Siège (n° 3) avec 2 Boulons (n°... - Página 18 Nous apprécions votre expérience d'utilisation des produits Sunny Health and Fitness. Pour obtenir l'aide concernant pièces dépannage, veuillez nous contacter à support@sunnyhealthfitness.com ou au 1-877-90SUNNY (877-907-8669). ÉTAPE 3: Fixez le Guidon De Gauche et De Droite (n° 4 et n° 5) au Joint de Raccordement (n°...
-
Página 19: Réglage De La Résistance
RÉGLAGE DE LA RÉSISTANCE Ce rameur possède 12 niveaux de résistance. La flèche sur le Cylindre Hydraulique (n° 30) indique le réglage de la résistance numérotée. Tournez l’anneau supérieur sur le Cylindre Hydraulique (n° 30) pour sélectionner le niveau de résistance souhaité. REMARQUE: Veuillez ne pas régler la résistance du cylindre hydraulique pendant le fonctionnement pour éviter les blessures et les dommages à... - Página 20 INSTRUCTIONS RELATIVES AU COMPTEUR SPÉCIFICATIONS: DURÉE -----------------------------------------00:00 à 99:59 MIN NOMBRE ---------------------------------------0 à 9999 NOMBRE TOTAL------------------------------0 à 9999 CALORIES --------------------------------------0,0 à 999,9 KCAL FONCTIONS : BALAYAGE: Affiche chaque fonction pendant 6 secondes dans l’ordre suivant: DURÉE — NOMBRE — NOMBRE TOTAL —CALORIES. MODE: Appuyez sur ce bouton pour sélectionner et régler une fonction.