Publicidad
Enlaces rápidos
Asesoría y Servicio Técnico:
Consultancy and Technical
Service:
servicio.tecnico@helvex.com.mx
Hola soy Fluxy, te
ayudaré a instalar
tu producto.
Hi I'm Fluxy, I'll
help you to install
your product.
Herramienta Requerida
/ Required Tools
perico
llave inglesa
teflón
wrench
plumber tape
adjustable
wrench
Instalación General
1
Cierre el suministro de agua.
Ubique y cierre las válvulas de suministro de agua.
Generalmente se encuentran debajo del lavabo. Si se trata de un
reemplazo de grifo, quite el grifo viejo y limpie completamente la
superficie del lavabo.
Locate and close the water supply valves.
Usually found under the sink. If it is a replacement faucet, remove
the old faucet and clean the entire surface of the sink.
GUÍA DE INSTALACIÓN
INSTALLATION GUIDE
01800 909 2020
01(55)53339431
Agradecemos su elección por los productos HELVEX.
Estamos seguros de que su confiabilidad por el producto excederá sus más altas expectativas, cuya
funcionalidad, estética, durabilidad, respaldo integral y alta calidad le otorgarán plena satisfacción por años,
reflejando el compromiso con la calidad, innovación y el medio ambiente que forman parte de Helvex.
Thank you for choosing HELVEX products.
We are confident that the product reliability will exceed your maximum expectations. The functionality,
aesthetics, durability, quality and support will grant you full satisfaction for years, it is Helvex commitment to
the quality, innovation and the environment.
Para disminuir el riesgo de lesiones o daños a la propiedad, lea todas las instrucciones antes de instalar el
producto. Utilice gafas de seguridad. En obras de construcción, instalación, modificación, ampliación y
reparación deben cumplir con el reglamento de construcción y obras de su localidad. El producto ilustrado
puede sufrir cambios de aspecto como resultado de la mejora continua a la que está sujeto.
To reduce the risk of injury or property damage, read all instructions. Before installing the product, please
remember to use safety glasses. Apply building normative for any construction, installation, alteration,
extension or repair. As result of continuous improvement, the product illustration may change in appearance.
Esta guía de instalación aplica al producto en cualquier acabado. / This installation
Requerimientos de Instalación
Requerimientos de Instalación
Installation Requirements
Installation Requirements
Para el correcto funcionamiento de éstos productos, se
recomiendan las siguientes presiones:
For the correct operation of these products, the following
Modelo
/ Model
pressures are recommended:
Mínima
kg/cm²
0,6
PIU-100
Herramienta Incluida en su Producto
/ Tools Included in your Product
llave para aireador
llave allen 5/64"
aireator wrench
5/64" allen key
/ General Installation
/ Close the water supply.
Refacciones Originales:
Original Parts:
refacciones@helvex.com.mx
ADVERTENCIA
/ WARNING
guide applies to the product in any finish.
/ Minimum
Máxima
/ Maximum
PSI
kPa
kg/cm²
PSI
8,5
58,8
6,0
85,3
llave de mantenimiento
key maintenance
Caliente
Hot
válvulas angulares
(no incluidas)
shut off valve
(not included)
(Nivel de Piso Terminado)
NPT
(Finished Floor Level)
FFL
1-02-2727-2
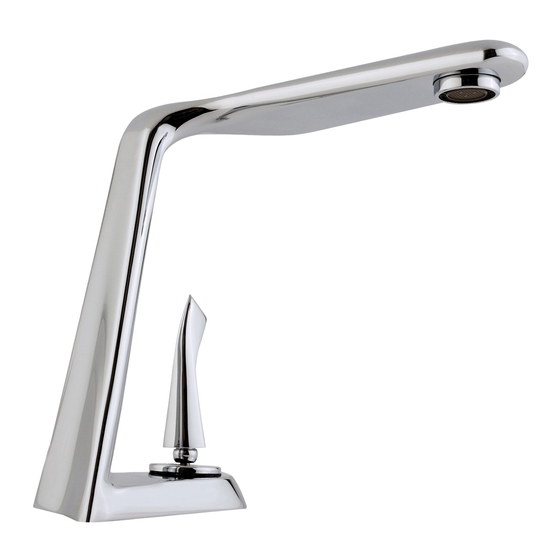
PIU-100
Monomando con Desagüe de Push
Drain mixer with Push
01 800 890 0594
01 (55) 53 33 94 00
53 33 94 21
Ext. 5068, 5815 y 5913
Cada metro de altura de
su producto a la base
del tinaco equivalen a
(0,1 kg/cm²) [1,42 PSI].
Every meter of height
of your product to the
base of the water tank
kPa
(0,1 kg/cm²) [1,42 PSI]
equivals.
588,3
Accesorios
Incluidos
/ Included
Accessories
llave p/ monomando
inserto /
key to mixer
without overflow
Fría
Cold
*55 cm
*20,3 cm
(21,6")
(8")
* Medidas recomendadas.
* Recommended dimesions.
Piura
/
insert basin
Publicidad

Manuales relacionados para Helvex Piura PIU-100


Resumen de contenidos para Helvex Piura PIU-100
- Página 1 Thank you for choosing HELVEX products. We are confident that the product reliability will exceed your maximum expectations. The functionality, aesthetics, durability, quality and support will grant you full satisfaction for years, it is Helvex commitment to the quality, innovation and the environment.
- Página 2 Desenrosque la tuerca y retire la Inserte la salida y verifique que se Se recomienda Instalar en un lavabo o rondana y el separador. / Unscrew the coloque el empaque. / Inssert the una placa de Mármol con una perforación de 3,5 cm. / It is nut and remove the washer and output and check that the gasket.
- Página 3 Instalación para Lavabo sin Rebosadero Enrosque el tubo unión céspol y posteriormente el céspol (no / Drain Installation Sink without Overflow incluido). Screw the joint pipe and then east to cespol (not included). Desenrosque la cubierta y extensión superior, coloque el inserto en el cuerpo contra con los o'rings y empaque.
- Página 4 4. It is recommended to clean your product daily. Nota: Vea nuestros tips en la pag. www.helvex.com.mx Note: See our tips on: www.helvex.com.mx HELVEX, S. A. DE C. V. Calzada Coltongo # 293, Col. Industrial Vallejo, Del. Azcapotzalco, C.P. 02300, Ciudad de México.