Tabla de contenido
Publicidad
Enlaces rápidos
WARNING:
!
CHOKING HAZARD -
Not for children under 3 years.
Activity Guide
Guide d'activités
Spielanleitung
Guía de Actividades
DANGER DE SUFFOCATION.
pièces. Pas pour les enfants en dessous de 3 ans.
ERSTICKUNGSGEFAHR.
Nicht geeignet für Kinder unter 3 Jahren.
Small parts.
PELIGRO DE AHOGO.
No recomendado para niños menores de 3 años.
Petites
Kleine Teile.
Partes pequeñas.
LER 9209
Publicidad
Tabla de contenido

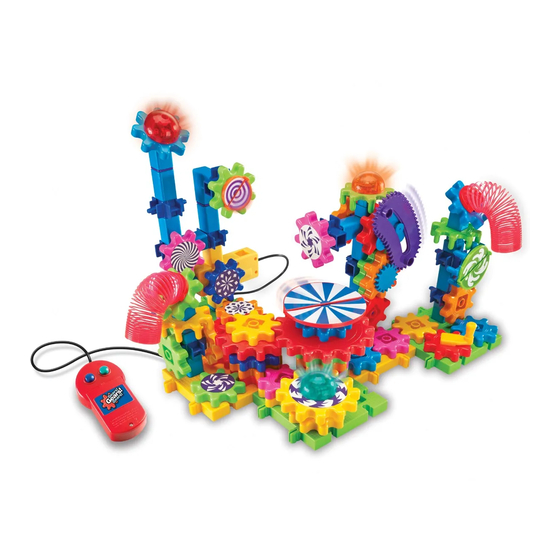
Resumen de contenidos para Learning Resources Lights&Action
- Página 1 LER 9209 Activity Guide Guide d‘activités Spielanleitung Guía de Actividades DANGER DE SUFFOCATION. Petites WARNING: pièces. Pas pour les enfants en dessous de 3 ans. ERSTICKUNGSGEFAHR. Kleine Teile. CHOKING HAZARD - Nicht geeignet für Kinder unter 3 Jahren. Small parts. PELIGRO DE AHOGO.
- Página 2 ® Gears! Gears! Gears! Lights & Action Building Set Parts List Medium Large Crown Small Gear (2) Gear Gear (5) Gear (38) Large Small Pillar 34 Degree Pillar (18) Pillar (12) Adapter (6) Connector (2) Angle (3) Toothed 6-Way Loop Gear (1) L Connector (2) Gear (1) Axle (12)
-
Página 3: Construir Una Base
Figure 1 Build a Base Attach the bases together by sliding the pegs into the slots of another base from the top. See Figure 1. There are many different ways to connect bases: rows, pyramids, zigzags, and more! Construir una base Une las bases deslizando las clavijas por las ranuras de otra base desde la parte superior. - Página 4 Figure 2 Add Gears Attach gears to the bases by lining up center hole of a gear to a peg on the base, and pop it on! See Figure 2. When assembled correctly, gears will spin easily in both directions by simply turning one gear.
- Página 5 Figure 3 Build Up Place a large pillar into a square hole on a base to begin building vertically. Add a 6-way axle to the large pillar and attach gears to the pegs. Make sure the gears, “teeth” mesh with the gears lying on the base.
-
Página 6: Arriba Y A Los Lados
Figure 5 Figure 4 Up and Over To make gears spin on both sides of a 6-way axle and to transfer movement to the top of a pillar, you will need to add a crown gear. First, connect a half pillar and peg by snapping the peg into the bottom of the half pillar. -
Página 7: Luces Y Acción
Figure 6 Figure 7 Lights & Action Now, add some lights and some action pieces to your creation: springs, loop gears, flip gears, stickers, and lights! To use the loop gear and toothed gear pieces, please follow these directions. See Figure 6. Connect the toothed gear to the center of any small gear. Attach the loop gear to an axle or base where no gears are connected. - Página 8 Beleuchtung und Bewegung Fügen Sie Ihrer Kreation jetzt die Beleuchtung und ein wenig Bewegung hinzu! Federn, Ringzahnräder, Klappzahnräder, Aufkleber und Beleuchtung! Befolgen Sie zur Verwendung der Ringzahnräder und der Zahnradstücke diese Anleitung. Siehe Abbildung 6. Verbinden Sie das Zahnrad mit der Mitte eines beliebigen kleinen Zahnrades. Befestigen Sie das Ringzahnrad an einer Achse oder einer Grundplatte, mit der keine Zahnräder verbunden sind.
-
Página 9: Añadir El Motor
Figure 8 Add Power To put your creation into motion, add the Power Motor. See Figure 8. To connect the power motor, snap its base into a square hole on one of the gear bases, meshing the drive with the base gears. -
Página 10: Plus De Puissance
Plus de puissance Pour mettre ta création en mouvement, ajoute le moteur. Image 8. Pour brancher le moteur électrique, clippe la base dans un trou carré sur l’une des bases, en emboîtant les engrenages d'entraînement avec ceux sur la base. Tu peux ainsi construire à partir du haut et de l’avant du moteur. - Página 11 CAUTION: • Remove old batteries and replace with new batteries. Be sure to insert batteries correctly according to (+) and (-) symbols located in the battery compartment. • Be sure to insert batteries correctly with adult supervision and always follow the toy and battery manufacturer’s instructions.
- Página 12 +44 (0)1553 762276 (U.K. & Europe) Your opinion matters! Visit to write a product review © Learning Resources, Inc., Vernon Hills, IL (U.S.A.) Learning Resources Ltd., King’s Lynn, Norfolk (U.K.) Please retain our address for future reference. Made in China.


