Tabla de contenido
Publicidad
Idiomas disponibles
Idiomas disponibles
Enlaces rápidos
Publicidad
Capítulos
Tabla de contenido

Manuales relacionados para Medion LIFE S63064


Resumen de contenidos para Medion LIFE S63064
-
Página 2: Tabla De Contenido
ÍNDICE ES Índice ....................... 1 Instrucciones de seguridad ................4 Sobre las presentes instrucciones .............. 4 Señales de aviso y rótulos usados en estas instrucciones ......5 El uso de este aparato por parte de niños y personas discapacitadas ... - Página 3 Funciones adicionales ................26 Hablar por teléfono con varios interlocutores .......... 31 AjUSTE DEL TELÉFONO MEDIANTE EL MENÚ ......... 33 Acceder al menú principal ............... 33 Navegación por el menú ................. 34 Utilizar SMS ....................35 ...
- Página 4 Limpieza ......................72 Eliminación ....................73 ES Datos técnicos ....................74 declaración de conformidad ............... 75 ...
-
Página 5: Instrucciones De Seguridad
INSTRUCCIONES DE SEGURIDAD Sobre las presentes instrucciones ¡Antes de la primera puesta en funcionamiento lea atentamente estas instrucciones y respete ante todo las instrucciones de seguridad! Todas las acciones en este aparato o con el mismo sólo se pueden realizar en la medida en que estén descritas en las presentes instrucciones de uso. -
Página 6: Señales De Aviso Y Rótulos Usados En Estas Instrucciones
Señales de aviso y rótulos usados en estas ES instrucciones ¡PELIGRO! ¡Advertencia de peligro de muerte inminente! ¡ADVERTENCIA! ¡Advertencia de un posible peligro de muerte y/o graves lesiones irreversibles! ¡Cuidado! ¡Observe las indicaciones para evitar lesiones y daños materiales! ¡ATENCIÓN! ¡Observe las indicaciones para evitar daños... -
Página 7: El Uso De Este Aparato Por Parte De Niños Y Personas Discapacitadas Comporta Riesgos
El uso de este aparato por parte de niños y personas discapacitadas comporta riesgos. Este aparato no ha sido concebido para ser utilizado por personas (niños incluidos) con discapacidad física, sensorial o psíquica, o por aquéllas que no tengan la suficiente experiencia o conocimientos, a no ser que, por su propia seguridad, sean supervisadas por una persona responsable o reciban de ésta las correspondientes instrucciones sobre su utilización. -
Página 8: Coloque El Aparato De Forma Segura
Coloque el aparato de forma segura ES Si traslada el aparato de un lugar frío a otro caliente, espere un rato antes de conectar la fuente de alimentación. Si no, el agua condensada que así se forma podría dañar el aparato. Cuando el aparato haya alcanzado la temperatura ambiental, se podrá... -
Página 9: Tormenta/No Utilizar
No coloque nunca el terminal móvil sin la tapa del compartimento de la batería en la estación base. Para evitar que alguien tropiece, no utilice cables de prolongación. Tormenta/No utilizar En caso de ausencia prolongada o de tormenta, desconecte el adaptador de red de la toma eléctrica y el cable del teléfono de la estación base. -
Página 10: Manejo Seguro De Las Baterías
Manejo seguro de las baterías ES Para el terminal móvil necesitará una batería. Para ello, observe las siguientes indicaciones: Mantenga las baterías alejadas de los niños. No arroje las baterías al fuego, no las cortocircuite y no las abra. ... -
Página 11: No Haga Nunca Reparaciones Por Su Cuenta
No intente en ningún caso abrir y/o arreglar Ud. mismo los aparatos. Existe el peligro de recibir una descarga eléctrica. En caso de mal funcionamiento del aparato, diríjase al Medion Service Center o a otro taller especializado. El cable de conexión del adaptador de red no puede sustituirse. Si el cable está... -
Página 12: Volumen De Suministro
VOLUMEN DE SUMINISTRO ES ¡PELIGRO! No permita que los niños pequeños jueguen con el plástico. ¡Existe peligro de asfixia! Retire todo el material de embalaje, también las láminas plásticas de las pantallas de la estación base y del terminal móvil. ... -
Página 13: Esquema Del Aparato
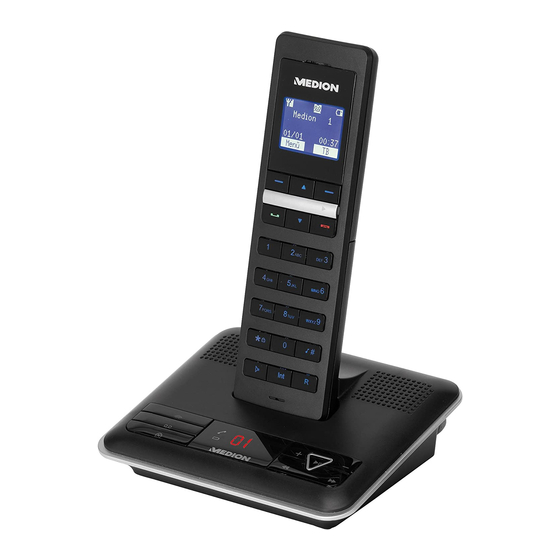
ESQUEMA DEL APARATO Terminal móvil Altavoz Pantalla Teclas de flecha en los menús: Seleccionar entradas/opciones; en reposo: : abrir lista de llamadas; en conversación: : Ajustar volumen de auricular/altavoz Tecla de control derecha Tecla de auricular: Finalizar llamada; pulsar prolongadamente: Encender y apagar el terminal móvil Teclas numéricas de 0 a 9: Para la... -
Página 14: Estación Base
Estación base ES Vista frontal Indicador de carga con contactos: Para la carga del terminal móvil Aumentar el volumen de la estación base Bajar el volumen de la estación base Tecla de salto hacia delante: Salta al mensaje siguiente Reproducción/pausa: Inicia y pausa la reproducción de mensajes Tecla de salto hacia atrás: Salta al mensaje anterior Pantalla: Muestra información del contestador automático... - Página 15 Vista posterior Toma para el cable de teléfono (clavija modular RJ11) Toma para el cable del adaptador de red Portacables para el cable del adaptador de red...
-
Página 16: Puesta En Funcionamiento
PUESTA EN FUNCIONAMIENTO ES Colocación Coloque la estación base sobre una superficie firme y lisa. Algunos barnices agresivos pueden dañar los pies de goma de la estación base. En caso necesario, coloque la estación base sobre un soporte. ... -
Página 17: Colocación De La Batería En El Terminal Móvil
Colocación de la batería en el terminal móvil En el volumen de suministro se encuentra una batería de hidruro de metal de níquel para el terminal móvil. ¡ATENCIÓN! Haga uso del terminal móvil sólo con la batería de hidruro de metal de níquel del tipo suministrado (NiMH). La garantía del aparato queda sin efecto si se usa otra batería. - Página 18 ES Conecte la clavija del cable del adaptador de red con la toma derecha de la estación base. Asegure la clavija para que no se caiga, pasando el cable por detrás de la fijación del cable. ...
-
Página 19: Cargar La Batería
Cargar la batería ¡ATENCIÓN! Conecte la estación base a la red telefónica sólo cuando el terminal móvil se haya cargado completamente. Si no, la batería no alcanzará su plena potencia. El tiempo de carga es de aprox. 14 horas. No interrumpa la operación de carga; si no, la potencia de la batería podría sufrir una merma permanente. - Página 20 Conexión de la estación base a la red telefónica ES ¡ATENCIÓN! Conecte la estación base a la red telefónica solamente cuando el terminal móvil se haya cargado completamente. En caso contrario, la batería no llegará a su rendimiento completo. ...
-
Página 21: La Pantalla
LA PANTALLA Pantalla inicial En la configuración original, la pantalla se muestra de la siguiente manera: Indicador de cobertura Contestador automático activado La batería se carga Nombre/número del terminal móvil Campos de hora y fecha Las entradas de estos campos cambian según el estado. Los comandos se activan mediante las teclas de control que se encuentran debajo. -
Página 22: Otras Indicaciones En La Pantalla
Idioma de la pantalla ES En la configuración de fábrica el idioma de la pantalla es el alemán. También se puede ajustar el idioma de pantalla a inglés y turco; ver página 55. Indicador de la batería El símbolo para la batería está dividido en cuatro campos. El color de relleno muestra el correspondiente estado de carga de la batería (lleno, 2/3, 1/3 y ... -
Página 23: Función Eco
FUNCIÓN ECO La función ECO permite un funcionamiento de baja radiación durante una conversación. La reducción de radiación depende de la distancia del terminal móvil hasta la estación base. La función viene preconfigurada y activada permanentemente. FULL-ECO La función Full-ECO anula totalmente la capacidad de emisión en modo standby. -
Página 24: Telefonear
TELEFONEAR ES Funciones básicas Encender y apagar el terminal móvil Si el terminal móvil no está colocado en la estación base, se puede apagar. Para apagar el terminal móvil, mantenga pulsado unos segundos la tecla del auricular (ver fig., tecla en gris). - Página 25 teléfono en modo de manos libres. Para aceptar la llamada cuando el terminal móvil no está en el cargador de la estación base, pulse la tecla de llamada. ADVERTENCIA Puede ajustar el terminal móvil de modo que haya que pulsar siempre la tecla de llamada para aceptar una llamada (ver Conexión directa Modificación del volumen del auricular...
- Página 26 Efectuar una llamada interna ES Puede llamar desde su terminal móvil a todos los demás de la misma estación base, sin pagar ninguna tarifa. Esta función requiere la conexión de otros terminales móviles compatibles con GAP (ver página 61). ...
-
Página 27: Funciones Adicionales
Funciones adicionales Modo de manos libres (hablar libremente) En el modo de manos libres puede mantener una conversación sin necesidad de tener el auricular en la mano. Pulse la tecla de manos libres durante la conversación. En pantalla aparecerá el símbolo de manos libres . Ahora puede hablar por teléfono a través del altavoz del terminal móvil. - Página 28 ¡NOTA! No obstante, rogamos que observe que estas funciones son ES realizadas por su compañía telefónica (no por el teléfono). Consulte a su operador de red qué funciones se pueden realizar con la tecla R. Pregunte también las exactas combinaciones de teclas para las diferentes funciones de la tecla R (p.
- Página 29 Silenciar el teléfono Para silenciar el teléfono, durante una llamada pulse la tecla de control izquierda “Silen.”. En pantalla aparece “Secreto”. El interlocutor ya no le oirá. Para poner fin al modo silencioso, pulse otra vez la tecla de control izquierda.
- Página 30 “Añafir a Agenda”: Se puede guardar el número en la agenda junto con un nombre. ES “Borrar”: Borra la entrada seleccionada de la lista de llamadas. “Borrar todos”: Borra todos los números de la lista de llamadas. ...
- Página 31 Rellamada En la lista de rellamadas se guardan los últimos 20 números (de un máximo de 24 dígitos) que haya marcado. Pulse la tecla de flecha . En pantalla aparece la indicación “Lista Chiamte” y se muestran los últimos números marcados.
-
Página 32: Hablar Por Teléfono Con Varios Interlocutores
Hablar por teléfono con varios interlocutores ES ADVERTENCIA Las siguientes funciones solamente están disponibles si por lo menos un terminal móvil adicional, compatible con GAP, está registrado en la estación base. Desviar llamadas Se puede aceptar una llamada y a continuación desviarla a un terminal móvil adicional, compatible con GAP, de la misma estación base. - Página 33 Teleconferencia Una teleconferencia es posible entre un participante externo y dos internos. Pulse la tecla Int durante unos dos segundos. Ahora todos los interlocutores participan en la conversación. En pantalla la indicación pasa de “Terminal #” a “Conferencia”. Cada participante puede desconectarse de la teleconferencia pulsando la tecla de auricular (colgar).
-
Página 34: Ajuste Del Teléfono Mediante El Menú
AJUSTE DEL TELÉFONO MEDIANTE EL MENÚ ES En el menú puede acceder a diversas funciones del teléfono y también realizar ajustes. Acceder al menú principal En la pantalla inicial del teléfono aparece, abajo a la izquierda, la entrada “Menu”. -
Página 35: Navegación Por El Menú
Navegación por el menú Seleccionar un punto de menú Utilice las teclas de flecha para seleccionar un punto de menú. Con la tecla de control izquierda (“Selec.”), abra el punto de menú. La mayor parte de los puntos del menú contienen submenús en forma de lista. -
Página 36: Utilizar Sms
UTILIZAR SMS ES Con su teléfono se puede leer, escribir, guardar, enviar y editar pequeños mensajes de texto (“SMS”, de “Short Message Service”). Los SMS se transmiten a través centros SMS. Para poder enviar o recibir los SMS se necesita el número de teléfono del centro SMS de su operador de red. ... -
Página 37: Menú "Sms
Menú “SMS” En el menú principal, seleccione el punto “SMS” y ábralo con la tecla de control izquierda “Selec.”. Aparecen las siguientes opciones: “Escribir” “Entrada” “Salida” “Conf. Mensajes” Seleccione la opción deseada con una tecla de flecha y pulse la tecla de control izquierda “Selec.”. - Página 38 Para cambiar entre las letras, pulse la tecla varias veces. Cuando esté marcada la letra que desee, pulse la tecla siguiente o espere ES un momento. Después de unos 2 segundos desaparece la indicación de los caracteres. ...
- Página 39 Opciones para SMS escritos Si ha escrito el SMS, después de pulsar la tecla de control izquierda “Send” hay disponibles estas opciones: “Enviado” “Guardar” “Enviado” Seleccione la opción deseada con una tecla de flecha y pulse la tecla de control izquierda “Select”.
-
Página 40: Lista De Entrada (Leer Sms)
Guardar ES Se puede guardar un SMS, p. ej., para enviarlo más adelante. Se pueden guardar hasta un total de 30 SMS. Los SMS almacenados los encontrará en el menú SMS, punto “Salida”, bajo el nombre “ Salida #”. Los ... - Página 41 SMS en el índice de entrada En el menú “SMS”, seleccione la opción “List” y pulse la tecla de control izquierda “Selec.”. En la pantalla aparecen todos los SMS recibidos, ordenados por fecha y hora. Con una tecla de flecha, seleccione el SMS deseado y pulse la tecla de control izquierda “Selec.”.
-
Página 42: Lista De Salida
Lista de salida ES En el menú “SMS”, seleccione la opción “Salida” y pulse la tecla de control izquierda “Selec.”. Abrir una entrada guardada Ud. ve, p. ej., la entrada “Salida 1”. Con las teclas de flecha, seleccione los otros SMS o e-mails almacenados (Salida 2, Salida 3, etc.). -
Página 43: Ajuste De Sms
Ajuste de SMS En el menú “SMS”, seleccione la opción “Conf. Mensajes” y pulse la tecla de control izquierda “Select”. Puede elegir entre las siguientes opciones: “Recibir Mensaje” “Enviar Servicio” “Cemtro SMS 1” “Mensaje Predet.” Recepción de SMS En la entrada “SMS-Inbox”... - Página 44 Centro SMS 1 ES En la entrada “ Cemtro SMS 1” defina el centro SMS de su proveedor telefónico, aquel con el que desea recibir y enviar SMS. Para que el terminal móvil reconozca los mensajes entrantes como SMS se debe introducir el ...
-
Página 45: Contestador Automático
CONTESTADOR AUTOMÁTICO Con el contestador automático puede grabar las llamadas entrantes o transmitir un mensaje a quien llama durante su ausencia. El contestador automático añade automáticamente a todos los mensajes la fecha y la hora. Por ello, para poder aprovechar correctamente el contestador automático, debe ajustar la fecha y la hora. -
Página 46: Ajustes En El Menú "Contestador Automático
Ajustes en el menú “Contestador automático” ES En el menú principal, abra el menú “ Contestador”. Seleccione ahí el punto “Configuración” y confirme con “Selec.”. Modo Contestar Seleccione “ Solo repuesta ” o “ Resp. & Grabar ”. ... - Página 47 Para su control, después de la grabación se repite su mensaje saliente. ¡NOTA! Si se ha grabado un mensaje saliente propio, a una llamada se repetirá este mensaje saliente automáticamente (y no el preajustado). Retardo de respuesta Puede determinar el número de señales de llamada tras el cual se conecta el contestador.
- Página 48 Tiempo de grabación ES Se puede ajustar la duración del mensaje que se graba en el contestador automático. Se han predefinido 60 segundos. La duración de grabación total es de 15 minutos. En el menú “ Configuración ”, seleccione la entrada “Grabar”. ...
- Página 49 Indicaciones de la estación base En la pantalla de la estación base se muestran informaciones importantes sobre el estado de su contestador automático. Indicación Significado vacío La base no está correctamente conectada a la corriente eléctrica. – – El contestador automático está desconectado. 0–XX El contestador automático está...
-
Página 50: Escuchar Mensajes
Escuchar mensajes ES El contestador automático distingue entre los mensajes ya escuchados (“antiguos”) y los que aún no se han escuchado (“nuevos”). Si se han grabado nuevos mensajes en el contestador automático, en la pantalla del terminal aparece “Neue Nachricht”. En la pantalla de la estación ... - Página 51 Para escuchar el mensaje anterior, haga dos breves pulsaciones de la tecla numérica 4. Para finalizar la reproducción, pulse la tecla de auricular. Escuchar los mensajes desde otra conexión telefónica Puede también escuchar los mensajes de su contestador automático desde otra conexión, como desde un teléfono móvil o una cabina telefónica.
- Página 52 ES Tecla Función Acceder al menú principal acústico: se oirán las funciones de las teclas numéricas Reproducir todos los mensajes Repetir el mensaje Borrar el mensaje actual Saltar el mensaje y reproducir el siguiente Encender el contestador automático Apagar el contestador automático Si no realiza ninguna entrada en 15 segundos se interrumpe automáticamente la conexión.
-
Página 53: Activar El Contestador Automático Desde Una Conexión Externa
Activar el contestador automático desde una conexión externa También puede conectar el contestador automático desde una conexión telefónica externa. Marque su número de teléfono. Aguarde a que empiece el mensaje del contestador automático. Mientras lo escucha, pulse la tecla de asterisco (*). ... -
Página 54: Escuchar También
Borrar los mensajes desde el terminal móvil En el menú “ Contestador ”, seleccione la entrada “Reproduciendo” y ES confirme con “Selec.”. Escuchará ahora el mensaje grabado. Pulse la tecla de control izquierda “Menu” para seleccionar otras opciones. ... -
Página 55: Otros Ajustes
Aceptar llamada tras escuchar Para aceptar la llamada, pulse la tecla de llamada del terminal móvil. Ahora puede hablar con su interlocutor y se finalizará la grabación del contestador automático. OTROS AJUSTES Menú “Ajuste del TM” En el menú principal, abra la entrada “MT Settings” confirmando con “Selec.”. - Página 56 Con la tecla de flecha , diríjase a “Melodía para llamada externa”. Con las teclas o , seleccione una de las 15 melodías para llamada ES externa. Con la tecla de flecha , diríjase a “Volumen de sonido de llamada”. ...
- Página 57 Cambiar el nombre del TM En el menú, confirme la entrada “Cambiar el nombre del TM” con “Selec.”. Con las teclas numéricas, introduzca el nombre que desee. Confirme con “OK”. Fondo En el menú, confirme la entrada “Fondo” con “Selec.”. ...
- Página 58 Bloqueo de números de llamada ES Puede bloquear hasta cuatro prefijos externos (p. ej., números 0180 o 0900). En el menú “Ajuste del TM”, confirme la entrada “Bloqueo de números de llamada” con “Selec.”. Introduzca el PIN del sistema y confirme la entrada con “OK”. ...
- Página 59 Restablecer TM Con esta función se pueden restablecer al estado original de fábrica todos los ajustes del terminal móvil realizados individualmente. En el menú “Ajuste del TM”, confirme la entrada “Restablecer TM” con “Selec.”. Introduzca el PIN de seguridad y confirme la entrada con la tecla de control izquierda “OK”.
-
Página 60: Menú "Ajuste De La Base
Menú “Ajuste de la base” ES En el menú, seleccione la entrada “Ajuste de la base” con “Select”. Borrar TM En el menú “Ajuste de la base”, confirme la entrada “Borrar TM” con “Selec.”. Con las teclas numéricas, introduzca el PIN del sistema y confirme con “OK”. - Página 61 Tipo de marcación Aquí puede ajustar su teléfono al tipo de marcación de su operador de red. Puede seleccionar entre marcación por tonos o por pulsos. La configuración de fábrica es “Marcación por tonos”. Éste es hoy en día el tipo de marcación más empleado.
- Página 62 ¡ATENCIÓN! No olvide que el PIN del sistema se necesita también para ES restablecer (Reset). El PIN del sistema no se restablece a como estaba originalmente. Así que apúntese bien el nuevo PIN del sistema y guárdelo en un lugar seguro. No obstante, si ha olvidado el nuevo PIN del sistema, diríjase a nuestro servicio posventa.
-
Página 63: Menú "Registro De Tm
Menú “Registro de TM” En el menú, confirme la entrada “Registro de TM” con “Selec.”. Se ofrecen cuatro estaciones base. En la configuración de fábrica, la primera está ocupada. Con las teclas numéricas, introduzca el PIN del sistema y confirme con “OK”. -
Página 64: Ajustar Fecha Y Hora
Ajustar fecha y hora ES ¡NOTA! Deben volver a introducirse la hora y la fecha cuando se separa la estación base de la corriente. El ajuste de la hora y de la fecha es importante para varias funciones, como por ejemplo el contestador automático, la alarma, el envío de SMS y de e-mails, etc. - Página 65 Alarma En este punto de menú se puede ajustar una alarma para una hora determinada. En el menú “Hora/alarma”, confirme el submenú “Alarma” con “Selec.”. Confirme la entrada “Alarma act.” con “Selec.”. Introduzca con el teclado numérico la hora deseada. ...
-
Página 66: Agenda
AGENDA ES En la agenda se pueden guardar hasta 100 números de teléfono. Los números de teléfono pueden tener hasta 24 dígitos, los nombres hasta 12 caracteres. Seleccione con la tecla de control derecha “Agenda”. Aparece la agenda. ... -
Página 67: Leer Una Entrada De La Agenda
Leer una entrada de la agenda En el menú “Agenda”, seleccione la entrada “Read” y confirme con “Selec.”. Con la tecla de flecha , desplácese por las entradas hasta llegar a la que busca. Confirme la selección con la tecla de control izquierda “Select”. ... -
Página 68: Estado De La Agenda
Estado de la agenda ES En la agenda telefónica pueden almacenarse 100 registros con su correspondiente número. En el menú “Agenda”, seleccione la entrada “Estado de la agenda” y confirme con “Selec.”. Aparecen las posiciones de memoria ocupadas; p. ej., “68/100 ocup.”: 68 posiciones de memoria están ocupadas;... -
Página 69: Caracteres Disponibles
Caracteres disponibles En la tabla siguiente se encuentran los caracteres disponibles que se pueden utilizar al escribir SMS o para entradas en la agenda. Tecla Caracteres en mayúsculas Caracteres en minúsculas 1 . , : ; ! ¡ ? ¿ * # & % $ € £ @ ¤ § 1 . -
Página 70: En Caso De Problemas
EN CASO DE PROBLEMAS ES Si se produce una avería en el aparato, compruebe primero si puede solucionarlo Ud. mismo con ayuda del siguiente resumen. En ningún caso trate de arreglar Ud. mismo el aparato. Si fuera necesario reparar el aparato, diríjase a nuestro centro de posventa o a cualquier otro taller especializado. - Página 71 En la pantalla del Compruebe la correcta conexión de la estación terminal móvil aparece base. “¡Cobertura!” Compruebe si el terminal móvil está dentro de la zona de cobertura de la estación base. Compruebe si el terminal móvil está registrado en la estación base deseada (ver página 59).
- Página 72 No pueden llamarle Compruebe si hay señal de línea y en pantalla aparece el símbolo del auricular después de ES pulsar la tecla de auricular verde. Compruebe si otro teléfono funciona en esa toma telefónica o si su teléfono funciona en otra toma telefónica.
-
Página 73: Limpieza
LIMPIEZA Antes de limpiar el aparato, desconéctelo de la red. Para limpiarlo, emplee un paño seco y suave. Evite emplear detergentes químicos y productos de limpieza, puesto que podrían dañar la superficie y/o las inscripciones del equipo. -
Página 74: Eliminación
ELIMINACIÓN ES Embalaje Su aparato está embalado para protegerlo contra eventuales daños durante el transporte. Los embalajes son materias primas y son reciclables o pueden ser entregados al circuito de reciclaje. Aparato No tire bajo ningún concepto el teléfono DECT al final de su vida útil a la basura doméstica normal. -
Página 75: Datos Técnicos
DATOS TÉCNICOS Batería para el terminal móvil: Tipo NiMh 2,4 V, 500 mAh Fabricante de la batería: Fabricante: TenPao Nº de modelo: GPHC05RN01 Estándar: DECT/GAP; aprox. 300 m de cobertura Tiempo de carga: Aprox. 16 horas en caso de descarga completa Standby: Aprox. -
Página 76: Declaración De Conformidad
DECLARACIÓN DE CONFORMIDAD ES MEDION AG declara que el teléfono DECT se encuentra en conformidad con los requisitos básicos y otras disposiciones pertinentes de la Directiva R&TTE 1999/5/CE). Las declaraciones de conformidad completas pueden consultarse en www.medion.com/conformity. 0168... - Página 78 INHALT Inhalt ........................ 1 Sicherheitshinweise ..................4 DE Zu dieser Anleitung ................... 4 In dieser Anleitung verwendete Warnsymbole und Signalwörter ....5 Gefahren für Kinder und Personen mit eingeschränkter Fähigkeit Geräte zu bedienen ....................6 ...
- Página 79 Weitere Funktionen ................. 26 Mit mehreren Gesprächspartnern telefonieren ........30 Telefon über Menü einstellen ..............32 Hauptmenü aufrufen ................32 Im Menü navigieren ................33 SMS nutzen ....................34 Voraussetzungen ..................34 Menü...
- Página 80 Werkseinstellungen ..................71 Werkseinstellungen am Mobilteil ............. 71 Werkseinstellungen an der Basisstation ........... 72 Weitere Werkseinstellungen ..............73 DE Reinigung ...................... 74 Entsorgung ....................75 Technische Daten ..................76 Konformitätsinformation ................77 ...
-
Página 81: Sicherheitshinweise
SICHERHEITSHINWEISE Zu dieser Anleitung Lesen Sie vor der ersten Inbetriebnahme diese Bedienungsanlei- tung gründlich durch und befolgen Sie vor allen Dingen die Sicherheitshinweise! Alle Tätigkeiten an und mit diesem Gerät dürfen nur soweit ausge- führt werden, wie sie in der Bedienungsanleitung beschrieben sind. Halten Sie diese Bedienungsanleitung stets griffbereit und bewah- ren diese gut auf, um sie bei einer Veräußerung dem neuen Besit- zer weitergeben zu können. -
Página 82: In Dieser Anleitung Verwendete Warnsymbole Und Signalwörter
In dieser Anleitung verwendete Warnsymbole und Signalwörter DE GEFAHR! Warnung vor unmittelbarer Lebensgefahr! WARNUNG! Warnung vor möglicher Lebensgefahr und/oder schweren irreversiblen Verletzungen! VORSICHT! Hinweise beachten, um Verletzungen und Sachschäden zu vermeiden! ACHTUNG! Hinweise beachten, um Sachschäden zu vermeiden! HINWEIS! Weiterführende Information für den Gebrauch des Geräts. -
Página 83: Gefahren Für Kinder Und Personen Mit Eingeschränkter Fähigkeit Geräte Zu Bedienen
Gefahren für Kinder und Personen mit ein- geschränkter Fähigkeit Geräte zu bedienen Dieses Gerät ist nicht dafür bestimmt, durch Personen (einschließlich Kinder) mit eingeschränkten physischen, sensorischen oder geistigen Fä- higkeiten oder mangels Erfahrung und/oder mangels Wissen benutzt zu werden, es sei denn, sie werden durch eine für ihre Sicherheit zuständige Person beaufsichtigt oder erhielten von ihnen Anweisungen, wie das Ge- rät zu benutzen ist. -
Página 84: Das Gerät Sicher Aufstellen
Das Gerät sicher aufstellen Warten Sie mit dem Anschluss des Netzteils, wenn das Gerät von einem kal- ten in einen warmen Raum gebracht wird. Das dabei entstehende Kondens- DE wasser kann sonst unter Umständen das Gerät zerstören. Wenn das Gerät Zimmertemperatur erreicht hat, kann es gefahrlos in Betrieb ... -
Página 85: Netzanschluss Zugänglich Lassen
Netzanschluss zugänglich lassen Schließen Sie die Basisstation nur an eine gut erreichbare Steckdose (230 V ~ 50 Hz) an, die sich in der Nähe des Aufstellortes befindet. Lassen Sie die Steckdose frei zugänglich, damit der Stecker ungehindert abgezo- gen werden kann. ... -
Página 86: Sicher Mit Akkus Umgehen
Sicher mit Akkus umgehen Für das Mobilteil benötigen Sie je einen Akkublock. Beachten Sie hierzu fol- gende Hinweise: DE Halten Sie Akkus von Kindern fern. Werfen Sie die Akkus nicht ins Feuer, schließen Sie sie nicht kurz und ... -
Página 87: Niemals Selbst Reparieren
Versuchen Sie auf keinen Fall, die Geräte selber zu öffnen und/oder zu reparieren. Es besteht die Gefahr eines elektri- schen Schlags! Wenden Sie sich im Störungsfall an das Medion Service Center oder eine andere geeignete Fachwerkstatt. Die Anschlussleitung des Netzadapters kann nicht ersetzt werden. Bei Beschädigung der Leitung muss der Netzadapter verschrottet und durch... -
Página 88: Lieferumfang
LIEFERUMFANG GEFAHR! DE Lassen Sie kleine Kinder nicht mit Folien spielen. Es besteht Erstickungsgefahr! Entfernen Sie sämtliches Verpackungsmaterial, auch die Folien auf den Dis- plays der Basisstation und des Mobilteils. Vergewissern Sie sich beim Auspacken, dass folgende Teile mitgeliefert wur- den: ... -
Página 89: Geräteübersicht
GERÄTEÜBERSICHT Mobilteil Lautsprecher Display Pfeiltasten in Menüs: Einträge/Optionen wählen; im Ruhezustand: : Anrufliste öffnen; im Gespräch: : Hörer-/ Lautsprecherlautstärke einstellen Steuertaste rechts Hörertaste: Anruf beenden; Länger drücken: Mobilteil ein-/ausschalten Zifferntasten 0 bis 9: Zur Eingabe von Ziffern und Buchstaben Raute-Taste: zur Eingabe des #-Zeichens, wechselt „abc“... -
Página 90: Basisstation
Basisstation Frontansicht DE Ladeschale mit Kontakten: zum Laden des Mobilteils Lautstärke für Basisstation erhöhen Lautstärke für Basisstation senken Sprungtaste vorwärts: springt zur nächsten Nachricht Play / Pause: startet und pausiert die Wiedergabe von Nachrichten Sprungtaste rückwärts: springt zur vorherigen Nachricht Display: zeigt Informationen zum Anrufbeantworter an Lade-Anzeige: leuchtet, wenn das Mobilteil auflädt Löschtaste: löscht Nachrichten auf dem Anrufbeantworter... - Página 91 Rückansicht Anschluss für das Telefonkabel (Westernstecker RJ11) Anschluss für das Netzadapterkabel Kabelhalter für Netzadapterkabel...
-
Página 92: Inbetriebnahme
INBETRIEBNAHME Aufstellen DE Stellen Sie die Basisstation auf eine ebene, feste Oberfläche. Einige aggressive Möbellacke können die Gummifüße der Basisstation angreifen. Stellen Sie die Basisstation ggfs. auf eine Unterlage. Stellen Sie die Basisstation in einer praktischen Arbeitshöhe und gegen Herunterfallen gesichert auf. -
Página 93: Akku In Das Mobilteil Einlegen
Akku in das Mobilteil einlegen Für das Mobilteil wird ein Nickel-Metallhydrid-Akkublock mitgeliefert. ACHTUNG! Verwenden Sie das Mobilteil nur mit einem Nickel- Metallhydrid-Akku des mitgelieferten Typs (NiMH). Die Garantie des Gerätes erlischt, wenn Sie einen anderen Akku einlegen. Das Mobilteil könnte beschädigt werden. ... -
Página 94: Netzteil An Die Basisstation Anschließen
Netzteil an die Basisstation anschließen ACHTUNG! DE Verwenden Sie zum Anschluss des Basisteils nur den Netz- adapter für die Basisstation Modell Nr.: S004LV0600045. Auf dem Netzteil befindet sich ein Typenschild mit den entsprechenden Angaben. Verbinden Sie den Stecker des Netzadapterkabels mit dem rechten An- schluss an der Basisstation. -
Página 95: Akkus Laden
Akkus laden ACHTUNG! Schließen Sie die Basisstation erst ans Telefonnetz an, wenn das Mobilteil vollständig aufgeladen ist. Ansonsten erreichen die Akkus nicht ihre volle Leistung. Die Ladezeit beträgt ca. 14 Stunden. Unterbrechen Sie den Lagevorgang nicht, da sonst die Leistung der Akkus dauerhaft verringer werden kann. - Página 96 Akku in der Basisstation laden HINWEIS! DE Während der Akku aufgeladen wird, können Sie mit dem Mobilteil noch nicht telefonieren. Schließen Sie die Basisstation deshalb erst nach dem vollständigen Aufladen des Mobilteils an das Telefonnetz Setzen Sie das Mobilteil in die Ladeschale der Basisstation und laden Sie ...
-
Página 97: Das Display
DAS DISPLAY Grunddisplay Im Auslieferungszustand stellt sich das Display folgendermaßen dar: Reichweitenanzeige Anrufbeantworter eingeschaltet Akku wird geladen Name/Nummer des Mobilteils Felder für Uhrzeit/Datum Die Einträge der folgenden Felder wechseln je nach Status. Die Befehle wer- den mit den darunter liegenden Steuertasten aktiviert. In dieser Abbildung sind dargestellt: Telefonbuch öffnen Hauptmenü... -
Página 98: Weitere Anzeigen Im Display
Displaysprache Im Auslieferungszustand ist die Displaysprache Deutsch. Sie können die Dis- playsprache auch auf Englisch und Türkisch einstellen; siehe Seite 54. DE Akkuanzeige Das Symbol für den Akku ist in vier Felder aufgeteilt. Die Füllungsfarbe zeigt den jeweiligen Füllungszustand des Akkus an (voll, 2/3, 1/3 und leer). ... -
Página 99: Eco Funktion
ECO FUNKTION Die Funktion ECO Mode ermöglicht einen strahlungsarmen Betrieb während eines Gesprächs. Die Strahlungsreduzierung hängt von der Entfernung des Mobilteils zur Basis ab. Die Funktion ist voreingestellt und dauerhaft aktiviert. FULL-ECO Die Funktion Full-ECO führt zur Vollständigen Abschaltung der Sendeleistung im Standby-Betrieb. -
Página 100: Telefonieren
TELEFONIEREN Grundfunktionen DE Mobilteil ein- und ausschalten Wenn das Mobilteil nicht in der Basisstation steht, können Sie es ausschalten. Um das Mobilteil auszuschalten, halten Sie die Hörertaste (siehe Abb., grau unterlegte Taste) für einige Sekunden gedrückt. Das Display erlischt und das Mobilteil ist nun abgeschaltet. - Página 101 Basisstation oder drücken Sie die Lautsprecherstaste, um das Telefon in den Freisprech-Modus zu schalten. Um den Anruf entgegen zu nehmen, wenn das Mobilteil nicht in der Ladeschale der Basisstation steht, drücken Sie die Gesprächstaste. HINWEIS Sie können das Mobilteil so einstellen, dass Sie zum Entgegen- nehmen eines Anrufs immer die Gesprächstaste drücken müssen (siehe Direktannahme).
- Página 102 Internen Anruf tätigen Sie können von Ihrem Mobilteil alle anderen Mobilteile derselben Basisstation anrufen, ohne Gebühren zu bezahlen. DE Voraussetzung für diese Funktion ist der Anschluss weiterer GAP-fähiger Mo- bilteile (siehe Seite 61). Drücken Sie die Taste für „Int“. ...
-
Página 103: Weitere Funktionen
Weitere Funktionen Freisprechmodus (Frei sprechen) Im Freisprechmodus können Sie telefonieren, ohne das Mobilteil in der Hand halten zu müssen. Drücken Sie während des Gesprächs die Frei- sprechtaste. Im Display erscheint das Freisprech- symbol. Sie können jetzt über den Lautsprecher am Mobilteil telefonieren. ... - Página 104 binationen für die verschiedenen R-Tasten-Funktionen (z. B.: „Anklopfenden annehmen“, „Anklopfenden abweisen“ etc). Tastensperre DE Um ein versehentliches Wählen zu verhindern, wenn Sie das Mobilteil bei sich tragen, können Sie die Tastensperre einschalten. Dies ist nicht während eines Gesprächs möglich. ...
- Página 105 Rufnummernanzeige Sie können im Display die Rufnummer eines Anrufers sehen, wenn Sie selbst bei Ihrem Netzbetreiber die CLIP-Funktion beauftragt haben und der Anrufer ebenfalls über einen Telefonanschluss mit CLIP-Funktion verfügt und er seine Rufnummer nicht unterdrückt. Abhängig von Ihrem Netzbetreiber können Sie ebenfalls Ihre Telefonnummer unterdrücken.
- Página 106 Wahlwiederholung In der Wahlwiederholungs-Liste sind die letzten 20 Rufnummern (mit maxi- mal 24 Stellen) gespeichert, die Sie gewählt haben. Drücken Sie die Pfeiltaste . DE Im Display erscheint der Eintrag „Redial List“ und es werden die letzten gewählten Rufnummern angezeigt. ...
-
Página 107: Mit Mehreren Gesprächspartnern Telefonieren
Mit mehreren Gesprächspartnern telefonieren HINWEIS Die folgenden Funktionen sind nur verfügbar, wenn mindestens ein zusätzliches, GAP-fähiges Mobilteil an der Basisstation ange- meldet ist. Anrufe weiter vermitteln Sie können ein Gespräch entgegennehmen und danach an ein zusätzliches, GAP-fähiges Mobilteil derselben Basisstation weiter vermitteln. ... - Página 108 Telefonkonferenz Eine Telefonkonferenz ist zwischen einem externen und zwei internen Teil- nehmern möglich. Drücken Sie die Int-Taste für ca. zwei Sekunden. Jetzt sind alle Teilneh- DE mer in das Gespräch einbezogen. Im Display wechselt die Anzeige von „Handset #“ zu „Conference“. ...
-
Página 109: Telefon Über Menü Einstellen
TELEFON ÜBER MENÜ EINSTELLEN Sie können im Menü verschiedene Funktionen des Telefons aufrufen sowie Einstellungen vornehmen. Hauptmenü aufrufen Im Grunddisplay des Telefons steht unten links der Eintrag „Menü“. Wenn dieser Eintrag nicht angezeigt wird, drücken Sie so oft die rechte Steuertaste („Back“), bis „Menu“... -
Página 110: Im Menü Navigieren
Im Menü navigieren Menüpunkt anwählen DE Benutzen Sie die Pfeiltasten, um einen Menüpunkt anzuwählen. Öffnen Sie den Menüpunkt mit der linken Steuertaste („Select“). Die meisten Menüpunkte enthalten weitere Untermenüs in Listenform. Benutzen Sie die Pfeiltasten oder , um einen Menüpunkt in einer Liste anzuwählen. -
Página 111: Sms Nutzen
SMS NUTZEN Sie können mit Ihrem Telefon kurze Textnachrichten („SMS“ für „Short Mes- sage Service“) lesen, schreiben, speichern, versenden und editieren. SMS werden über SMS-Centren ausgetauscht. Um SMS senden und emp- fangen zu können, benötigen Sie die Rufnummer des SMS-Centers Ihres Netzanbieters. -
Página 112: Menü „Sms
Menü „SMS“ Wählen Sie im Hauptmenü den Punkt „SMS“ und öffnen Sie ihn mit der linken Steuertaste „Select“. DE Es erscheinen folgende Optionen: „Write“ „Inbox“ „Outbox“ „SMS Settings“ Wählen Sie die gewünschte Option mit einer Pfeiltaste und drücken Sie die linke Steuertaste „Select“. - Página 113 Sie die Taste mehrfach. Wenn der gewünschte Buchstabe markiert ist, drücken Sie die nächste Taste oder warten Sie kurze Zeit. Nach etwa zwei Sekunden erlischt die Anzeige der Zeichen. Um den nächsten Buchstaben zu schreiben, drücken Sie jetzt die nächste Taste.
- Página 114 Wählen Sie die gewünschte Option mit einer Pfeiltaste und drücken Sie die linken Steuertaste „Select“. Senden an DE HINWEIS! Wenn Sie eine SMS speichern möchten, müssen Sie das vor Ein- gabe der Rufnummer tun (siehe nächster Abschnitt). Um die SMS zu versenden, geben Sie die Rufnummer des Empfängers ein.
-
Página 115: Eingangsliste (Sms Lesen)
SMS unterbrechen Wenn ein Anruf eingeht, während Sie eine SMS schreiben, wird diese SMS automatisch gespeichert. Nach dem Gespräch können Sie diese SMS weiter bearbeiten. Eingangsliste (SMS lesen) Der SMS Speicher kann 30 Nachrichten aufnehmen. Nachrichten im SMS-Speicher sind SMS und E-Mails im Eingangsverzeichnis und in der Aus- gangsliste. - Página 116 SMS im Eingangsverzeichnis Wählen Sie im Menü „SMS“ die Option „List“ und drücken Sie die linke Steuertaste „Select“. DE Im Display werden alle empfangenen SMS nach Datum und Uhrzeit sortiert angezeigt. Wählen Sie die gewünschte SMS mit einer Pfeiltaste und drücken Sie die ...
-
Página 117: Ausgangsliste
Ausgangsliste Wählen Sie im Menü „SMS“ die Option „Outbox“ und drücken Sie die linke Steuertaste „Select“. Gespeicherten Eintrag öffnen Sie sehen z. B. den Eintrag „Outbox 1“. Wählen Sie mit den Pfeiltasten die anderen gespeicherten SMS oder E-Mails (Outbox 2, Outbox 3 usw.) aus. -
Página 118: Sms-Einstellung
SMS-Einstellung Wählen Sie im Menü „SMS“ die Option „SMS Settings“ und drücken Sie die linke Steuertaste „Select“. DE Sie können zwischen folgenden Optionen wählen: „Receiving SMS“ „Send Service“ „SMS-Centre 1“ „SMS Default“ SMS-Empfang Unter dem Eintrag „SMS-Inbox“... - Página 119 Um die Telefonnummer des SMS-Centers anzusehen oder zu ändern, wählen Sie den entsprechenden Speicherplatz und drücken Sie die linke Steuertaste „Select“. Sie können jetzt die Rufnummer Ihres SMS-Centers mit den Zifferntasten eingeben oder ändern. Benutzen Sie die rechte Steuertaste („Delete“), um die letzte Eingabe zu löschen.
-
Página 120: Anrufbeantworter
ANRUFBEANTWORTER Mit dem Anrufbeantworter können Sie in Ihrer Abwesenheit eingehende Anrufe aufzeichnen oder dem Anrufer eine Nachricht übermitteln. DE Der Anrufbeantworter fügt jeder Nachricht automatisch das Datum und die Uhrzeit hinzu. Daher müssen Sie Datum und Uhrzeit einstellen, um den An- rufbeantworter richtig nutzen zu können. -
Página 121: Einstellungen Im Menü „Anrufbeantworter
Einstellungen im Menü „Anrufbeantworter“ Öffnen Sie im Hauptmenü das Menü „Answere Machine“. Wählen Sie dort den Punkt „Settings“ an und bestätigen Sie mit „Select“. Antwortmodus Wählen Sie „Answer&Record“ oder „Answer Only“ aus. „Answer&Record“: der Anrufbeantworter beantwortet den Anruf und zeichnet Nachrichten auf;... - Página 122 Sie werden nun aufgefordert, nach dem Signalton Ihre Ansage aufzusprechen. Sprechen Sie den Text in normaler Lautstärke in das Mikrofon des Mobil- teils. DE Bestätigen Sie „OK“. Zur Kontrolle wird Ihre Ansage nach dem Ende der Aufnahme wiederholt. ...
- Página 123 Wenn Sie das zweite Rufsignal hören, bedeutet das, dass keine neuen Nachrichten für Sie aufgezeichnet wurden. Legen Sie in diesem Fall sofort auf. Der Anrufbeantworter würde nach dem vierten Rufsignal einschalten. Aufnahmezeit Sie können einstellen, wie lang die Nachricht auf dem Anrufbeantworter sein darf.
- Página 124 Fernabfrage-PIN ändern Die PIN ist ein Kennwort und dient dazu, die Fernabfrage Ihres Anrufbeant- worters durch fremde Personen zu verhindern. Werkseitig ist die PIN auf „0000“ eingestellt. Diese PIN ist nicht mit der System-PIN identisch. DE Wählen Sie im Menü „Settings“ den Eintrag „Modify Pin“ an. ...
-
Página 125: Nachrichten Abhören
F (blinkt) Der Speicher ist voll. Nachrichten abhören Der Anrufbeantworter unterscheidet zwischen bereits abgehörten („alten“) Nachrichten und Nachrichten, die noch nicht abgehört wurden („neue Nachrichten“). Wenn auf dem Anrufbeantworter neue Nachrichten auf- gezeichnet sind, erscheint im Display des Mobilteils „Neue Nachricht“. - Página 126 Nachrichten vom Mobilteil abhören Wählen Sie im Menü „Answere Machine“ den Eintrag „Save Message.“ an und bestätigen Sie mit „Select“. Die auf dem Anrufbeantworter gespeicherten Nachrichten werden wieder- DE gegeben. Wenn das Display Ihres Mobilteiles „Not available“ anzeigt, wird der Anruf- ...
- Página 127 Taste Funktion Akustisches Hauptmenü aufrufen: Die Funktionen der Ziffern- tasten werden angesagt Alle Nachrichten wiedergeben Nachricht wiederholen Aktuelle Nachricht löschen Nachricht überspringen und nächste Nachricht wiedergeben Anrufbeantworter einschalten Anrufbeantworter ausschalten Wenn Sie 15 Sekunden lang keine Eingabe machen, wird die Verbindung automatisch unterbrochen.
-
Página 128: Anrufbeantworter Von Einem Externen Anschluss Einschalten
Anrufbeantworter von einem externen An- schluss einschalten Sie können den Anrufbeantworter auch von einem externen Telefonanschluss DE einschalten. Wählen Sie Ihre Rufnummer. Warten Sie bis die Ansage des Anrufbeantworter beginnt. Drücken Sie während der Ansage die Sternchentaste (*). ... -
Página 129: Mithören
Sie hören jetzt die Ansage „Alle alten Nachrichten wurden gelöscht“. Im Display wird die Zahl der neuen Nachrichten angezeigt. Nachrichten vom Mobilteil aus löschen Wählen Sie im Menü „Answering Machine“ den Eintrag „Playing“ an und bestätigen Sie mit „Select“. ... -
Página 130: Weitere Einstellungen
Am Mobilteil mithören Wenn eine Aufnahme aufgezeichnet wird, erscheint im Display des Mobilteils der Eintrag „Screening“. Um einen Anruf mitzuhören, drücken Sie die linke Steuertaste „OK“. DE Anruf nach Mithören entgegennehmen Um den Anruf entgegenzunehmen, drücken Sie die Gesprächstaste am ... - Página 131 nen, ob der Anrufer von außerhalb anruft oder an derselben Basisstation registriert ist. Bestätigen Sie im Menü „MT einstellen“ den Eintrag „Tonruf einstell.“ mit „Select“. Wählen Sie nun den Eintrag „Melodie intern“ für Anrufe an derselben Basisstation. Wählen Sie mit den Pfeiltasten oder eine von 15 Melo- dien (polyphonen Klingeltönen) für den internen Anruf.
- Página 132 MT-Name ändern Bestätigen Sie im Menü den Eintrag „MT-Name ändern“ mit „Select“. Geben den gewünschten Namen mit den Zifferntasten ein. Bestätigen Sie mit „OK“. DE Hintergrund Bestätigen Sie im Menü den Eintrag „Hintergrund“ mit „Select“. ...
- Página 133 Rufnummernsperre Sie haben die Möglichkeit bis zu vier externe Vorwahlnummern zu sperren (z. B. 0180er Nummern oder 0900er Nummern). Bestätigen Sie im Menü „MT einstellen“ den Eintrag „Rufnummern- sperre“ mit „Select“. Geben Sie den System-PIN ein und bestätigen Sie die Eingabe mit „OK“. ...
- Página 134 MT rücksetzen Mit dieser Funktion setzen Sie sämtliche individuell vorgenommenen Einstel- lungen des Mobilteils wieder auf den Auslieferungszustand zurück. Bestätigen Sie im Menü „MT einstellen“, den Eintrag „MT rücksetzen“ DE mit „Select“. Geben Sie den Sicherheits-PIN ein und bestätigen Sie die Eingabe mit der ...
-
Página 135: Menü „Basis Einstellen
Menü „Basis einstellen“ Wählen Sie im Menü den Eintrag „Basis einstellen“ mit „Select“. MT löschen Bestätigen Sie im Menü „Basis einstellen“, den Eintrag „MT löschen“ mit „Select“. Geben Sie mit den Zifferntasten die System-PIN ein und bestätigen Sie mit „OK“. - Página 136 Wahlverfahren Hier können Sie Ihr Telefon an das Wahlverfahren Ihres Netzbetreibers an- passen. Sie können zwischen Tonwahl und Impulswahl auswählen. Die Werkseinstellung ist „Tonwahl“. Das ist das heutzutage gebräuchliche Wahl- DE verfahren. Die Impulswahl wird kann bei einigen älteren Telefonanlagen notwendig sein.
- Página 137 ACHTUNG! Beachten Sie, dass die System-PIN auch für das Rücksetzen (Reset) benötigt wird. Die System-PIN selbst wird nicht in den Lieferzustand zurückgesetzt. Notieren Sie sich also eine neue System-PIN und heben Sie sie an einem sicheren Ort auf. Wenn Sie die neue System-PIN dennoch vergessen haben sollten, wenden Sie sich bitte an unseren Kundendienst.
-
Página 138: Menü Mt Anmelden
Menü MT anmelden Bestätigen Sie im Menü den Eintrag „MT anmelden“ mit „Select“. Es werden vier Basisstationen angeboten. Im Auslieferungszustand ist die DE Erste belegt. Geben Sie mit den Zifferntasten die System-PIN ein und bestätigen Sie mit „OK“. ... -
Página 139: Datum Und Zeit Einstellen
Datum und Zeit einstellen HINWEIS! Datum und Uhrzeit müssen neu eingegeben werden, wenn die Basisstation vom Stromnetz getrennt war. Die Einstellung von Zeit und Datum ist wichtig für diverse andere Funktion, wie etwa den Anrufbeantworter, den Alarm, die SMS- und E-Mail-Versendung u. a. m. ... - Página 140 Alarm In diesem Menüpunkt können Sie einen Alarm für eine bestimmte Zeit ein- stellen. Bestätigen Sie im Menü „Uhrzeit/Alarm“, Untermenü „Alarm“, mit DE „Select“. Bestätigen Sie den Eintrag „Alarm ein“ mit „Select“. Geben Sie mit den Zifferntasten die gewünschte Zeit ein. ...
-
Página 141: Telefonbuch
TELEFONBUCH Im Telefonbuch können Sie bis zu 100 Rufnummern speichern. Die Rufnum- mer können bis zu 24 Zeichen umfassen, die Namen bis zu 12 Zeichen. Wählen Sie mit der rechten Steuertaste „TB“. Es erscheint das Telefon- buch. Neuer Eintrag ... -
Página 142: Telefonbucheintrag Ansehen
Telefonbucheintrag ansehen Wählen Sie im Telefonbuch-Menü den Eintrag „Read“ und bestätigen Sie mit „Select“. DE Scrollen Sie mit der Pfeiltaste durch alle Eintragungen zu dem ge- wünschten Eintrag. Bestätigen Sie die Auswahl mit der linken Steuertaste „Select“. ... -
Página 143: Telbuch-Status
Telbuch-Status Im Telefonbuch können 100 Teilnehmer mit je einer Nummer gespeichert werden. Wählen Sie im Telefonbuch-Menü den Eintrag „Telbuch-Status“ und bestätigen Sie mit „Select“. Es erscheinen die belegten Speicherplätze; z. B. „68/100 Bel.“: 68 Speicher- plätze sind belegt; 32 sind noch frei. -
Página 144: Anrufen
Anrufen Öffnen Sie das Telefonbuch direkt mit der Steuertaste rechts und wählen den Teilnehmer an, den Sie anrufen möchten. DE Drücken Sie die Gesprächstaste. Die Nummer wird gewählt. Verfügbare Zeichen Die folgende Tabelle zeigt die verfügbaren Zeichen, die Sie beim Schreiben von SMS oder für Telefonbucheinträge verwenden können: ... -
Página 145: Wenn Störungen Auftreten
WENN STÖRUNGEN AUFTRETEN Bei einer Störung des Geräts prüfen Sie bitte zunächst, ob Sie das Problem mit Hilfe der folgenden Übersicht selbst beheben können. Versuchen Sie auf keinen Fall, die Geräte selbst zu reparieren. Wenn eine Reparatur notwendig ist, wenden Sie sich bitte an unser Service Center oder eine andere geeignete Fachwerkstatt. - Página 146 Im Display des Mobilteils Überprüfen Sie, ob die Basisstation richtig wird „Reichweite!“ an- angeschlossen ist. gezeigt Überprüfen Sie, ob sich das Mobilteil in Reichweite der Basisstation befindet. DE Überprüfen Sie, ob das Mobilteil an der ge- wünschten Basisstation angemeldet ist (siehe Seite 58).
- Página 147 Sie können nicht angeru- Überprüfen Sie, ob ein Freizeichen und im fen werden Display das Hörersymbol erscheint, nachdem Sie die grüne Hörertaste gedrückt haben. Überprüfen Sie, ob ein anderes Telefon an der Telefonsteckdose funktioniert oder ob Ihr Te- lefon in einer anderen Telefonsteckdose funk- tioniert.
-
Página 148: Werkseinstellungen
WERKSEINSTELLUNGEN Werkseinstellungen am Mobilteil DE Einstellung Optionen Werkseinstellung Ruftöne extern 15 Ruftöne; 5 x normal, Melodie 11 10 x polyphon Ruftöne intern 15 Ruftöne; 5 x normal, Melodie 11 10 x polyphon Rufton-Lautstärke 5 Stufen und aus Stufe 5 Hörer-Lautstärke Lautstärke in 5 Stufen Lautstärke Stufe 3... -
Página 149: Werkseinstellungen An Der Basisstation
Werkseinstellungen an der Basisstation Einstellung Optionen Werks- einstellung Ruftöne 5 versch. Ruftöne Melodie 11 Rufton-Lautstärke 5 Stufen und aus Stufe 11 Wahlverfahren Impulswahl/Tonwahl Tonwahl System-PIN – 0000... -
Página 150: Weitere Werkseinstellungen
Weitere Werkseinstellungen Einstellung Optionen Werkseinstellung DE Alarmmelodie 3 Ruftöne Melodie 1 Alarm bei neuen An/Aus Nachrichten auf An- rufbeantworter Zahl der Ruftöne, 2 - 9 Ruftöne oder Spar- Sparmodus bevor der Anrufbe- modus antworter einge- schaltet wird. -
Página 151: Reinigung
REINIGUNG Vor der Reinigung ziehen Sie bitte den Netzadapter aus der Steckdose. Für die Reinigung verwenden Sie ein trockenes, weiches Tuch. Vermeiden Sie den Gebrauch von chemischen Lösungs- und Reinigungsmitteln, weil diese die Oberfläche und/oder Beschriftungen des Geräts beschädigen können. -
Página 152: Entsorgung
ENTSORGUNG Verpackung Ihr Gerät befindet sich zum Schutz vor Transportschäden in einer DE Verpackung. Verpackungen sind Rohmaterialien und können wiederverwertet oder dem Recycling-Kreislauf zugeführt werden. Gerät Werfen Sie das DECT-Telefon am Ende seiner Lebenszeit keines- falls in den normalen Hausmüll. Erkundigen Sie sich nach Mög- lichkeiten einer umweltgerechten Entsorgung. -
Página 153: Technische Daten
TECHNISCHE DATEN Akku Pack für Mobilteil Typ NiMh 2,4 V, 500 mAh Hersteller Akku: Hersteller: TenPao Modell Nr.: GPHC05RN01 Standard DECT/GAP; ca. 300 m Reichweite Ladezeit ca. 16 Stunden bei vollständiger Entladung Bereitschaftsbetrieb ca. 100 Stunden Gesprächsdauer ca. 10 Stunden Netzadapter Basisstation Hersteller: TenPao... -
Página 154: Konformitätsinformation
KONFORMITÄTSINFORMATION Hiermit erklärt die MEDION AG, dass sich das DECT Telefon in Übereinstim- mung mit den grundlegenden Anforderungen und den anderen relevanten DE Vorschriften der Richtlinie R&TTE 1999/5/EG befindet. Vollständige Konformitätserklärungen sind erhältlich unter www.medion.com/conformity. 0168 ... - Página 156 DE CONTENTS CONTENTS ...................... 1 SAFETY INSTRUCTIONS ................4 About these instructions ................4 Warning symbols and key words used in these instructions ......5 Dangers to children and people with limited ability to operate appliances ..6 ...
- Página 157 Making calls to several callers simultaneously .......... 31 Making telephone settings via the menu ........... 33 Calling up the main menu ............... 33 Navigating in the menu ................34 USING SMS ....................35 Basic requirements .................. 35 ...
- Página 158 DE Phone book status ..................68 Calling ..................... 69 IF ERRORS OCCUR ..................70 Cleaning ......................72 DISPOSAL ..................... 73 TECHNICAL DATA ..................74 CONFORMITY INFORMATION ..............75 EN ...
-
Página 159: Safety Instructions
SAFETY INSTRUCTIONS About these instructions Before using the appliance for the first time, please read these operating instructions thoroughly, paying special attention to the safety notices. This device may only be used as described in the operating instructions. Always keep these operating instructions to hand but store them safely so that you can pass them on to a new owner should you sell the device. -
Página 160: Warning Symbols And Key Words Used In These Instructions
DE Warning symbols and key words used in these instructions DANGER! WARNING: IMMEDIATE MORTAL DANGER! WARNING! EN WARNING: POSSIBLE MORTAL DANGER AND/OR SERIOUS IRREVERSIBLE INJURIES! BEWARE! PLEASE NOTE THE FOLLOWING GUIDELINES TO AVOID INJURIES AND PROPERTY DAMAGE! CAUTION! PLEASE NOTE THE FOLLOWING GUIDELINES TO AVOID PROPERTY DAMAGE! Additional information on using the device... -
Página 161: Dangers To Children And People With Limited Ability To Operate Appliances
Dangers to children and people with limited ability to operate appliances This product is not intended for use by people (including children) with reduced physical, sensory or mental abilities or for those without experience and/or knowledge, unless they are supervised by a person responsible for their safety or they have been instructed in its use. -
Página 162: Setting Up The Appliance Safely
DE Setting up the appliance safely Wait before connecting the device to the power supply if the unit has been moved from a cold to a warm room. Condensation can develop which could damage the device. The device can be operated as soon as it reaches room temperature. ... -
Página 163: Thunder Storms/Non-Use
Avoid the use of extension cables in order to prevent tripping. Thunder storms/non-use Pull the mains plug from the socket and the telephone cable from the base station if you are likely to be away for a long period of time or if there is a thunder storm. -
Página 164: Handling The Rechargeable Batteries Safely
DE Handling the rechargeable batteries safely You will need a rechargeable battery for each handset. Please observe the following instructions: Keep children away from the rechargeable batteries. Do not throw rechargeable batteries into a fire, do not short-circuit them and do not dismantle them. -
Página 165: Correct Repair Procedure
NEVER TRY TO OPEN AND/OR REPAIR THE APPLIANCES YOURSELF. THERE IS A RISK OF ELECTRIC SHOCK! In the event of a fault please contact the Medion Service Centre or an approved repair specialist. The mains cable of the mains adapter cannot be replaced. If the cable is damaged, the mains adapter must be scrapped and replaced with a mains adapter of the same type to avoid hazards. -
Página 166: Package Contents
DE PACKAGE CONTENTS DANGER! DO NOT LET CHILDREN PLAY WITH THE PLASTIC FILM. THERE IS A RISK OF SUFFOCATION! Remove all packaging materials including the film on the displays of the base EN station and the handset. Make sure that the following parts have been supplied with the device when ... -
Página 167: General Overview
GENERAL OVERVIEW Handset Loudspeaker Display Arrow keys In menus: Select entries/options; When idle: : Open call list; While calling: : Adjust the earpiece/loudspeaker volume Control key right Call key: end the call; press longer to switch the handset on/off Alphanumeric keys 0 to 9: To enter numbers and letters Hash key: To enter the # symbol;... -
Página 168: Base Station
DE Base station Front view EN Charging cradle with contacts: to charge the handset Raise the volume on the base station Lower the volume on the base station Jump key forwards: Jumps to the next message Play/pause: Begins and pauses playback of messages Jump key backwards: Jumps to the previous message Display: Shows information on the answering machine Charging indicator: Lights up when the handset is charging... - Página 169 Rear view Connection for telephone cable (Western jack RJ11) Connection for mains adapter lead Cable holder for mains adapter lead...
-
Página 170: First Operation
DE FIRST OPERATION Setting up Place the base station on a stable, level surface. Some aggressive furniture paints can weaken the appliance’s rubber feet. If necessary, place the base station on a pad. Set up the base station at a practical working height and secure it from EN ... -
Página 171: Insert Rechargeable Battery Into The Handset
Insert rechargeable battery into the handset A rechargeable nickel-metal hydride battery block has been supplied for the handset. CAUTION! ONLY USE NICKEL-METAL HYDRIDE RECHARGEABLE BATTERIES OF THE SUPPLIED TYPE (NIMH) IN THE HANDSET. THE WARRANTY FOR THE DEVICE WILL BE VOID IF YOU INSERT A DIFFERENT BATTERY. -
Página 172: Connect The Power Supply To The Base Station
DE Connect the power supply to the base station CAUTION! TO CONNECT THE BASE STATION, ONLY USE THE BASE STATION MAINS ADAPTER MODEL NO.: S004LV0600045. A TYPE PLATE WITH THE EN RELEVANT DETAILS CAN BE FOUND ON THE MAINS ADAPTER. ... -
Página 173: Charging The Batteries
Charging the batteries CAUTION! ONLY CONNECT THE BASE STATION TO THE TELEPHONE NETWORK AFTER THE HANDSET HAS BEEN COMPLETELY CHARGED. OTHERWISE THE RECHARGEABLE BATTERIES WILL NOT ACHIEVE THEIR FULL CAPACITY. THE CHARGING TIME IS 14 HOURS. DO NOT INTERRUPT THE CHARGING PROCESS; OTHERWISE THE CAPACITY OF THE RECHARGEABLE BATTERIES COULD BE PERMANENTLY REDUCED. - Página 174 DE Charging the rechargeable batteries in the base station You cannot make calls with the handset while the rechargeable batteries are being charged. For that reason, only connect the base station to the telephone network after the handset has been completely charged.
- Página 175 Connecting the base station to the telephone network CAUTION! DO NOT CONNECT THE BASE STATION TO THE TELEPHONE NETWORK UNTIL AFTER THE HANDSET HAS BEEN COMPLETELY CHARGED. OTHERWISE THE RECHARGEABLE BATTERIES WILL NOT ACHIEVE THEIR FULL CAPACITY. Insert the Western jack of the supplied telephone cable in the left jack at the back of the base station.
-
Página 176: The Display
DE THE DISPLAY Basic display EN When delivered, the display will show the following: Range display Answering machine switched on Battery charging Name/number of handset Fields for time/date The entries in the following fields will change depending on the status. The commands are activated using the control keys located below. -
Página 177: Other Indicators On The Display
Display language On delivery, the display language is German. You can also set the display language to English and Turkish; see page 56. Rechargeable battery indicator The battery charge symbol is divided into four fields. The fill colour indicates the respective charging state of the battery (full, 2/3, 1/3 and empty). When the battery is empty or almost empty, the battery symbol (1/3 or empty) flashes, and the handset must be placed in the base station so that the battery can be charged. -
Página 178: Eco Function
DE ECO FUNCTION ECO mode enables low-radiation operation during a call. The reduction in radiation will depend on the distance of the handset from the base. The function is preset and permanently activated. FULL ECO The Full ECO function completely disables the telephone’s transmitting EN ... -
Página 179: Making Calls
MAKING CALLS Basic functions Switching the handset on and off You can switch off the handset if it is not in the base station. To switch off the handset, keep the call key (key highlighted in grey on the diagram) pressed down for a few seconds. - Página 180 DE To accept a call when the handset is not in the charge cradle on the base station, press the talk key. NOTE You can set the handset so that you must always press the talk key to accept incoming calls. ...
- Página 181 Making internal calls You can make free calls from your handset to all other handsets of the same base station. To be able to use this function, additional GAP-enabled handsets must be connected (see page 62). Press the “Int” key. All other handsets that are registered with the base •...
-
Página 182: Additional Functions
DE Additional functions Hands free mode In hands free mode you can make calls without having to hold the handset. During the call press the loudspeaker button. The hands free symbol will appear on the display. You can now make calls via the handset loudspeaker. EN ... - Página 183 Key lock To prevent accidental dialling when you are carrying the handset with you, you can activate the keypad lock. This is not possible during a call. Hold down the asterisk key until the symbol for the key lock appears on the display. This will not affect your ability to receive calls.
- Página 184 r e n o c a l l s r e n o c a l l s r e n o c a l l s r e n o c a l l s r e n o c a l l s r e n o c a l l s r e n o c a l l s r e n o c a l l s...
- Página 185 Redial The last 20 telephone numbers (with a maximum of 24 digits) that you dialled are stored in the redial list. Press the arrow button. The screen displays the entry “Redial List” and the last few telephone numbers that you dialled are displayed. If there are no telephone numbers stored in memory, “List Empty”...
-
Página 186: Making Calls To Several Callers Simultaneously
DE Making calls to several callers simultaneously NOTE The following functions are only available if at least one additional, GAP-enabled handset is registered with the base station. EN Transferring calls You can accept a call and then transfer it to an additional, GAP-enabled ... - Página 187 Conference call A conference call between one external and two internal subscribers is possible. Press the Int key for approx. two seconds. Now all subscribers are included in the call. The display changes from “Handset #” to “Conference”. Any one of the participants is able to leave the conference call by simply pressing the call key (hanging up).
-
Página 188: Making Telephone Settings Via The Menu
DE MAKING TELEPHONE SETTINGS VIA THE MENU You can call up various telephone functions as well as make some settings via the menu. Calling up the main menu EN The “Menu” entry is at the bottom left of the standard telephone display. If this entry is not displayed, press the right control key (“Back”) repeatedly ... -
Página 189: Navigating In The Menu
Navigating in the menu Selecting a menu option Use the arrow keys to select a menu option. Open the menu option with the left control key (“Select”). Most of the menu options contain further sub-menus in list form. ... -
Página 190: Using Sms
DE USING SMS You can use your telephone to read, write, store, send and edit short text messages (“SMS” for “Short Message Service”). Text messages are exchanged through SMS centres. To be able to send and receive SMS, you need the telephone number of your network provider's SMS Centre. -
Página 191: Sms" Menu
”SMS” menu In the main menu, select the “SMS” option and open it with the left control key “Select”. The following options appear: “Write” “Inbox” “Outbox” “SMS Settings” Select the desired option with an arrow key and press the left control key “Select”. - Página 192 DE To switch between the individual letters, press the key repeatedly. Once the desired letter is highlighted, press the next key or wait for a brief moment. The displayed characters will disappear after about two seconds. To write the next letter, press the next key now. ...
- Página 193 Options for written text messages The following options are available when you have written a text message and have pressed the left control key “Send”: “Send” “Save” “Notify” Select the desired option with an arrow key and press the left control key “Select”.
- Página 194 DE Saving You can store a text message, e.g. to send it at a later time. You can store up to 30 text messages. You will find a stored text message in the SMS menu option “Outbox“, under “Outbox #“. The stored text messages are saved chronologically with sequential numbers ...
-
Página 195: Incoming List (Read Sms)
Incoming list (read SMS) The SMS memory can store up to 30 messages. Messages in the SMS memory are text messages and e-mails in the incoming folder and in the outgoing list. When the memory is filled (i.e. a newly received SMS has filled the last available memory slot), the message “SMS Full”... - Página 196 DE Options for read messages While the text message is shown on the display, you can call up the following options with the left control key: “Details”: Displays the name, number, date and time of the message. “Reply”: You can send a reply to the sender without having to enter their telephone number.
-
Página 197: Outgoing List
Outgoing list Select the option “Outbox” in the “SMS” menu and press the left control key “Select”. Opening the saved entry You see, e.g. the entry “Outbox 1”. With the arrow keys, select the other saved text messages or e-mails (Outbox 2, Outbox 3, etc.). -
Página 198: Sms Settings
DE SMS settings Select the option “SMS Settings” in the “SMS” menu and press the left control key “Select“. You can choose between the following options: “Receiving SMS” “Send Service” EN “SMS-Centre 1” “SMS Default”... - Página 199 To view or change the telephone number of the SMS centre, select the corresponding memory space and press the left control key “Select”. Using the keypad you can now enter or change the telephone number of your SMS centre. ...
-
Página 200: Answering Machine
DE ANSWERING MACHINE Use the answering machine to record incoming messages during your absence or to leave a message for a caller. The answering machine will automatically add the date and time to every message. You must therefore set the date and time in order to use the answering machine properly. -
Página 201: Settings In The "Answering Machine" Menu
Settings in the “Answering Machine” menu In the main menu, open the “Answering machine” menu. Choose the option “Settings” and confirm the selection with “Select”. Answering mode Select either “Answere&Record“ or “Answere Only”. “Answere&Record”: The answering machine will respond to the call and record messages;... - Página 202 DE For checking purposes, your announcement will be repeated at the end of the recording. Once an announcement has been recorded, this announcement (and not the default one) will be played when there is a call. EN Answering delay You can set the number of ring signals after which the answering machine is activated.
- Página 203 Length of recording You can set a maximum length for messages on the answering machine. The default value is 60 seconds. The total recording time is 15 minutes. In the “Settings” menu select the “Recording” entry. Select either “60 Sec.”, “120 Sec.”, “180 Sec." or “Unlimited” and confirm with “Select”.
-
Página 204: Playing Back Messages
DE Display Explanation empty The base station is not connected properly to the mains. – – The answering machine is switched off. 0–XX The answering machine is switched on. “XX”: Number of stored messages EN 1–XX Answering machine is switched on, and there is at least one (flashes) new message. - Página 205 Playing back messages on the base station To play back messages, press the Play/Pause button on the base station. The recorded messages will now be played back. To end playback, press the Play/Pause button again. Playback is now ended. ...
- Página 206 DE Playing back messages from a different telephone extension You can play back the messages on your answering machine from an external line, such as a mobile phone or a telephone booth. Proceed as follows: Dial the telephone number of your connection. ...
- Página 207 If you do not make any entries for 15 seconds the connection will be interrupted automatically. If no new calls have been received, you can avoid the fees for the enquiry if the answering machine is set to economy mode.
-
Página 208: Switching On The Answering Machine From An External Number
DE Switching on the answering machine from an external number You can also switch on the answering machine from an external telephone number. Dial your telephone number. Wait for the recorded Answere message to begin. EN Press the asterisk key (*) during the recorded Answere message. ... -
Página 209: Monitoring
Deleting messages with the handset In the “Answering Machine” menu, select “Playing” and confirm with “Select”. You will now hear the recorded message. Press the left control key “Menu” to select further options. Select the option “Delete” and press the left control key “Select”. You will hear the announcement “All old messages have been deleted”. -
Página 210: Other Settings
DE OTHER SETTINGS “HS settings” menu In the main menu, open the “HS settings” option and confirm with “Select”. Audio settings EN You can set the volume of the in-built loudspeaker and the receiver in this menu. Select the option “Speaker Volume” and confirm with “Select”. ... - Página 211 Advisory tones In the “HS Settings” menu, choose the “Advisory Tone” entry and confirm with “Select”. You can choose whether no signal tone should be played for each of the following functions (“Off”), or if you would like to hear a quiet or loud signal tone: ...
- Página 212 DE Change HS name Choose the “Change HS Name” entry in the menu and confirm with “Select”. Enter the desired name using the numeric keypad. Confirm with “OK”. Background EN Choose the “Background” entry in the menu and confirm with “Select”. ...
- Página 213 Block numbers You have the option of blocking up to four external dialling codes (e.g. 0180 numbers or 0900 numbers). In the “HS Settings” menu, choose the “Block Numbers” entry and confirm with “Select”. Enter the system PIN and confirm with “OK”. ...
- Página 214 DE In the “HS Settings” menu, choose the “Reset HS” entry and confirm with “Select”. Enter the security PIN and confirm your entry with the left control key “OK”. Confirm the security prompt with the left control key “OK”. ...
-
Página 215: Base Settings" Menu
“Base settings” menu Choose the “Base settings” entry in the menu and confirm with “Select”. Delete HS In the “Base settings” menu, choose the “Delete HS” entry and confirm with “Select”. Enter the system PIN with the keypad and confirm with “OK”. ... - Página 216 DE Dialling mode Here you can set your telephone to the dialling mode of your network provider. You can choose between tone dialling and pulse dialling. The factory setting is “Tone Dialling”. That is the most commonly used dialling mode nowadays.
- Página 217 CAUTION! PLEASE NOTE THAT THE SYSTEM PIN IS ALSO NEEDED FOR RESETTING. THE SYSTEM PIN ITSELF IS NOT RESET TO THE DEFAULT SETTING. THEREFORE, WRITE DOWN YOUR NEW SYSTEM PIN AND SAVE IT IN A SAFE LOCATION. IF YOU DO, HOWEVER, FORGET YOUR SYSTEM PIN, PLEASE CALL OUR CUSTOMER SERVICE.
-
Página 218: Register Hs Menu
DE Register HS menu Choose the “Register HS” entry in the menu and confirm with “Select”. Four base stations are available. In the factory settings, the first one is assigned. Enter the system PIN with the keypad and confirm with “OK”. ... -
Página 219: Setting The Date And Time
Setting the date and time The date and time must be re-entered after the base station has been cut off from the mains. Setting the time and date is important for various other functions, such as the answering machine, alarm and for sending text messages and e-mails, among other things. - Página 220 DE Alarm In this menu option you can set an alarm for a particular time. In the “Time/Alarm” menu, choose the “Alarm” sub-menu, confirm by pressing “Select”. Choose the “Alarm On” entry and confirm with “Select”. Use the keypad to enter the desired time. ...
-
Página 221: Phone Book
PHONE BOOK You can store up to 100 telephone numbers in the directory. The telephone numbers can contain up to 24 characters, and names up to 12 characters. Select the telephone book with the right control key “TB”. The phone book appears. -
Página 222: Viewing A Directory Entry
DE Viewing a directory entry In the Phone book menu, select “Read” and confirm with “Select”. Use the arrow key to scroll through all entries to the desired entry. Confirm your selection with the left control key “Select”. ... -
Página 223: Phone Book Status
Phone book status You can store 100 subscribers and their respective numbers in the phone book. In the Phone book menu, select “Phone book status” and confirm with “Select”. Information on used memory spaces appears: for example, “68/100 used”: 68 memory spaces are used;... -
Página 224: Calling
DE Calling Open the phone book directly with the right control key and select the subscriber you would like to call. Press the talk key. The number will be dialled. Available characters The following table shows the available characters you can use when writing EN ... -
Página 225: If Errors Occur
IF ERRORS OCCUR For appliance errors, please check first if you can eliminate the error yourself with the help of the following overview. Never try to repair the appliances yourself. Contact our service centre or other qualified personnel if a repair is necessary. ... - Página 226 DE The display on the Check whether the base station is correctly handset shows connected. “Range!”. Check if the handset is within the range of the base station. Check if the handset is registered with the desired base station (see page 62).
-
Página 227: Cleaning
You cannot be called Press the green call key and check for a dialling tone and for whether the receiver symbol appears on the display. Check whether another telephone works on the telephone socket or if your telephone works on a different telephone socket. -
Página 228: Disposal
DE DISPOSAL Packaging Your appliance has been packaged to protect it against transportation damage. The packaging constituents are raw materials and can be reused or recycled. EN Appliance At the end of its lifetime, do not dispose of the DECT telephone in ... -
Página 229: Technical Data
TECHNICAL DATA Rechargeable battery pack for handset Type NiMh 2,4 V, 500 mAh Battery manufacturer: Manufacturer: TenPao Model no.: GPHC05RN01 Standard DECT/GAP; ca. 300 m range Charging time Approx. 16 hours if completely discharged Standby operation Approx. 100 hours Talk time Approx. -
Página 230: Conformity Information
DE CONFORMITY INFORMATION MEDION AG hereby declares that the DECT telephone conforms to the fundamental requirements and other regulations of the relevant directive R&TTE 1999/5/EC. Full declarations of conformity are available at www.medion.com/conformity. EN 0168 ...