Klarstein Maxfresh Instrucciones De Uso
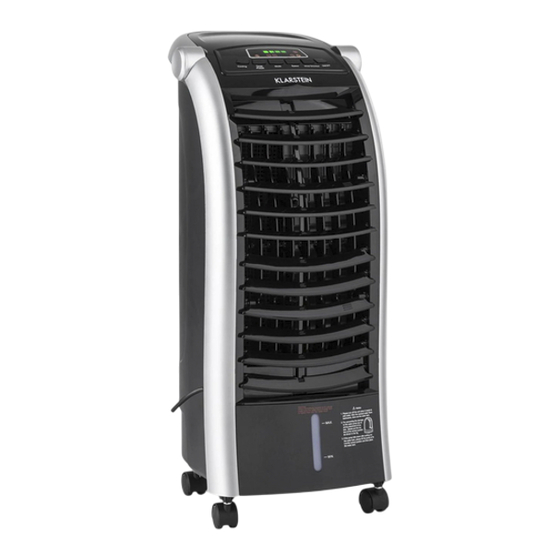
Climatizador evaporativo enfriador de aire
Ocultar thumbs
Ver también para Maxfresh:
- Manual de instrucciones (52 páginas) ,
- Manual del usuario (76 páginas)
Capítulos
Tabla de contenido
Solución de problemas

Manuales relacionados para Klarstein Maxfresh


Resumen de contenidos para Klarstein Maxfresh
- Página 1 Maxfresh Luftkühler-Ventilator Fan Ventilator Rafraîchisseur d’air Ventilatore rinfrescatore d’aria Climatizador evaporativo enfriador de aire 10029393 10029394 10034640 10036141...
-
Página 3: Tabla De Contenido
Sehr geehrter Kunde, wir gratulieren Ihnen zum Erwerb Ihres Gerätes. Lesen Sie die folgenden Hinweise sorg- fältig durch und befolgen Sie diese, um möglichen Schäden vorzubeugen. Für Schäden, die durch Missachtung der Hinweise und unsachgemäßen Gebrauch entstehen, über- nehmen wir keine Haftung. Scannen Sie den QR-Code, um Zugriff auf die aktuellste Bedienungsanleitung und weitere Informationen rund um das Produkt zu erhalten. -
Página 4: Geräteübersicht Und Bedienfeld
• Da das Gerät viel Feuchtigkeit erzeigt, stellen Sie es nicht in Regale. Falls doch, schalten Sie die Luftbefeuchtung aus und benutzen Sie nur die Kühlfunktion. • Füllen Sie Wasser nach bevor der Wasserstand die Min-Marke erreicht hat. • Kinder, physisch und körperlich eingeschränkte Menschen sollten das Gerät nur benutzen, wenn sie vorher von einer Aufsichtsperson ausführlich mit den Funktionen und den Sicherheitsvorkehrungen vertraut gemacht wurden. -
Página 5: Tastenfunktionen
TASTENFUNKTIONEN Standby-Modus Nachdem das Gerät eingeschaltet wurde leuchten alle Lampen kurz auf. Sobald die Lampen wieder aus sind befindet sich das Gerät im Standby-Modus. ON/OFF-Taste Wenn Sie die Taste im Standby-Modus drücken läuft der Ventilator auf Stufe 1. Sobald Sie erneut auf die Taste drücken stoppt der Ventilator. -
Página 6: Inbetriebnahme Und Bedienung
INBETRIEBNAHME UND BEDIENUNG Installation • Entnehmen Sie das Gerät der Verpackung und überprüfen Sie ob das Gerät, die Fernbedienung, 2 Eisboxen und die 4 Räder enthalten sind. • Installieren Sie die Räder bevor Sie das Gerät in Betrieb nehmen. Drücken Sie den Schaft am Ende der Rollen dazu in die Aussparungen unten am Gerät (siehe Bild). -
Página 7: Fehlersuche Und Fehlerbehebung
So benutzen Sie die Eisboxen • Öffnen Sie die Eisbox nicht während des Betriebs und verzehren Sie die darin enthaltenen Eiskristalle nicht. • Legen Sie die Eisbox 4 Stunden lang ins Gefrierfach und legen Sie sie dann in den Wassertank. Der Wassertank sollte befüllt werden bevor Sie die Eisboxen hineinlegen. -
Página 8: Hinweise Zur Entsorgung
HINWEISE ZUR ENTSORGUNG Befindet sich die linke Abbildung (durchgestrichene Mülltonne auf Rädern) auf dem Pro- dukt, gilt die Europäische Richtlinie 2012/19/EU. Diese Produkte dürfen nicht mit dem nor- malen Hausmüll entsorgt werden. Informieren Sie sich über die örtlichen Regelungen zur getrennten Sammlung elektrischer und elektronischer Gerätschaften. -
Página 9: Technical Data
Dear Customer, Congratulations on purchasing this equipment. Please read this manual carefully and take care of the following hints to avoid damages. Any failure caused by ignoring the mentioned items and cautions mentioned in the instruction manual are not covered by our warranty and any liability. CONTENTS Technical Data 9 Safety Instructions 9... -
Página 10: Product Descriptino And Control Panel
• When this unit won‘t be used for a long time, please unplug the power plug for preventing harm to the unit. • If the power cord is damaged, please ask the manufacturer or repair service or similar professionals to replace it for preventing hazards. -
Página 11: Controls And Functions
CONTROLS AND FUNCTIONS Stand by: After the fan is powered on, all LEDs will be bright. 1 s later, all LEDs will go out and the unit will tu m to stand by status. 0N/OFF button: In standby status, the unit will be turned on after pressing this button and the defaulted running status is gen- eral wind at the speed of option 1;... -
Página 12: Use And Operation
USE AND OPERATION Installation • Take out the unit after opening the carton box, and check whether there‘s a remote controller, two ice boxes and four castors. • Install the castors before operating the unit. The unit should be placed horizontally during installation. -
Página 13: Troubleshooting
Operation Instruction for Ice Box • Do not open the ice box during operation. Prohibit eating the ice crystal inside the ice box. • Freeze the ice box in refrigerator for about 4 hours and then put it into the water tank (water tank should be filled with water before putting the ice box). -
Página 14: Hints On Disposal
HINTS ON DISPOSAL According to the European waste regulation 2012/19/EU this symbol on the product or on its packaging indicates that this product may not be treated as household waste. Instead it should be taken to the appropriate collection point for the recycling of electrical and elec- tronic equipment. -
Página 15: Datos Técnicos
Estimado cliente: Le felicitamos por la adquisición de este producto. Lea atentamente el siguiente ma- nual y siga cuidadosamente las instrucciones de uso con el fin de evitar posibles da- ños. La empresa no se responsabiliza de los daños ocasionados por un uso indebido del producto o por haber desatendido las indicaciones de seguridad. -
Página 16: Descripción Del Aparato Y Panel De Control
• Si no utiliza el aparato en un periodo prolongado de tiempo, desconecte el enchufe de la toma de corriente. • Si el cable de alimentación está dañado, deberá ser sustituido por el fabricante o por un servicio técnico o persona debidamente autorizados.•... -
Página 17: Botones De Función
BOTONES DE FUNCIÓN Modo standby Una vez haya encendido el aparato, se encenderán todas las luces brevemente. Cuando las luces se apaguen de nuevo, el aparato se encontrará en modo standby. Botón ON/OFF Si pulsa el botón en modo standby, el ventilador comenzará a funcionar en el nivel 1. Si pulsa de nuevo el botón, el aparato se detiene, todas las luces se apagan y el aparato pasa al modo standby. -
Página 18: Puesta En Marcha Y Uso
PUESTA EN MARCHA Y USO Instalación • Retire el aparato del embalaje y compruebe si se encuentran todos los componentes: aparato, mando a distancia, 2 acumuladores de frío y cuatro ruedas. • Instale las ruedas antes de poner en marcha el aparato. Presione la va- rilla del extremo de las ruedas dentro del orificio de la parte inferior del aparato (consulte imagen). -
Página 19: Detección Y Resolución De Problemas
Cómo utilizar los acumuladores de frío • No abra el acumulador durante el funcionamiento del aparato ni ingiera su contenido. • Introduzca el acumulador durante cuatro horas en el congelador y a continuación colóquelo dentro del depósito de agua. El depósito debe estar lleno antes de introducir los acumuladores. -
Página 20: Indicaciones Para La Retirada Del Aparato
INDICACIONES PARA LA RETIRADA DEL APARATO Si el aparato lleva adherida la ilustración de la izquierda (el contenedor de basura tachado) entonces rige la normativa europea, directiva 2012/19/UE. Este producto no debe arrojarse a un contenedor de basura común. Infórmese sobre las leyes territoriales que regulan la recogida separada de aparatos eléctricos y electrónicos. -
Página 21: Fiche Technique
Chère cliente, cher client, Toutes nos félicitations pour l’ a cquisition de ce nouvel appareil. Veuillez lire atten- tivement et respecter les instructions de ce mode d’ e mploi afin d’ é viter d’ é ventuels dommages. Nous ne saurions être tenus pour responsables des dommages dus au non-respect des consignes et à... - Página 22 • Débrancher l’ a ppareil en cas d’inutilisation prolongée. • Si le cordon d’ a limentation est endommagé, le faire remplacer par le fabricant, un atelier autorisé ou un professionnel qualifié.Comme l’ a ppareil produit beaucoup d’humidité, ne pas l’installer dans une étagère. Si tel était le cas néanmoins, désactiver la fonction d’humidification et utiliser uniquement la fonction de rafraîchissement.
-
Página 23: Aperçu De L' A Ppareil Et Panneau De Commande
FONCTIONS DES TOUCHES Mode veille Toutes les lampes s’ a llument brièvement après le démarrage. Quand les lampes s’ é teignent de nouveau, cela signifie que l’ a ppareil se trouve en mode veille. Touche ON/OFF En mode veille, appuyer sur cette touche pour que le ventilateur se mette en marche à la vitesse 1. Appuyer de nouveau sur cette touche pour interrompre le ventilateur. -
Página 24: Mise En Marche Et Utilisation
MISE EN MARCHE ET UTILISATION Installation • Sortir l’ a ppareil de son emballage et vérifier que le contenu de l’ e mbal- lage comprend un appareil, une télécommande, 2 packs réfrigérants et 4 roulettes. • Installer les roulettes avant de faire fonctionner l’ a ppareil. Enfoncer la tige des roues dans les trous situés sur le dessous de l’... -
Página 25: Identification Et Résolution Des Problèmes
Utilisation des packs réfrigérants • Ne pas ouvrir les packs réfrigérants pendant le fonctionnement de l’ a ppareil et ne pas consommer les cristaux de glace qu’ils contiennent. • Placer les packs réfrigérants pendant une durée de 4 heures dans le compartiment de congélation puis les mettre dans le réservoir d’... -
Página 26: Information Sur Le Recyclage
INFORMATION SUR LE RECYCLAGE Vous trouverez sur le produit l’image ci-contre (une poubelle sur roues, barrée d‘une croix), ce qui indique que le produit se trouve soumis à la directive européenne 2012/19/UE. Ren- seignez-vous sur les dispositions en vigueur dans votre région concernant la collecte séparée des appareils électriques et électroniques. -
Página 27: Dati Tecnici
Gentile cliente, La ringraziamo per aver acquistato il nostro prodotto. La preghiamo di leggere attentamente le seguenti istruzioni e di seguirle per evitare eventuali danni. Non ci assumiamo alcuna responsabilità per danni derivati da una mancata osservazione delle avvertenze di sicurezza e da un uso improprio del dispositivo. Scansionare il codice QR seguente, per accedere al manuale d’uso più... -
Página 28: Descrizione Del Prodotto E Pannello Dei Comandi
• Se il cavo di alimentazione è danneggiato, farlo sostituire dal produttore o da un centro assistenza qualificato o da un tecnico specializzato.Dal momento che il dispositivo produce molta umidità, non collocarlo sui ripiani. In alternativa, disattivare l’umidificazione dell’ a ria e utilizzare solo la funzione di raffreddamento. •... -
Página 29: Tasti Funzione
TASTI FUNZIONE Modalità standby Una volta acceso il dispositivo, tutte le spie si accendono brevemente. Quando le spie si spengono, il disposi- tivo passa in modalità standby. Tasto ON / OFF Se si preme una volta questo tasto in modalità standby, la ventola si mette in funzione al livello 1. Se si preme di nuovo il tasto, il ventilatore si arresta. -
Página 30: Messa In Funzione E Utilizzo
MESSA IN FUNZIONE E UTILIZZO Installazione • Rimuovere il dispositivo dalla confezione e controllare se sono inclusi nella consegna: l’unita’ principale, il telecomando, 2 siberini e 4 rotelline. • Prima di mettere in funzione il dispositivo, assemblare le rotelline. Preme- re l’... -
Página 31: Ricerca E Risoluzione Dei Problemi
Come utilizzare i siberini • Non aprire i siberini e non consumare i cristalli di ghiaccio all’inter- no. Lasciare i siberini per 4 ore nel congelatore e in seguito metterli nel serbatoio. Il serbatoio deve essere riempito prima di mettere i siberini. -
Página 32: Smaltimento
SMALTIMENTO Se sul prodotto è presente la figura a sinistra (il cassonetto dei rifiuti mobile sbarrato), si applica la direttiva europea 2012/19/UE. Questi prodotti non possono essere smaltiti con i rifiuti normali. Informarsi sulle disposizioni vigenti in merito alla raccolta separata di dispo- sitivi elettrici ed elettronici.