Tabla de contenido
Publicidad
Idiomas disponibles
Idiomas disponibles
Enlaces rápidos
Istruzioni ed avvertenze per l'installazione e l'uso
Instructions and warnings for installation and use
Instrucciones y advertencias para su instalación y uso
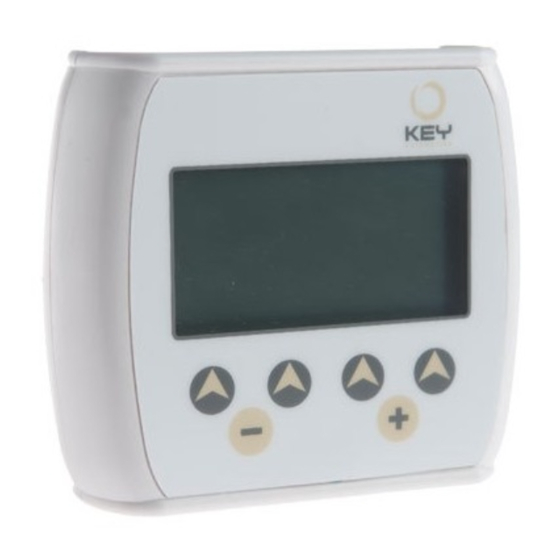
EASY
Selettore digitale con display per porte automatiche
Digital selector pad with display for automatic doors
Selector digital con pantalla gráfica para puertas automáticas
Publicidad
Tabla de contenido

Manuales relacionados para Key Automation EASY


Resumen de contenidos para Key Automation EASY
- Página 1 Istruzioni ed avvertenze per l’installazione e l’uso Instructions and warnings for installation and use Instrucciones y advertencias para su instalación y uso EASY Selettore digitale con display per porte automatiche Digital selector pad with display for automatic doors Selector digital con pantalla gráfica para puertas automáticas...
- Página 2 INDICE Introduzione al prodotto pag. 3 Descrizione del prodotto e modello pag. 3 Installazione del prodotto pag. 4 Collegamenti elettrici pag. 4 Schermate di stato della porta automatica pag. 5 Tastiera pag. 5 Immissione della password ed accesso al menu pag.
-
Página 3: Introduzione Al Prodotto
1 - INTRODUZIONE AL PRODOTTO 1.1 - Descrizione del prodotto e modello EASY è un dispositivo per il controllo dI porte automatiche che si Per accedere ai menu di configurazione e diagnostica sarà neces- sario immettere una password (di fabbrica impostata 0000). -
Página 4: Installazione Del Prodotto
2 - INSTALLAZIONE DEL PRODOTTO 2.1 - Collegamenti elettrici Centrale CT-PAE --> Selettore digitale EASY EASY CT-PAE + 24 V + 24 V - 24 V - 24 V A 485 B 485 SEL R RESET RESET LED D. Centrale CT-PAE --> Selettore rotativo SMNPAE --> Selettore digitaleEASY... - Página 5 . 3.2 - Immissione della password ed accesso al menu principale Per accedere al “menu principale” del selettore digitale EASY sarà sufficiente tenere premuto il secondo tasto da sinistra, per più di 5 secondi. Verrà richiesto l’immissione della PASSWORD...
- Página 6 4 - APPROFONDIMENTI - MENU AVANZATO 4.1 - Struttura Menu Avanzato PARAMETRI SCHEDA VISUALIZZAZIONI SCHEDA VISUALIZZAZIONI ERRORI BIDIREZIONALE FREE (libero) BLOCCO PARZIALE AZIONI SCHEDA APERTURA RADAR ESTERNO RADAR INTERNO ERRORE STATO SELETTORE UTILITÀ 4.2 - Menu parametri scheda Entrando nel menu “Parametri Scheda” viene visualizzata la scritta modificare ogni singolo parametro.
- Página 7 Tensione applicata a porta ferma 0 = non sorvegliata Sorveglianza FOTO 1 = un dispositivo sorvegliato 2 = due dispositivi sorvegliati 0 = non sorvegliata Sorveglianza FOTO RALL 1 = un dispositivo sorvegliato 2 = due dispositivi sorvegliati 0 = non sorvegliata Sorveglianza STOP 1 = un dispositivo sorvegliato 2 = due dispositivi sorvegliati...
- Página 8 4.4 - Menu visualizzazione errori ERRORI ATTUALI STORICO ERRORI Sarà visualizzata una sequenza degli errori presenti sulla scheda; Sarà visualizzato il codice errore e la sua descrizione; l’errore n.1 è altrimenti si leggerà la frase “non ci sono errori da visualizzare”. l’errore più...
- Página 9 Per resettare la scheda della porta automatica sarà sufficiente premere il tasto “+” per più di 5 secondi. ATTENZIONE: nel caso di utilizzo contemporaneo del selettore digitale EASY e del selettore rotativo SMNPAE il reset potrà essere effettuato solo dal selettore rotativo SMNPAE...
-
Página 10: Tabla De Contenido
TABLE OF CONTENTS Product Introduction page 11 Product and model description page 11 Installing the Product page 12 Electric connections page 12 Automatic door status screens page 13 Keypad page 13 Entering the password to access the page 13 main menu Further details - ADVANCED MENU page 14 Advanced Menu Structure... -
Página 11: Product Introduction
10 seconds When switched on, the EASY sets by default for control of the auto- to make additional changes, after which he will be prompted to enter matic door’s status. -
Página 12: Installing The Product
- 24 V - 24 V A 485 B 485 SEL R RESET RESET LED D. CT-PAE control unit --> SMNPAE manual selector switch --> EASY digital selector pad EASY CONNECTION CABLE 550CABL003A00 CT-PAE SMNPAE + 24 V - 24 V... -
Página 13: Automatic Door Status Screens
3.2 - Entering the password for accessing the main menu To access the “main menu” of the EASY digital selector pad, simply hold down the second key from the left for more than 5 seconds. PASSWORD request... -
Página 14: Further Details - Advanced Menu
4 - FURTHER DETAILS - ADVANCED MENU 4.1 - Advanced Menu Structure BOARD PARAMETERS BOARD DISPLAYS BIDIRECTIONAL MANUAL LOCKED PARTIAL PASSWORD request ERROR DISPLAYS PARTIAL FREE LOCKED BIDIRECTIONAL Exit OPEN ENTRY EXIT BIDIRECTIONAL BOARD ACTIONS OPEN EXTERNAL RADAR INTERNAL RADAR ERROR SELECTOR STATUS... -
Página 15: Board Display Menu
Voltage applied when door stopped 0 = not monitored FOTO Surveillance 1=one monitored device 2=two monitored devices 0 = not monitored FOTO RALL Surveillance 1=one monitored device 2=two monitored devices 0 = not monitored STOP Surveillance 1=one monitored device 2=two monitored devices 0 = test disabled Battery Test 1 = test enabled... -
Página 16: Error Display Menu
4.4 - Error display menu CURRENT ERRORS ERROR LOG The errors on the board will be displayed in sequence; otherwise, The error code and its description will be displayed: error no. 1 is the screen will show “no errors for display”. the most recent error. -
Página 17: Selector Status Menu
To reset the automatic door board, simply hold down the “+” key for more than 5 seconds. CAUTION: if the EASY digital selector pad is used simultaneously with the SMNPAE manual selector switch, the reset can only be carried out using the SMNPAE manual selector switch... - Página 18 ÍNDICE Introducción al producto pag. 19 Descripción del producto y modelo pag. 19 Instalación del producto pag. 20 Conexiones eléctricas pag. 20 Ventanas de estado de la puerta automática pag. 21 Teclado pag. 21 Introducción de la contraseña y acceso al menú pag.
-
Página 19: Introducción Al Producto
1 - INTRODUCCIÓN AL PRODUCTO 1.1 - Descripción del producto y modelo EASY es un dispositivo para el control de puertas automáticas que Para acceder a los menús de configuración y diagnóstico será ne- se propone como alternativa o integración del selector rotativo cesario introducir una contraseña (de fábrica configurada en 0000). -
Página 20: Instalación Del Producto
- 24 V - 24 V A 485 B 485 SEL R RESET RESET LED D. Central CT-PAE --> Selector rotativo SMNPAE --> Selector digital EASY EASY CABLE DE CONEXIÓN 550CABL003A00 CT-PAE SMNPAE + 24 V - 24 V A 485... -
Página 21: Ventana De Estado De La Puerta Automática
3.2 - Introducción de la contraseña y acceso al menú principal Para acceder al “menú principal” del selector digital EASY es suficiente con mantener presionado el segundo pulsador de la izquierda durante más de 5 segundos. -
Página 22: Descripción Detallada - Menú Avanzado
4 - DESCRIPCIÓN DETALLADA - MENÚ AVANZADO 4.1 - Estructura Menú Avanzado PARAMETROS TARJETA VISUALIZACIÓN TARJETA SOLICITUD password BIDIRECCIONAL MANUAL BLOQUEADA PARCIAL VISUALIZACIÓN ERRORES BLOQUEADA PARCIAL FREE (libre) BIDIRECCIONAL Salida ABIERTA ENTRADA SALIDA BIDIRECCIONAL ACTIONES TARJETA APERTURA RADAR EXTERNO RADAR INTERNO ERROR ESTADO SELECTOR... -
Página 23: Menú Visualización Tarjeta
Tensión aplicada a puerta parada 0 = no supervisada Supervisión FOTO 1 = un dispositivo supervisado 2 = dos dispositivos supervisados 0 = no supervisada Supervisión FOTO RALL 1 = un dispositivo supervisado 2 = dos dispositivos supervisados 0 = no supervisada Supervisión STOP 1 = un dispositivo supervisado 2 = dos dispositivos supervisados... -
Página 24: Menú Visualización Errores
4.4 -Menú visualización errores ERRORES ACTUALES HISTORIAL DE ERRORES Se visualizará una secuencia de los errores presentes en la tarjeta; Se mostrará el código de error y su descripción; el error n° 1 es el por el contrario aparecerá la frase “no hay errores para visualizar”. error más reciente. - Página 25 Para reajustar la tarjeta de la puerta automática será suficiente con pulsar “+” durante más de 5 segundos. ATENCIÓN: en caso de uso contemporáneo del selector digital EASY y del selector rotativo SMNPAE el reajuste podrá ser hecho solo desde el selector rotativo SMNPAE...
- Página 26 NOTAS...
- Página 27 NOTAS...
- Página 28 Key Automation S.r.l. Via A. Volta 30 - 30020 Noventa di Piave (VE) T. +39 0421.307.456 - F. +39 0421.656.98 Instruction version info@keyautomation.it - www.keyautomation.it 580ISPD REV.00...