Tabla de contenido
Publicidad
Enlaces rápidos
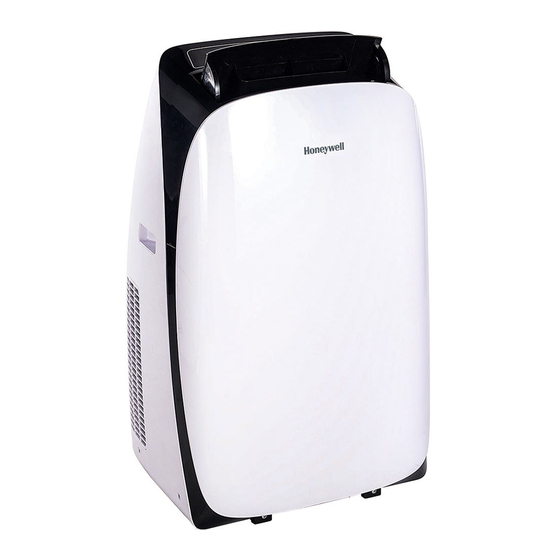
Portable Air Conditioner
EN
User Manual
Read and save these instructions before use
Climatiseur portatif
FR
Mode d'emploi
Lire ces consignes avant l'utilisation de l'appareil et les conserver
Aire Acondicionado Portátil
ES
Manual del Propietario
Lea y guarde estas instrucciones antes de usar la unidad
Customer Support:
Assistance Au Client:
Servicio de atencion a clientes:
USA/ EE.UU: 1-800-474-2147
CANADA/ CANADÁ^ : 1-888-209-0999
^ Canada Customer Support service available for models sold in Canada only.
^ Le Service Client Canadien est disponible uniquement pour les modèles vendus sur le territoire Canadien.
^ Servicio de Atención A Clientes en Canadá disponible solo para modelos vendidos en Canadá.
www.jmatek.com
Email: usinfo@jmatek.com
Model / Modèle / Modelo:
HL Series / Série / Serie
Publicidad
Tabla de contenido

Manuales relacionados para Honeywell HL Serie


Resumen de contenidos para Honeywell HL Serie
- Página 1 Portable Air Conditioner User Manual Read and save these instructions before use Climatiseur portatif Mode d’emploi Lire ces consignes avant l’utilisation de l’appareil et les conserver Aire Acondicionado Portátil Manual del Propietario Lea y guarde estas instrucciones antes de usar la unidad Model / Modèle / Modelo: HL Series / Série / Serie Customer Support:...
- Página 2 SAFETY READ AND SAVE THESE INSTRUCTIONS IMPORTANT SAFETY INSTRUCTIONS. READ CAREFULLY AND KEEP FOR FUTURE REFERENCE. IN CASE THERE IS ANY INCONSISTENCY OR CONFLICT BETWEEN THE ENGLISH VERSION AND ANY OTHER LANGUAGE VERSION OF THE CONTENT OF THIS MATERIAL, THE ENGLISH VERSION SHALL PREVAIL.
- Página 3 SAFETY (CONTINUED) • This appliance has been manufactured for use in domestic environments and should not be used for other purposes. • Only use the installation kit provided to install this unit. DO NOT attempt to extend the exhaust hose or install this unit using other methods other than that shown in this manual.
- Página 4 THANK YOU Congratulations on your purchase of this Honeywell Portable Air Conditioner. Regarding the information pertaining to the installation, handling, servicing, cleaning and disposal of the appliance, please refer to the below paragraph of the manual. USER TIPS Portable Air Conditioners are ideal for spot cooling. The compressor, condenser and evaporator are housed in a compact unit.
-
Página 5: Parts Description
PARTS DESCRIPTION 1) Control Panel 9) Upper Dust Filter 2) Air Outlet 10) Upper Rubber Drain Plug (Dehumidifying Mode) 3) Handle 11) Lower Dust Filter 4) Casters 12) Lower Grill 5) Remote Control 13) Drain Tube (For Continuous Drain) 6) Exhaust Hose Connector 14) Lower Rubber Drain Plug (Air Conditioning Mode) 7) Cord Winder... - Página 6 INSTALLATION It is important that the installation instructions below are followed for successful installation of this Portable Air Conditioner. Please call Customer Support if you have any difficulties or queries regarding these installation procedures. Installation Kit: 1. Window Bracket Kit (1 Set) 4.
- Página 7 INSTALLATION (CONTINUED) Note: After setting the window bracket to the size of your window, please remove it from the window and follow the instructions below. 3. Connect the exhaust hose to the hose connector on back of the unit. Slide-in the hose connector downwards until it is locked in place.
- Página 8 INSTALLATION (CONTINUED) IMPORTANT: Do not replace or lengthen the exhaust hose as this could cause the unit to malfunction. 50 cm / 20" NOT RECOMMENDED RECOMMENDED WARNING: Any warranties included with this product will be voided if an extra extension hose is added to the originally provided installation kit or if the installation is performed differently than the manufacturer's instructions, without proper consultation.
-
Página 9: Use & Operation
USE & OPERATION CONTROL PANEL HIGH COOL POWER TIMER TIMER SLEEP WATER SLEEP HEAT FULL 1) Timer Control / Sleep Control 4) Mode Control 2) Fan Speed Control 5) Power Control 3) Timer / Temperature Set Controls 6) Indicator Lights FUNCTION BUTTONS POWER CONTROL The Power Control... - Página 10 USE & OPERATION (CONTINUED) FUNCTION BUTTONS (CONTINUED) • Heating Mode* (HEAT) This unit uses Heat-Pump technology which reverses the air conditioning cooling cycle by transferring heat from the outside into the room – this is more energy efficient than traditional electric heaters that generate heat instead of transferring heat into the room.
- Página 11 USE & OPERATION (CONTINUED) FUNCTION BUTTONS (CONTINUED) FAN SPEED CONTROL 3 settings: High, Medium and Low. TIMER CONTROL The Timer is adjustable between 1 - 24 hours. AUTO TURN OFF: While unit is running, press the TIMER button and the display will flash. While the display is flashing, press the + or - button to select the number of hours you want the unit to turn OFF automatically.
- Página 12 USE & OPERATION (CONTINUED) REMOTE CONTROL The functions work the same as the Portable Air Conditioner's Control Panel. All key functions can be accessed from the remote control. Power Control ON / OFF Temperature / Timer Set • Used for adjusting the timer and temperature.
-
Página 13: Cleaning & Maintenance
CLEANING & MAINTENANCE Appliance Maintenance: Turn off the appliance before disconnecting the power supply. Only clean the appliance with a soft dry cloth. Dust Filter Maintenance: The dust filter is to be cleaned every two weeks to maintain air cooling efficiency. Please follow the below instructions for cleaning the dust filters: Switch off and unplug the air conditioner from the electrical outlet. -
Página 14: Water Condensation Drainage
WATER CONDENSATION DRAINAGE When there is excess water condensation inside the unit, the air conditioner stops running and shows a warning light (the WATER FULL indicator illuminates with a red light). This indicates that the water condensation needs to be drained using the following procedures: Manual Draining in Cooling, Dehumidifying and Heating* Modes Water may need to be drained in high humidity areas. -
Página 15: Troubleshooting Guide
TROUBLESHOOTING GUIDE The following troubleshooting guide addresses the most common problems. If problems persist, call customer support. Unplug and disconnect the appliance from the power source before attempting to troubleshoot. PROBLEM POSSIBLE CAUSE SOLUTION No electricity. Check for power. Batteries in the remote control need to be Change remote control batteries. - Página 16 TROUBLESHOOTING GUIDE (CONTINUED) PROBLEM POSSIBLE CAUSE SOLUTION A door or window is open. Make sure the window or door is closed. The dust filter is dirty. Clean the dust filter. The exhaust hose is Reinstall exhaust hose properly detached. (refer to Installation section). Runs but not Temperature setting is Reduce temperature setting on control panel.
- Página 17 TROUBLESHOOTING GUIDE (CONTINUED) PROBLEM POSSIBLE CAUSE SOLUTION Heating function not activated yet. Check that the Heating function has been activated. The ambient temperature Increase temperature setting. is too high. Heater* is not switching ON Heating is activated only when the ambient Switch on the Heating function when the ambient temperature is below temperature reaches below 25°C (77°F).
-
Página 18: Error Code Guide
ERROR CODE GUIDE ERROR CODE ERROR POSSIBLE CAUSE "E1" Indoor temperature sensor failure (open circuit or short circuit). "E3" Evaporator temperature sensor failure (open circuit or short circuit). "P1" Water Full alarm. - Página 19 SEGURIDAD LEA Y GUARDE ESTAS INSTRUCCIONES LÉALAS DETENIDAMENTE Y GUÁRDELAS PARA FUTURA REFERENCIA. EN CASO DE EXISTIR ALGUNA DISCREPANCIA O CONFLICTO, EN EL CONTENIDO DE ESTE MATERIAL, E N T R E L A V E R S I Ó N E N I N G L É S Y L A V E R S I Ó N E N CUALQUIER OTRO IDIOMA PREVALECERÁ...
- Página 20 SEGURIDAD (CONTINUACIÓN) • NO operar el aire acondicionado cuando esté mojado. • Las precauciones básicas de seguridad siempre se deben seguir cuando se utilizan aparatos eléctricos. • Este producto ha sido fabricado para uso habitacional y no debe ser utilizado para otros propósitos. •...
- Página 21 SEGURIDAD (CONTINUACIÓN) • El fabricante no se hace responsable de los daños causados a las personas o daños a la propiedad debido a incumplimiento de las instrucciones de mantenimiento y el uso indebido del aparato. • El aparato se instalará de acuerdo con las normas nacionales de cableado.
-
Página 22: Agradecimiento
USO RECOMENDADO Los aires acondicionados portátiles Honeywell son ideales para el enfriamiento de lugares. El compresor, condensador y evaporador están alojados dentro de una unidad compacta. El aire es deshumidificado y enfriado mientras una manguera flexible de drenado de aire envía el calor al exterior. -
Página 23: Descripción De Partes
DESCRIPCIÓN DE PARTES 1) Panel de Control 9) Filtro de Polvo Superior 2) Salida de Aire 10) Tapón de goma de drenaje superior (Modo Deshumidificador) 3) Manija 11) Filtro de Polvo Inferior 4) Ruedas 12) Rejilla Inferior 5) Control Remoto 13) Manguera de drenaje (para continuo drenaje) 6) Conector de la Manguera... -
Página 24: Instalación
INSTALACIÓN Es importante que las instrucciones de instalación se siguen para la correcta instalación de este aire acondicionado portátil. Por favor llamar al Centro de Atención a Clientes si usted tiene cualquier dificultad o duda con respecto a estos procedimientos de instalación. Kit de Instalación: 1. - Página 25 INSTALACIÓN (CONTINUACIÓN) Nota: Después de ajustar el Adaptador de Soporte de Ventana al tamaño de su ventana removerlo de la misma y seguir las siguientes instrucciones. 3. Conecte la manguera de plástico al conector de manguera en la parte posterior de la unidad. Deslícelo hacia abajo hasta que quede fijo en su lugar.
- Página 26 INSTALACIÓN (CONTINUACIÓN) IMPORTANTE: No remplazar o alargar la manguera de plástico, esto podría causar mal funcionamiento del equipo. 50 cm / 20" NO RECOMENDADO RECOMENDADO ADVERTENCIA: Cualquier garantía que se incluya con este producto será anulada si una manguera de extensión se añade al kit de instalación suministrado originalmente o si la instalación se realiza de manera diferente a las instrucciones del fabricante, sin la debida consulta.
-
Página 27: Uso Y Operación
USO Y OPERACIÓN PANEL DE CONTROL HIGH COOL POWER TIMER TIMER SLEEP WATER SLEEP HEAT FULL 1) Control del Temporizador / Modo Nocturno 4) Control de Modo 2) Control de Velocidad 5) Control de Energía 3) Ajuste de Temperatura / Temporizador 6) Luces Indicadoras BOTONES DE FUNCIONES CONTROL DE ENERGÍA El control de encendido... - Página 28 USO Y OPERACIÓN (CONTINUACIÓN) BOTONES DE FUNCIONES (CONTINUACIÓN) • Modo Calefacción* (HEAT) Esta unidad usa tecnología Bomba-Calor la cual retorna el ciclo de enfriamiento del aire acondicionado, transfiriendo calor de fuera en la habitación - esto es mas eficiente que los calentadores eléctricos tradicionales que generan calor en lugar de transferir el calor a la habitación.
- Página 29 USO Y OPERACIÓN (CONTINUACIÓN) BOTONES DE FUNCIONES (CONTINUACIÓN) CONTROL DE VELOCIDAD 3 configuraciones: Alta, Media y Baja. AJUSTE DE TEMPORIZADOR El tiempo puede ser ajustado entre 1 - 24 horas. APAGADO AUTOMÁTICO: Mientras la unidad esté funcionando, presionar el botón y el display parpadeará. Mientras el display esté parpadeando, presionar el botón + o - para seleccionar el número de horas que deseé. La unidad se apagará...
- Página 30 USO Y OPERACIÓN (CONTINUACIÓN) CONTROL REMOTO Las funciones trabajan igual que los controles de los acondicionadores de aire portátil. Todas las funciones de las teclas se puede acceder desde el control remoto. Control de Encendido Encendido / Apagado Ajuste de Temperatura / Temporizador •...
-
Página 31: Limpieza Y Mantenimiento
LIMPIEZA Y MANTENIMIENTO Mantenimiento de la unidad: Apague la unidad andes de desconectarla de la toma de corriente eléctrica. Limpie con un lienzo suave y seco. Mantenimiento del Filtro de Aire: Es necesario limpiar el filtro de aire después de 2 semanas de uso. Hágalo de la siguiente manera: Apague la unidad y desconecte desde la toma de corriente. -
Página 32: Drenado De Agua
DRENADO DE AGUA Cuando la unidad tiene un exceso de agua de condensación dentro de la unidad, el equipo dejará de funcionar y mostrara una luz de advertencia. ( el boton de encendido parpadeará con una luz roja) Este error indicará que el agua necesita ser drenada de acuerdo a algunos de los métodos: Drenado Manual en Enfriamiento. Modo Deshumidificador y Calentador* Si el área está... - Página 33 GUÍA DE SOLUCIONES La siguiente guía solución de problemas aborda los problemas más comunes. Si los problemas persisten, llame a servicio al cliente. Desconecte el aparato de la corriente eléctrica antes de intentar reparar cualquier problema. PROBLEMA POSIBLE CAUSA SOLUCIÓN No hay electricidad. Revisar la corriente eléctrica.
- Página 34 GUÍA DE SOLUCIONES (CONTINUACIÓN) PROBLEMA POSIBLE CAUSA SOLUCIÓN Una puerta o ventana Cerrar cualquier puerta o ventana que se encuentre está abierta. abierta. El filtro de polvo Conectar la manguera de polvo. está sucio. La manguera de Reinstalar la manguera de drenado de aire drenado de aire está...
- Página 35 GUÍA DE SOLUCIONES (CONTINUACIÓN) PROBLEMA POSIBLE CAUSA SOLUCIÓN La función de calefacción El calefactor* no está activada aún. El Revise que la función de Incremento el juego de no enciende juego de temperatura temperatura. es muy baja. *Aplica solo para modelos seleccionados con la función Calefacción.
-
Página 36: Guía Para Codigo De Error
GUÍA PARA CODIGO DE ERROR CODIGO DE ERROR CAUSA DE POSIBLE ERROR "E1" Falla del sensor de temperatura interior (circuito abierto o cortocircuito). Falla del sensor de temperatura del evaporador "E3" (circuito abierto o cortocircuito). "P1" Alarma Tanque Lleno. - Página 37 SEGURIDAD LEA Y GUARDE ESTAS INSTRUCCIONES LÉALAS DETENIDAMENTE Y GUÁRDELAS PARA FUTURA REFERENCIA. EN CASO DE EXISTIR ALGUNA DISCREPANCIA O CONFLICTO, EN EL CONTENIDO DE ESTE MATERIAL, E N T R E L A V E R S I Ó N E N I N G L É S Y L A V E R S I Ó N E N CUALQUIER OTRO IDIOMA PREVALECERÁ...
- Página 38 SEGURIDAD (CONTINUACIÓN) • NO operar el aire acondicionado cuando esté mojado. • Las precauciones básicas de seguridad siempre se deben seguir cuando se utilizan aparatos eléctricos. • Este producto ha sido fabricado para uso habitacional y no debe ser utilizado para otros propósitos. •...
- Página 39 SEGURIDAD (CONTINUACIÓN) • El fabricante no se hace responsable de los daños causados a las personas o daños a la propiedad debido a incumplimiento de las instrucciones de mantenimiento y el uso indebido del aparato. • El aparato se instalará de acuerdo con las normas nacionales de cableado.
- Página 40 USO RECOMENDADO Los aires acondicionados portátiles Honeywell son ideales para el enfriamiento de lugares. El compresor, condensador y evaporador están alojados dentro de una unidad compacta. El aire es deshumidificado y enfriado mientras una manguera flexible de drenado de aire envía el calor al exterior.
- Página 41 DESCRIPCIÓN DE PARTES 1) Panel de Control 9) Filtro de Polvo Superior 2) Salida de Aire 10) Tapón de goma de drenaje superior (Modo Deshumidificador) 3) Manija 11) Filtro de Polvo Inferior 4) Ruedas 12) Rejilla Inferior 5) Control Remoto 13) Manguera de drenaje (para continuo drenaje) 6) Conector de la Manguera...
- Página 42 INSTALACIÓN Es importante que las instrucciones de instalación se siguen para la correcta instalación de este aire acondicionado portátil. Por favor llamar al Centro de Atención a Clientes si usted tiene cualquier dificultad o duda con respecto a estos procedimientos de instalación. Kit de Instalación: 1.
- Página 43 INSTALACIÓN (CONTINUACIÓN) Nota: Después de ajustar el Adaptador de Soporte de Ventana al tamaño de su ventana removerlo de la misma y seguir las siguientes instrucciones. 3. Conecte la manguera de plástico al conector de manguera en la parte posterior de la unidad. Deslícelo hacia abajo hasta que quede fijo en su lugar.
- Página 44 INSTALACIÓN (CONTINUACIÓN) IMPORTANTE: No remplazar o alargar la manguera de plástico, esto podría causar mal funcionamiento del equipo. 50 cm / 20" NO RECOMENDADO RECOMENDADO ADVERTENCIA: Cualquier garantía que se incluya con este producto será anulada si una manguera de extensión se añade al kit de instalación suministrado originalmente o si la instalación se realiza de manera diferente a las instrucciones del fabricante, sin la debida consulta.
- Página 45 USO Y OPERACIÓN PANEL DE CONTROL HIGH COOL POWER TIMER TIMER SLEEP WATER SLEEP HEAT FULL 1) Control del Temporizador / Modo Nocturno 4) Control de Modo 2) Control de Velocidad 5) Control de Energía 3) Ajuste de Temperatura / Temporizador 6) Luces Indicadoras BOTONES DE FUNCIONES CONTROL DE ENERGÍA El control de encendido...
- Página 46 USO Y OPERACIÓN (CONTINUACIÓN) BOTONES DE FUNCIONES (CONTINUACIÓN) • Modo Calefacción* (HEAT) Esta unidad usa tecnología Bomba-Calor la cual retorna el ciclo de enfriamiento del aire acondicionado, transfiriendo calor de fuera en la habitación - esto es mas eficiente que los calentadores eléctricos tradicionales que generan calor en lugar de transferir el calor a la habitación.
- Página 47 USO Y OPERACIÓN (CONTINUACIÓN) BOTONES DE FUNCIONES (CONTINUACIÓN) CONTROL DE VELOCIDAD 3 configuraciones: Alta, Media y Baja. AJUSTE DE TEMPORIZADOR El tiempo puede ser ajustado entre 1 - 24 horas. APAGADO AUTOMÁTICO: Mientras la unidad esté funcionando, presionar el botón y el display parpadeará. Mientras el display esté parpadeando, presionar el botón + o - para seleccionar el número de horas que deseé. La unidad se apagará...
- Página 48 USO Y OPERACIÓN (CONTINUACIÓN) CONTROL REMOTO Las funciones trabajan igual que los controles de los acondicionadores de aire portátil. Todas las funciones de las teclas se puede acceder desde el control remoto. Control de Encendido Encendido / Apagado Ajuste de Temperatura / Temporizador •...
- Página 49 LIMPIEZA Y MANTENIMIENTO Mantenimiento de la Unidad: Apague la unidad andes de desconectarla de la toma de corriente eléctrica. Limpie con un lienzo suave y seco. Mantenimiento del Filtro de Aire: Es necesario limpiar el filtro de aire después de 2 semanas de uso. Hágalo de la siguiente manera: Apague la unidad y desconecte desde la toma de corriente.
- Página 50 DRENADO DE AGUA Cuando la unidad tiene un exceso de agua de condensación dentro de la unidad, el equipo dejará de funcionar y mostrara una luz de advertencia. ( el boton de encendido parpadeará con una luz roja) Este error indicará que el agua necesita ser drenada de acuerdo a algunos de los métodos: Drenado Manual en Enfriamiento. Modo Deshumidificador y Calentador* Si el área está...
- Página 51 GUÍA DE SOLUCIONES La siguiente guía solución de problemas aborda los problemas más comunes. Si los problemas persisten, llame a servicio al cliente. Desconecte el aparato de la corriente eléctrica antes de intentar reparar cualquier problema. PROBLEMA POSIBLE CAUSA SOLUCIÓN No hay electricidad. Revisar la corriente eléctrica.
- Página 52 GUÍA DE SOLUCIONES (CONTINUACIÓN) PROBLEMA POSIBLE CAUSA SOLUCIÓN Una puerta o ventana Cerrar cualquier puerta o ventana que se encuentre está abierta. abierta. El filtro de polvo Conectar la manguera de polvo. está sucio. La manguera de Reinstalar la manguera de drenado de aire drenado de aire está...
- Página 53 GUÍA DE SOLUCIONES (CONTINUACIÓN) PROBLEMA POSIBLE CAUSA SOLUCIÓN La función de calefacción El calefactor* no está activada aún. El Revise que la función de Incremento el juego de no enciende juego de temperatura temperatura. es muy baja. *Aplica solo para modelos seleccionados con la función Calefacción.
- Página 54 GUÍA PARA CODIGO DE ERROR CODIGO DE ERROR CAUSA DE POSIBLE ERROR "E1" Falla del sensor de temperatura interior (circuito abierto o cortocircuito). Falla del sensor de temperatura del evaporador "E3" (circuito abierto o cortocircuito). "P1" Alarma Tanque Lleno.
- Página 55 Hecho en China © 2017 JMATEK Limited. Todos los derechos reservados. La marca Honeywell es usada bajo licencia de Honeywell International Inc. Honeywell International Inc. no representa ni garantiza este producto. Este producto es fabricado por Airtek Int'l Corp. Ltd.