Publicidad
Idiomas disponibles
Idiomas disponibles
Publicidad
Tabla de contenido

Manuales relacionados para Mainstays 9448WWWM


Resumen de contenidos para Mainstays 9448WWWM
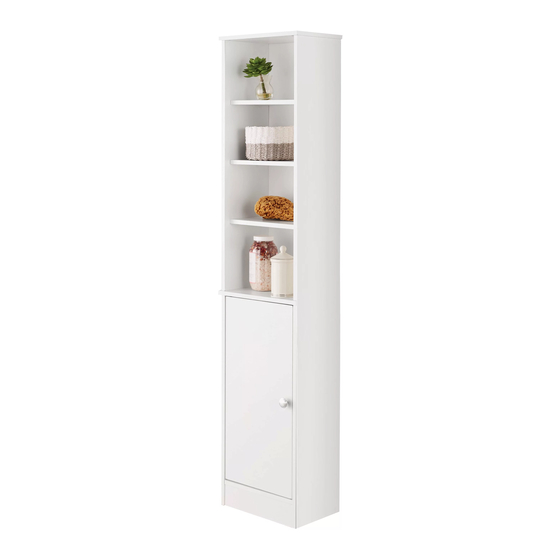
- Página 1 Assembly Instructions Model 9448WWWM (White) For Spanish and French instructions, start on page 15. Para instrucciones en español y francés, comience en la página 15. Pour les instructions espagnoles et françaises, commencez à la page 15. 1-800-892-3986 IS8444 Pg 1 of 28...
-
Página 2: Before You Begin
Before You Begin: Thank you for purchasing this product. Please identify all parts and hardware pieces before you begin. When laying out parts, place them on a soft surface to prevent scratching. If any pieces are missing, call our Toll Free Number 1-800-892-3986 between 8:00AM-5:00PM EST Monday through Friday. -
Página 3: List Of Parts
List of Parts Top and Middle Shelf Trim Piece Top Side Panel Adjustable Shelf Bottom Side Panel (1 right and 1 left) Door Bottom Shelf Back Panel 1-800-892-3986 IS8444 Pg 3 of 28... - Página 4 List of Hardware Allen Wrench for use with Large Screws (H2) x 24 Large Screw x 40 Nail Cambolt Plastic Snap Cam Hinge Bushing Hinge Hinge Screw Magnet Magnet Screw H 10 Knob H 11 Knob Screw H 12 1-800-892-3986 IS8444 Pg 4 of 28...
- Página 5 List of Hardware - continued Magnet Strike H 13 Magnet Strike Screw H 14 Dowel H 15 Sheet of 6 stickers H 16 H 17 Screw Cap Shelf Clip x 12 H 18 Wall Mount Kit Anti-tip Screw Washer Nylon Strap 1-800-892-3986 IS8444 Pg 5 of 28...
- Página 6 Step 1 - Attaching the Top Shelf. finished edge Step 2 - Installing the Cambolts and Dowels. • NOTE: DO NOT OVERTIGHTEN CAMBOLTS (H4)! finished edge x 12 H 15 H 15 H 15 H 15 1-800-892-3986 IS8444 Pg 6 of 28...
- Página 7 Step 3 - Attaching the Middle Shelf. finished edge Step 4 - Attaching the Bottom Left Side Panel. H 15 finished edge NOTE: ALL holes on bottom shelf (D) face UP. H 15 1-800-892-3986 IS8444 Pg 7 of 28...
- Página 8 Step 5 - Installing the Magnet. H 10 H 10 finished edge Step 6 - Attaching the Bottom Right Side Panel. finished edge H 15 H 15 1-800-892-3986 IS8444 Pg 8 of 28...
- Página 9 Step 7 - Attaching the Top assembly to the Bottom assembly. • Carefully place the top assembly onto the bottom assembly. NOTE: Be sure to align the cambolts (H4) with the holes in bottom side panels (C). • Insert snap cams (H5) into the holes in the bottom side panels (C). NOTE: If necessary, lightly tap the snap cams with a hammer.
- Página 10 Step 8 - Attaching the Back Panel. • Carefully lay the unit face down on floor with the unfinished edges facing up. • Fasten back panel (E) to back of unit. • Helpful Hint: With the seam side of back panel facing up align the back panel properly, fasten a nail in each of the corners of the back panel first.
- Página 11 Step 9 - Installing the TOP Hinge. H 13 H 14 Incorrect!! Correct!! H 14 H 13 unfinished edge 1-800-892-3986 IS8444 Pg 11 of 28...
- Página 12 Step 10 - Installing the Hinge Bushings. Step 11 - Attaching the Door. • Set the door into the top hinge bushing. • Fit bottom hinge (H7) into the bottom hinge bushing and fasten the bottom hinge (H7) to the door (G). •...
- Página 13 Step 12 - Installing the Adjustable Shelves. H 16 H 18 x 12 H 18 H 18 Apply stickers (H16) to unused holes. 1-800-892-3986 IS8444 Pg 13 of 28...
- Página 14 Step 13 - Mounting the unit to the wall. RECOMMEND WARNING: BEFORE CUTTING OR DRILLING INTO ANY WALL SURFACE, VERIFY THE LOCATION OF ELECTRICAL, PLUMBING AND GAS LINES. CUTTING ANY OF THESE MAY CAUSE SERIOUS INJURY. • It is imperative that the unit be fastened to the wall for safety and stability. •...
- Página 15 Instrucciones de Ensamblado / Instructions de montage Modelo / Modèle 9448WWWM (Blanco / blanc) 1-800-892-3986 IS8444 Pg 15 of 28...
-
Página 16: Antes De Que Empiece
Antes de que empiece: Muchas gracias por comprar este producto. Identifique todas las piezas y las piezas de ferretería antes de comenzar. Al distribuir las piezas, colóquelas sobre una superficie suave para evitar que se rayen. Si faltaran piezas, llame a nuestro número gratuito 1-800-892-3986 entre las 8:00 a.m.- 5:00 p.m., hora del este, de lunes a viernes. - Página 17 Lista de Partes / Liste des pièces Repisa superior y del medio Pieza de terminación Étagère supérieure et du milieu Garniture Panel lateral superior Repisa ajustable Panneau latéral supérieur Étagère amovible Puerta Panel lateral inferior (C-R derecho y C-L izquierdo) Porte Panneau latéral inférieur (C-R droite et C-L gauche) Panel posterior...
- Página 18 Continuación de lista de partes / Liste des pièces, suite Llave Allen hexagonal para ser usada con los tornillos grandes (H2) Clé hexagonale pour les vis longues (H2) Tornillo grands x 24 Vis longue Clavo x 40 Clou Perno para leva Boulon à...
-
Página 19: Kit De Montaje De Pared / Kit De Montage Mural
Lista de piezas de tornillería continuada / Liste des pièces de montage, suite Contrachapa de imán H 13 Gâche d’aimant Tornillos para Contrachapa de imán H 14 Vis pour gâche d’aimant Clavija H 15 Goujon Hoja de 6 adhesivos H 16 Feuille de 6 autocollants Tapa roscada H 17... - Página 20 Paso 1 - Ajustar la repisa superior. Étape 1 – Fixation de l’étagère supérieure. Borde Acabado Bord fini Paso 2 - Instalar las levas de fijación y los tarugos. Étape 2 – Installation des Boulons à came et des Goujons. •...
- Página 21 Paso 3 - Ajustar la repisa del medio. Étape 3 – Fixation de l’étagère du milieu. Borde Acabado Bord fini Paso 4 - Ajustar el panel lateral izquierdo inferior. Étape 4 – Fixation du panneau latéral inférieur gauche. H 15 Borde Acabado Bord fini NOTA: TODOS los orificios en...
- Página 22 Paso 5 - Instalar el imán. Étape 5 – Installation de l'aimant. H 10 H 10 Borde Acabado Bord fini Paso 6 - Ajustar el panel lateral derecho inferior. Étape 6 – Fixation du panneau latéral inférieur droit. Borde Acabado Bord fini H 15 H 15...
- Página 23 Paso 7 - Ajustar el conjunto Superior al conjunto Inferior. Étape 7 – Fixation de l’ensemble supérieur à l’ensemble inférieur • Coloque con cuidado el conjunto superior en el conjunto • Placez délicatement l’ensemble supérieur sur l’ensemble inferior. NOTA: asegúrese de alinear las levas de fijación (H4) inférieur.
- Página 24 Paso 8: sujetar panel posterior. Étape 8 – raccordement du panneau arrière. • Recueste la unidad boca abajo en el piso con los • Posez soigneusement l’appareil face vers le bas sur le sol extremos no terminados hacia arriba. avec les bords non finis vers le haut. •...
- Página 25 Paso 9 - Instalar la bisagra SUPERIOR. Étape 9 – Installation des charnières SUPÉRIEURES. H 13 H 14 ¡¡Correcto!! ¡¡Incorrecto!! Correct ! Incorrect ! H 14 H 13 Borde Sin Acabado Bord non fini 1-800-892-3986 IS8444 Pg 25 of 28...
- Página 26 Paso 10 - Instalar las bisagras con cojinete. Étape 10 – Installation des bagues de charnière. Paso 11: sujetar las puerta. Étape 11 – raccordement des porte. • Fije la puerta en la bisagra superior con cojinete. • Placez la porte dans la bague de charnière supérieure. •...
- Página 27 Paso 12 - Instalar las repisas ajustables. Étape 12 – Installation des étagères ajustables. H 18 x 12 H 16 H 18 H 18 Aplique los adhesivos (H16) a los orificios inutilizados. Collez les autocollants (H16) aux trous non utilisés. 1-800-892-3986 IS8444 Pg 27 of 28...
- Página 28 Paso 13: montaje de la unidad en la pared. Étape 13 – montage de l’unité au mur. RECOMIENDA ADVERTENCIA: AVERTISSEMENT : ANTES DE CORTAR O TALADRAR EN AVANT DE COUPER OU PERCER TOUTE SURFACE RECOMMANDÉ CUALQUIER SUPERFICIE DE PARED, VERIFIQUE MURALE, VÉRIFIEZ L’EMPLACEMENT DES LA UBICACIÓN DE LOS CONDUCTOS CANALISATIONS ÉLECTRIQUES, SANITAIRES ET...