Tabla de contenido
Publicidad
Idiomas disponibles
Idiomas disponibles
Enlaces rápidos
Item #1002 962 459
Model #5240103
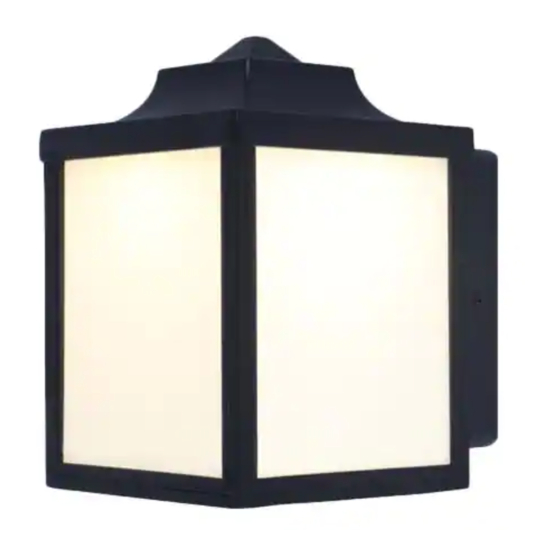
USE AND CARE GUIDE
OUTDOOR LED WALL LANTERN
Questions, problems, missing parts? Before returning to the store,
call Hampton Bay Customer Service
8 a.m. – 7 p.m., EST, Monday – Friday, 9 a.m. – 6 p.m., EST, Saturday
1-855-HD-HAMPTON
HAMPTONBAY.COM
THANK YOU
We appreciate the trust and co dence you have placed in Hampton Bay through the purchase of this wall lantern. We strive to continually create
quality products designed to enhance your home. Visit us online to see our full line of products available for your home improvement needs. Thank
you for choosing Hampton Bay!
Publicidad
Capítulos
Tabla de contenido
Solución de problemas

Manuales relacionados para HAMPTON BAY 5240103


Resumen de contenidos para HAMPTON BAY 5240103
- Página 1 THANK YOU We appreciate the trust and co dence you have placed in Hampton Bay through the purchase of this wall lantern. We strive to continually create quality products designed to enhance your home. Visit us online to see our full line of products available for your home improvement needs. Thank...
-
Página 2: Tabla De Contenido
Table of Contents Safety Information............2 Hardware Included..............3 Warranty................. 2 Package Contents ..............4 Pre-installation ............. 3 Installation ..............5 Planning Installation ............... 3 Care and Maintenance ..........7 Tools Required ................ 3 Troubleshooting............7 Safety Information Please read and understand this entire manual before attempting to operate or install the product. -
Página 3: Pre-Installation
Pre-installation PLANNING INSTALLATION Before you begin to install this lighting fixture, ensure all parts are present. Compare parts with the Hardware Included and Package Contents lists. If any part is missing or damaged, do not attempt to assemble the product. TOOLS REQUIRED Wire Phillips... -
Página 4: Package Contents
Pre-installation (continued) Pre-installation (continued) PACKAGE CONTENTS —A Part Description Quantity LED light fixture... -
Página 5: Installation
Installation Installing the crossbar Connecting the wires and installing the fixture CAUTION: Never rely on the wall switch alone to turn off □ Connect the ground wire from the fixture and the power. bare ground wire from the junction box to the ground screw on the crossbar (CC). - Página 6 Installation (continued) Installation (continued) Sealing the fixture □ Apply silicone caulking adhesive (not included) completely around the perimeter of the fixture (A) where the back meets the mounting surface to prevent water from seeping into the junction box.
-
Página 7: Care And Maintenance
Care and Maintenance CAUTION: Turn OFF all power to circuit at the main circuit breaker or fuse box. DO NOT rely on the wall switch alone to turn off the power. □ This lantern provides years of maintenance-free service. □ Do not touch the bulb i f e housing. - Página 8 Questions, problems, missing parts? Before returning to the store, call Hampton Bay Customer Service 8 a.m. – 7 p.m., EST, Monday – Friday, 9 a.m. – 6 p.m., EST, Saturday 1-855-HD-HAMPTON HAMPTONBAY.COM Retain this manual for future use.
-
Página 9: Farol Led De Pared Para Exteriores
HAMPTONBAY.COM GRACIAS Agradecemos la confianza que ha puesto en Hampton Bay al comprar este farol de pared. Nos esforzamos continuamente para crear productos de calidad diseñados para mejorar su hogar. Visítenos en línea para ver nuestra línea completa de productos disponibles para sus necesidades de mejoramiento del hogar. ¡Gracias por elegir a Hampton Bay! -
Página 10: Información De Seguridad
Índice Información de seguridad ........... 10 Herraje incluido ............11 Garantía ................. 10 Contenido del paquete ..........12 Antes de la instalación ..........11 Instalación ..............13 Planificación de la instalación ........11 Cuidado y mantenimiento ..........15 Herramientas requeridas ........... 11 Resolución de problemas .......... -
Página 11: Antes De La Instalación
Antes de la instalación PLANIFICACIÓN LA INSTALACIÓN Antes de empezar a instalar esta lámpara, asegúrese de que estén todas las piezas. Compare las piezas con el Herraje Incluido y con las listas de Contenido de los Paquetes. Si falta alguna pieza o está dañada, no intente armar el producto. HERRAMIENTAS REQUERIDAS Wire Phillips... -
Página 12: Contenido Del Paquete
Antes de la instalación (continuación) Antes de la instalación (continuación) CONTENIDO DEL PAQUETE —A Pieza Descripción Cantidad Lámpara de luz LED... -
Página 13: Instalación
Instalación Instalación del travesaño Conexión de los cables e instalación de la lámpara PRECAUCIÓN: Nunca confíe solamente en el □ Conecte el cable de tierra de la lámpara y el cable de interruptor de pared para apagar la alimentación. tierra pelado de la caja de conexiones al tornillo de conexión a tierra del travesaño (CC). -
Página 14: Impermeabilización De La Lámpara
Instalación (continuación) Instalación (continuación) Impermeabilización de la lámpara □ Aplique adhesivo de calafateo de silicona (no incluido) completamente alrededor del perímetro de la lámpara (A) donde la parte posterior se encuentra con la superficie de montaje para evitar que el agua se filtre en la caja de conexiones. -
Página 15: Cuidado Y Mantenimiento
Cuidado y mantenimiento PRECAUCIÓN: Apague la alimentación en el disyuntor principal o caja de fusibles. NUNCA confíe solamente en el interruptor de pared para apagar la alimentación. □ Este farol proporciona años de servicio sin mantenimiento. □ No toque la bombilla o abra la cubierta de la lámpara. □... - Página 16 ¿Tiene preguntas o problemas, o le faltan piezas? Antes de devolver a la tienda, llame a Atención al Cliente de Hampton Bay Lunes a viernes de 8:00 a.m. - 7:00 p.m., EST, y los sábados de 9:00 a.m. - 6:00 p.m., EST.