Tabla de contenido
Publicidad
Enlaces rápidos
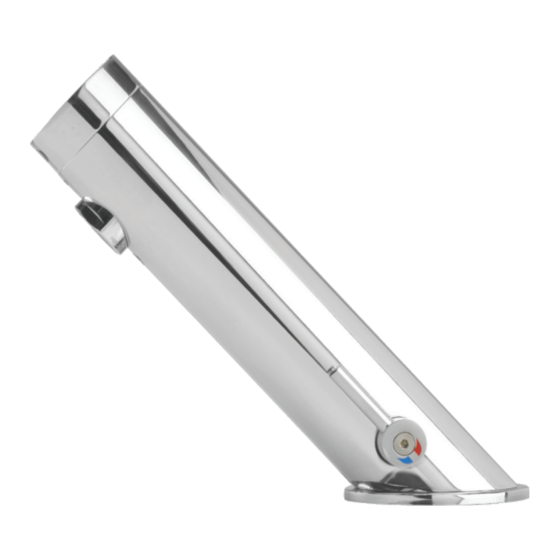
GREEN & GREEN 1000
E L E C T R O N I C L A V A T O R Y F A U C E T
GRIFO ELECTRÓNICO PARA LAVABO
INSTA L L AT I ON A N D M A I N T E N A N CE GU I D E
INSTA L L AT I ON A N D M A I N T E N A N CE GU I D E
M A NUA L DE I N STA L ACI Ó N Y M A NT E N IM I E N TO
M A NUA L DE I N STA L ACI Ó N Y M A NT E N IM I E N TO
Publicidad
Tabla de contenido

Resumen de contenidos para Stern Engineering GREEN Serie
- Página 1 GREEN & GREEN 1000 E L E C T R O N I C L A V A T O R Y F A U C E T GRIFO ELECTRÓNICO PARA LAVABO INSTA L L AT I ON A N D M A I N T E N A N CE GU I D E INSTA L L AT I ON A N D M A I N T E N A N CE GU I D E M A NUA L DE I N STA L ACI Ó...
-
Página 2: Technical Data / Información Técnica
210 mm. Adjustable. design, are the property of Stern Engineering Ltd or other third parties and you are not permitted to use them without the prior written consent of Stern Engineering Ltd or such third party as may own them. -
Página 3: Pack Contents / Contenido Del Embalaje
PACK CONTENTS / CONTENIDO DEL EMBALAJE PACK CONTENTS / CONTENIDO DEL EMBALAJE (EN) Familiarize yourself with the part names and confirm that the parts are included. (EN) Familiarize yourself with the part names and confirm that the parts are included. (ES) Familiarícese con los nombres de las piezas y verifique que están todas incluidas. -
Página 4: Pre-Installation Info / Información Previa A La Instalación
PRE-INSTALLATION INFO / INFORMACIÓN PREVIA A LA INSTALACIÓN INSTALLATION / INSTALACIÓN (EN) (EN) STEP 1 – PREPARATION FOR MOUNTING THE FAUCET Check contents (ES) PASO 1 - PREPARACIÓN PARA EL MONTAJE DEL GRIFO Separate all parts from packaging and check each part with the pack contents section. Pay attention to the different model variations. - Página 5 INSTALLATION / INSTALACIÓN INSTALLATION / INSTALACIÓN (EN) STEP 4 – CONNECTING THE POWER SOURCE (EN) STEP 3 – CONNECTING THE WATER SUPPLY (ES) PASO 4 - CONEXIÓN DE LA FUENTE DE ALIMENTACIÓN (ES) PASO 3 - CONEXIÓN DEL SUMINISTRO DE AGUA (EN) This product includes a self adjusting sensor.
- Página 6 INSTALLATION / INSTALACIÓN GREEN 1000 TECHNICIAN’S MIXER / GREEN 1000 TECHNICIAN’S MIXER (EN) If your model is Green 1000 with technician’s mixer, this model allows removing the mixing handle in order to STEP 4 – CONNECTING THE POWER SOURCE allow the maintenance staff to adjust the water temperature without giving the same possibility to the end user. PASO 4 - CONEXIÓN DE LA FUENTE DE ALIMENTACIÓN (ES) Si su modelo es Green 1000 with technician’s mixer, este modelo permite retirar la palanca mezcladora para permitir al personal de mantenimiento ajustar la temperatura del agua sin dar esta opción al usuario.
-
Página 7: Settings Adjustment / Configuración De Parámetros
SETTINGS ADJUSTMENT / CONFIGURACIÓN DE PARÁMETROS SETTINGS ADJUSTMENT / CONFIGURACIÓN DE PARÁMETROS (EN) DETECTION RANGE: This faucet was supplied with a self adjusting sensor. The ideal detection range for the specific location will be set automatically. Only if necessary, use the remote control to adjust the sensor range as follows: (EN) DETECTION RANGE (EN) DELAY OUT TIME Press the RANGE button. -
Página 8: Battery Replacement / Sustitución De La Pila
SETTINGS ADJUSTMENT / CONFIGURACIÓN DE PARÁMETROS BATTERY REPLACEMENT / SUSTITUCIÓN DE LA PILA GREEN AB1953 (EN) DELAY OUT TIME: This button allows modifying the water flow time after the user removes his hands from the faucet. A delay out time close to 0 will save more water. An increased delay out time will make the user experience (EN) When the battery weakens, the LED indicator will blink at a constant rate. -
Página 9: Maintenance / Mantenimiento
BATTERY REPLACEMENT / SUSTITUCIÓN DE LA PILA GREEN 1000 AB1953 MAINTENANCE / MANTENIMIENTO (EN) When the battery weakens, the LED indicator will blink at a constant rate when the user’s hands are within the sensor range. The battery must be replaced within two weeks. (EN) (ES) Cuando la pila se esté... -
Página 10: Spare Parts List
SPARE PARTS LIST LISTA DE REPUESTOS 10-pack Solenoid Valve Kit 07232000 Kit de válvula solenoide - Paquete de 10 07232000 Seals and Screws Kit for Green/Green 1000 07210082 Kit de juntas y tornillos para Green/Green 1000 07210082 Seals and Screws Kit for Green B/E/1000B/1000E 07210083 Kit de juntas y tornillos para Green B/E/1000B/1000E 07210083... -
Página 11: Troubleshooting
TROUBLESHOOTING SOLUCIÓN DE PROBLEMAS PROBLEM INDICATOR CAUSE SOLUTION PROBLEMA INDICADOR CAUSA SOLUCIÓN No water 1. Sensor flashes No sale agua 1. El sensor parpadea coming out continuously del grifo contiuamente of the faucet: when user’s cuando las manos Pila agotada Sustituya la pila Low battery. -
Página 12: Garantía Limitada
Si con el uso normal se detecta un defecto, Y. Stern Engineering Ltd., a su propio criterio, If a defect is found in normal use, Y. Stern Engineering Ltd. will, at its discretion, repair, reparará... - Página 13 777 Passaic Avenue, Clifton NJ,07012, USA Tel: +1-973 773 8011 | Fax: +1-973-779-8768 Toll Free: 1-800-4364410 info@sternfaucets.com | tech@sternfaucets.com 06.20 01500499-A...
