
Manuales relacionados para Axor Citterio Select 39862001


Resumen de contenidos para Axor Citterio Select 39862001
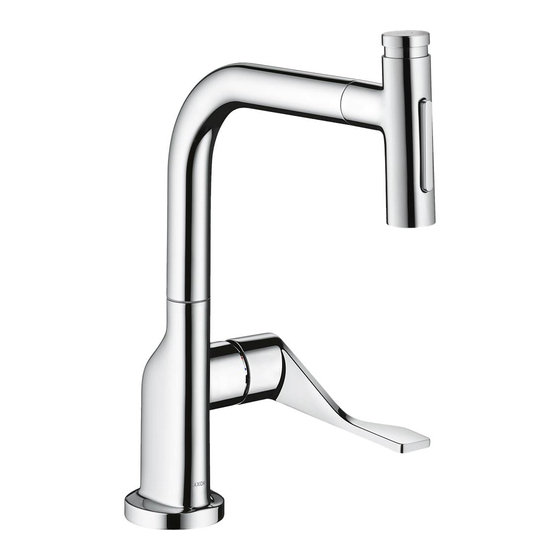
- Página 1 ⁄ Assembly instructions ⁄ Instructions for use ⁄ Instructions de montage ⁄ Mode d'emploi ⁄ Instrucciones de montaje ⁄ Modo de empleo A XOR Citterio Select 39862001 ⁄ 39862801 39863001 ⁄ 39863801 I N S T A L L A T I O N...
-
Página 2: Datos Tecnicos
E N G L I S H F R A N Ç A I S E S P A Ñ O L TEC HN I C A L I NF O RM ATI O N DON N É ES TEC H NIQ UES DATOS TECNICOS Water pressure Pression d’eau... - Página 3 A XOR Citterio Select 9¼" (234 mm) 39862001 ⁄ 39862801 8⅝" (219 mm) Ø 1⅛" (28 mm) 5¼" (133 mm) 3⅞" (99 mm) 4"(103 mm) Ø 2½" 5½"(141mm) (64 mm) 6¼" (158 mm) 1⅜" (34 mm) Ø1⅜" (34 mm) ⅜" (10 mm) G3/8 ⅝" (15 mm) G3/8 ⅞"...
- Página 4 A XOR Citterio Select 9¼" (234 mm) 39863001 ⁄ 39863801 8⅝" (219 mm) Ø 1⅛" (28 mm) 5¼" (133 mm) 4" (103 mm) 3⅞" (99 mm) 5½" (141 mm) 2½" (64 mm) 1⅜" (34 mm) G ⅜ ⅜ TOO LS R EQU I RE D / OU T I L E S U TIL E S / HERR A MIEN TA S Ú...
- Página 5 I NSTALL ATI ON S UGG EST IO N S / S U G G ESTI O N S D 'I N STA L L AT I ON / SU GEREN C I AS PARA L A IN STAL ACI Ó N A XOR Citterio Select 39862001 ⁄ 39862801 m m...
- Página 6 I N S T A L L A T I O N / I N S T A L L A T I O N / I N S T A L A C I Ó N 3 9 8 6 2 X X X EN G LISH F RA N Ç...
- Página 7 ADJUST THE SPOUT ROTATION / AJUSTEZ L A ROTATION DU BEC / AJUSTE L A ROTACIÓN DEL SURTIDOR 150° 75° 75° 24 x 15° 105° 45° 105° 45° 110° 55° 55° 24 x 15° 110° 85° 25° 85° 25°...
- Página 8 EN G LISH F RA N Ç A IS E SPAÑOL Lightly lubricate the o-rings. Lubrifiez légèrement les joints Lubrique levemente las juntas toriques. toroidales. Align the hole in the rear of the spout with the detent pin on the Alignez le trou à l’arrière du bec Alinee el orificio en la parte trasera faucet body. avec la goupille d’arrêt sur le corps del surtidor con el pasador de tope du robinet. en el cuerpo del grifo. Press the spout downward firmly. Appuyez fermement sur le bec vers Presione firmemente el surtidor le bas. hacia abajo. Remove the squeezing connection Retirez le raccord à bague sertie Retire la conexión a presión del 22 m m 9 6 5 07 0 0 0 from the hose connector assembly.
- Página 9 EN GLISH F R A N Ç A IS ES PAÑ OL Feed the hose and the weight into Passez le tuyau et le contrepoids Pase la manguera y el peso hacia the hose box. dans le boîtier de tuyau. dentro de la caja de la manguera. Pull upwards on the handspray hose Tirez le tuyau de la douchette vers Tire hacia arriba de la manguera until the connector is against the top le haut jusqu’à ce que le connect- del rociador de mano hasta que of the hose box. eur soit contre la partie supérieure el conector esté contra la parte du boîtier de tuyau. superior de la caja de la manguera. Install the stopper. Installez le butoir. Instale el tapón. Snap the two halves of the guide around the handspray hose. Enclenchez les deux moitiés de la Acople a presión las dos mitades pièce de guidage autour du tuyau de la guía alrededor de la mangu- de la douchette. era del rociador de mano. Seat the guide in the hose box. The Logez la pièce de guidage dans le Asiente la guía en la caja de la...
- Página 10 EN G LISH F RA N Ç A IS E SPAÑOL Move the clips to the desired Déplacez les pièces de fixation aux Mueva los elementos de fijación a positions. positions souhaitées. las posiciones deseadas. Lock the clips into position on the Verrouillez les pièces de fixation Bloquee los elementos de fijación hose box: Rotate the fastener over en position sur le boîtier de tuyau : en su posición en la caja de la the nut. Tighten the nut by using the Tournez le clip sur l’écrou. Serrez manguera: Rote las presillas sobre fastener to turn the nut clockwise. l’écrou en utilisant le clip pour tourn- la tuerca. Apriete la tuerca, usando er l’écrou dans le sens des aiguilles la presilla para girar la tuerca en d’une montre. sentido horario. If there is insufficient space under Placez le boîtier de tuyau sous l’évi- Coloque la caja de la manguera the sink, the hose box can be er. Certaines installations suggérées debajo del fregadero. A continu- tilted a maximum of 20°. See sont présentées ci-dessous.
- Página 11 EN GLISH F R A N Ç A IS ES PAÑ OL Remove the handspray clip. Retirez l’étrier. Retire la presilla. Remove the handspray from the Retirez la douchette. Retire el rociador de mano. hose. Flush the hot and cold supplies for Rincez les conduites d’alimentation Lave los suministros de agua cali- at least two minutes. d’eau chaude et d’eau froide pen- ente y agua fría durante al menos dant au moins deux minutes. dos minutos. > 2 min Install the handspray. Installez la douchette. Instale el rociador de mano. Install the clip. Installez l’étrier. Instale la presilla.
- Página 12 OPTION AL I NSTAL L AT I O N / E N O P T IO N / O PC IO N A L 4 " x . ( 1 0 43333000 x . 1 ( 3 0 ⅛...
- Página 13 I NSTALL ATI ON / INSTA LL AT IO N / I N STA L ACI Ó N 3 9 86 3X X X EN GLISH F R A N Ç A IS ES PAÑ OL EN GLISH F R A N Ç...
- Página 14 A DJU ST TH E SPOUT ROTAT IO N / AJ U ST EZ L A ROTATI O N D U BEC / AJUSTE L A ROTACI ÓN D EL SURTI DO R 150° 75° 75° 24 x15 ° 105°...
- Página 15 EN GLISH F R A N Ç A IS ES PAÑ OL Lightly lubricate the o-rings. Lubrifiez légèrement les joints Presione firmemente el surtidor toriques. hacia abajo. Align the hole in the rear of the spout with the detent pin on the Alignez le trou à l’arrière du bec Alinee el orificio en la parte trasera faucet body. avec la goupille d’arrêt sur le corps del surtidor con el pasador de tope du robinet. en el cuerpo del grifo. Press the spout downward firmly. Appuyez fermement sur le bec vers Presione firmemente el surtidor le bas. hacia abajo. Remove the protective cap from the Retirez le capuchon de protection Retire la tapa protectora de la handspray hose. du tuyau de la douchette. manguera del rociador de mano. Connect the handspray hose to the Raccordez le tuyau de la douchette Conecte la manguera del rociador connection hose using the squeez- au tuyau de raccordement à l’aide de mano con la manguera de...
- Página 16 EN G LISH F RA N Ç A IS E SPAÑOL Remove the clip. Retirez l’étrier. Retire la presilla. Remove the handspray. Retirez la douchette. Retire el rociador de mano. Flush the hot and cold supplies for Rincez les conduites d’alimentation Lave los suministros de agua cali- at least two minutes. d’eau chaude et d’eau froide pen- ente y agua fría durante al menos dant au moins deux minutes. dos minutos. > 2 min Install the handspray. Installez la douchette. Instale el rociador de mano. Instale la presilla. Install the clip. Installez l’étrier.
- Página 17 JU STIFY THE HAND L E / RÉ GLEZ L A P O IG N É E / AJ U ST E L A M A N I J A 14 0 °...
- Página 18 REP L ACE M E NT PARTS / P IÈC ES D ÉTAC HÉE S / R E PU E STO S A XOR Citterio Select 92566XXX 39862001 ⁄ 39862801 98201000 (14x1.5) 92567000 98463000 92583XXX 98112000 93410XX1 (8x2) 96456000 39861XXX 96029000...
- Página 19 A XOR Citterio Select 39863001 ⁄ 39863801 92566XXX 93410XX1 98201000 (14x1.5) 96456000 98112000 (8x2) 92567000 92583XXX 98463000 96029000 (110°⁄150°) (M6x10) 98211000 (21x2.5) 96338000 98193000 (32x2) 98365000 95008000 93342XXX 39861XXX 98603XXX 95910000 96461000 92730000 98422000 (7x1.5) 92568000 95372000 92634000 96099000 (900 mm) (40x3) 92500000 92569000 97548000 97523000 95049000 96456000...
- Página 20 USER INST RUC TI ON S / IN ST RU C T ION S D E SERV I CE / M A N EJ O paused resumed ouvert mise en pause a repris fermé...
-
Página 21: Troubleshooting
TROUB LE SH OOTI N G Problem Possible Cause Solution Handle stiff – Cartridge dirty or worn – Replace cartridge Mixer dripping – Cartridge dirty or worn – Replace cartridge – Improper Select valve installed Low flow with Select valve after valve replacement – Replace Select valve (#98463000) Water escaping in area of swivel spout – O-ring dirty or worn – Replace O-ring Water escaping at the threaded base – connection hoses not completely screwed into basic – Tighten connection hoses by hand body – O-ring at the connection hose dirty or worn. –... -
Página 22: Recomendación De Limpieza Para Los Productos De Hansgrohe
CLEANING RECOMMENDATION FOR HANSGROHE PRODUCTS ⁄ Modern bathroom faucets, kitchen faucets and shower products are made from different Do not spray cleaners directly onto the product as drops could enter openings and materials to comply with the needs of the market with regard to design and functionality. To gaps and cause damage. When using spray cleaners, spray the cleaner onto a soft avoid damage to the product, it is necessary to take proper care of it. cloth or sponge. ⁄ Always rinse your Hansgrohe product thoroughly with clear water and polish dry with For best results: a soft cloth after cleaning. ⁄ Prevent the buildup of mineral scale and /or soap residue by cleaning your Hansgrohe product(s) when needed. Important ⁄ Select a cleaning agent specifically intended for the type of product. ⁄ Residue from soaps and shampoos can cause damage. Rinse the product with clean ⁄ Do not use these types of cleaners as they will cause damage to your Hansgrohe water after each use. product: ⁄ Residue from basin/tub/tile cleaner can cause damage to faucets and fittings. – Any cleaning agent containing hydrochloric acid, formic acid, lye, or acetic acid. Immediately rinse any overspray from the Hansgrohe product. ⁄... - Página 24 C. Labor and other expenses for disconnection, deinstallation, or return of the that are purchased by a consumer in the United States or Canada after March 1, product for warranty service (including but not limited to proper packaging 1996, and installed in either the United States or in Canada. and shipping costs), or for installation or reinstallation of the product. D. Accessories, connected materials and products, or related products not WHO IS COVERED BY THE WARRANTY manufactured by Hansgrohe. E. Any Hansgrohe or Axor product sold for display purposes. This limited warranty extends to the original purchaser only. This warranty is non- transferable. Hansgrohe neither assumes nor authorizes any person to create for HANSGROHE SHALL NOT BE LIABLE TO PURCHASER OR ANY OTHER it any other obligation or liability in connection with this product. PERSON FOR ANY INCIDENTAL, SPECIAL OR CONSEQUENTIAL DAMAGES, ARISING OUT OF BREACH OF THIS LIMITED WARRANTY. LENGTH OF WARRANTY Some provinces and some states do not allow the exclusion or limitation of...