Tabla de contenido
Publicidad
Idiomas disponibles
Idiomas disponibles
Enlaces rápidos
Publicidad
Tabla de contenido

Manuales relacionados para DHP Dakota Upholstered Bed 4027119


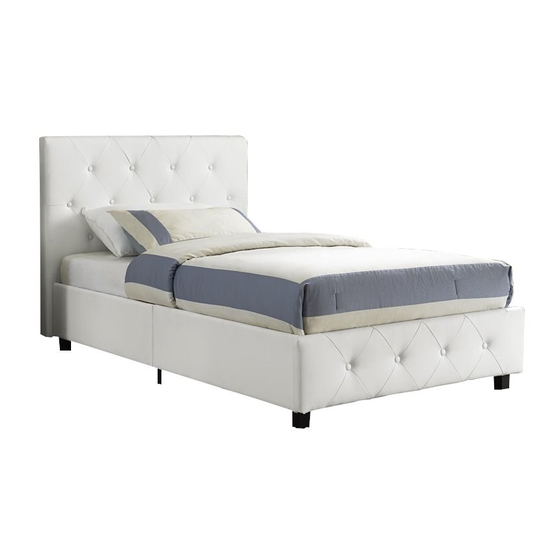
Resumen de contenidos para DHP Dakota Upholstered Bed 4027119
-
Página 2: Warranty Information
Warranty Information Read Before Beginning Assembly DHP warrants this product to be free from defects in material and workmanship and agrees to remedy any such defect. This warranty covers one year from the date of original purchase. This is solely limited to the repair or replacement of defective 2 (however it is always better parts and assembly labor is not included. - Página 3 4027119...
- Página 4 Parts Replacement Parts, vist www.dorelfurniture.com/eng/support-home All in 1 big box! Before you throw the package, please use the Check Box to identify the parts and ensure that you have all the parts needed for the assembly. HEADBOARD BACK PANEL FOOTBOARD SIDE PANEL 1 SIDE PANEL 2 T932330...
- Página 5 Parts Replacement Parts, vist www.dorelfurniture.com/eng/support-home All in 1 big box! Before you throw the package, please use the Check Box to identify the parts and ensure that you have all the parts needed for the assembly. LEFT BRACKET RIGHT BRACKET SINGLE SLAT CAP DOUBLE SLAT CAP T393080...
-
Página 6: Hardware Pack
Hardware Pack Hardware Pack #: T4028319-01 5/16" 1/4" X 3/4" X 44 1/4" X 1 3/8" 1/4" X 1 9/16" X 28 1/4" X 1 3/4" 5/16" X 2 1/4" 1/4" Hardware Note: Please do not completely tighten all the hardware, until the entire assembly is complete, unless indicated otherwise in the step-by-step instructions. - Página 7 Step 1 Join (C) & (D) using (F) & (H) with BOLTS 3, as shown below. NOTE: Holes on part (F) should be facing upward. X 16 4027119...
- Página 8 Step 2 Attach (G) to subassembly (C,D) from STEP ONE using BOLTS 3. X 12 4027119...
- Página 9 Step 3 Attach (S1) & (T1) to subassembly from previous step using BOLT 1, as shown below. X 12 4027119...
- Página 10 Step 4 Stick (A1) to the back of (A) with Velcro, as shown below. 4027119...
- Página 11 Step 5 Pre-asssembly BOLT 1 to (A) & (B), then hang (S1) & (T1) onto BOLT 1. Please do not completely tighten Bolts (1) until Step 10 is complete. 4027119...
- Página 12 Step 6 Push NUT 6 into the hole of the Leg Z, then attach (Z) to (N) with BOLT 5 and NUT 6. 4027119...
- Página 13 Step 7 7.1 Attach (N X4) to (A)&(B)&(C)&(D) with BOLT 1; 7.2 Attach (L X2) to (H) with BOLT 2 . 4027119...
- Página 14 Step 8 Insert (I) & (J) into (M) and secure using BOLT 1 as shown below. 4027119...
- Página 15 Step 9 Attach subassembly (I,J) to (A) & (B) with B0LT 1 as shown below. 4027119...
- Página 16 Step 10 Attach (K) to (F) & (J) with BOLTS 4 and NUTS 9, as shown. Completely tighten all bolts in this step. 4027119...
- Página 17 Step 11 11.1 Insert (O) into (X); 11.2 Then press (X) into (F/G); 11.3 Repeat the same procedure for the opposite side as shown. 11.3 4027119...
- Página 18 Step 12 Insert both (O) into (Y), then press (Y) into (I/J) as shown. 4027119...
-
Página 19: Helpful Hints
T393100 Do not allow horseplay on the bed and prohibit X 16 jumping on the bed. D o not use substitute parts. Contact DHP for END CAP 02 replacement parts. T393120 T he use of water or sleep flotation mattresses is END CAP 03 prohibited. - Página 20 1-800-267-1739 / Lunes - Viernes / 9:00 am - 5:00 pm (hora del este) DHP / 410E, First Street South, Wright City MO 63390, USA Nota: El producto debe ser registrado dentro del mismo cuatrimestre en que se realiza la compra. Visite www.dhpfurniture.com/eng/register para mas detalles acerca de este concurso.
-
Página 21: Lea Antes De Comenzar A Ensamblar
Lea antes de comenzar a ensamblar Partes Piezas de reemplazo, visite www.dhpfurniture.com/spa/support-home utilizado su producto. Todo se incluye en 1 caja grande! (sin embargo es recomendable contar con ayuda adicional). Tiempo estimado de ensamble es 1.5 horas. identificar sus partes y garantizar que cuenta con todas las piezas necesaria etiquetadas o selladas en los bordes. -
Página 22: Instrucciones
Paso 7 (N) en (A) (B) (C) y (D) (L) en (H) con le No utilice piezas sustitutas. entre en contacto con dhp para las piezas de reemplazo. Paso 8 Una la parte "I" y "J" a la parte "M" con perno (1) , como se muestra a Guarde estas instrucciones para referencia futura. - Página 23 DHP. cs@dhpfurniture.com 1-800-267-1739 / Lundi - Vendredi / 9:00 am - 5:00 pm (Heure de l'Est) DHP / 410E, First Street South, Wright City MO 63390, USA Remarque: Attention: Consumer Service. concours.
- Página 24 Avant de commencer l'assemblage www.dhpfurniture/fre/support-home 2 (cependant il vaut de 2 heures. l'assmeblage. (A)Cabecera: T932330 (B)Pie de la Cama:T932340 :T932310 lors de l'assemblage. : T932320 (M) Pieds de support centrale: T926660 : T926670 T926680 commercial. : T926690 (I) Entretoise centrale 1: T926700 (J) Entretoise centrale 2: T926710 enfants.
-
Página 25: Appuyez Sur (X) En (F, G)
Instructions 11.1 Diapositive (X) sur (O); 11.2 Appuyez sur (X) en (F, G) Fixer la partie "C" et "D" F" y "H" avec boulons (3), ci-dessous. Diapositive (O) sur (Y); Appuyez sur (Y) en (I/J) . Fixer la partie "G y "D"...