Tabla de contenido
Publicidad
Idiomas disponibles
Idiomas disponibles
Enlaces rápidos
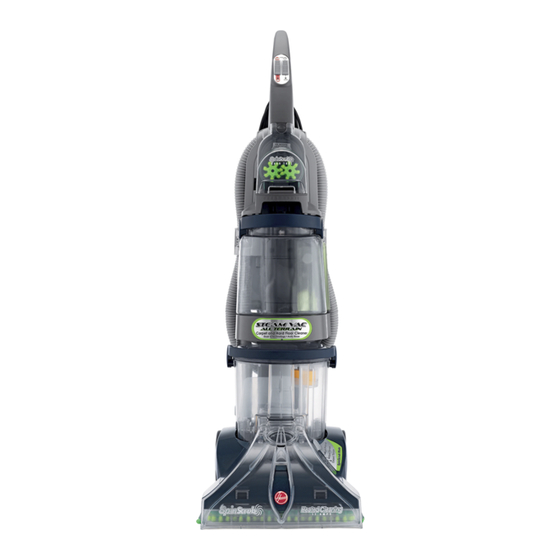
All Terrain Carpet and
Hard Floor Cleaner
with Auto Rinse
Feature
The Easy to Use Carpet
and Hard Floor Cleaner
SteamVac™ All Terrain™ Cleaner cleans carpet fibers and hard floors
by applying, scrubbing and removing hot tap water and cleaning solution.
www.hoover.com
ENGLISH
ESPAÑOL
TM
™
pp. 1-17
pág. 18-28
®
Publicidad
Capítulos
Tabla de contenido

Manuales relacionados para Hoover SteamVac All Terrain


Resumen de contenidos para Hoover SteamVac All Terrain
- Página 1 All Terrain Carpet and Hard Floor Cleaner with Auto Rinse ™ Feature The Easy to Use Carpet and Hard Floor Cleaner SteamVac™ All Terrain™ Cleaner cleans carpet fibers and hard floors by applying, scrubbing and removing hot tap water and cleaning solution. www.hoover.com...
-
Página 2: Important Safeguards
Do not immerse left outdoors, or dropped into water, product. take it to a Hoover Sales and Service Center or Authorized Hoover Warranty This appliance must be grounded. If it • Connect to a properly grounded Service Dealer. -
Página 3: Tabla De Contenido
If you need any assistance: Parts needed for assembly..3 Visit our website at www.hoover.com. Click on the “Service” button to find Assembling cleaner ... 3-6 the service outlet nearest you OR Cleaner description . - Página 4 The assembled cleaner will look like this drawing. Attach upper handle NOTE: If the cord protector (A) on back of handle should become dislodged Remove clean water tank (upper tank) during unpacking, make sure it is repo- from cleaner. sitioned properly before continuing with assembly of your cleaner.
- Página 5 1-10 1-11 Rotate top of caddy toward cleaner Storing hose and Identify the hose parts before storing handle. Slide caddy down so notch (G) hose. tools on caddy rests in hook (H) on cleaner. I. Nozzle connector end Press hose, a few inches from nozzle J.
- Página 6 1-19 1-18 How to reattach tool Pull tool down and outward. To reposition the tool, reverse this proce- cover dure. The tool cover is designed with a break- away feature which allows it to snap free if it is pushed open too far. To reattach, align hinges of cover with holes on sides of tool storage area.
-
Página 7: How To Use
2. How to use The assembled cleaner will look like the drawing. Cleaner description 1. Hand grip 2. Solution trigger: press to release cleaning solution 3. ON/OFF switch 4. Rinse Setting switch 5. SpinScrub™ hand tool 6. Carrying handle 7. Clean water tank handle 8. -
Página 8: Carrying Handle
Slide selector button to the desired set- Do not use without float and float ting before cleaning. retainer in place. If broken or dis- lodged, take to an Authorized Hoover Service Center or Dealer for repair. 2-10 The tanks How to fill... - Página 9 15 minutes. In case of contact with skin, wash with water. If irritation persists, call a physician. Fill container (16 oz.) with HOOVER WARNING: Certain oxygenated-type Carpet/Upholstery Detergent or cleaners, such as OxiClean* and HOOVER Hard Floor Cleaning Solution.
-
Página 10: Recovery Tank
3. How to clean Before you begin cleaning a. Vacuum thoroughly - For carpet, use a HOOVER vacuum cleaner with an agitator for best results. Vacuum uphol- stery with a vacuum cleaner with clean- ing tool attachments. Use a crevice tool to reach into tufts and folds. -
Página 11: After Cleaning
After cleaning a. Allow carpet or upholstery to dry. To help prevent matting and resoiling the carpet, keep children and pets away from surface until it is completely dry. If it is necessary to walk on damp car- pet, place towels or white cloths on the traffic areas. -
Página 12: Carpet Cleaning
Figs. 2-9 to 2-12. with water only, set Rinse Setting switch ble passing through the recovery tank 3. Fill detergent container with HOOVER to RINSE (Fig. 3-8). Repeat steps 8-10. lid. Carpet/Upholstery Detergent according In this setting, rinsing will be done on to instructions for Figs. -
Página 13: Picking Up Spills
Figs. 2-9 to 2-12. stroke. and remove squeegee from nozzle. Rinse it in clear water. 2. Fill detergent container with HOOVER 8. To pick up dirty solution, release trig- Hard Floor Cleaning Solution according ger and slowly move cleaner over area to instructions for Figs. -
Página 14: Using The Tools
3-14 3-15 Using the tools Attach hose Unplug cleaner from electrical outlet. 3-13 Insert short hose end, matching tabs on Plug solution tube firmly into solution hose with same-sized slots in port. Push connection port (B). hose into port and lock in place. Open hose connection port (A). -
Página 15: Cleaning Carpeted Stairs
Figs. 2-9 to 2-12. 11. Lift tool, and position it against riser. Pull tool slowly over carpet without 4. Fill detergent container with HOOVER 9. Pre-spray the carpeted stair by hold- pressing trigger (dry stroke). Carpet/Upholstery Detergent according ing the tool (A) or (B) about one inch to instructions for Figs 2-13 to 2-15. -
Página 16: Maintenance
4. Maintenance Removable brushes Your cleaner is equipped with removable brushes. Follow these directions for changing brush assemblies or for easy cleaning. To remove brushes Disconnect cleaner from electrical Grab brush assembly and pull firmly. To replace brushes outlet. The brushes can be cleaned under run- To prevent possible leaking, remove Align posts (A) on both ends of brush ning water. -
Página 17: If You Have A Problem
• Blown fuse/tripped breaker service outlet locations (U.S. only). • Replace fuse/reset breaker Do not send your cleaner to Hoover in Newton, Iowa for service, this will only Problem: Low solution pick-up result in delay. Possible cause... -
Página 18: Warranty
This warranty does not cover pick up delivery, or house calls; however, if you mail your appliance to a Hoover Sales and Service Center for warranty service, transportation will be paid one way. While this warranty gives you specific legal rights, you may also have other rights which vary from state to state. -
Página 19: Anote Y Guarde
Consejo: Adjunte su recibo de compra a este manual del propietario. de superficie dura Para obtener el servicio de garantía de su producto HOOVER puede requerirse la verificación de la fecha de compra. con función ¡Salvaguardias importantes! AutoRinse™... -
Página 20: Piezas Necesarias Para El Ensamblado
Visite nuestro sitio de Internet adaptador, se lo debe fijar con un la limpiadora. Con la flecha (B) del www.hoover.com. Pulse el botón tornillo de metal. protector del cordón apuntando hacia “Service” para encontrar el centro de NOTA: El Código de electricidad de... -
Página 21: Para Guardar La Manguera Y Los Accesorios
se van a utilizar, para que se pueda 2. Cómo usar la 1-14 retirar y colgar para guardarlo. limpiadora Si no lo desea instalar en la limpiadora Repita en el otro extremo de la por ahora, continúe con la figura 1-10 manguera. -
Página 22: Selector De Modo Spinscrub
Para encender la limpiadora (ON), agua. Hoover o al distribuidor para que lo empuje el interruptor hacia abajo. reparen. Para apagar la limpiadora (OFF), 2-10 empuje el interruptor hacia arriba. -
Página 23: Tanque De Recuperación
15 una aspiradora HOOVER con agitador. minutos. En caso de contacto con la Al llenarse el tanque, el mecanismo de Aspire los tapices con una aspiradora apagado automático funcionará, , la... -
Página 24: Para Limpiar La Boquilla
(por sáquelo. Limpie la malla y ponga el de HOOVER de acuerdo con las ejemplo, plástico) debajo de las marco de nuevo en su lugar. instrucciones para las figuras de 2-12 a alfombras antes de limpiarlas. -
Página 25: Limpieza De Pisos Expuestos
HOOVER de acuerdo parezca más nueva. con las instrucciones para las figuras de 3-10 2-12 a 2-14. -
Página 26: Para Recoger Derrames
HOOVER de acuerdo con las para escaleras y tapicería. Aunque se van a limpiar. instrucciones para las figuras de 2-13 a ninguna solución limpiadora puede... -
Página 27: Limpieza De Tapices
10. Coloque el accesorio contra la parte instrucciones “Después de la limpieza” de HOOVER de acuerdo con las vertical del escalón y presione en la página 23 “Después de usar el instrucciones para las figuras de 2-13 a ligeramente las fibras de la alfombra. -
Página 28: Si Tiene Un Problema
1. Saque el tanque de agua limpia. Solución posible EE.UU.). 2. Gire la tapa de la válvula (A) en No envíe su limpiadora a Hoover en • No está bien enchufada sentido contrario a las agujas del Newton, Iowa para obtener servicio; esto •... -
Página 29: Garantía
Centro de Ventas y de Servicio de Hoover para un servicio de garantía, el transporte se pagará en una sola dirección. Si bien esta garantía le otorga derechos específicos, usted puede tener otros... - Página 30 Name___________________________________________ Street___________________________________________ PAYMENT METHOD: Replacement parts and accessory items may be purchased from your Authorized Hoover Dealer, Leading Retailers, Hoover Sales & Service Centers, on-line at www.hoover.com, or by completing this order form. Check or Money Order made payable to: The Hoover Company Mail orders limited to U.S.
- Página 31 Cheque o giro postal pagadero a: The Hoover Company Las piezas y accesorios de repuesto se pueden comprar a través del concesionario autorizado de Hoover, las prin- cipales tiendas, los Centros de ventas y servicio de Hoover, en Internet en www.hoover.com, o rellenando este for-...
- Página 33 HOOVER y son marcas registradas HOOVER and are registered trademarks ® ® R1 3-06 F7452900 Printed in Mexico 56518-193...