Publicidad
Enlaces rápidos
®
IIIWoods
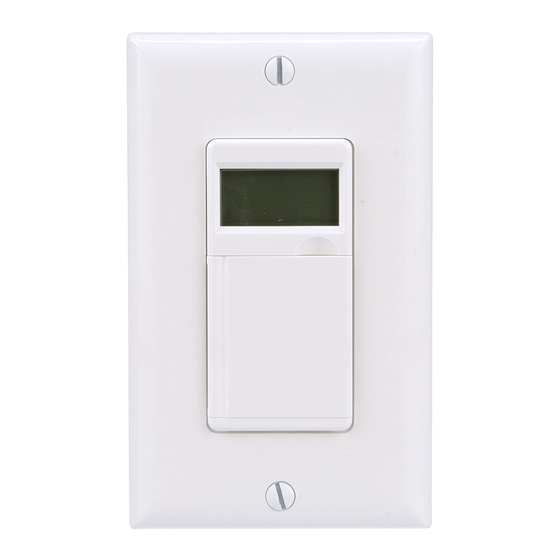
Model 59020 In-Wall Digital Timer
Modeles 59020 de minuterie numerique murale
Temporizador digital de pared, modelos 59020
WARNING: INSTALLATION SHOULD BE MADE BY A
LICENSED ELECTRICIAN
WARNING: TO AVOID FIRE, SHOCK, OR DEATH, TURN OFF POWER AT CIRCUIT
BREAKER AND TEST THAT POWER IS OFF BEFORE WIRING.
Note: This timer is not compatible for 3-way switches. Ground wire must be
connected for unit to operate. Allow 2 mintues for timer to warm up after connection.
Installation:
l.
Turn power OFF at the circuit breaker or remove the fuse.
2.
Remove existing wall plate and switch, if applicable. Please note two black wires
connected to switch.
3.
Strip 3/8" insulation from each wire, which is required for installation.
4. Connect the green wire from the junction box to the green wire from the timer.
5.
Connect the black wire from the timer to the HOT wire (previously connected
to the switch) and connect the red wire from the timer to the second wire
(previously connected to the switch). Note: If not sure which wire is HOT,
connect black wire from timer to one of the black wires, previously
connected, & the red wire from timer to the second black wires (previously
connected to the switch). Secure connections with wire connectors.
6.
Carefully shift all wires to provide room for timer in the junction box.
7.
Secure timer to box with screws included, and install cover plate.
8.
Reconnect your electrical power.
Note: If the timer is not functional, interchange two black wires previously connected to
switch (see #5 above). IMPORTANT: Be sure to again turn OFF the power before wiring.
Power-up Sequence: Open the timer door. Slide the switch to ON. Press the R button
using a tooth pick or pen tip. The display will go blank and restore after 30 second,
showing 12:00 AM.
To Set the Current Time: Press the PROG button. Then press the DAY, HOUR and
MINUTE button as many times as necessary to advance the display to the correct day
and time. Press the MAN button to preserve the clock setting.
To Program the Timer:
l. Press the PROG button twice to display the first ON/OFF setting "l ON --:--".
2. Press the MINUTE and HOUR buttons as necessary to set the ON time you want. To
change from AM to PM toggle 12 times.
3. Press the DAY button as necessary to choose the day or group of days you want for
the time setting.
4. Press the PROG button again to display the second ON/OFF setting "l OFF --:--"
5. Repeat the procedure to create the OFF setting.
Repeat Steps l thru 5 for additional ON/OFF settings.
Note: If at any time during the clock or program setting is inactive for 5 seconds the
timer will return to the default display
Daylight Saving Time Setting "DST"
Press and hold the HOUR button for 5 seconds, entering into the Daylight Saving Time
(DST) mode and time on clock will advance one hour: Press and hold for another 5
seconds to cancel the DST function and time on clock will fall back one hour.
Random Setting "RND"
Press and hold the MIN button for 5 seconds, entering into the random mode of the
programmed settings. Press and hold the MIN button for another 5 seconds to cancel
the function. Vacation option for extra security by varying the ON/OFF times within 30
minutes
To Delete/Recall Setting "MODE"
It allows you to disable or enable the programmed ON/OFF settings.
a. Scroll to the setting you wish to delete, then press the MODE button once and
the display will replace the setting with dashes, removing the program.
b.
Press the MODE button again and the display will show the previous
programmed setting.
Initial Startup: When you initially program the unit, it may be necessary to press the
MAN button as the unit will not look back to determine if it should be ON. For example,
if the current time is 2:00 PM and you just programmed the unit to turn ON at l :00 PM,
you will need to press the MAN button to turn it ON. Thereafter, the unit will resume
normal operation (automatic).
Manual Override: Pressing the MAN button or timer door will override the timer
settings
Operating the Timer: Press the MAN button repeatedly to set the timer to Automatic or
Manual mode. Note: For the timer to run programmed events, it must be set to AUTO
mode.
BLACK (HOT WIRE)
NOIR (FIL SOUS TENSION)
NEGRO (CABLE DE CORRIENTE)
---AUTO ON MODE: In AUTO ON mode the wired lights are on. The wired lights
will be off until the next programming OFF time. You can push MAN button
while in AUTO mode to manually override the program and turn the wired
lights on or off. The programmed switching times remain.
---AUTO OFF MODE: In the AUTO OFF mode the wired lights are off. The wired
lights will be on until the next programming on time. You can push MAN
button while in AUTO mode to manually override the program and turn the
wired lights on or off. The programmed switching times remain.
---MANUAL OFF MODE: In the MANUAL OFF mode the wired lights are off. You
can push MAN button to ON mode and turn the wired lights ON.
---MANUAL ON MODE: In the MANUAL ON mode the wired lights are on. You can
push MAN button to OFF mode and turn the wired lights OFF
Memory Backup: The timer is equipped with a rechargeable battery which
will protect your programs during power failure for up to 30 days. No need to
replace battery. Note that the screen blanks during a power failure.
AVERTISSEMENT: L'INSTALLATION DEVRAIT SE FAIRE PAR UN
ELECTRICIEN AGREE.
AVERTISSEMENT : POUR EVITER LES INCENDIES, CHOCS OU LA MORT, COUPEZ LE
COURANT AU DISJONCTEUR ET TESTEZ QUE LE COURANT EST COUPE AVANT LE
CABLAGE.
Remarque : Cette minuterie n'est pas compatible pour les interrupteurs a 3 voies.
Le fil de mise a la terre doit etre connecte pour faire fonctionner l'appareil. Laissez
la minuterie prechauffer pendant 2 minutes apres la connexion.
Installation :
l.
Coupez le courant au disjoncteur ou retirez le fusible
2.
Retirer la plaque murale existante et l'interrupteur, le cos echeant.
Veuillez noter que deux fils noirs son! raccordes a l'interrupteur.
3.
Denudez 9.5 mm (3/8 po) d'isolant de chaque fil requis pour l'installation.
4.
Raccordez le fil vert du boTt i er de raccordement au fil vert de la minuterie.
5.
Branchez le fil noir devant la minuterie au fil SOUS TENSION (deja branche a
l'interrupteur) et branchez le fil rouge de la minuterie au second fil (deja
branche a l'interrupteur). Remarque : Si vous ne savez pas quel fil est SOUS
TENSION, branchez le fil noir de la minuterie a l'un des fils noirs deja
branche et le fil rouge de la minuterie au second fil noir (deja branche a
l'interrupteur). Fixez les connexions avec des serre-fils.
6.
Cachez bien taus les fils pour fournir de la place pour la minuterie dons
la boTte de jonction.
7.
Fixez le minuterie au boTtier avec les vis incluses, et installez le couvercle.
8.
Remettez sous tension.
Remarque: Si la minuterie ne fonctionne pas, interchangez les deux fils noirs deja
branches a l'interrupteur (voir le n
couper a nouveau le courant avant le coblage.
Mise sous tension : Ouvrez la trappe de la minuterie. Glissez l'interrupteur sur la
position ON (marche). Appuyez sur le bouton R (reinitialiser) avec un cure-dent ou
le bout d'un stylo. L'ecran deviendra blanc et sera restaure au bout de 30
secondes, en affichant 12:00 AM (12h00).
Pour regler l'heure actuelle : Appuyez sur le bouton PROG. Puis, appuyez sur le
bouton DAY (JOUR), HOUR (HEURE) et MINUTE autant de fois que necessaire pour
faire avancer l'affichage au ban jour et a la bonne heure. Appuyez sur le bouton
MAN pour conserver le reglage de l'horloge.
Pour programmer la minuterie
l. Appuyez a deux reprises sur le bouton PROG pour afficher le premier reglage
ON/OFF-« l ON --:--».
2.
Appuyez sur les boutons MINUTE et HOUR au besoin pour regler l'heure de
marche ON que vous desirez. Pour changer de AM a PM basculez 12 fois.
Consumer Support/ Service d'aide a la clientele / Servicio al consumidor (800) 561-4321
TIMER
MINUTERIE
TEMPORIZADOR
111111111
RED (LOAD)
GREEN (GROUND)
ROUGE (CHARGE)
VERT (TERRE)
ROJO (CARGA)
VERDE (TIERRA)
°
5 plus haul). IMPORTANT : assurez-vous de
Publicidad

Manuales relacionados para Woods 59020


Resumen de contenidos para Woods 59020
- Página 1 TIMER MINUTERIE TEMPORIZADOR Model 59020 In-Wall Digital Timer Modeles 59020 de minuterie numerique murale Temporizador digital de pared, modelos 59020 WARNING: INSTALLATION SHOULD BE MADE BY A LICENSED ELECTRICIAN WARNING: TO AVOID FIRE, SHOCK, OR DEATH, TURN OFF POWER AT CIRCUIT BREAKER AND TEST THAT POWER IS OFF BEFORE WIRING.
- Página 2 Appuyez sur le bouton DAY au besoin pour choisir le jour ou le groupe de 3. Quite 9,5 mm (3/8 pulg.) del aislamiento de coda cable, que se requiere para la instalaci6n. jours que vous desirez pour le reglage de l'heure. 4.