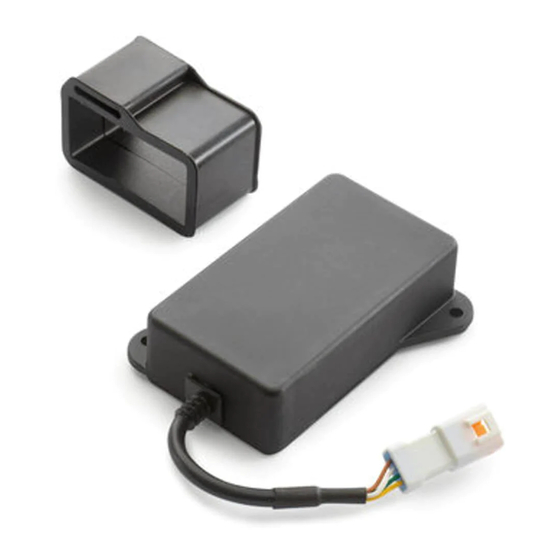
Resumen de contenidos para KTM 64112966000
- Página 1 INFORMATION KTM MY RIDE CONTROL UNIT 64112966000 04.2018 3.213.951 KTM Sportmotorcycle GmbH *3213951* 5230 Mattighofen, Austria www.ktm.com...
- Página 2 3 DEUTSCH Wir freuen uns, dass Sie sich für dieses Produkt entschieden haben. Unser hochwertiges Qualitätsprodukt ist rennerprobt und wurde speziell für sportliche Herausforderungen entwickelt. Eine korrekte Montage des Produktes ist unerlässlich, um ein Maximum an Sicherheit und Funktionalität gewährleisten zu können. Bitte befolgen Sie daher die Montageanleitung oder wenden Sie sich an Ihren autorisierten Fachhändler.
- Página 3 Lieferumfang 1x KTM MY RIDE-Steuergerät 1x Haltegummi Montage - Schrauben entfernen. - Schrauben mit Buchsen entfernen. - Tankverkleidung im Bereich abziehen und nach hinten abnehmen. - KTM MY RIDE-Steuergerät (Lieferumfang) mit Haltegummi Halter montieren. - Steckerverbindung zusammenstecken. HINWEIS Der Stecker befi ndet sich hinter der Rahmenabdeckung und muss ggf.
- Página 4 - Fahrersitzbank montieren (s. Bedienungsanleitung). - Soziussitzbank montieren (s. Bedienungsanleitung). - KTM MY RIDE-Steuergerät mit dem KTM-Diagnosetool freischalten. Bedienung - S. Bedienungsanleitung (Kombiinstrument > Menü > Bluetooth® (optional), KTM MY RIDE (optional), Pairing (optional), Audio play- er (optional) und Telefonie (optional)
- Página 5 - Remove screws - Remove screws with the bushings. - Detach the fuel tank fairing in area and take off to the rear. - Mount KTM MY RIDE control unit (included) with rubber strap on the bracket. - Join plug-in connector NOTE The socket connector is located behind the frame cover and must fi...
- Página 6 - Mount the front rider’s seat (see Owner’s Manual). - Mount the passenger seat (see owner’s manual). - Enable KTM MY RIDE control unit using the KTM diagnostics tool. Operation - See Owner’s Manual (combination instrument > menu > Blue- tooth®...
- Página 7 - Rimuovere le viti con le boccole. - Staccare la carena del serbatoio nella zona e rimuoverla da dietro. - Montare la centralina KTM MY RIDE (volume della fornitura) con il gommino di fi ssaggio sul supporto. - Collegare il connettore...
- Página 8 - Montare la sella del pilota (v. manuale d’uso). - Montare la sella del passeggero (v. il manuale d’uso). - Attivare la centralina KTM MY RIDE con il tester diagnosi KTM. Utilizzo - Vedi manuale d’uso (Quadro strumenti > Menu > Bluetooth®...
- Página 9 - Enlever le carénage de réservoir de carburant par les zones le retirer vers l’arrière. - Mettre en place l’unité de contrôle KTM MY RIDE (comprise dans la livraison) et le caoutchouc de maintien sur la fi xation.
- Página 10 Travaux ultérieurs - Monter la selle du pilote (voir manuel d’utilisation). - Mettre en place la selle passager (voir manuel d’utilisation). - Activer l’unité de contrôle KTM MY RIDE depuis le boîtier diagnos- tic KTM. Utilisation - Voir manuel d’utilisation (tableau de bord > menu > Bluetooth® (en option), KTM MY RIDE (en option), Pairing (en option), lecteur audio (en option) et téléphonie (en option)
-
Página 11: Montaje
- Desmontar el carenado embellecedor de depósito de gasolina de la zona y retirarlo hacia atrás. - Montar la unidad de control KTM MY RIDE con goma de suje- ción (volumen de suministro) en la fi jación. - Página 12 Trabajos posteriores - Montar el asiento del conductor (véase el manual de instrucciones). - Montar el asiento del pasajero (véase el manual de instrucciones). - Activar la unidad de control KTM MY RIDE con la herramienta de diagnóstico de KTM. Manejo - Véase el manual de instrucciones [Cuadro de instrumentos >...


