Publicidad
Idiomas disponibles
Idiomas disponibles
Installation instructions for part AXGMLN-03
GM Data Interface
• Provides accessory power (12-volt 10-amp)
• Retains R.A.P. (retained accessory power)
• Provides NAV outputs (parking brake,
reverse, speed sense)
• Pre-wired AXSWC harness (AXSWC sold
separately)
• Retains chimes to the factory speaker
* If the vehicle is amplified, either use the AXGMLN-04 interface, or bypass the amplifier. If bypassing the
amplifier, follow the "Axxess Interface Amp Bypass Schematic" online.
CHEVROLET
Cobalt
2007-2010
HHR
2006-2011
Malibu
2008-2012
Axxess Integrate
AXGMLN-03
2006-2012
INTERFACE FEATURES
• Adjustable chime level
• Retains OnStar / OE Bluetooth
• Adjustable OnStar level
• Designed for non-amplified models, or
when bypassing a factory amp *
• Retains balance and fade
• AXUSB-CBL updatable (sold separately)
APPLICATIONS
PONTIAC
SATURN
G5
2007-2009
Aura
G6
2010
Sky
G6 (5th digit of VIN must
be a J, K, or L)
2009
Solstice
2006-2009
axxessinterfaces.com
Connections to be made ................................................2-3
Installing the AXGMLN-03 ................................................ 3
Initializing the AXGMLN-03 .............................................. 3
Adjusting the AXGMLN-03 ................................................ 4
INTERFACE COMPONENTS
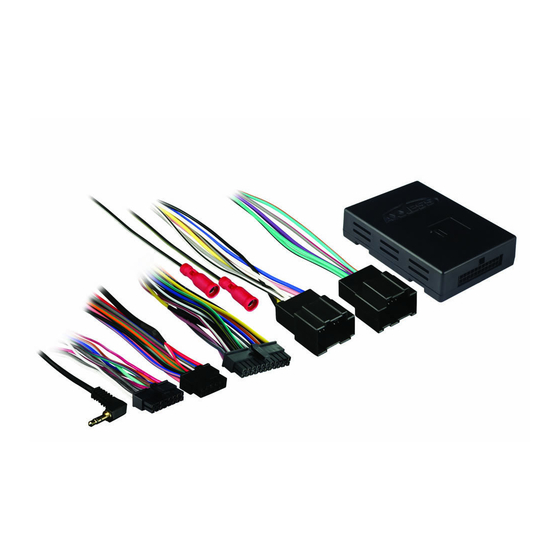
• AXGMLN-03 interface • AXGMLN-03 harness
• 16-pin harness with stripped leads
TOOLS REQUIRED
• Wire cutter • Crimp tool • Solder gun • Tape
• Connectors (example: butt-connectors, bell caps, etc.)
• Small flat-blade screwdriver
2007-2009
2007-2009
CAUTION!
especially air bag indicator lights must be connected before cycling
the ignition. Also, do not remove the factory radio with the key in the
on position, or while the vehicle is running.
•
metraonline.com
Table of Contents
All accessories, switches, climate controls panels, and
© COPYRIGHT 2020 METRA ELECTRONICS CORPORATION
Publicidad
Tabla de contenido

Resumen de contenidos para Axxess AXGMLN-03
- Página 1 TOOLS REQUIRED * If the vehicle is amplified, either use the AXGMLN-04 interface, or bypass the amplifier. If bypassing the amplifier, follow the “Axxess Interface Amp Bypass Schematic” online. • Wire cutter • Crimp tool • Solder gun • Tape •...
-
Página 2: Connections To Be Made
Connections to be made From the 16-pin harness with stripped leads to the aftermarket radio: From the AXGMLN-03 harness to the aftermarket radio: • Connect the Red wire to the accessory wire. • Connect the Black wire to the ground wire. - Página 3 • Connect the AXGMLN-03 harness to the wiring harness in the vehicle. connections and programming. • If using the AXSWC, connect it after you initialize and test the AXGMLN-03, with the key in the off position. Note: Disregard the harness that comes with the AXSWC.
- Página 4 Installation instructions for part AXGMLN-03 Adjusting the AXGMLN-03 IMPORTANT If you are having difficulties with the Chime level adjustment: installation of this product, please call our • Turn the vehicle off but leave the keys in the ignition. Open the driver’s door and leave it open;...
-
Página 5: Herramientas Requeridas
* Si el vehículo está amplificado, utilice la interfaz AXGMLN-04 o elimine el amplificador. Si se pasa por • Cortacables • Ponchadora • Pistola soldadora • Cinta alto el amplificador, siga el “Axxess Interface Amp Bypass Schematic” en línea. • Conectores (ejemplo: conectores de extremo, de campana, etc.) •... -
Página 6: Conexiones Que Se Deben Hacer
Conexiones que se deben hacer Del arnés de 16 pins con conectores pelados al radio de mercado secundario: Del arnés AXGMLN-03 al radio de mercado secundario: • Conecte el cable rojo con el cable de accesorios. • Conecte el cable negro al cable de tierra. -
Página 7: Instalación Del Axgmln
Arnés AXSWC precableado de 12 pins: Con la llave en la posición de apagado: • Conecte el arnés de 16 pins con conectores pelados, y el arnés AXGMLN-03, a • Este arnés se debe usar junto con el AXSWC opcional (no incluido) para retener la interfase. - Página 8 Instrucciones de instalación para la pieza AXGMLN-03 Adjusting the AXGMLN-03 IMPORTANTE Si tiene dificultades con la instalación Ajuste del nivel de tonos: de este producto, llame a nuestra línea • Apague el vehículo pero deje las llaves en el encendido. Abrir la puerta del conductor y dejarla de soporte técnico al 1-800-253-TECH.


