Tabla de contenido
Publicidad
Idiomas disponibles
Idiomas disponibles
Enlaces rápidos
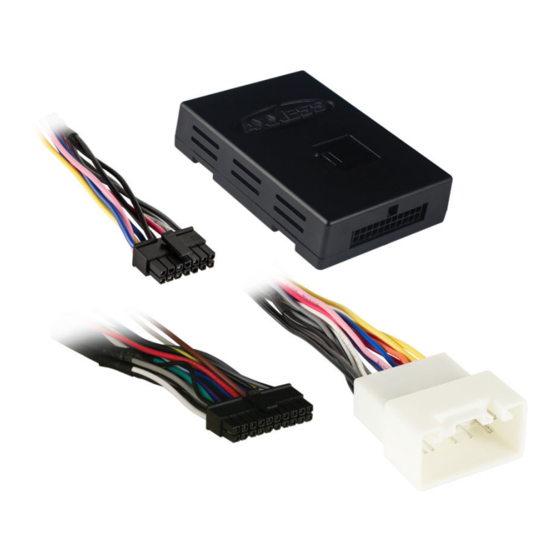
INTERFACE COMPONENTS
• AXTO-TY1 harness
• AXTO-TY1 interface
• 16-pin harness with stripped leads
APPLICATIONS
See inside front cover
AxxessInterfaces.com
Toyota Digital Amplifier Interface
Visit
AxxessInterfaces.com
for more detailed information about the product and up-to-date
vehicle specific applications
INTERFACE FEATURES
• Designed for amplified models
• Retains balance and fade
• USB Micro-B updatable
© COPYRIGHT 2022 METRA ELECTRONICS CORPORATION
AXTO-TY1
I N S TA L L AT I O N I N S T R U C T I O N S
2001-2015
TABLE OF CONTENTS
Connections .........................................................2-3
Installation .............................................................3
Programming .........................................................3
Audio level adjustment .........................................3
Wiring diagram ......................................................4
TOOLS REQUIRED
• Crimping tool and connectors, or solder gun,
solder, and heat shrink
• Tape • Wire cutter • Zip-ties
• Small flat-blade screwdriver
Attention:
With the key out of the ignition,
disconnect the negative battery terminal
before installing this product. Ensure that all
installation connections are secure before
cycling the ignition to test this product.
NOTE: Refer to the instructions included with
the aftermarket radio.
REV. 1/3/22 INSTAXTO-TY1
Publicidad
Tabla de contenido

Resumen de contenidos para Axxess AXTO-TY1
-
Página 1: Tabla De Contenido
• Crimping tool and connectors, or solder gun, solder, and heat shrink • Tape • Wire cutter • Zip-ties • Small flat-blade screwdriver INTERFACE COMPONENTS • AXTO-TY1 harness • AXTO-TY1 interface • 16-pin harness with stripped leads Attention: With the key out of the ignition, disconnect the negative battery terminal before installing this product. -
Página 2: Connections
APPLICATIONS CONNECTIONS LEXUS TOYOTA (Cont.) From the 16-pin harness with stripped leads to the aftermarket radio, connect as indicated: ES Series 2007-2012 FJ Cruiser 2011-2014 • White wire to the left front (+) speaker output. ES Series (w/ multi disc) 2002-2006 Highlander 2008-2013 • White/Black wire to the left front (-) speaker output. GS Series 2001-2005 Highlander Hybrid 2008-2012... -
Página 3: Installation
1. Connect the 16-pin harness with stripped leads, and the AXTO-TY1 harness into the level; counter clockwise to lower the audio level. AXTO-TY1 interface. 3. Once at a desired level, audio adjustment is complete. 2. Connect the AXTO-TY1 harness to the wiring harness in the vehicle. REV. 1/3/22 INSTAXTO-TY1... -
Página 4: Wiring Diagram
AXTO-TY1 I N S TA L L AT I O N I N S T R U C T I O N S Having difficulties? We’re here to help. WIRING DIAGRAM Contact our Tech Support line at: 386-257-1187 Update Port... - Página 5 • Cinta • Cortacables • Zip lazos • Pequeño destornillador de cabeza plana COMPONENTES DE LA INTERFASE • Arnés AXTO-TY1 • Interfaz AXTO-TY1 ATENCIÓN: Con la llave fuera del encendido, • Arnés de 16 pins con conectores pelados desconecte el terminal negativo de la batería...
-
Página 6: Aplicaciones
APLICACIONES CONEXIONES LEXUS TOYOTA (Cont.) Desde el arnés de 16 clavijas con cables pelados al radio de mercado secundario, conéctelo ES Series 2007-2012 FJ Cruiser 2011-2014 como se indica: ES Series (con multi disco) 2002-2006 Highlander 2008-2013 • Blanco con la salida positiva de la bocina izquierda delantera. GS Series 2001-2005 Highlander Hybrid 2008-2012 • Blanco/Negro con la salida negativa de la bocina izquierda delantera. IS Series 2002-2005 Matrix... -
Página 7: Instalación
1. Conecte el arnés de 16 pins con conectores pelados, y arnés AXTO-TY1, a la interfase. para aumentar el nivel de audio y hacia la izquierda para disminuir el nivel de audio. 2. Conecte el arnés AXTO-TY1 al arnés de cableado en el vehículo. 3. Una vez en el nivel deseado, el ajuste de audio está completo. -
Página 8: Diagrama De Cableado
Tenga el vehículo separado y listo para realizar los pasos de solución de problemas antes de ponerse en contacto con el soporte técnico de Metra/Axxess. EL CONOCIMIENTO ES PODER Mejore sus habilidades de instalación y ®...


