Tabla de contenido
Publicidad
Idiomas disponibles
Idiomas disponibles
Enlaces rápidos
Publicidad
Tabla de contenido

Manuales relacionados para Steren CCTV-908


Resumen de contenidos para Steren CCTV-908
- Página 2 IMPORTANT Before using your new CCTV multiplexer for 8 cameras, please read this instruction manual carefully. After reading it, please keep this instruction manual for future references. • This device must be placed in an area with adequate ventilation. • Do not expose this device to direct sunlight, dust, or humidity.
- Página 3 CONTROLS FRON PANEL 1.- Power indicator light. Illuminates when the device is in use. 2.- IR sensor. Receives the infrared signal from the remote control. 3.- Menu / A-B Menu: Access for the setup menu and Exits setup mode Change page A (cameras 1 to 4) or B (camera 5 to 8) 4.- Auto / Freeze.
- Página 4 6.- VCR / Enter. VCR allows you to access the VCR. Enter applies the changes that have been made in the setup menu. 7.- CAM1 and 5 / Up. Allows you to select the camera connected to the channel 1 or 5 input jack.
-
Página 5: Rear Panel
REAR PANEL 2 3 4 1.- CAM Input. Allows you to connect up to four cameras with BNC plugs. 2.- VCR input Accept 1 composite video input for playback from the VCR. 3.- VCR output Provide 1 composite video output for recording in the VCR. 4.- Monitor Output. -
Página 6: Remote Control
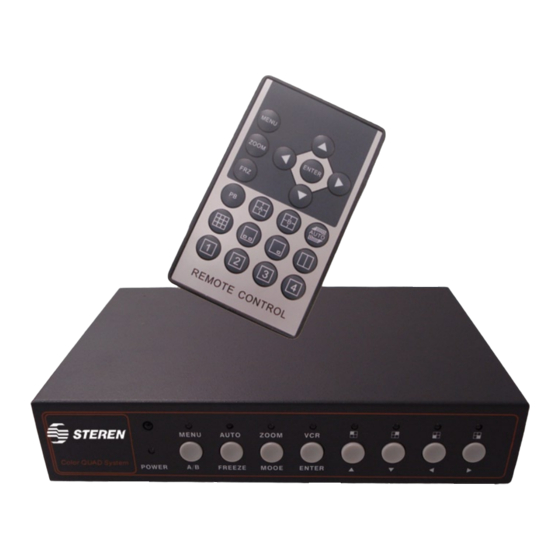
REMOTE CONTROL 1.- Menu Enters or exits the main menu 2.- Zoom Allows you to zoom in/out on an image 3.- FRZ Allows you to freeze the image 4.- Arrow keys Allows you to navigate within a menu 5.- Enter Allows you to select an option within the menus 6.- A or B... - Página 7 9.- CAM1, 2, 3 y 4 Allows you to view CAM 1 and 5, CAM 2 and 6, CAM 3 and 7, CAM 4 and 8 10.- PB Access to the record / playback VCR CONNECTIONS 1. Locate the BNC inputs on the rear panel of the recorder 2.
-
Página 8: System Startup
SYSTEM STARTUP After powering your device on, the system will start up and the monitor will display the four cameras with the following information: Top: Date and time Screen: Channel number (CH1-CH4) SETUP MENU Press the Menu button on the remote control in order to enter the main menu. - Página 9 Afterwards, press the left/right arrow keys in order to adjust the month digit(s). Press the down arrow key in order to switch to select the day and adjust it using the left/right arrow keys. Repeat this same procedure in order to adjust the time. Setting NTSC or PAL format (system format) Press the down arrow key in order to select the system format and adjust it using the left/right arrow keys.
- Página 10 Screen Position: Allows you to move the screen horizontally (x) or vertically (y) on your monitor. Use the up/down arrow keys in order to select this option and the right/left arrow keys in order to adjust the screen. Border Coloring: Allows you to choose the border color (separation between camera screens in quad setting) between black, gray, white, or none.
- Página 11 d) Camera Setup. This option allows you to name the cameras as well as adjust the brightness, contrast, color, and hue of each camera selected. In order to select this option use the up/down arrow keys and use the right/left arrow keys in order to change the values. Use the ENTER key in order to save the changes.
- Página 12 f) Event Setup This function is used to configure the events of each camera. The multiplexer through an alarm begin to sound in loss or motion mode (the motion have to enable, see section “Motion setup”) Use the controls up / down, right / left of the remote control to select Alarm, loss and Motion mode of each camera.
- Página 13 g) Event Report This option displays the occurred events. It will display the event number, the date, time, camera number, and the occurred event. If you wish to delete the list of events, press the down arrow key until you reach DELETE LIST and press the ENTER button.
- Página 14 RS-232C INTERFACE The host providing RS-232C interface can control this system remotely. Receiving and transmitting can be worked by 4800bps. System accepts aonly 1 byte to get commands from host and sends 6 bytes to transmit operating status and event information. ENGLISH-14...
-
Página 15: Display Mode
Transmit protocol Byte 1 PG4 PG3 MN ZM FZ PB 1 PG2 PG1 CODE VALUE SELECTION FOR EACH CHANNEL camera 1 is displayed for channel 1 camera 5 is displayed for channel 1 camera 2 is displayed for channel 2 camera 6 is displayed for channel 2 camera 3 is displayed for channel 3 camera 7 is displayed for channel 3... -
Página 16: Video Loss
CODE VALUE FUNCTION Not invoking menu function Invoking setup menu function Not invoking zoom function Invoking zoom function Not invoking freeze funtion Invoking freeze function Not invoking playback function Invoking playback function Not detected Detected CODE VALUE VIDEO LOSS MOTION DETECT Not detected Not detected Not detected... - Página 17 DESCRIPTION Null Channel 1/5 Channel 2/6 Channel 3/7 Channel 4/8 Quad A page Quad A page Auto sequence Non-realtime 8 split 2 picture in picture 1 picture in picture Dual split Playback Freeze Zoom Menu High control Down control left control right control Enter 21-31...
- Página 18 ALARM A1~A8: Alarm inputs. GND: Ground from the sensors. NO: Normal open alarm output. COM: Common alarm output. The event has three kinds of detection, which are alarm detection, video loss detection and motion detection. When event occurs from only one channel, the corresponding channel will be displayed as single full screen.
- Página 19 Example of connetion SPECIFICATIONS Input: 12V - - - 1A REMOTE CONTROL Input: 3V - - - (Battery CR2025) AC ADAPTOR Input: 110-240V~ 50/60Hz 400mA max Output: 12V - - - 1A Product design and specifications are subject to change without previous notice.
- Página 20 Part number: CCTV-908 Brand: Steren WARRANTY This Steren product is warranted under normal usage against defects in workmanship and materials to the original purchaser for one year from the date of purchase. CONDITIONS 1.- This warranty card with all the required information, invoice or purchase ticket, product box or package, and product, must be presented when warranty service is required.
- Página 21 RETAILER INFORMATION Name of the retailer Address Product Brand Part number Serial number Date of delivery In case your product fails or have questions, please contact your nearest dealer. If you are in Mexico, please give a call to our Call Center. Call Center 01 800 500 9000...
-
Página 23: Caracteristicas
IMPORTANTE Antes de utilizar su nuevo Kit Convertidor Analógico/Digita Ant Antes de utilizar el multiplexor CCTV P/8 cámaras, lea este de utilizar su nuevo Kit Convertidor Analógico/Digital lea instructivo para evitar cualquier mal funcionamiento. Guárdelo para futuras referencias. este instructivo para evitar cualquier mal funcionamiento. •... -
Página 24: Panel Frontal
CONTROLES PANEL FRONTAL 1.- Indicador de energía. Enciende cuando el equipo está en uso. 2.-Sensor IR. Recibe la señal IR del control remoto. 3.-Menú / A-B Menú: Accede al menú de configuración y Sale del modo de configuración. A: Permite visualizar las cámaras 1 a la 4 en modo mosaico. B: Permite visualizar las cámaras 5 a la 8 en modo mosaico. - Página 25 5.-Zoom / Mode permite ver en modo mosaico las 8 cámaras, tambien permite la visualización de diferentes modos de pantallas. 6.-VCR / Enter. VCR permite visualizar la reproducción de la videograbadora y Enter aplica los cambios de selección del panel de configuración. 7.-CAM1 y 5 / Arriba.
-
Página 26: Panel Trasero
PANEL TRASERO 2 3 4 1.- Entrada de vídeo. Permite conectar hasta 8 cámaras de video con conector BNC. 2.- VCR IN. Permite conectar un VCR, DVR para reproducir. 3.- VCR OUT. Permite grabar en un VCR. 4.- MONITOR OUT Permite conectar un monitor a través de un conector BNC. -
Página 27: Control Remoto
CONTROL REMOTO 1.- Menú. Entra o sale del menú principal. 2.- Zoom. Permite realizar la función de imagen sobre imagen. 3.- FRZ. Permite congelar la imagen. 4.- Botón hacia la derecha / izquierda, Arriba/ Abajo Permite seleccionar y mover los valores dentro del menú... -
Página 28: Conexiones
8.-Multi-pantallas Permite la visualización de las pantallas en diferentes modos. 9.-CAM 1, 2, 3 y 4. CAM 1 Permite la visualización de las cámaras 1 y 5 CAM 2 Permite la visualización de las cámaras 2 y 6 CAM 3 Permite la visualización de las cámaras 3 y 7 CAM 4 Permite la visualización de las cámaras 4 y 8 10.- PB. -
Página 29: Inicio Del Sistema
6.- Inserte el adaptador de corriente en la entrada DC y el extremo contrario conéctelo al contacto eléctrico. Antes de utilizar su nuevo Kit Convertidor Analógico/Digita Ant Para utilizar los puertos de alarma y RS-232C dirijase a la sección “RS-232 y Alarma” CAMARA CAMARA ALARMA... -
Página 30: Menu De Configuracion
MENU DE CONFIGURACION Presione el botón de menú del control remoto para entrar al menú principal, podrá ver los siguientes sub-menús. Configuración del Sistema (System setup) Configuración de Pantalla (Display setup) Auto Secuencia (Auto Sequence) Configuración de Cámara (Camera setup) Configuración de Movimiento (Motion setup) Configuración de Eventos (Event Setup) Reporte de Eventos (Event Report) -
Página 31: Configuración De Pantalla (Display Setup)
Configuración del formato NTSC o PAL (system format) Oprima el botón Abajo para selección del formato y con el botón Derecha para cambiar el formato puede elegir entre NTSC o PAL. ID del sistema (System ID number) Oprima el botón Abajo para selección de ID del sistema, y con los botones Derecho / izquierdo para modificarlo del 01 al 16 Bloqueo de Teclas (Key lock) Permite habilitar o deshabilitar el bloqueo de teclas en modo on esta... - Página 32 Posición de la pantalla (Screen position): Permite desplazar en forma horizontal (x) o en forma vertical (y) la pantalla. Para selección oprima el botón de abajo y para modificar con el botón Derecha / izquierda. Color del borde (Border color): Permite elegir el color del borde (separación en modo mosaico de las cámaras) entre negro, gris, blanco o ninguno.
- Página 33 Para seleccionar el tiempo en el que cambiará la cámara a configurar seleccione la cámara y oprima el botón derecha o izquierda para aumentar o disminuir el tiempo. Para activar la función de auto secuencia oprima el botón AUTO del control remoto.
- Página 34 Para seleccionar el modo oprima el botón derecha o izquierda. En on/off permite habilita el tiempo de encendido y el tiempo en el que se apagará la detección. Para configurar oprima el botón abajo y para cambiar de dígito oprima el botón derecha o izquierda.
- Página 35 Esta función sirve para configurar los eventos de cada cámara y que el equipo por medio de un timbre (alarma) empiece a sonar cada vez que detecte perdida de señal de las cámaras o detecte movimiento (siempre y cuando este activada la alarma de movimiento, vea la sección “Configuración de alarma de movimiento”) Use los controles arriba/abajo, derecha/izquierda del control remoto para seleccionar Alarma (alarm), perdida de señal (Loss), detección de...
-
Página 36: Funcionamiento
g) Reporte de Eventos (Event Report) En esta parte se muestra los eventos ocurridos, nos muestra el número de evento la fecha, hora, el número de la cámara y el evento efectuado. Si deseamos borrar la lista solo presione el botón Abajo hasta llegar a borrar lista, oprima el botón derecho / izquierdo y para confirmar Enter. - Página 37 FUNCION VCR Función grabar: La salida “VCR OUT” envia una señal del modo mosaico (Quad) hacia una videocasetera o DVR. Función de reproducir: La entrada “VCR IN” funciona para reproducir lo grabado de una videocasetera o VCR , Oprima el botón PB del control remoto y elija la cámara que desee para ver la reproducción.
- Página 38 Protocolo de transmisión Byte Primero 1 1 PG4 PG3 MN ZM FZ PB Segundo 1 1 PG2 PG1 Tercero Cuarto Quinto Sexto CODIGO VALOR SELECCIÓN DE CADA CANAL cámara 1 es desplegado para el canal 1 cámara 5 es desplegado para el canal 1 cámara 2 es desplegado para el canal 2 cámara 6 es desplegado para el canal 2 cámara 3 es desplegado para el canal 3...
-
Página 39: Codigo Valor Perdida De Video Detecccion De Movimiento
CODIGO VALOR FUNCION No entra a menú de configuración Entra al menú de configuración no entra al función zoom Entra a la función zoom No entra al modo congelamiento Entra al modo congelamiento No entra ala función reproducción. Entra al modo reproducción. Alarma no detectada Alarma detectada CODIGO VALOR PERDIDA DE VIDEO DETECCCION DE MOVIMIENTO... - Página 40 VALOR DESCRIPCION Ninguno Canal 1/5 Canal 2/6 Canal 3/7 Canal 4/8 Página A Mosaico Página B Mosaico Auto secuencia División de pantalla (no en tiempo real) 2 imaden en imagen 1 imagen en imagen Mitad media Reproducción Congelamiento Zoom Menú Control hacia arriba Control hacia abajo Control hacia la izquierda...
-
Página 41: Sistema De Alarma
SISTEMA DE ALARMA A1~A8: Entradas de alarmas GND: Sistema de aterrizaje de sensores. N.O: Abierto normal de la salida de alarma. COM: Salida común de alarma. Este sistema tiene 3 tipos de detección. Alarma de detección. Video perdido Detección de movimiento. Cuando un evento ocurre solo en un canal, el canal correspondiente se desplegará... - Página 42 Ejemplo de conexión ESPAÑOL-21...
-
Página 43: Especificaciones
ESPECIFICACIONES Entrada: 12V - - - 1A Convertidor Entrada: 100-240V~ 50/60Hz 400mA max Salida: 12V - - - 1A Control remoto Entrada: 3V - - - (1xCR2025) El diseño del producto y las especificaciones pueden cambiar sin previo aviso. ESPAÑOL-22... -
Página 44: Póliza De Garantía
1.- Para hacer efectiva la garantía, presente ésta póliza y el producto, en donde fue adquirido o en Electrónica Steren S.A. de C.V. 2.- Electrónica Steren S.A de C.V. se compromete a reparar el producto en caso de estar defectuoso sin ningún cargo al consumidor. Los gastos de transportación serán cubiertos por el proveedor. - Página 45 Biólogo MaximIno Martínez No. 3408 Int. 3 y 4, San Salvador Xochimanca, México, D.F. 02870, RFC: SPE941215H43 ELECTRONICA STEREN DEL CENTRO, S.A. DE C.V. Rep. del Salvador 20 A y B, Centro, 06000, México. D.F. RFC: ESC9610259N4 ELECTRONICA STEREN DE GUADALAJARA, S.A.