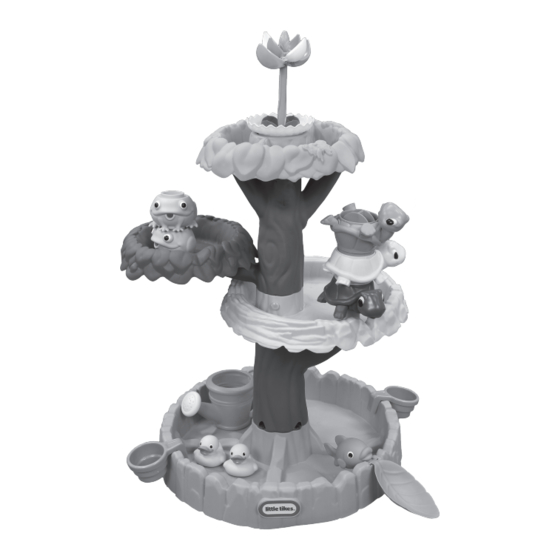
Resumen de contenidos para Little Tikes Magic Flower Water Table
- Página 1 Magic Flower Water Table ™ ASSEMBLY INSTRUCTIONS #651342M Adult assembly required. Approx. assembly time: 30 min. Look for video of assembly at littletikes.com/videoinstructions XIM651342-R1 - 12/20...
- Página 2 • Clear a flat surface to lay out all the materials so everything is close at hand. • You will need a Phillips head screwdriver (not included) to assemble the Magic Flower Water Table™. - When installing screws, be sure screws are tightened snugly, but do NOT OVER-TIGHTEN.
- Página 3 BEFORE you begin assembly, make sure you have all the parts listed below. Some packages of hardware may have extras pieces. Questions? We’re here to help. Little Tikes customer service team at 1-800-321-0183. Screw Cover (2) Top Basin (1) Bottom Turtle...
- Página 4 Let’s GO, screw in the trunk! " (.82 cm) " (.82 cm) Next, secure (7) 3/8” (.82cm) screws into each hole on the top trunk (E). First secure (2) 3/8” (.82cm) screws into DO NOT TIGHTEN each hole on the bottom trunk (F). screws 1-6 DO NOT TIGHTEN TIGHTEN...
- Página 5 Build the tree...bottom first! Insert bottom of trunk (F) into bottom basin (D). Align notches on the bottom trunk and push down. 1" (2.54 cm) Next, secure (4) 1” (2.54 cm) screws into base of trunk.
- Página 6 Build the tree...now the middle! Insert middle basin 1 (part C) onto top of bottom trunk. Line up the branch on bottom trunk to slot on middle basin. ALIGN NOTCHES, push into place. Part is keyed to fit TIGHTEN screws.
- Página 7 Build the tree...now the middle! Insert top trunk (E) onto middle basin 1. ALIGN NOTCH. Part is Keyed to fit. 1" (2.54 cm) Insert (2) 1” (2.54 cm) screws through (2) screw covers (part I). Install screw and screw cover into each side of basin and into trunk, close the screw...
- Página 8 The middle is almost done! Insert middle basin 2 (part B) on top of top trunk. Branch support SNAPS into place TURN the table around and TIGHTEN screws underneath.
- Página 9 Build the tree...top it off! Align assembled branch halves (parts G1-G2) G1-G2 with opening on top trunk (E). Push until you hear a snap. Insert top basin (part A) onto top of top trunk. Line up the branches on PULL APART small branch bottom trunk to the to secure around the tab.
- Página 10 Build the tree...secure the top! Secure (1) 3/8" (.82cm) screw into upper location on small branch. " (.82 cm) TIGHTEN (4) screws underneath.
- Página 11 Watch the flower grow! Insert flower assembly (H) . HINT turn watering can upside down and place on top of flower assembly. Push down to assemble. Insert the turtle support. Insert bottom turtle support (part J) . Part is keyed to fit...
- Página 12 Stack up the turtles! Insert bottom turtle (part M) onto turtle support. Part is keyed to fit. Many ways to play Correct stacking order Stack the turtles one on top of the other. Located under the top basin leaf, allows water to overflow onto the spinning water wheel feature in the top turtle.
- Página 13 Don’t forget the fish! Locate indentation for fish and leaf (part R) on the bottom basin. Click into place. Use watering can to scoop water from the pond and pour onto the Magic Flower to watch it grow! Ready for magic flower fun!! Fill the frogs with water and create a water fountain!
-
Página 14: Información Realmente Importante Que Debería Conocer
Magic Flower Water Table INSTRUCTIONS DE MONTAGE Montage par un adulte requis. Durée de montage approximative : 30 min. Merci d’avoir choisi l’ensemble Magic Flower Water Table de Little © Tikes . Nous sommes déterminés à fournir un jouet durable et facile à... -
Página 15: Service Consommateurs
à compter de sa date d’achat (le reçu d’achat daté est exigé comme preuve d’achat). Au titre de • SERREZ les (4) vis en dessous. la présente garantie, la seule responsabilité de The Little Tikes Company et le seul recours se limitent Étape 5 : Regardez la fleur pousser! au remplacement de la pièce défectueuse ou au remplacement du produit. - Página 16 El montaje debe realizarlo un adulto. Tiempo aproximado de montaje: 30 min. © Gracias por elegir Magic Flower Water Table™ de Little Tikes Nos esforzamos por crear juguetes perdurables, fáciles de ensamblar y creados para durar, que brindan a sus niños años de diversión fascinante y ocurrente.
-
Página 17: Servicio Al Cliente
• Inserta el cuenco superior (parte A) en la parte superior Impreso en E.U.A. del tronco superior. © The Little Tikes Company, una compañía de MGA Entertainment. LITTLE TIKES® es una marca registrada de • Alinea las ramas en el tronco inferior con las aberturas MINIMUM SIZE allowed is .2” high Little Tikes en EE.UU. -
Página 20: Consumer Service
LIMITED WARRANTY The Little Tikes Company makes fun, high quality toys. We warrant to the original purchaser that this product is free of defects in materials or workmanship for one year * from the date of purchase (dated sales receipt is required for proof of purchase).


