Tabla de contenido
Publicidad
Idiomas disponibles
Idiomas disponibles
Enlaces rápidos
Publicidad
Tabla de contenido

Resumen de contenidos para Panacom SP-1786DJ
- Página 1 Pg. 1...
- Página 2 Pg. 2...
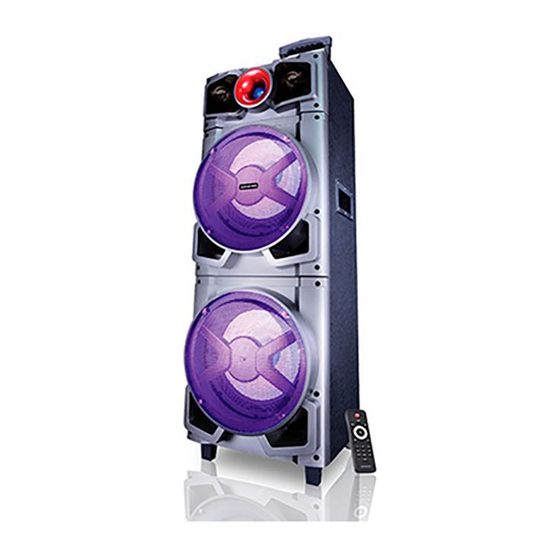
- Página 3 SP-1786DJ PROFESSIONAL TROLLEY SPEAKER User’s Guide Thank you for purchasing Panacom’s SP-1786DJ. Please read the manual carefully before operating. PRECAUTIONS In order to prevent operating problems or serious damage to the device, please comply with the following remarks. 1. Hold the electric outlet while pulling out the plug. Do not pull the wire.
-
Página 4: Top Panel
TOP PANEL 1. JOG WHEEL– This wheel has 2 functions: SCRATCH mode: Turn the Jog Wheel to N0.6 Effect, activate the scratch function. You can scratch the track with the Jog Wheel like a vinyl record while the music is playing. PARAMETER mode: TIME BUTTON –... - Página 5 are 16 DJ effects: 1. Flanger 2. FlangerVerb 3. Phaser 4. RobotFlange 5. Pitch 6. Scratch 7. Analog Delay 8. Trans 9. Phaser Wah 10. Filter 11. Auto Wah 12. Small Hall 13. Thin plate 14. Plate 15. LPF Reverb 16.
- Página 6 15. Display Screen 16. Bass Knob Use this knob to adjust the bass levels. 17. Input/Scan/Play/Pause Button. Press this button one time to change the input modes (USB/SD –LINE-FM-Wireless BT Connection). Press and hold this button to automatically scan for radio stations in FM mode.
- Página 7 Press this button to choose the APPLAUSE sound effect. 27. Bypass Button Press this button to cancel or choose a DJ effect. Once a DJ effect is selected, the display screen will show “DJ”. When the DJ effect is cancelled, the display screen will show “BYPASS”.
- Página 8 Pg. 8...
-
Página 9: Rear Panel
B. Ensure that Wireless BT Connection is activated on your mobile device. Search for “SP-1786DJ”. C. Once found, select “SP-1786DJ” and wait for connection. D. Once the device and unit have successfully paired, the unit screen will dis- play “BLUE” and it will emit a sound signal. - Página 10 Pg. 10...
-
Página 11: Remote Control
REMOTE CONTROL 1. Standby Button: Press this button to select standby. 2. Mode Selector Button: When there is NO USB or SD Card inserted into the unit, press this button to select any of the following input modes: AUX/FM/Wireless BT connection. When there is a USB or SD Card inserted into the unit, press this button to select any of the following input modes: USB/SD/AUX/FM/Wireless BT connection. - Página 12 Pg. 12...
-
Página 13: Especificaciones
SP-1786DJ PARLANTE PORTATIL STAGE SOUND User’s Guide Gracias por comprar el Panacom SP-1786DJ. Por favor lea este manual cuidadosamente previo al uso. PRECAUCIÓN Con el fin de evitar problemas de funcionamiento o daños graves en el dis- positivo, cumpla con las siguientes observaciones. -
Página 14: Panel Frontal
PANEL FRONTAL 1. RUEDA DE SELECCIÓN - Esta rueda tiene dos funciones: Modo SCRATCH Mover la rueda de selección hasta el efecto número 6 y activar la función SCRATCH. Se puede frotar la rueda de selección como a un disco vinilo hacia adelante y hacia atrás mientras la música está repro- duciéndose. - Página 15 1. Flanger: combinación de dos señales de audio 2. Flanger verb 3. Phaser: procesador electrónico de audio 4. Robot de Flanger 5. Tono 6. Scratch: técnica para producir sonidos rítmicos, de percusión u otros efectos de sonido moviendo el disco vinilo hacia adelante y hacia atrás. 7.
- Página 16 para ir a la estación siguiente cuando se encuentre en modo FM. Presion- ar sostenidamente el botón para aumentar el volumen del modo USB/ tarjeta SD/Conexión Inalámbrica BT/LINE. 19. Pista anterior: presionar este botón para ir a la pista anterior del modo USB/tarjeta SD/Conexión Inalámbrica BT.
- Página 17 Pg. 17...
- Página 18 Pg. 18...
-
Página 19: Panel Trasero
B. Asegurarse de tener activado el Conexión Inalámbrica BT de su dis- positivo móvil. Buscar la opción “SP-1786DJ”. C. Una vez que la haya encontrado, seleccionar “SP-1786DJ” y esperar la conexión. D. Una vez que el dispositivo y la unidad se hayan conectado correcta- mente, la unidad va a emitir un sonido y la pantalla de visualización... - Página 20 Pg. 20...
-
Página 21: Control Remoto
CONTROL REMOTO 1. Botón Standby: Presionar este botón para seleccionar standby. 2. Botón para Seleccionar los Modos: En el caso de no haber insertado una tar- jeta SD o USB en la unidad, presionar este botón para seleccionar cualquiera de los siguientes modos: AUX/FM/Conexión Inalámbrica BT. -
Página 22: International Warranty
INTERNATIONAL WARRANTY Terms and Conditions 1. PANACOM warrants the operation of this product to be free from any manufacturing and/or material defect for a period of 6 months from the date of purchase by the user. 2. This warranty is limited to the repair and/or replacement of this product,... -
Página 23: Garantia Internacional
GARANTIA INTERNACIONAL Términos y Condiciones 1. PANACOM garantiza el funcionamiento de este producto ante cualquier defecto de fabricación y/o vicio de material por el término de 6 meses conta- do a partir de la fecha de compra por parte del usuario. - Página 24 TECHNICAL SERVICES / SERVICIO TECNICO RAZÓN SOCIAL LOCALIDAD DOMICILIO TELÉFONO COMPANY LOCALITY ADDRESS PHONE CIUDAD DE BUENOS AIRES SERVICIO POST VENTA 0810-888-7262 PROVINCIA DE BUENOS AIRES TAURO ELECTRÓNICA Santa Teresita Av 41 Nº 688 02246-52-0932 TOSHIMAR Mar del Plata Bolivar 3056 0223-494-0723 SERVICE DE LA COSTA San Nicolás...
- Página 25 RAZÓN SOCIAL LOCALIDAD DOMICILIO TELÉFONO COMPANY LOCALITY ADDRESS PHONE PROVINCIA DE MENDOZA PLAY SERVICE Mendoza San Juan 1630 0261-489-9691 OMEGA.COM San Rafael Gutierrez 489 02627-429-206 PROVINCIA DE MISIONES TOTAL SERVICE Posadas Chacra 32-33 edif 18 03764-47-1360 escalera 38 dto A PB PROVINCIA DE NEUQUÉN ELECTRONICA INTEGRAL Neuquén...
- Página 26 Pg. 26...
- Página 27 Pg. 27...
- Página 28 www.panacom.com...


