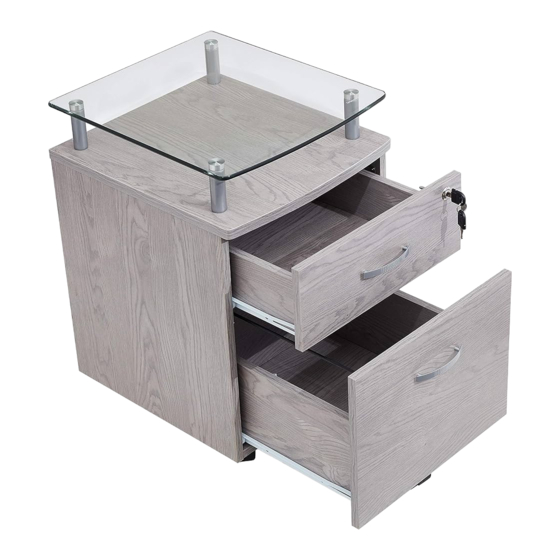
Resumen de contenidos para Techni Mobili RTA-S06
- Página 1 English MODEL RTA - S06 Thanks for purchasing one of our products. Please read carefully the assembly instructions before the installation. Please save this manual for future reference.
- Página 2 Spanish MODELO RTA - S06 Gracias por comprar uno de nuestros productos. Por favor lea cuidadosamente las instrucciones de ensamblaje antes de instalar la unidad. Por favor guarde este manual para referencias futuras.
- Página 3 RTA-S06 DIMENSIONS Product Size: 16"W x 18"D x 24"H MAXIMUM WEIGHT CAPACITIES DO NOT exceed this limit Please use care and good judgement when placing objects on wood surface...
- Página 4 x2SETS...
- Página 5 L Bracket and Nut Soporte y Tuerca 4X35 MM 6X35 MM...
- Página 7 RTA-S06...
- Página 8 RTA-S06...
- Página 9 RTA-S06 Use screws C to assemble the Metal Fitting (23B) to the Top Drawer 3X15 MM Right Panel (2) & Bottom Drawer Right Panel (8). Use tornillos C para ensemblar el Accesorio de Metal (23B) al Panel 4PCS Derecho de la Gaveta Superior (2) & Panel Derecho de Gaveta Inferior.
- Página 10 RTA-S06 P.10 Right Set aside the flat sliders (12), they are used until step 15. Turn drawer upside-down and assemble the “L” type sliders (12) to the side panels (1)&(2), making the holes align with the pre-drilled holes, and with the wheels facing to the back, then fix them with screws (C).
- Página 11 RTA-S06 P.11 4X14 MM 2PCS 6X12 MM Use screws E & F to assemble the L Bracket (19) to the Bottom Drawer Front Panel (9). Fix the Front Wheel (20) to the L Bracket (19) with the nut and tighten it well.
- Página 12 RTA-S06 P.12 Slide in the Drawer Bottom Panel (5). Use Screws B to fix the Bottom Drawer Back Panel (10) to the Bottom Drawer’s Left and Right Panels (7&8). Deslice el Panel Inferior de Gaveta (5). Use tornillos B para fijar el Panel Posterior de Gaveta Inferior (10) a los Paneles Izquierdo y Derecho de Gaveta Inferior (7 y 8).
- Página 13 RTA-S06 P.13 4X20 MM 2PCS Tighten the metal plates on the marked position of the metal bar First slide into the Metal Bar (23E) the 4 Metal Fittings in the order shown in the drawing (23A,23C,23C.23A). Then, tighten the metal plates 23C on the marked position of the Metal Bar (23E) with 23F.
- Página 14 RTA-S06 P.14 Left Right 3X15 MM 8PCS Match the flat Sliders (12) with the holes of the inside faces of the Left & Right Panels (14 & 15). Then fix them to the Panels using screws C. Haga coincidir los Deslizadores planos (12) con los agujeros de la cara interna de los Paneles Izquierdo y Derecho (14 y 15).
- Página 15 RTA-S06 P.15 6X40 MM 4PCS Slide in Back Panel (17) between the Left & Right Panels (14 & 15). Insert the Bolts A in the holes of the Top Panel (18) and put it over the Left & Right Panels (14 & 15) and tighten all cam locks.
- Página 16 RTA-S06 P.16 Use Screws G to assemble the Support Tubes (21) with the Top Glass Panel (22). Use tornillos G para ensamblar los Tubos de Soporte (21) con el Vidrio del Panel Superior (22). 6X20 MM 4PCS Use Screws H to assemble the Support Tubes (21) with the Top Panel (18).
-
Página 17: Care And Maintenance
CARE AND MAINTENANCE English - DO NOT EXPOSE THE SURFACES TO DIRECT SUNLIGHT, OR EXTREME ENVIRONMENTAL CONDITIONS. EXPOSURE WILL DAMAGE THE PRODUCT, WHICH IS NOT COVERED BY THE WARRANTY. - DO NOT USE SOLVENTS OVER SURFACES OR STRUCTURAL TUBES. SURFACES MUST BE CLEANED WITH A SOLUTION OF A SMOOTH SOAP AND WATER, THEN CLEARED WITH A DRY TOWEL.


