Tabla de contenido
Publicidad
Idiomas disponibles
Idiomas disponibles
Enlaces rápidos
H-8992, H-8993
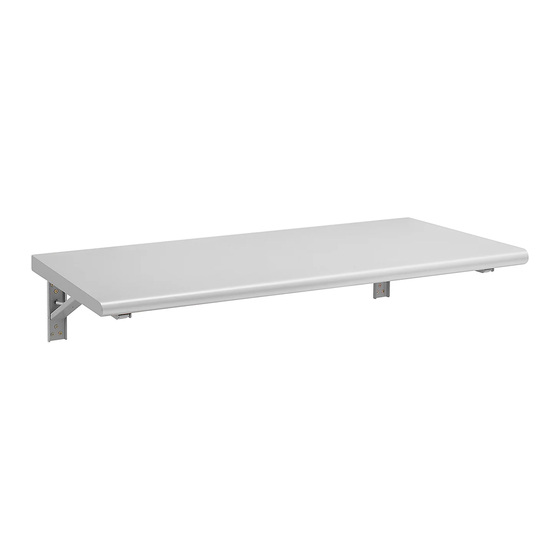
FOLDING WORKBENCH
TOOLS NEEDED
Electric
11/64" Drill Bit
Drill
5/16" Drill Bit
Phillips Head
10 mm Socket
Drill Bit
Tabletop x 1
NOTE: Tabletop includes pre-drilled holes that
are not used for this product.
LOCATING MOUNTING POSITION
1.
Locate desired bracket mounting position on wall.
DRYWALL
WARNING! If mounting to drywall, brackets
must be properly attached to wood studs
behind wall in order to hold the 500 lb. listed
capacity.
1.
Using stud finder, locate studs that will be used for
bracket mounting. Studs are commonly spaced
16" apart center-to-center. 48" long tables should
space brackets 32" apart center-to-center, and 60"
tables should space 48" apart. Depending on stud
spacing, distance between brackets may need to
be adjusted.
CONCRETE WALL
1.
For cement wall mounting, brackets should not be
spaced more than 46" apart center-to-center for
either workbench size.
PAGE 1 OF 9
1-800-295-5510
uline.com
Tape Measure
Level
Mounting Bracket x 2
Wood Screw x 8
ASSEMBLY
Stud Finder
Two Person Assembly
Recommended
PARTS
M6 x 25 mm
Wall Mount Screw x 12
2. With bracket unfolded and in upright position, align
top of bracket to desired height. Use pencil to mark
three wall mount holes at top and bottom of bracket.
(See Figure 1) Repeat for second bracket.
(See Figure 2)
NOTE: Tabletops add 1⁄ – 1¾" to overall height.
Figure 1
Figure 2
Para Español, vea páginas 4-6.
Pour le français, consulter les pages 7-9.
M6 x 55 mm
60 mm Plastic
Anchor x 12
0321 IH-8992
Publicidad
Tabla de contenido

Manuales relacionados para Uline H-8992


Resumen de contenidos para Uline H-8992
- Página 1 Para Español, vea páginas 4-6. Pour le français, consulter les pages 7-9. H-8992, H-8993 1-800-295-5510 uline.com FOLDING WORKBENCH TOOLS NEEDED Electric 11/64" Drill Bit Tape Measure Stud Finder Drill 5/16" Drill Bit Two Person Assembly Phillips Head 10 mm Socket...
- Página 2 ASSEMBLY CONTINUED ATTACHING TO WALL 5. With both brackets securely in the upright position, place tabletop onto brackets leaving a 1/4" space DRYWALL between end of tabletop and wall. This spacing allows clearance for tabletop to properly fold down. If attaching to wood studs, drill mounting pilot holes (See Figure 5) using a drill with a 11/64"...
- Página 3 10. Ensure all screws and bolts are fully secured. 11. Test folding of workbench to ensure proper clearance from the wall. NOTE: If top is having trouble folding down, adjust spacing of tabletop from wall. Completed Assembly 1-800-295-5510 uline.com PAGE 3 OF 9 0321 IH-8992...
-
Página 4: Mesa De Trabajo Abatible
H-8992, H-8993 800-295-5510 uline.mx MESA DE TRABAJO ABATIBLE HERRAMIENTAS NECESARIAS Taladro Broca de 11/64" Cinta de Medir Detector de Eléctrico Broca de 5/16" Vigas Se Recomienda Armar Broca de Cabeza Dado de Nivel Entre Dos Personas de Cruz 10 mm... -
Página 5: Continuación Del Ensamble
CONTINUACIÓN DEL ENSAMBLE FIJAR A LA PARED 5. Con ambos soportes asegurados en la posición vertical, coloque la cubierta sobre los soportes PANEL DE YESO dejando unos 6 mm (1/4") de espacio entre el extremo de la cubierta y la pared. Este espacio Si la fija a las vigas de madera, taladre los orificios permitirá... -
Página 6: Funcionamiento
11. Pruebe la mesa de trabajo abatible para confirmar que esté bien alejada de la pared. NOTA: Si hay problemas para abatir la cubierta hacia abajo, ajuste el espacio entre la cubierta y la pared. Ensamble Completo 800-295-5510 uline.mx PAGE 6 OF 9 0321 IH-8992... -
Página 7: Outils Requis
H-8992, H-8993 1-800-295-5510 uline.ca ÉTABLI ESCAMOTABLE OUTILS REQUIS Perceuse Mèche de perceuse de 11/64 po Ruban à Détecteur électrique mesurer de montants Mèche de perceuse de 5/16 po Montage à deux personnes Mèche de perceuse Douille de 10 mm Niveau à bulles recommandé... -
Página 8: Fixation Au Mur
MONTAGE SUITE FIXATION AU MUR 5. Posez la surface de table sur les supports bien placés en position droite en laissant un espace CLOISON SÈCHE de 1/4 po entre le mur et le bord de la table. Cet espace permet à la surface de table de librement Si le montage se fait sur des colombages en bois, se replier. - Página 9 11. Essayez d'abaisser l'établi pour vous assurer que l'espace vers le mur est suffisant. REMARQUE : Si vous avez du mal à replier la surface, ajustez l'espace entre le mur et la surface de table. Montage complété 1-800-295-5510 uline.ca PAGE 9 OF 9 0321 IH-8992...