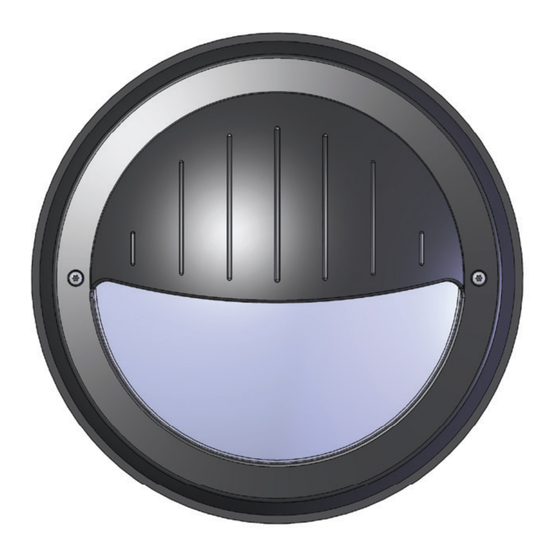
Tabla de contenido
Publicidad
Idiomas disponibles
Idiomas disponibles
Enlaces rápidos
IB519021EN
Installation Instructions - TR11 LED
Instructions d'installation - DEL TR11
Instrucciones de instalación - LED TR11
WARNING
Make certain power is OFF before starting installation
or attempting any maintenance. Risk of fire/electric
shock. If not qualified, consult an electrician.
RISK OF ELECTRIC SHOCK— Disconnect power
●
●
at fuse or circuit breaker before installing or
servicing.
RISK OF BURN—Disconnect power and allow
●
●
fixture to cool before servicing.
IMPORTANT: Read before installing fixture. Retain for future reference.
GENERAL: Upon receipt of fixture thoroughly inspect for any freight damage, which should be brought to the attention
of the delivery carrier. Compare the catalog description listed on the packing slip with the fixture label on the housing to
assure you have received the correct merchandise.
SAFETY: This fixture must be wired in accordance with the National Electrical Code and applicable local codes and
ordinances. Proper grounding is required to insure personal safety. Carefully observe grounding procedure under
installation section.
CLEANING: The reflector and lens may be cleaned with any non-abrasive cloth and mild detergent (i.e. 409 Cleaner).
Cleaning should be done on the lens at room temperature, and out of direct sunlight. To remove paint, lipstick, marker,
etc., the following solvents may be used.
RECOMMENDED:
1.
A solution of three (3) parts alcohol, one (1) part TOLUOL.
2.
Four (4) parts alcohol, one (1) part Methylethylketone MEK). Also safe, but less effective: Naphtha, Butyl Celiosolve,
Kerosene.
RISK OF PERSONAL INJURY— Fixture may
●
●
become damaged and/or unstable if not installed
properly.
NOTICE: These instructions do not claim to cover all
details or variations in the equipment, procedure, or
process described, or to provide directions for meeting
every possible contingency during installation, operation
or maintenance. When additional information is desired
to satisfy a problem not covered sufficiently for user's
purpose, please contact your nearest representative.
Design specifications and dimensions are subject to
change without notice.
OR
Brand Logo
reversed out of
black
INS #
INS #
Publicidad
Tabla de contenido

Resumen de contenidos para Cooper TR11
- Página 1 IB519021EN INS # INS # Installation Instructions - TR11 LED Instructions d’installation - DEL TR11 Instrucciones de instalación - LED TR11 WARNING RISK OF PERSONAL INJURY— Fixture may ● ● become damaged and/or unstable if not installed Make certain power is OFF before starting installation properly.
- Página 2 Installation Instructions - TR11 LED INSTALLATION Identify what type of unit is being installed. This will aid you through the remaining of the installation instructions. Refer to each section for each specific type of unit. There are two styles of units (flat and shallow) as described by their depth of protrusion from the mounting surface (see figures below).
- Página 3 Installation Instructions - TR11 LED CAUTION Driver will Wall Clearance always be on Gasket Do not touch LEDs on fixture, care must be taken to not Hole for come in contact with LED board(s) or connector(s) during 1/4” Bolt fixture installation.
- Página 4 Installation Instructions - TR11 LED Shallow Cast Unit Installation Shallow Casting Remove lens, using a TORX T20 center pin reject screwdriver. Shallow Casting Remove back plate using Philips screwdriver. Select the correct type fasteners to use for the mounting surface, 1/4” nominal diameter (not supplied).
-
Página 5: Risque De Brûlure
Commencez par retirer le module de la lentille à l'aide d'un tournevis Torx T20 pour les vis avec goupille centrale. (Tournevis vendu séparément, nombre de catalogue Cooper Lighting Solutions VRSD ou mèche VRSB de 6,35 mm (1/4 po). ø11,50 (292,10) Installation du modèle plat... - Página 6 Instructions d’installation - DEL TR11 Centrez la plaque centrale sur un plafond ou mur plat Trou de dégagement pour et lisse au-dessus de la boîte de jonction. Utilisez la boulon de 6,35 mm (1/4po) plaque centrale comme modèle pour disposer les emplacements des fixations.
- Página 7 Instructions d’installation - DEL TR11 Remettez la lentille en place en alignant (3) goupilles de lentille et les fentes de la plaque de montage. Sur la plaque, doivent être disposées à 3, 9 et 12 heures. Installez le joint torique (fourni) avec les quatre vis.
- Página 8 Instructions d’installation - DEL TR11 Replacez la plaque dorsale retirée à l'étape 2. Remettez la lentille en place en alignant (3) goupilles de lentille et Montage du les fentes de la plaque de montage. Sur la plaque, elles joint carré...
-
Página 9: Riesgo De Descarga Eléctrica
Torx T20 para tornillos con cabeza de forma estrellada. (El destornillador se vende por separado, número de catálogo Cooper Lighting Solutions VRSD o broca VRSB de 1/4” .) ø11,50 Instalación de la unidad plana (292.10) - Página 10 Instrucciones de instalación - LED TR11 Conecte los cables de la luminaria a los cables de alimentación correspondientes y colóquelos en la caja Orificio de de derivación. Necesitará un cable de alimentación de paso para el 90 grados como mínimo. Conecte la luminaria a tierra tornillo de 1/4”...
- Página 11 Instrucciones de instalación - LED TR11 Vuelva a colocar la lente alineando las (3) clavijas con las ranuras de la placa de montaje. Debe colocarlos sobre la placa en las posiciones de las 3, 9 y 12, como si fuera un reloj. Use la junta tórica (incluida) con los cuatro tornillos.
- Página 12 Instrucciones de instalación - LED TR11 Coloque nuevamente la placa trasera que retiró en el paso 2. Vuelva a colocar la lente alineando las (3) Montaje con clavijas con las ranuras de la placa de montaje. Debe junta cuadrada colocarlos sobre la placa en las posiciones de las 3, 9 y 12, como si fuera un reloj.
- Página 16 Garanties et limitation de responsabilité Veuillez consulter le site www.cooperlighting.com pour obtenir les conditions générales. Garantías y Limitación de Responsabilidad Visite www.cooperlighting.com para conocer nuestros términos y condiciones. Cooper Lighting Solutions is a registered trademark. Cooper Lighting Solutions All trademarks are property...
