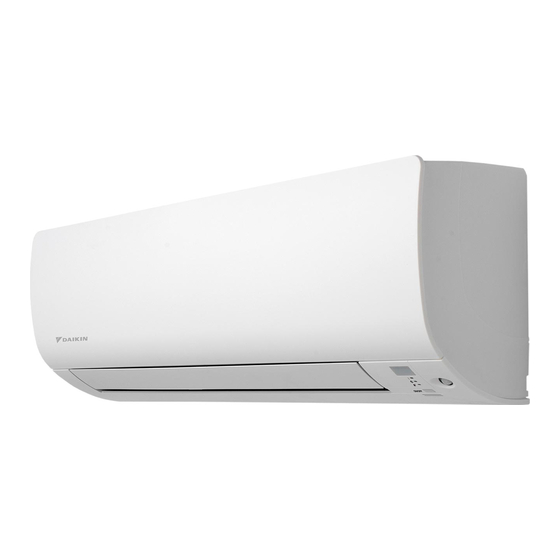
Daikin FTXS35K2V1B Manual Del Usuario
Ocultar thumbs
Ver también para FTXS35K2V1B:
- Manual del usuario (44 páginas) ,
- Manual de funcionamiento (44 páginas) ,
- Manual de instalación (20 páginas)
Resumen de contenidos para Daikin FTXS35K2V1B
- Página 1 DAIKIN ROOM AIR CONDITIONER INSTALLATION MANUAL R410A Split Series MODELS FTXS35K2V1B FTXS35K3V1B FTXS42K2V1B FTXS42K3V1B FTXS50K2V1B FTXS50K3V1B ATXS35K2V1B ATXS35K3V1B ATXS50K2V1B ATXS50K3V1B...
- Página 2 18 ** DICz*** este autorizat să compileze Dosarul tehnic de construcţie. 24 ** Spoločnosť DICz*** je oprávnená vytvoriť súbor technickej konštrukcie. 25 ** DICz*** Teknik Yapı Dosyasını derlemeye yetkilidir. ***DICz = Daikin Industries Czech Republic s.r.o. Takayuki Fujii Managing Director...
- Página 3 18 ** DICz*** este autorizat să compileze Dosarul tehnic de construcţie. 24 ** Spoločnosť DICz*** je oprávnená vytvoriť súbor technickej konštrukcie. 25 ** DICz*** Teknik Yapı Dosyasını derlemeye yetkilidir. ***DICz = Daikin Industries Czech Republic s.r.o. Takayuki Fujii Managing Director...
- Página 4 02 ** Daikin Europe N.V. hat die Berechtigung die Technische Konstruktionsakte zusammenzustellen. 08 ** A Daikin Europe N.V. está autorizada a compilar a documentação técnica de fabrico. 14 ** Společnost Daikin Europe N.V. má oprávnění ke kompilaci souboru technické konstrukce.
-
Página 5: Safety Precautions
Safety Precautions • The precautions described herein are classified as WARNING and CAUTION. They both contain important information regarding safety. Be sure to observe all precautions without fail. • Meaning of WARNING and CAUTION notices WARNING..Failure to follow these instructions properly may result in personal injury or loss of life. CAUTION..Failure to observe these instructions properly may result in property damage or personal injury, which may be serious depending on the circumstances. -
Página 6: Choosing An Installation Site
Safety Precautions CAUTION • Do not install the air conditioner at any place where there is a danger of flammable gas leakage. In the event of a gas leakage, build-up of gas near the air conditioner may cause a fire to break out. •... -
Página 7: Preparation Before Installation
Preparation before Installation Removing and installing the front panel • Removal method 1) Place your fingers in the indentations on the main unit (one each on the left and right sides), and open the front panel until it stops. 2) Continue to open the front panel further while sliding the panel to the right and pulling it toward you in order to disengage the front panel shaft on the left side. -
Página 8: Indoor Unit Installation Drawings
Indoor Unit Installation Drawings ■ How to attach the indoor unit Mounting Hook the claws of the bottom frame plate to the mounting plate. If the claws are difficult to hook, remove the front grille. Claw Mounting plate ■ How to remove the indoor unit Push up the lower part of the front grille to release the claws. -
Página 9: Indoor Unit Installation
Indoor Unit Installation Installing the mounting plate • The mounting plate should be installed on a wall which can support the weight of the indoor unit. 1) Temporarily secure the mounting plate to the wall, make sure that the panel is completely level, and mark the boring points on the wall. - Página 10 Indoor Unit Installation • Remove the pipe port cover as shown below. 1) Cut off the pipe port cover from inside the front grille using a copping saw. Apply the blade of the copping saw to the notch, and cut off the pipe port cover along the uneven inner surface.
- Página 11 Indoor Unit Installation 3-2. Left-side, left-back, or left-bottom piping How to replace the drain plug and drain hose • Replacing onto the left side Drain hose attachment position 1) Remove the insulation fixing screw on the * The drain hose is on the back of the unit. right and remove the drain hose.
-
Página 12: Wiring Diagram
Wiring diagram Unified Wiring Diagram Legend For applied parts and numbering refer to the wiring diagram sticker supplied on the unit. Part numbering is realized by Arabic numbers in ascending order for each part and is represented in the overview below by symbol “*” in the part code. CIRCUIT BREAKER CIRCUIT BREAKER PROTECTIVE EARTH... - Página 13 Indoor Unit Installation Wiring 1) Strip wire ends (15mm). 2) Match wire colours with terminal numbers on indoor and outdoor unit’s terminal blocks and firmly screw wires to the corresponding terminals. 3) Connect the earth wires to the corresponding terminals. 4) Pull wires to make sure that they are securely latched up, then retain wires with wire retainer.
- Página 14 Indoor Unit Installation • Removal methods of metal plate electrical wiring covers 1) Remove the front grille. 2) Remove the electrical wiring box. (1 screw) 3) Raise the 2 upper parts of the metal plate electrical wiring cover, pull the parts frontward, and remove the 3 tabs. 4) Slide the metal plate electrical wiring cover upward and remove the 2 tabs on the lower side.
-
Página 15: Drain Piping
Indoor Unit Installation Drain piping The drain hose should be inclined downward. 1) Connect the drain hose, as described right. No trap is permitted. Do not put the end of the hose in water. 2) Remove the air filters and pour some water into the drain pan to check the water flows smoothly. -
Página 16: Caution On Piping Handling
Refrigerant Piping Work Refrigerant piping CAUTION • Use the flare nut fixed to the main unit. (To prevent cracking of the flare nut by aged deterioration.) • To prevent gas leakage, apply refrigeration oil only to the inner surface of the flare. (Use refrigeration oil for R410A.) •... -
Página 17: Trial Operation And Testing
Trial Operation and Testing Trial operation and testing 1-1 Measure the supply voltage and make sure that it falls in the specified range. 1-2 Trial operation should be carried out in either cooling or heating mode. • In cooling mode, select the lowest programmable temperature; in heating mode, select the highest programmable temperature. - Página 18 3P363588-2G 2017.02...


