
Manuales relacionados para Power Wheels Hot Wheels


Resumen de contenidos para Power Wheels Hot Wheels
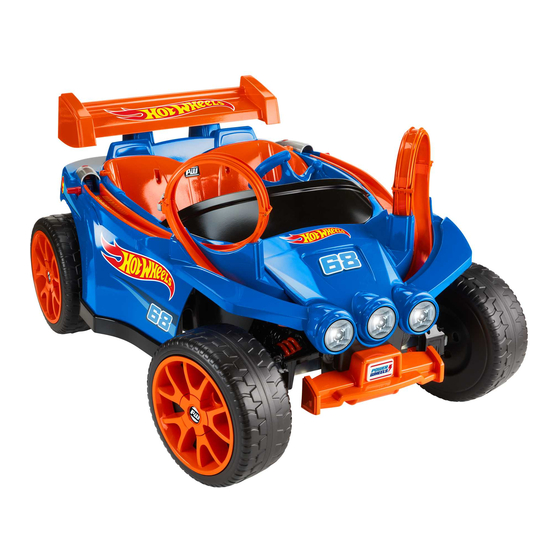
- Página 1 EASY ASSEMBLY VIDEO ¡VIDEO QUE MUESTRA LO FÁCIL QUE ES ARMARLA! VIDÉO D’ASSEMBLAGE fisher-price.com/assembly/GRJ52 OWNER’S MANUAL MANUAL DEL USUARIO GUIDE DE L’UTILISATEUR...
-
Página 2: Tabla De Contenido
INDEX ÍNDICE SOMMAIRE BEFORE YOU BEGIN • ANTES DE EMPEZAR • AVANT DE COMMENCER ..........3 DANGERS AND WARNINGS • PELIGROS Y ADVERTENCIAS DANGERS ET AVERTISSEMENTS ....................... 5 CHARGING • CARGAR • CHARGEMENT ................... 10 PARTS • PIEZAS • PIÈCES ......................12 ASSEMBLY •... -
Página 3: Before You Begin Antes De Empezar Avant De Commencer
Requires 1 - 12V, 12 Ah, non-spillable, sealed lead acid orange battery (included). Requires 1 - 12V charger (included). The charger is not a toy. Use ONLY a Power Wheels® orange battery and charger with this product. Use of any other battery or charger will damage your vehicle. - Página 4 Para el centro de servicio autorizado más cercano a su localidad, visítenos en línea en powerwheels.com o llámenos al 1-800-348-0751. Power Wheels a établi un réseau de centres de service autorisés indépendants au Canada et aux États-Unis. Ces centres de service autorisés réparent ou remplacent sans frais les pièces sous garantie.
-
Página 5: Dangers And Warnings • Peligros Y Advertencias Dangers Et Avertissements
DANGER/POISON PELIGRO/ VENENO DANGER/POISON • SHIELD EYES. EXPLOSIVE GASES. CAN CAUSE BLINDNESS OR INJURY. • CUBRIRSE LOS OJOS. GASES EXPLOSIVOS. PUEDEN CAUSAR CEGUERA O LESIONES. • PROTÉGER LES YEUX. GAZ EXPLOSIFS. PEUT RENDRE AVEUGLE OU CAUSER DE GRAVES BLESSURES. • NO SPARKS / FLAMES / SMOKING •... - Página 6 • Never modify the electrical system. Alterations could cause a fire. • Use only a Power Wheels battery and charger. Other batteries or chargers ®...
- Página 7 • Nunca modificar el sistema eléctrico. Las alteraciones podrían causar un incendio. • Usar solo una batería y cargador de Power Wheels. Otras baterías o cargadores podrían causar un incendio o explosión. • Los niños se pueden lastimar con las piezas pequeñas y con los bordes y puntas filosas de las piezas individuales del vehículo desmontado, así...
- Página 8 • Ne jamais modifier le système électrique. Toute modification peut provoquer un incendie. • Utiliser uniquement une batterie et un chargeur Power Wheels. Tout autre type de batterie ou de chargeur peut provoquer un incendie ou une explosion.
- Página 9 WARNING ADVERTENCIA AVERTISSEMENT Prevent injuries and deaths • Direct adult supervision required. • Never ride at night. • Keep children within safe riding areas. These areas must be: - away from swimming pools and other bodies of water to prevent drownings. - generally level to prevent tipovers.
-
Página 10: Charging • Cargar • Chargement
CARGAR CHARGEMENT • Before first time use, you must charge the battery • La batería Power Wheels de 12V incluye un fusible at least 18 hours. térmico. El fusible térmico es un dispositivo • Charge the battery for at least 14 hours after each de seguridad que se restablece por sí... - Página 11 18 hour first time charge 18 horas para la primera carga La première fois, charger la batterie pendant 18 heures. 14 hour charge after each use 14 horas después de cada uso Après chaque utilisation, la charger pendant 14 heures. •...
-
Página 12: Parts • Piezas • Pièces
PARTS PIEZAS PIÈCES 2 Front Wheels 2 Rear Wheels (Left and Right) (Left and Right) 2 ruedas delanteras 2 ruedas traseras (izquierda y derecha) (izquierda y derecha) 2 roues avant 2 roues arrière (gauche et droite) (gauche et droite) - Página 13 Left and Right izquierda y derecha Gauche et droit Left and Right Left and Right izquierda y derecha izquierda y derecha Gauche et droit Gauche et droit...
- Página 14 Tuerca ciega de 1 cm Vis M3,5 de 1,9 cm Écrou de sécurité de 1 cm x 52 M6 x 32 mm Screw Not shown: 5 Hot Wheels™ Tornillo M6 x 32 mm diecast cars Vis M6 de 32 mm No mostrado: 5 vehículos Hot Wheels Non illustrées : 5 voitures...
- Página 15 Identifique todas las piezas Ne pas jeter l’emballage Identify all parts before antes del montaje y guarde avant d’avoir terminé assembly and save all todo el material de embalaje l’assemblage pour s’assurer packaging material until hasta que el montaje esté qu’aucune pièce n’est jetée assembly is complete completo para asegurarse...
-
Página 16: Assembly Montaje Assemblage
ASSEMBLY MONTAJE ASSEMBLAGE ASSEMBLY MONTAJE ASSEMBLAGE Carefully turn the vehicle frame over. Fit the screw holes on the ends of the frame rails over the screw pegs on each side. Voltear cuidadosamente el vehículo. Ajustar los orificios de tornillo de los extremos de los rieles del armazón sobre las clavijas de tornillo en cada lado. - Página 17 BOTTOM VIEW VISTA DE ABAJO VUE DE DESSOUS Fit the spoiler assembly to the back of the seat. Ajusta la unidad del alerón en la parte trasera del asiento. Fixer l’aileron à l’arrière de Fixer l’aileron à l’arrière de la banquette. la banquette.
- Página 18 BOTTOM VIEW VISTA DE ABAJO VUE DE DESSOUS Turn the vehicle upright. Colocar el vehículo en posición vertical. Remettre le véhicule à l’endroit.
- Página 20 Carefully turn the vehicle on its side. Pon cuidadosamente el vehículo sobre un lado. Tourner soigneusement le véhicule sur le côté.
- Página 21 Fit the Hot Wheels™ launcher into the recess at the back of the vehicle. The launcher handle should point away from the vehicle. Ajusta el lanzador de Hot Wheels™ en el hueco de la parte posterior del vehículo. La manija del lanzador debe apuntar en dirección opuesta...
- Página 22 Fit the Hot Wheels™ launcher into the recess at the back of the vehicle. The launcher handle should point away from the vehicle. Ajusta el lanzador de Hot Wheels™ en el hueco de la parte posterior del vehículo. La manija del lanzador debe apuntar en dirección opuesta...
- Página 23 Rear Wheel Rueda trasera Roue arrière Turn the vehicle upright. Colocar el vehículo en posición vertical. Remettre le véhicule à l’endroit.
- Página 24 Rear Wheel Rueda trasera Roue arrière...
- Página 26 Pull to rotate the front axle completely towards the front of the vehicle. Jalar para girar los ejes delanteros Jala hasta el frente del vehículo. Tirer sur l’essieu avant pour le faire Tire pivoter complètement vers l’avant pivo du véhicule. du v...
- Página 29 Pull to rotate the front axle completely towards the front of the vehicle. towards th Jalar para girar los ejes delanteros Jalar para hasta el frente del vehículo. hasta el fr Tirer sur l’essieu avant pour le faire Tirer sur l pivoter complètement vers l’avant pivoter co du véhicule.
- Página 33 Pull the straight end of the steering column up so that only the bend is visible (out from the bottom of the steering post). Hold the steering column in place and lower the assembly to fit both the steering post into the hole in the floor of the vehicle and the steering column into the slot in the front end of the vehicle.
- Página 34 Carefully turn the vehicle on its side. Fit the steering column through the hole in the steering linkage. Fit a 1 cm lock nut onto the end of the steering column and tighten with the assembly wrench. Poner cuidadosamente el vehículo sobre un lado.
- Página 35 Turn the vehicle upright. Fit the steering wheel onto the steering column assembly. Colocar el vehículo en posición vertical. Ajustar el volante en la unidad de la columna de mando. Remettre le véhicule à l’endroit. Poser le volant sur la colonne de direction.
- Página 36 Track pieces are designed to fit one way. If the track does not seem to fit, turn it around and try again. Los tramos de las pistas están diseñados para ajustarse de una sola manera. Si la pista no se ajusta, voltéala e inténtalo de nuevo.
- Página 37 Track pieces are designed to fit one way. If the track does not seem to fit, turn it around and try again. Los tramos de las pistas están diseñados para ajustarse de una sola manera. Si la pista no se ajusta, voltéala e inténtalo de nuevo.
- Página 38 Lift and close the track loop. Press the latch on the lower track and secure the loop to the lower track. Levanta y cierra el loop de la pista. Presiona el pestillo en la pista inferior y fija el loop a la pista inferior. Lever et fermer la boucle de piste.
- Página 39 Carefully turn the vehicle on its side. Poner cuidadosamente el vehículo sobre un lado. Tourner soigneusement le véhicule sur le côté. Turn the vehicle upright. i ht Track pieces are designed to fit one way. If the track does not seem to fit, turn it around and try again.
- Página 40 Track pieces are designed to fit one way. If the track does not seem to fit, turn it around and try again. Los tramos de las pistas están diseñados para ajustarse de una sola manera. Si la pista no se ajusta, voltéala e inténtalo de nuevo.
- Página 41 Lift and close the track loop. Press the latch on the lower track and secure the loop to the lower track. Levanta y cierra el loop de la pista. Presiona el pestillo en la pista inferior y fija el loop a la pista inferior. Lever et fermer la boucle de piste.
- Página 42 Carefully turn the vehicle on its side. Poner cuidadosamente el vehículo sobre un lado. Tourner soigneusement le véhicule sur le côté. Turn the vehicle upright. Lift to open the hood. open Colocar el vehículo en posición Coloc vertical. Lift to open the hood. vertic Remettre le véhicule à...
- Página 43 Pull the hood forward. Jala el capó hacia delante. Jala el capó hac Ramener le capot vers l’avant. Ramener le cap Insert the tabs on the windshield under the arch at the front of the vehicle. Inserta las lengüetas en el parabrisas bajo el arco en la parte frontal del vehículo.
-
Página 45: Let'S Launch! ¡Vamos A Lanzar! Lancer
Tira de la manija del lanzador hacia atrás para activarlo. Tirer la poignée du lanceur vers l’arrière pour l’enclencher. Place a Hot Wheels™ car onto the track. Coloca un vehículo Hot Wheels™ en la pista. Placer une voiture Hot Wheels sur la piste. - Página 46 Make sure that the Hot Wheels™ car is pushed all the way into the launcher. Press the button on the top of the launcher and watch the high speed action! Asegúrate de empujar el vehículo Hot Wheels™ completamente hasta el lanzador. ¡Presiona el botón en la parte superior del lanzador y mira la acción de alta velocidad!
- Página 47 The Hot Wheels™ cars will land under the vehicle hood. Lift the hood and tilt the hood back to open and retrieve the Hot Wheels™ cars. Los vehículos Hot Wheels™ caerán bajo el capó del vehículo. Levanta el capó e inclínalo hacia atrás para abrirlo y recupera los vehículos Hot Wheels™.
-
Página 48: Decoration Decoración Décoration
DECORATION DECORACIÓN DÉCORATION DECORATION DECORACIÓN DÉCORATION For best results, avoid repositioning a label once it has been applied to the vehicle. Para mejores resultados, evitar reposicionar las etiquetas. Pour de meilleurs résultats, éviter d’apposer un autocollant plus d’une fois sur le véhicule. -
Página 50: Battery Installation Colocación De La Batería Installation De La Batterie
BATTERY INSTALLATION COLOCACIÓN DE LA BATERÍA BATTERY INSTALLATION COLOCACIÓN DE LA BATERÍA INSTALLATION DE LA BATTERIE INSTALLATION DE LA BATTERIE Press the battery door button on the back end of the vehicle. Lower the battery door. Presionar el botón del compartimento de la batería en la parte trasera del vehículo. - Página 51 Plug the motor harness connector into the battery. Push firmly. Enchufar el conector del arnés del motor en la batería. Empujar con firmeza. Brancher le connecteur du câble du moteur sur la batterie. Pousser fermement. Lift the battery door and “snap” into place.
-
Página 52: Règles Pour Une Conduite En Toute Sécurité
SAFE DRIVING RULES NORMAS DE SEGURIDAD PARA CONDUCIR RÈGLES POUR UNE CONDUITE EN TOUTE SÉCURITÉ • Un niño que no esté sentado en el asiento podría caerse, causar que se voltee el vehículo o bloquear la vista del conductor. • Usar el vehículo sólo durante el día o en áreas bien iluminadas. -
Página 53: Vehicle Operation • Funcionamiento Del Vehículo • Fonctionnement Du Véhicule
VEHICLE OPERATION FUNCIONAMIENTO DEL VEHÍCULO FONCTIONNEMENT DU VÉHICULE Beginner Use – Low Speed • Mover la palanca a la posición de velocidad (4 km/h - 2,5 mph) lenta . Presionar el pedal para avanzar. • Después de que el niño se sienta cómodo Principiantes –... - Página 54 Advanced Use – High Speed • Antes de desconectar el tornillo bloqueador (8 km/h - 5 mph) de velocidad rápida, asegúrese de que el niño sepa cómo virar, arrancar y detener el Avanzados – Velocidad rápida (8 km/h) vehículo, y que sepa las reglas para manejar Conducteurs expérimentés –...
-
Página 55: Care • Mantenimiento • Entretien
CARE MANTENIMIENTO ENTRETIEN BATTERY CARE • En condiciones de lluvia o nieve, guardar el • If a battery leak develops, avoid contact with the vehículo bajo techo o cubrirlo totalmente. leaking acid and place the damaged battery in Cargar la batería por lo menos una vez al mes a plastic bag. -
Página 56: Battery Disposal Eliminación De La Batería Mise Au Rebut De La Batterie
BATTERY DISPOSAL ELIMINACIÓN DE LA BATERÍA MISE AU REBUT DE LA BATTERIE • CONTAINS SEALED LEAD BATTERY. BATTERY MUST BE RECYCLED. • Recycle or dispose of the battery in an environmentally sound manner. • Do not dispose of a lead acid battery in a fire. The battery may explode or leak. -
Página 57: Warranty • Garantía • Garantie
Power Wheels ride-on vehicle (purchased ® Fisher-Price) against defects in materials and from an authorized dealer of Power Wheels workmanship. The six month limited warranty vehicles) against defects in materials and applies only to the 6 or 12 volt battery included workmanship. - Página 58 PÓLIZA DE GARANTÍA *Garantie limitée de un (1) an à partir de la date d’achat pour le véhicule Power Wheels ® . Mattel de México, S.A. de C.V., garantiza este Garantie limitée de six (6) mois à partir de la date producto por un periodo de 1 año en todas...
-
Página 59: General Information • Información General Renseignements Généraux
INFORMATION INFORMACIÓN RENSEIGNEMENTS FCC STATEMENT (UNITED STATES ONLY) Nota: los cambios o modificaciones no expresamente This equipment has been tested and found to autorizados por el fabricante responsable del comply with the limits for a Class B digital device, cumplimiento de las normas puede cancelar la pursuant to Part 15 of the FCC rules. - Página 60 Mattel Chile, S.A., Avenida Américo Vespucio 501-B, Quilicura, Santiago. Tel.: 1230-020-6213. HOT WHEELS and associated trademarks and trade dress are owned by, and used under license from Mattel. © 2021 Mattel. HOT WHEELS ainsi que les marques et les designs y afférents appartiennent à...