Publicidad
Idiomas disponibles
Idiomas disponibles
Enlaces rápidos
Publicidad

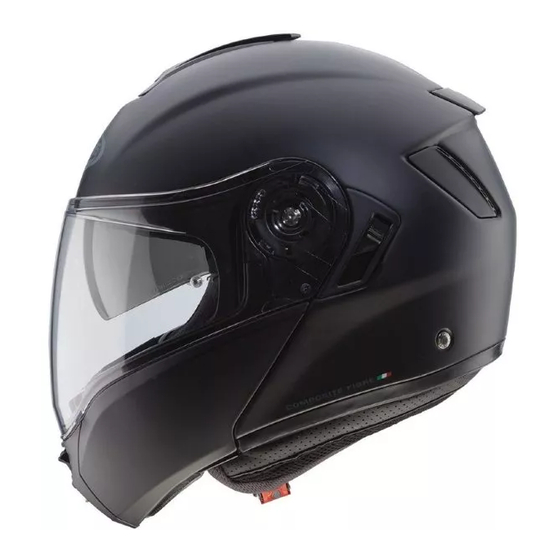
Resumen de contenidos para Caberg LEVO
- Página 3 Italiano pag. 4-5 ................................English pag. 6-7 ................................Deutsch pag. 8-9 ..............................Français pag. 10-11 ..............................Español pag. 12-13 ...............................
- Página 4 Il casco LEVO, grazie alla doppia omologazione P/J può essere utilizzato in 2 configurazioni (mentoniera chiusa “P” e mentoniera aperta “J”) Leva P/J Quando la leva P/J viene posizionata in “J” è possibile bloccare la mentoniera in posizione sollevata (Fig.1) La selezione “J” deve essere eseguita solo con mentone completamente alzato.
- Página 5 Per rimontare il mentone apribile eseguire le suddette operazioni in senso contrario. ATTENZIONE! Durante l’assemblaggio accertarsi che tutti i componenti siano posizionati correttamente onde evitare di pregiudicarne il funzionamento. ATTENZIONE! Non utilizzare il casco privo del mentone. 4. ISTRUZIONI SMONTAGGIO FODERA INTERNA LAVABILE 4.1 Estrarre il paranuca sganciando prima la porzione centrale posteriore con una leggera trazione verso l’alto (Fig.7-8), poi, alla stesso modo sganciare, le parti laterali (fig.7-9) ed in fine sfilare le parti frontali con una leggera trazione verso la parte posteriore del casco.
- Página 6 Your helmet LEVO thanks to the double homologation P/J can be used in 2 configurations (chin guard closed “P” and chin guard open “J”) Lever P/J When the P/J lever is positioned on “J” it is possible to block the chin guard in the open position (Pic.1).
- Página 7 WARNINGS! Do not ever use the helmet without the chin-guard. 4. HOW TO REMOVE THE INNER WASHABLE LINING 4.1 Starting from the neck protection, pull slightly towards the inside of the helmet (Pic.7-8), then the lateral sides ( Pic.7-9) and at the end release the frontal part (Pic.10) 4.2 To remove the cheek pad, first detach the studs at the back and then extract it from the chin strap through the slot.
- Página 8 Ihr Helm LEVO kann dank der doppelten Homologation P / J in 2 Konfigurationen verwendet werden (Kinnschutz geschlossen “P” und Kinnschutz offen “J”) Hebel P / J Wenn der P / J-Hebel auf “J” steht, ist es möglich, den Kinnschutz in der offenen Position zu sperren (Abb.
- Página 9 3.3 Kinnschutz entfernen Um den Kinnschutz zu installieren, wiederholen Sie den obigen Vorgang in umgekehrter Reihenfolge. WARNUNG! Während der Kinnschutzinstallation ist darauf zu achten, dass alle Komponenten korrekt positioniert sind. WARNUNG! Verwenden Sie den Helm nie ohne Kinnschutz. 4. ANLEITUNG ZUM AUSBAU DES WASCHBAREN INNENFUTTERS 4.1 Ausgehend vom Nackenschutz ziehen Sie das Innenfutter leicht in die Innenseite des Helms (Abb.
- Página 10 Le casque LEVO peut grâce à sa double homologation P/J être utilisé en 2 configurations (mentonnière fermée position “P” et mentonnière ouverte position “J”) Levier P/J Quand le levier P/J est positionné en mode “J” il est possible de bloquer la mentonnière en position ouverte (Fig.1).
- Página 11 ATTENTION! Durant le remontage, s’assurer que tous les composants sont positionnés correctement afin de ne pas endommager le fonctionnement. 4. INSTRUCTION DE DÉMONTAGE DE LA COIFFE LAVABLE A partir de la nuque, tirer légèrement vers l’intérieur du casque (Fig.7-8), puis les fixations des côtés (Fig.7-9) et à...
- Página 12 El casco LEVO, gracias a la doble homologación P/J, se puede utilizar en 2 posiciones (mentonera cerrada “P” y mentonera abierta “J”). Cursor P/J Cuando el cursor P/J está situado en la posición “J” es posible bloquear la mentonera en posición abierta (Fig.
- Página 13 ADVERTENCIAS Durante el montaje de la mentonera, asegurarse de que todos los componentes están en posición correcta para no minimizar el funcionamiento correcto de la mentonera. ADVERTENCIAS! Nunca utilizar el casco sin la mentonera. 4. CÓMO EXTRAER EL INTERIOR LAVABLE 4.1 A partir de la protección del cuello, tire ligeramente hacia el interior del casco (Fig.
- Página 14 Fig. 1 Fig. 2 Fig. 3 Fig. 4 Fig. 5...
- Página 15 CLIPS Fig. 6 Fig. 7 Fig. 8 Fig. 9 Fig. 10...
- Página 16 Fig. 11 Fig. 12 Fig. 13 Fig. 14 Fig. 15...
- Página 17 Fig. 16 Fig. 17 Fig. 18 Fig. 19...


