Publicidad
Enlaces rápidos
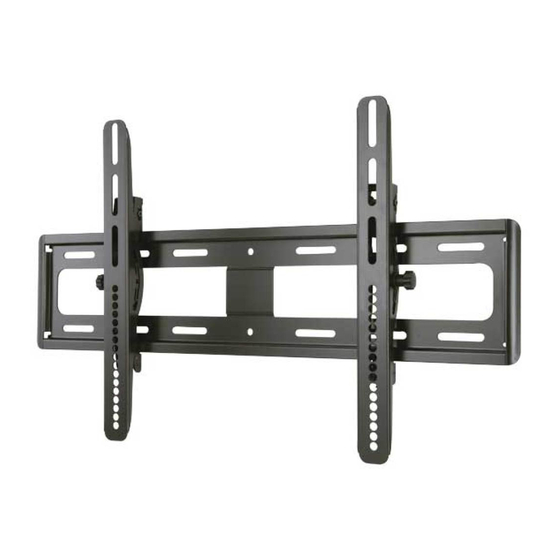
VMPL50A Instruction Manual
We are here to help!
Please contact Customer Service with any questions.
Customer Service
•
Americas: 800-359-5520
info@SANUS.com
•
UK: +44 (0) 800 056 2853
info@SANUS.com
SANUS • 6436 City West Parkway • Eden Prairie, MN 55344 USA
©2020 Legrand AV Inc. All rights reserved. SANUS is a division of Legrand AV.
All other brand names or marks are used for identi cation purposes and are trademarks of their respective owners.
SANUS.com
Publicidad

Resumen de contenidos para Sanus VMPL50A
- Página 1 SANUS • 6436 City West Parkway • Eden Prairie, MN 55344 USA ©2020 Legrand AV Inc. All rights reserved. SANUS is a division of Legrand AV. All other brand names or marks are used for identi cation purposes and are trademarks of their respective owners.
- Página 2 English - How to use this manual For best results, reference both the text and illustrations. Cut along the dashed lines to match your language with the illustrations. Select one item or the other. This item is optional English Text Pages 3-10 Français - Utilisation de ce guide Pour obtenir de meilleurs résultats, reportez-vous à...
- Página 3 English IMPORTANT SAFETY INSTRUCTIONS – SAVE THESE INSTRUCTIONS – PLEASE READ ENTIRE MANUAL PRIOR TO USE Specifications Ù Weight capacity-DO NOT EXCEED: 68 kg (150 lbs) includes TV and any accessories Ù Tilt: -10° to +8.5° CAUTION: Avoid potential personal injuries and property damage! Ù...
-
Página 4: Required Tools
Required Tools 5.5mm 13 mm 10 mm (1/2 in.) (7/32 in.) (3/8 in.) Supplied Parts and Hardware WARNING: This product contains small items that could be a choking hazard if swallowed. Before starting assembly, verify all parts are included and undamaged. If any parts are missing or damaged, do not return the damaged item to your dealer;... - Página 5 Install TV Brackets Before you begin, hand thread screws into the threaded inserts on the back of your TV to determine the correct screw diameter (M4, M6, or M8). Verify that there are adequate threads to secure the brackets to the monitor. If you encounter resistance, stop immediately and contact customer service.
- Página 6 For TV's with an irregular/obstructed back For TVs with an irregular back Ensure the brackets are level on the back of the TV and the directional arrow at the bottom of each bracket is pointing upward. Standard con gurations are shown. For special applications, or if you are uncertain about your hardware selection, contact Customer Service.
- Página 7 5.5mm (1/2 in.) (7/32 in.) For assitance in determining wall plate location, see Height Finder at SANUS.com. Locate studs. Verify the center of the stud with an awl or thin nail or use an edge to edge stud finder. ≤ 16 mm (5/8 in.)
- Página 8 13 mm 10 mm Solid concrete or concrete block (1/2 in.) (3/8 in.) For assitance in determining wall plate location, see Height Finder at SANUS.com. Level wall plate and mark the hole locations. CAUTION: Avoid potential personal injuries and property damage! Ù...
- Página 9 Hang the TV with Mounting Brackets onto the Wall Plate CAUTION: You will need assistance with this step. Install the TV / Bracket assembly by fitting the top hooks of the mounting brackets over the top edge of the wall mount. Swing the mounting brackets down until the spring loaded locking tabs slip over and fully engage the bottom edge of the wall mount.
- Página 10 Adjust Level ProSet Post Installation Leveling [10] ± 12.7 mm ( ± ½ in.) Remove the TV from the Wall To remove the TV from the wall plate, flip the locking tabs of each vertical bracket away from the wall plate to release the brackets, then lift the TV up and out from the wall.
- Página 12 Voir l’illustration de la page 7. Montage muralPour obtenir de l’aide a n de déterminer l’emplacement de la plaque murale, consultez le site SANUS.com sous la rubrique « Height Finder ». Installation sur des murs avec montants de bois. Voir l’illustration de la page 7.
- Página 13 ATTENTION: Une utilisation inadéquate peut réduire la force de rétention du boulon tire-fond. A n d’éviter tout dommage matériel ou blessure : • Assurez-vous que les douilles à expansion [06] ne dépassent pas de la surface de béton. • Montez la plaque murale [03] directement sur la surface de béton. •...
- Página 14 Consulte el gráfico en la página 7 Montaje sobre paredSi necesita ayuda para determinar la ubicación de la placa mural, utilice la herramienta HeightFinder disponible en SANUS.com. Montaje sobre montantes de madera.
- Página 15 Busque tacos. Verificar el centro del perno con un punzón o clavo delgado o utilizar un borde a borde buscador de estudios. Ù Nivel de la placa de pared [03] y marque la ubicación agujero. Ù Perforar agujeros piloto como se ilustra. Ù...
-
Página 16: Customer Service
SANUS • 6436 City West Parkway • Eden Prairie, MN 55344 USA ©2020 Legrand AV Inc. All rights reserved. SANUS is a division of Legrand AV. All other brand names or marks are used for identi cation purposes and are trademarks of their respective owners.


