Tabla de contenido

Manuales relacionados para Beamz Illusion 1


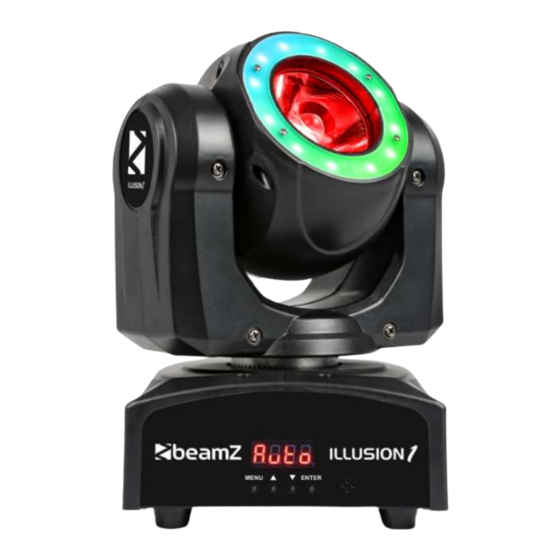
Resumen de contenidos para Beamz Illusion 1
- Página 1 Illusion 1 Moving Head LED Beam with LED ring Ref. nr.: 150.466 INSTRUCTION MANUAL GEBRUIKSAANWIJZING BEDIENUNGSANLEITUNG MANUAL DE INSTRUCCIONES MANUEL D'INSTRUCTIONS INSTRUKCJA OBSŁUGI V1.1...
- Página 2 ENGLISH Congratulations to the purchase of this Beamz product. Please read this manual thoroughly prior to using the product in order to benefit fully from all features. Read the manual prior to using the product. Follow the instructions in order not to invalidate the warranty. Take all precautions to avoid fire and/or electrical shock.
-
Página 3: Unpacking Instruction
UNPACKING INSTRUCTION CAUTION! Immediately upon receiving the product, carefully unpack the carton, check the contents to ensure that all parts are present, and have been received in good condition. Notify the shipper immediately and retain packing material for inspection if any parts appear damage from shipping or the package itself shows signs of mishandling. -
Página 4: Dmx-512 Connection
DISPLAY The control board offer several features: you can simple set the starting address, run the pre-programmed program or make a reset. The main menu is accessed by pressing the Mode-button, browse through the submenu by pressing Up or Down. Press the Enter-button in order to select the desired menu. -
Página 5: Dmx Addressing
DMX ADDRESSING The DMX address, also known as the start channel, is the first channel used to receive instructions from a DMX controller. The fixture is controlled using a minimum of 16 DMX channels (but has an extended mode which uses more channels). Each DMX controlled fixture must have a DMX address set. - Página 6 FIXTURE TIME To display the fixture’s operating hours counter, select “HOUR” and press ENTER. The display will show the number of hours the fixture has been in operation since manufacture. Press MENU to exit. FIRMWARE VERSION To display the fixture’s current firmware version, select “UER” and press ENTER. The display will show the version of firmware in the fixture.
- Página 7 NEDERLANDS Hartelijk dank voor de aanschaf van dit Beamz product. Neemt U a.u.b. een paar momenten de tijd om deze handleiding zorgvuldig te lezen, aangezien wij graag willen dat u onze producten snel en volledig gebruikt. Lees deze handleiding eerst door alvorens het product te gebruiken. Volg de instructies op anders zou de garantie weleens kunnen vervallen.
-
Página 8: Installatie
UITPAKKEN LET OP! Onmiddellijk na ontvangst, zorgvuldig uitpakken van de doos, controleer de inhoud om ervoor te zorgen dat alle onderdelen aanwezig zijn en zijn in goede staat zijn ontvangen. Bij transportschade of ontbreken van onderdelen onmiddellijk de verkopende partij inlichten. Bewaar de verpakking en het verpakkingsmateriaal. Indien het product moet worden teruggestuurd, is het belangrijk dat het product in originele verpakking wordt geretourneerd. -
Página 9: Master/Slave Bediening
DISPLAY Het bedieningspaneel biedt verschillende mogelijkheden zoals: eenvoudige invoeren van het startadres, voorgeprogrammeerde programma selecteren of een reset. Het hoofdmenu wordt geopend door op de Mode-toets, blader door het submenu door Up of Down-toets. Druk op de Enter-toets om het gewenste menu te selecteren. U kunt de selectie wijzigen door te drukken op de Up of Down-toets. - Página 10 GEBRUIK VAN HET CONTROLE MENU Druk op de MENU-knop om naar de bedieningsmenu's te gaan. Navigeer door de menustructuur met de knoppen ENTER, DOWN en UP. Druk op de knop ENTER om een menuoptie te selecteren of om een selectie te bevestigen. Om terug te keren naar een hoger niveau in de menustructuur zonder een wijziging aan te brengen, drukt u op de MENU-knop.
- Página 11 AUTO TEST Om een volledige test van alle fixture-functies uit te voeren: 1. Selecteer "TEST" en druk op de knop ENTER. 2. Druk op de knop ENTER. De fixture voert een zelf test routine uit. FIXTURE TIME Om de bedrijfsuren teller van de fixture weer te geven, selecteert u "HOUR" en drukt u op ENTER. Het display toont het aantal uren dat het armatuur in bedrijf is sinds de fabricage.
- Página 12 DEUTSCH Vielen Dank für den Kauf dieses Beamz gerat. Nehmen Sie sich einen Augenblick Zeit, um diese Anleitung sorgfältig durchzulesen, damit sie die Möglichkeiten, die unser Produkt bietet, sofort voll ausnutzen können. Lesen Sie erst die Anleitung vollständig vor der ersten Inbetriebnahme durch.
- Página 13 AUSPACKEN Packen Sie das Gerät sofort nach Empfang aus und prüfen Sie den Inhalt. Wenn Teile fehlen oder beschädigt sind, benachrichtigen Sie sofort den Spediteur und bewahren Sie die Verpackung auf. Falls ein Gerät ins Werk zurückgeschickt werden muss, ist es wichtig, dass es in der Originalverpackung versandt wird. Das Gerät darf nicht in Betrieb genommen werden, nachdem es von einem kalten in einen warmen Raum gebracht wurde.
- Página 14 DISPLAY Die Konsole bietet verschiedene Funktionen wie: einfache Eingabe der Startadresse, wählen Sie Preset-Programm oder ein Reset. Das Hauptmenü wird durch Drücken der Mode-Taste aufgerufen, blättern Sie durch die Untermenüs durch Up oder Down-Taste. Drücken Sie die Enter-Taste, um das gewünschte Menü auszuwählen. Sie können die Auswahl mit der Taste Up oder Down, ändern.
- Página 15 DMX ADDRESSING Die DMX-Adresse, auch Startkanal genannt, ist der erste Kanal, über den Befehle von einem DMX-Controller empfangen werden. Das Gerät wird mit mindestens 16 DMX-Kanälen angesteuert (hat aber einen erweiterten Modus, der mehr Kanäle verwendet). Jedes DMX-gesteuerte Gerät muss über eine DMX-Adresse verfügen. Wenn das Gerät z.B. eine DMX-Adresse von 10 hat, dann verwendet es die Kanäle 10 bis einschließlich 26.
-
Página 16: Reinigung Und Wartung
AUTO TEST Um einen kompletten Test aller Funktionen des Geräts durchzuführen: 1. Wählen Sie "TEST" und drücken Sie die ENTER-Taste. 2. Drücken Sie die ENTER-Taste. Das Gerät führt einen Selbsttest durch. FIXTURE TIME Um den Betriebsstundenzähler des Geräts anzuzeigen, wählen Sie "HOUR" und drücken Sie ENTER. Auf dem Display wird die Anzahl der Stunden angezeigt, die das Gerät seit der Herstellung in Betrieb war. - Página 17 ESPAÑOL Enhorabuena por la compra de este efecto de luces Beamz. Por favor lea atentamente este manual antes de usar el aparato para disfrutar al completo de sus prestaciones. Seguir las instrucciones le permite no invalidar la garantía. Tome todas las precauciones para evitar que se produzca fuego o una descarga eléctrica.
-
Página 18: Instrucciones De Desembalaje
INSTRUCCIONES DE DESEMBALAJE ATENCIÓN! Inmediatamente después de recibir un dispositivo, desempaque cuidadosamente la caja de cartón, compruebe el contenido para asegurarse de que todas las partes están presentes, y se han recibido en buenas condiciones. Notifique inmediatamente al transportista y conserve el material de embalaje para la inspección por si aparecen daños causados por el transporte o el propio envase muestra signos de mal manejo. -
Página 19: Panel De Control (Display)
PANEL DE CONTROL (DISPLAY) The El panel de control ofrece varias características: puede simplemente asignar la dirección de inicio, ejecutar el programa de pre-programado o hacer un reset. Al menú principal se accede pulsando la tecla Modo, se navega por el submenú pulsando arriba o abajo. -
Página 20: Usando El Menu De Control
USANDO EL MENU DE CONTROL Para acceder a los menús de control, presione el botón MENÚ. Navegue por la estructura del menú usando los botones ENTER, DOWN y UP. Para seleccionar una opción del menú o para confirmar una selección, presione el botón ENTER. Para volver a un nivel superior en la estructura del menú... -
Página 21: Limpieza
BACKLIGHT (ILUMINACION PANTALLA) Para encender o apagar la retroiluminación de la pantalla del panel de control: 1. Seleccione LED y presione ENTER para confirmar. El modo actual parpadeará en la pantalla. 2. Use los botones ABAJO y ARRIBA para seleccionar ENCENDIDO o APAGADO. 3. - Página 22 La garantie deviendrait également caduque en cas d’accidents ou dommages causes par une utilisation inappropriée de l’appareil ou un non respect des consignes présentes dans cette notice. Beamz ne pourrait être tenu responsable en cas de dommages matériels ou corporels causés par un non respect...
- Página 23 DEBALLAGE ATTENTION ! Immédiatement après réception, vérifiez le contenu du carton et assurez-vous que tous les éléments sont bien présents et en bon état. Si besoin, faites les réserves nécessaires si le matériel ou les cartons sont endommagés. SI l’appareil doit être retourné, faites-le dans l’emballage d’origine.
-
Página 24: Fonctionnement Master/Slave
AFFICHAGE Le panneau de commande vous permet d’effectuer différents réglages : réglage de l’adresse de démarrage, gestion d’un programme pré-programmé, lancer un Reset. Le menu principal est accessible en appuyant sur la touche Mode, vous pouvez naviguer dans le sous-menu avec la touche Up ou Down. Appuyez sur la touche Enter pour choisir le menu souhaité. - Página 25 UTILISATION VIA LE MENU DE GESTION Pour accéder aux menus de contrôle, appuyez sur la touche MENU. Naviguez dans la structure du menu en utilisant les touches ENTER, DOWN, et UP. Pour sélectionner une option de menu ou confirmer une sélection, appuyez sur la touche ENTER.
- Página 26 AUTO TEST Pour faire un auto-test de toutes les fonctions de l’appareil : 1. Sélectionnez “TEST” et appuyez sur ENTER. 2. Appuyez sur ENTER, l’appareil démarre le test. HEURES DE FONCTIONNEMENT Pour afficher le compteur d’heures de fonctionnement de l’appareil, sélectionnez “HOUR“ et appuyez sur ENTER. L’affichage indique le nombre d’heures de fonctionnement de l’appareil depuis sa fabrication.
- Página 27 POLSKI Gratulujemy zakupu urządzenia marki BeamZ. Proszę o przeczytanie instrukcji przed użyciem urządzenia, aby jak najlepiej móc wykorzystać jego możliwości. Przeczytaj tę instrukcję przed pierwszym użyciem urządzenia. Postępuj zgodnie z instrukcją, aby nie utracić gwarancji. Zwróć uwagę na wszystkie ostrzeżenia, aby uniknąć pożaru lub/oraz porażenia prądem. Naprawy mogą być przeprowadzane jedynie przez autoryzowany serwis.
- Página 28 INSTRUKCJA ROZPAKOWYWANIA OSTRZEŻENIE! Natychmiast po odbiorze urządzenia, ostrożnie otwórz karton ochronny, oraz sprawdź zawartość i stan techniczny przedmiotu. Niezwłocznie powiadom kuriera oraz zachowaj opakowanie zewnętrzne do kontroli, jeśli jakikolwiek element zawartości wygląda na zniszczony w transporcie lub nosi objawy złego traktowania paczki. W takim wypadku należy niezwłocznie odesłać...
-
Página 29: Tryb Master/Slave
WYŚWIETLACZ Panel sterowania oferuje kilka funkcjonalności: możesz łatwo ustawić adresowanie DMX, włączyć gotowe programy lub zresetować urządzenie. Menu główne jest dostępne po naciśnięciu przycisku Mode. Możesz się poruszać w menu za pomocą przycisków Up oraz Down. Naciśnij Enter, aby wybrać pożądany tryb. Możesz zmienić... -
Página 30: Nawigacja Po Menu
NAWIGACJA PO MENU By uzyskać dostęp do menu naciśnij przycisk MENU. Poruszaj się po menu za pomocą przycisków DOWN, UP oraz ENTER. Wybrać konkretną opcje, należy potwierdzić wybór przyciskiem ENTER. By powrócić do poprzedniej kategorii bez dokonywania żadnych zmian, naciśnij przycisk MENU. By całkowicie opuścić menu, naciśnij I przytrzymaj przycisk MENU. ADRESOWANIE DMX Adres DMX, znany również... -
Página 31: Czyszczenie Urządzenia
WŁ/WYŁ TYŚWIETLACZ By wyłączyć tylny wyświetlacz należy: 1. Wybrać z menu pozycję “LED” i nacisnąć ENTER. 2. Używając przycisków DOWN I UP, wybrać pomiędzy YES a NO (wyświetlacz wygaszony). 3. Zatwierdź wybór używając przycisku ENTER. AUTO TEST By wykonać kompleksowy test wszystkich funkcji urządzenia, należy: 1. - Página 32 MENU / MENÜ / MENÚ Mode Programming Description DMX address DMX Address (1-512) Fixture DMX address setting 16 Channel Channel mode 21 Channel Master mode Fixture acts as master Slave mode Slave 1 Slave copies master Slave 2 Slave synced by master Show model Show 1--4 Select stand-alone program...
- Página 33 Channel Function Value Description 000-010 No Function 011-044 045-079 Green 080-114 Blue SMD section 3 115-149 Yellow 150-184 Magenta 185-219 Cyan 220-255 White 000-010 011-044 045-079 Green 080-114 Blue SMD section 4 115-149 Yellow 150-184 Magenta 185-219 Cyan 220-255 White 000-089 No function 090-099...
- Página 34 Channel Function Value Description 150-184 Magenta 185-219 Cyan 220-255 White 000-010 No Function 011-044 045-079 Green 080-114 Blue SMD section 4 115-149 Yellow 150-184 Magenta 185-219 Cyan 220-255 White 000-089 No function 090-099 Black-out on while pan/tilt moving 100-110 Black-out off while pan/tilt moving 111-199 No function Mode...
- Página 35 Declaration of Conformity Manufacturer: Tronios B.V. Bedrijvenpark Twente 415 7602KM Almelo The Netherlands Phone: +31(0)85-1053155 Product number: 150.466 Product Description: Illusion 1 Trade Name: BEAMZ Regulatory Requirement: EN 60598-1:2015 EN 60598-2-17:1989+A2:1991 EN 61347-1:2008+A1:2011+A2:2013 EN 61347-2-13:2014 EN 62031:2008+A1:2013+A2:2015 EN 61000-3-2/-3-3 I hereby declare that the product meets the requirements stated in Directives 2014/35/EU, 2014/30/EU 2011/65/EU and conforms to the above mentioned Declarations.
- Página 36 Specifications and design are subject to change without prior notice. www.tronios.com Copyright © 2018 by Tronios The Netherlands...