Tabla de contenido
Publicidad
Idiomas disponibles
Idiomas disponibles
Enlaces rápidos
SGS 43
D
Gebrauchsanweisung
Glaswaage
G
Instruction for use
Glass scale
F
Mode d'emploi
Pèse-personne en verre
E
Instrucciones para el uso
Báscula de vidrio
o
Инструкция по применению
RUS
Cтеклянные весы
Service-Adresse:
Hans Dinslage GmbH
Riedlinger Str. 28
88524 Uttenweiler
GERMANY
Tel.: +49 (0) 73 74 - 91 57 66
Fax: +49 (0) 73 74 - 92 07 23
E-mail: service@sanitas-online.de
Publicidad
Capítulos
Tabla de contenido

Manuales relacionados para Sanitas SGS 43


Resumen de contenidos para Sanitas SGS 43
- Página 1 Gebrauchsanweisung Glaswaage Instruction for use Glass scale SGS 43 Mode d'emploi Pèse-personne en verre Instrucciones para el uso Báscula de vidrio Инструкция по применению Cтеклянные весы Service-Adresse: Hans Dinslage GmbH Riedlinger Str. 28 88524 Uttenweiler GERMANY Tel.: +49 (0) 73 74 - 91 57 66 Fax: +49 (0) 73 74 - 92 07 23 E-mail: service@sanitas-online.de...
-
Página 2: Tabla De Contenido
Deutsch Inhaltsverzeichnis 1. Zum Kennenlernen ................2 2. Zeichenerklärung ................3 3. Sicherheitshinweise ................3 4. Gerätebeschreibung .................4 5. Inbetriebnahme ................5 6. Montage des Bedienteils ..............5 7. Information ..................5 8. Bedienung ..................6 9. Batterien wechseln ................7 10. Gerät reinigen und pflegen ...............7 11. Entsorgung ..................7 12. -
Página 3: Zeichenerklärung
2. Zeichenerklärung Folgende Symbole werden in der Gebrauchsanleitung verwendet. Warnung Warnhinweis auf Verletzungsgefahren oder Gefahren für Ihre Gesundheit. Achtung Sicherheitshinweis auf mögliche Schäden am Gerät/Zubehör. hinweis Hinweis auf wichtige Informationen. 3. sicherheitshinweise Bitte lesen Sie diese Gebrauchsanleitung aufmerksam durch, bewahren Sie sie für späteren Gebrauch auf, machen Sie sie auch anderen Anwendern zugänglich und beachten Sie die Hinweise. -
Página 4: Gerätebeschreibung
Aufbewahrung und Pflege Die Genauigkeit der Messwerte und Lebensdauer des Gerätes hängt ab vom sorgfältigen Umgang: Achtung • Von Zeit zu Zeit sollte das Gerät gereinigt werden. Benutzen Sie keine scharfen Reinigungsmittel und halten Sie das Gerät niemals unter Wasser. •... -
Página 5: Inbetriebnahme
5. Inbetriebnahme Batterien einlegen Falls vorhanden, ziehen Sie den Batterie-Isolierstreifen am Batteriefachdeckel beziehungsweise entneh- men Sie die Batterien aus dem Verpackungsschutz und setzen Sie die Batterien gemäß Polung in die Waage und in das Bedienteil ein. Beachten Sie die Grafik im Batteriefach. Bedienteil 2 x CR 2032 3V Li Batterien Waage... -
Página 6: Bedienung
8. Bedienung Gewicht messen Stellen Sie die Waage auf einen ebenen festen Boden (kein Teppich); ein fester Bodenbelag ist Vorausset- zung für eine korrekte Messung. Achten Sie darauf, dass das Bedienteil und die Waage im direkten Kontakt zueinander stehen. Sende- und Empfängereinheit nicht abdecken. -
Página 7: Batterien Wechseln
Achten Sie darauf, dass Sie das Bedienteil und die Waage immer zuerst einschalten und die Anzeige „0.0“ (Abb. 2) abwarten, bevor Sie sie betreten. Waage ausschalten Die Waage und das Bedienteil schalten sich nach ca. 10 Sekunden immer automatisch ab. Um das Bedienteil manuell auszuschalten, drücken Sie die Taste „ON/OFF”. -
Página 8: Was Tun Bei Problemen
12. Was tun bei Problemen? Stellt die Waage bei der Messung einen Fehler fest, wird folgendes angezeigt. Displayanzeige ursache Behebung Die maximale Tragkraft von 150 kg wurde Nur bis 150 kg belasten. überschritten. Die Batterien der Waage sind fast leer. Wechseln Sie die Batterien der Waage. -
Página 9: Technische Angaben
13. technische Angaben Batterien Waage 4 x 1,5 V Typ AAA Batterien Bedienteil 2 x Lithium Batterien CR2032 Messbereich 1 kg bis 150 kg Einteilung Gewicht 100 g Übertragung Infrarotübertragung Technische Änderungen vorbehalten. 14. Garantie Sie erhalten 3 Jahre Garantie ab Kaufdatum auf Material- und Fabrikationsfehler des Produktes. Die Garantie gilt nicht: •... -
Página 10: Getting To Know Your Instrument
eNGLIsh contents 1. Getting to know your instrument ............10 2. Signs and symbols................10 3. Safety notes ..................11 4. Unit description ................12 5. Initial use ..................12 6. Setting up the control panel............13 7. Information ..................13 8. Operation ..................13 9. Replacing batteries .................14 10. -
Página 11: Safety Notes
3. safety notes Please read these instructions for use carefully and keep them for later use, be sure to make them accessible to other users and observe the information they contain. • Do not stand on the outer edge to one side of the scale otherwise it may tip! •... -
Página 12: Unit Description
Batteries Warning • Swallowing batteries can be extremely dangerous. Keep the batteries out of the reach of small children. If a battery is swallowed, get immediate medical help. • Do not throw batteries into fire. Explosion hazard! Important • Batteries must not be recharged or reactivated by other means, taken apart or short-circuited. •... -
Página 13: Setting Up The Control Panel
changing the weight unit On delivery the scale is set to the unit „kg“. A switch located on the back of the control panel enables you to change to „pounds“ (lb) and „stone“ (st). setting up the scale Set up the scale on a level and solid surface. A solid surface is a prerequisite for a correct measurement. 6. -
Página 14: Replacing Batteries
---- Your measured weight is displayed shortly after this (Fig 4). The scale switches off 10 seconds after you step down from it. The result remains vi- sible during this time. Fig. 3 Make sure that you always switch on the scale first and wait for the display to show „0.0“... -
Página 15: Disposal
Important • Do not use aggressive solvents or cleaning agents! • Never immerse the unit in water! • Do not wash the unit in a dishwasher! 11. Disposal Standard and rechargeable batteries should not be disposed of separately from the household waste. As a consumer, you are legally obliged to return used batteries for proper disposal. -
Página 16: Technical Specifications
No measurement possible Possible errors Remedy The scale was not activated before being Activate the scale correctly (wait for „0.0“) stepped on. If you step onto the scale before and repeat the measurement. „0.0“ appears in the display, Switch on the control panel and the scale before the it will not function correctly. -
Página 17: Eléments Fournis
FRANçAIs sommaire 1. Familiarisation avec l‘appareil ............17 2. Symboles utilisés ................18 3. Consignes de sécurité ..............18 4. Description de l‘appareil ..............19 5. Mise en service ................20 6. Montage de l‘élément de commande ..........20 7. Informations ..................20 8. Utilisation ..................21 9. Remplacement des piles ..............22 10. -
Página 18: Symboles Utilisés
2. symboles utilisés Voici les symboles utilisés dans la notice d‘utilisation : Avertissement Ce symbole vous avertit des risques de blessures ou des dangers pour votre santé. Attention Ce symbole vous avertit des éventuels dommages au niveau de l‘appareil ou d‘un accessoire. -
Página 19: Description De L'aPpareil
stockage et entretien La précision des valeurs mesurées et la durée de vie de l‘appareil dépend du maniement avec soin : Attention • Nettoyez de temps en temps l‘appareil. N‘utilisez pas de produits de nettoyage agressifs et n‘immergez jamais l‘appareil dans l‘eau. •... -
Página 20: Mise En Service
5. Mise en service Insertion des piles Tirez éventuellement sur la languette isolante de la pile sur le couvercle du compartiment à piles ou retirez les piles de leur emballage de protection et introduisez-les dans la balance et dans l‘élément de comman- de en respectant la polarité. -
Página 21: Utilisation
8. utilisation Mesure du poids Posez la balance sur un sol plan et stable (sans tapis ni moquette) ; une surface ferme est la condition préalable à une mesure exacte. Assurez-vous que l‘élément de commande et la balance soient en contact direct. Ne recouvrez pas l‘unité d‘émission et l‘unité... -
Página 22: Remplacement Des Piles
Veillez à toujours allumer l‘élément de commande et la balance en premier et à attendre que l’affichage « 0.0 » (fig. 2) s’allume pour monter. Mise hors tension du pèse-personne La balance et l‘élément de commande s‘éteignent toujours automatiquement au bout de 10 secondes env. -
Página 23: Que Faire En Cas De Problèmes
Respectez les réglementations locales en matière d‘élimination de matériaux. Eliminez l‘appareil conformément à la directive européenne 2002/96/ec – Weee (Waste Electrical and Electronic Equipment) relative aux appareils électriques et électroniques usagés. Pour toute question, adressez-vous aux collectivités locales responsables de l‘élimination et du recyclage de ces produits. -
Página 24: Caractéristiques Techniques
Mesure de poids erronée causes possibles d‘erreurs Remède La balance se trouve sur le tapis. Posez la balance sur un sol plan et stable. Le point zéro de la balance est mauvais. Allumez la balance et attendez qu‘elle s‘éteigne d‘elle-même (le témoin DEL s‘éteint). Répétez ensu- ite la mesure. -
Página 25: Introducción
1. Introducción Funciones del aparato Esta báscula digital sirve para pesar. La báscula está equipada con una pantalla que indica los valores de medición por transmisión de infrarrojos. El peso se indica en pasos de 100 gramos. La báscula está de- stinada para el uso propio en el sector privado. -
Página 26: Reparación
• Proteja el dispositivo frente a los golpes, la humedad, el polvo, los productos químicos, los cambios bruscos de temperatura y la proximidad a las fuentes de calor (hornos, radiadores). • Sólo el servicio de asistencia al cliente o los comerciantes autorizados pueden realizar reparaciones en el aparato. -
Página 27: Descripción Del Aparato
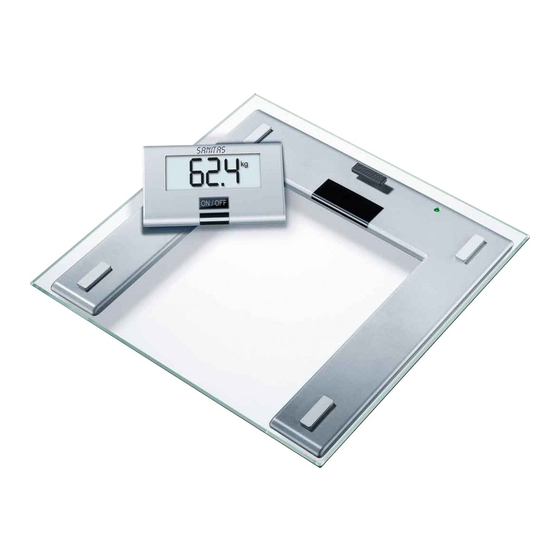
4. Descripción del aparato Vista general 1 Elemento de mando con pantalla 2 Botón ON/OFF 3 Unidad receptora 4 Báscula 5 Unidad emisora 6 LED 7 Soporte para montaje mural 5. Puesta en marcha colocación de las pilas Si la hay, tire de la cinta aislante de las pilas situada en la tapa del compartimento de las pilas, extraiga las pilas de la protección del embalaje y colóquelas con la polaridad correcta en la báscula y el elemento de mando. -
Página 28: Información
Montaje en la pared Con las cintas adhesivas de doble cara puede fijar el soporte para montaje mu- ral a la pared. Para ello, la superficie de la pared debe estar limpia, seca, lisa y sin grasa. max. 50° • Extraiga la lámina protectora de la cinta adhesiva del lado trasero del soporte para montaje mural. -
Página 29: Cambio De Pilas
Posibilidad 2: encender la plataforma de la báscula y luego el elemento de mando Pise la báscula de forma breve, fuerte y bien audible para activar el sensor de vibraciones Primero el LED se ilumina en rojo y, pasados 5 segundos, cambia a verde. Pulse el botón “ON/OFF”... -
Página 30: Eliminación
11. eliminación Las pilas y los acumuladores no deben tirarse a la basura doméstica. Como consumidor está obligado por ley a devolver las pilas usadas. Puede entregar las pilas usadas en los puntos limpios oficiales de su municipio o en cualquier sitio donde se vendan pilas de este tipo. Aviso: En las pilas que contienen sustancias nocivas aparecen los siguientes símbolos: Pb = la pila contiene plomo,... -
Página 31: Características Técnicas
No es posible realizar la medición Posible fallo Reparación La báscula no se ha activado antes de subirse. Active la báscula correctamente (espere a que in- Si sube a la báscula antes de que la pantalla in- dique „0.0“) y vuelva a repetir la medición. Antes de dique „0.0“, la báscula no funciona correcta- la medición, primero encienda el elemento de man- mente. -
Página 32: Для Ознакомления
РУССКИЙ Оглавление 1. Для ознакомления ................32 2. Пояснения к символам ..............33 3. Указания по технике безопасности ..........33 4. Описание прибора ................34 5. Подготовка к работе ..............35 6. Монтаж блока управления ............35 7. Информация ..................35 8. Управление ...................36 9. Замена элементов питания ............37 10. -
Página 33: Пояснения К Символам
2. Пояснения к символам В инструкции по применению используются следующие символы. Предостережение Предупреждает об опасности травмирования или Внимание Указывает на возможные повреждения прибора/принадлежностей. Указание Отмечает важную информацию. 3. Указания по технике безопасности Внимательно прочитайте данную инструкцию и следуйте указаниям, приведённым в ней. Сохраните инструкцию... -
Página 34: Описание Прибора
Хранение и уход Точность взвешивания и срок службы прибора зависят от бережного обращения с ним: Внимание • Периодически следует чистить прибор. Не используйте абразивные моющие средства, не погружайте прибор в воду. • Следите за тем, чтобы на весы не попадала вода. Не погружайте весы в воду. Не мойте весы под струёй... -
Página 35: Подготовка К Работе
5. Подготовка к работе Установка батареек Если имеется, удалите изолирующую пленку с крышки отсека для батареек, или выньте батарейки из защитной упаковки и установите в весы и в блок управления, учитывая полярность. Обращайте внимание на рисунок в отсеке для батареек Пульт... -
Página 36: Управление
8. Управление Измерение веса Установите весы на прочный, ровный пол (но не на ковер); прочное напольное покрытие является условием точных измерений. Следите за тем, чтобы блок управления и весы находились в прямом контакте друг с другом. Не перекрывать блок передачи и приема. Максимальное расстояние между блоком управления и весами составляет... -
Página 37: Замена Элементов Питания
Учтите, что, прежде чем встать на весы, Вы должны вначале включить блок управления и весы и дождаться появления индикации „0.0“ (рис. 2). Выключение весов Весы и блок управления всегда отключаются автоматически приблизительно через 10 секунд. Для выключения блока управления вручную нажмите кнопку „ON/OFF“ . 9. -
Página 38: Что Делать При Возникновении Каких-Либо Проблем
Соблюдайте местные законодательные нормы по утилизации отходов. Прибор следует утилизировать согласно Директиве ЕС по отходам электрического и электронного оборудования 2002/96/EC – WEEE (Waste Electrical and Electronic Equipment). В случае вопросов обращайтесь в местную коммунальную службу, ответственную за утилизацию отходов. 12. Что делать при возникновении каких-либо проблем? Если... -
Página 39: Технические Данные
Весы показывают неправильный вес Возможные ошибки Устранение Весы стоят на ковре Установить весы на ровный, твердый пол. Неверный нуль шкалы весов. Включить весы и дождаться, пока они автоматически не отключатся (светодиод гаснет). После этого повторить измерение. 13. Технические данные Батарейки для весов 4 x 1,5 В, тип...