Publicidad
Idiomas disponibles
Idiomas disponibles
Enlaces rápidos
Mounting
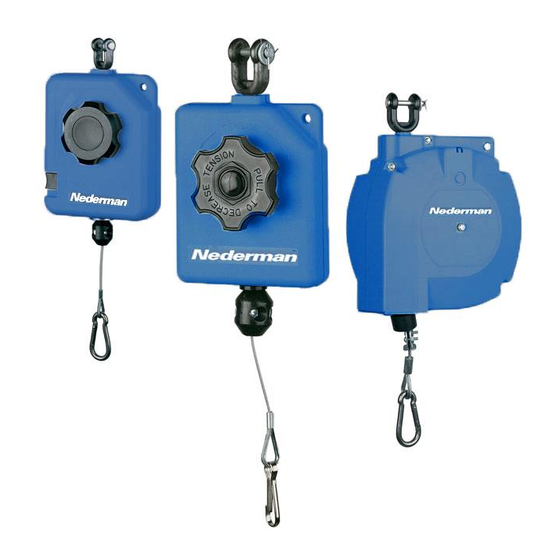
Hang the balancer directly over the work area by
the swivel fork provided at the top of the balancer.
NB! The support device should have a break
strength exceeding six times the combined weight
of the balancer and the load.
Tool Attachment
The balancer is furnished with a tool clip. Attach tool
complete with hose or cable and fittings. Warning!
Never pull the balancer tool clip down to the tool.
Always lift the tool up to the tool clip.
Cable stop/bumper Adjustment
Make all cable stop adjustments with the tool
attached to the tool clip and tension properly set.
Loosen cable stop and slide the cable up or down
to position tool at desired working height. Then
tighten the cable stop
Automatic Lock
If tension is too low or a spring should break, an
automatic lock will engage to prevent the drum
from turning.
Maintenance and inspection
The balancer is designed to require little mainte-
nance. Periodically check cable, tool clip, swivel and
hanger for wear. Replace all worn parts immediately.
The balancer is lubricated for life and requires no
additional lubrication.
Service
When replacing spare parts the balancer shall be disassembled
according to following description:
1. Remove all spring tension (see "Spring Tension Adjustment")
2. Remove the tool with all attachments.
3. Remove the balancer from its support device and perform
the work on a workbench.
4. Remove the screws from the cable guide (18).
5. Remove the balancer cases.
6. When replacing cable the folowing parts should be removed
and replaced together with the new cable:
- Auto stop set (26)
- Cable guide (18)
- Cable stop (21)
- Tool clip (24)
R
SER. 810
Spring Tension Adjustment
NB! Attach full load including all attachments before
adjusting tension.
Increasing Spring Tension
If the tool attached to the balancer cable descends,
there is not enough tension on the balancer mainspring.
To increase tension:
1. Turn the mainshaft (a) with a wrench in a
counterclockwise direction.
2. Turn mainshaft 1/4 turn (1-click) at a time until
desired tension is achieved.
Decreasing Spring Tension
If the cable stop is up tight against the cable
guide, there is too much tension on the
balancer mainspring. To reduce tension:
1. Turn mainshaft (a) with a wrench in a
counterclockwise direction just enough
to release tension lock lever (b).
2. Push tension lock lever (b).
3. Slowly allow mainshaft to turn
clockwise and release tension lock
lever before allowing mainshaft to
rotate 1/4 turn (1-click).
4. Repeat this process until
desired tension is achieved.
If the spring tension has been increased
check that the required length of
the cable can be drawn out with-
out stretching the spring to the limit.
Warning!
Risk of personal injury!
Never remove the spring from the drum
and spring assembly. Replacement
springs are sealed for safety.
NO. 144006(00)
DAT. 2009-12-21
ENGLISH
Publicidad

Resumen de contenidos para Nederman 810 Serie
- Página 1 NO. 144006(00) SER. 810 DAT. 2009-12-21 ENGLISH Mounting Spring Tension Adjustment Hang the balancer directly over the work area by NB! Attach full load including all attachments before the swivel fork provided at the top of the balancer. adjusting tension. NB! The support device should have a break strength exceeding six times the combined weight Increasing Spring Tension...
- Página 2 DEUTSCH Montage Einstellung der Federkraft Den Balancer direkt über dem Arbeitsbereich auf- Achtung! Komplett Werkzeug inkl. evtl. Zubehör anschließen, hängen. Achtung! Die Aufhängungsvorrichtung soll bevor die Federspannung justiert wird. mindestens der 6-fachen Belastung des Gewichtes Erhöhung der Federkraft von Balancer und Werkzeug entsprechen. Läßt sich das angeschlossene Werkzeug nicht richtig Anschluß...
- Página 3 FRANÇAIS Montage Réglage de tension du ressort Placer l'équilibreur directement au-dessus de la zone Attention! Attacher la totalité de l'outil y compris les de travail. Noter que le dispositif d'appui doit pouvoir accessoires avant d'ajuster la tension. supporter une charge équivalant à six fois au-moins le Augmentation de la tension du ressort poids de l'équilibreur et de l'outil.
-
Página 4: Montaje
ESPANOL Montaje Ajuste de la tensión del resorte Colgar el bloque equilibrador directamente sobre la Nota: Acoplar la herramienta complementaria incluyendo superficie de trabajo. Obsérvese que el mecanismo de accesorios antes de ajustar el tensado del resorte. suspensión tiene que soportar una carga que como Aumento del tensado mínimo equivalga a seis veces el peso combinado del Si la herramienta acoplada no se levanta bien, es señal de... - Página 5 ITALIANO Regolazione tensione molla Montaggio N.B.! Collegare l'attrezzo completo con gli accessori Hang the balancer directly over the work area by the swivel prima di registrare la tensione della molla. fork provided at the top of the balancer. NB! The support device should have a break strength exceeding six times Aumento della forza della molla the combined weight of the balancer and the load.
- Página 6 SVENSKA Justering av fjäderkraft Montering Obs! Anslut komplett verktyg inkl. eventuella tillbehör innan Häng upp balansblocket direkt ovanför arbetsytan. fjäderspänningen justeras. Observera att upphängningsanordningen bör klara en belastning som minst motsvarar sex gånger den Ökning av fjäderkraften kombinerade vikten av balansblock och verktyg. Om det anslutna verktyget inte lyfts ordentligt är fjäderkraften Anslutning av verktyg för låg.
-
Página 7: Konformitätserklärung
Ser. 810 ENGLISH Försäkran om överensstämmelse Declaration of conformity Vi, AB Ph. Nederman & Co., försäkrar under eget ansvar att We, AB Ph. Nederman & Co., declare under our sole Nedermanprodukten: responsibility that the Nederman product: - Ser. 810 med tillbehör som omfattas av denna försäkran är i - Ser. -
Página 8: Δήλωση Συμμόρφωσης
Megfelelőségi Nyilatkozat Atbilstības deklarācija Mi, az AB Ph. Nederman & Co. nevében, felelősségünk tudatában kijelentjük Mēs AB Ph. Nederman & Co paziņojam un esam atbildīgi par to, ka Nederman hogy a(z) iztrādājums: - Ser. 810 Nederman termék és azon kiegészítői melyekre ez a Nyilatkozat - Ser.
