Tabla de contenido
Publicidad
Enlaces rápidos
Publicidad
Tabla de contenido

Resumen de contenidos para Gear4music COSMOS PARTY MIX
- Página 1 COSMOS PARTY MIX USER MANUAL...
- Página 2 COSMOS PARTY...
- Página 3 WARNING! ADVARSEL! Do not open cover. No user-serviceable parts inside. Refer servicing to qualified service personnel Dækslet må ikke åbnes. Ingen bruger-udskiftelige dele indeni. Overlad service til kvalificeret service Do not place the product in a location near a heat source such as a radiator, or in an area subject to personale direct sunlight, excessive dust, mechanical vibration or shock Placer ikke produktet i nærheden af varmekilder såsom en radiator eller i direkte sollys, meget støv,...
- Página 4 VAROITUS! réguliers par la suite. Avant de procéder au montage, assurez-vous que la zone prévue pour l’installation peut supporter le poids de l’appareil. Utilisez un câble de sécurité en acier pour l’installation de l’appareil par suspension Älä avaa kantta. Ei sisällä käyttäjä-huollettavia osia. Huollot saa suorittaa vain pätevä huoltomies. aérienne.
- Página 5 Le manovre aeree richiedono una vasta esperienza. I limiti di carico di lavoro dovrebbero essere Instalacja urządzenia powinna być poddawana regularnym przeglądom w celu zapewnienia rispettati e dovrebbero essere utilizzati materiali di installazione certificati. bezpieczeństwa. L’installazione dovrebbe essere ispezionata regolarmente per sicurezza. Upewnij się, że w obszarze poniżej miejsca instalacji nie znajduje się...
- Página 6 DÔLEŽITÉ INFORMÁCIE K MONTÁŽI! INFORMACIÓN IMPORTANTE Zariadenie by mal inštalovať len kvalifikovaný profesionál. Nesprávna inštalácia môže spôsobiť vážne La instalación ha de ser llevada a cabo por personal cualificado. Si no se instalase correctamente esto zranenia alebo škody na majetku. podría ocasionar graves y serios problemas.
-
Página 7: Main Features
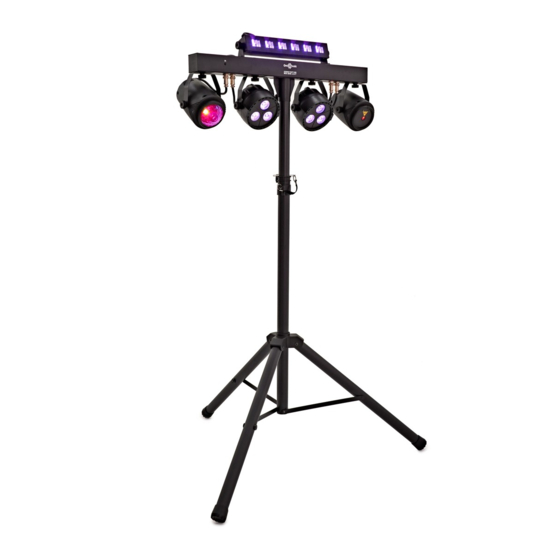
INTRODUCTION Thank you for purchasing the Cosmos Party Mix by Gear4music. To help you get the most out of your new equipment, please read this manual carefully. MAIN FEATURES Compact, all-in-one micro size lighting package 1 UV and strobe bar light... - Página 8 LASER WARNING LABELS The following labels are attached to the product. LASER APERTURE CAUTION CLASS 3B LASER RADIATION WHEN OPEN AVOID EXPOSURE TO BEAM...
- Página 9 MENU SEQUENCE Each time you press the MENU button you will Auto mode has two adjustable parameters: Each move to the next item in the table below. Use the time you press the ENTER button the display UP/DOWN buttons to adjust the value. Changes alternates between the two parameters.
-
Página 10: Sound Sensitivity
SOUND SENSITIVITY Press the MENU button repeatedly, until the display shows the current sound sensitivity in the range . Use the UP/DOWN buttons to adjust the sensitivity if desired. Level 1 is the least sensitive and level 9 is the most sensitive. SLAVE MODE Two or more lights of the same model can operate in sync by connecting them together using DMX... - Página 11 IR REMOTE FUNCTIONS ON/OFF AUTO SOUND SOUND SOUND STROBE AUTO SPEED/ SENSITIVITY SPEED/ SENSITIVITY 1. Sets the unit into blackout on or off. 6. Actives the strobe function. 2. Puts the unit into auto show mode. 7. Toggles between the auto show modes. 3.
-
Página 12: Channel Mode
DMX MODES 3 CHANNEL MODE Blackout 10-39 AT01 All lights 40-69 AT02 Par Light (jump change) 70-99 AT03 Par + Kaleidoscope + Laser 100-129 AT04 Par + Kaleidoscope + Laser + Strobe 130-159 AT05 Par + Kaleidoscope + Laser + UV 160-189 AT06 Par + Kaleidoscope + Strobe + UV... - Página 13 SPECIFICATIONS Power Supply ..220~240V, 50/60Hz Power Consumption . . .60W Fuse ....3A, 250V Control Modes ..3 / 12 Channel DMX512 / Auto / Sound / Master / Slave / Remote Control Light Source .
- Página 14 If you have any more questions about this product, please do not hesitate to contact the Gear4music Customer Service Team on: +44 (0) 330 365 4444 or info@gear4music.com...
