Publicidad
Idiomas disponibles
Idiomas disponibles
Enlaces rápidos
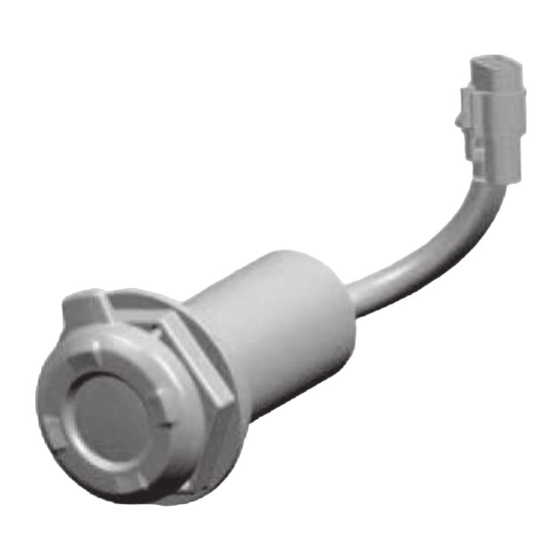
DC SOCKET
Description:
Applications:
DL1050RQ M0–
Ref.
Contents
1
2
Ref. Description
Tools
Required
(1) + Driver
I N S T A L L A T I O N I N S T R U C T I O N S
Description
Terminal
Installation Instructions
GENUINE SUZUKI ACCESSORIES
Part Number: 38850-3181
Installation Time: 0.2 Hours
QTY
(1)
99021-06LA0
1/4
1
1
Publicidad

Manuales relacionados para Suzuki 38850-3181 Serie


Resumen de contenidos para Suzuki 38850-3181 Serie
- Página 1 I N S T A L L A T I O N I N S T R U C T I O N S DC SOCKET Part Number: 38850-3181 Description: Applications: DL1050RQ M0– Installation Time: 0.2 Hours Ref. Description Contents Terminal Installation Instructions Ref. Description Tools Required (1) + Driver GENUINE SUZUKI ACCESSORIES 99021-06LA0...
- Página 2 6. Protect any items removed or to be installed from scratches by plac- ing them on a soft cloth first before putting them on the ground. 7. Use care not to cause any damage to the body of the vehicle during installation of the accessory. GENUINE SUZUKI ACCESSORIES...
- Página 3 For other bolts not listed in the 29.0 21.0 table, refer to the service manual. 1. Remove the pillion seat. Installation 2. Remove the cover A. 3. Remove the clamp B from the cover A. 4. Remove the cap C from the coupler. GENUINE SUZUKI ACCESSORIES...
- Página 4 D. 8. Connect the coupler E of the Terminal 1 to the vehicle cou- pler. 9. Install the clamp for the original position that was removed step 10.Install the vehicle parts in the reverse order of removal. GENUINE SUZUKI ACCESSORIES...
- Página 5 I N S T R U C T I O N S D E M O N T A G E DOUILLE CC N° de pièce : 38850-3181 Description : Modèles : DL1050RQ M0– Temps d’installation : 0,2 heures Réf. Description Qté Contenu Borne Instruction de montage Réf. Description Outils néces- (1) Tournevis cruciforme saires GENUINE SUZUKI ACCESSORIES 99021-06LA0...
- Página 6 0,55 Les valeurs données dans ce 13,0 tableau correspondent couples de serrage des boulons 29,0 conventionnels ou des boulons marqués “4”. Pour les boulons non listés dans ce tableau, voir le manuel d’entretien. GENUINE SUZUKI ACCESSORIES...
- Página 7 1. Déposer la selle arrière. Installation 2. Déposer le cache A. 3. Déposer l’attache B du cache 4. Déposer le bouchon C du coupleur. GENUINE SUZUKI ACCESSORIES...
- Página 8 D. 8. Raccorder le coupleur E de la borne 1 au coupleur du véhi- cule. 9. Installer l’attache déposée à l’étape 3 à son emplacement d’origine. 10.Reposer les pièces du véhicule dans l’ordre inverse de la dépose. GENUINE SUZUKI ACCESSORIES...
- Página 9 M O N T A G E A N L E I T U N G GLEICHSTROMANSCHLUSS Teil-Nr.: 38850-3181 Beschreibung: Verwendungen: DL1050RQ M0– Montagezeit: 0,2 hr(s) Beschreibung Stck Inhalt Klemme Montageanleitung Nr. Beschreibung Notwen- dige (1) +-Schraubendreher Werk- zeuge GENUINE SUZUKI ACCESSORIES 99021-06LA0...
- Página 10 6. Abgenommene oder zu montierende Teile nicht einfach auf den Boden, sondern auf einen weichen Lappen legen, damit sie nicht ver- kratzt werden. 7. Darauf achten, dass die Fahrzeugkarosserie bei der Montage des Zubehörs nicht beschädigt wird. GENUINE SUZUKI ACCESSORIES...
- Página 11 “4” markierte Schraube an. Für andere, nicht in der Tabelle aufge- führte Schrauben, schlagen Sie bitte in der Wartungsanleitung nach. 1. Den Soziussitz abnehmen. Montage 2. Die Abdeckung A abnehmen. 3. Die Klemme B von der Abdec- kung A abnehmen. GENUINE SUZUKI ACCESSORIES...
- Página 12 8. Den Stecker E von Klemme 1 mit dem Fahrzeugstecker ver- binden. 9. Die Klemme, die in Schritt 3 entfernt wurde, wieder an der ursprünglichen Position anbrin- gen. 10.Die Fahrzeugteile in der umge- kehrten Ausbaureihenfolge ein- bauen. GENUINE SUZUKI ACCESSORIES...
- Página 13 I S T R U Z I O N I P E R L ' I N S T A L L A Z I O N E PRESA CC Codice: 38850-3181 Descrizione: Applicazioni: DL1050RQ M0– Tempo di montaggio: 0,2.hr(s) Rif. Descrizione Q.tà Conte- nuto Terminale Istruzioni di installazione Rif. Descrizione Attrezzi necessari (1) Cacciavite a stella GENUINE SUZUKI ACCESSORIES 99021-06LA0...
- Página 14 5. Scollegare il cavo negativo (–) dalla batteria. 6. Proteggere da graffi ogni elemento rimosso o da installare metten- dolo su di un panno soffice steso a terra. 7. Fare attenzione a non danneggiare la scocca del veicolo durante l’installazione dell’accessorio. GENUINE SUZUKI ACCESSORIES...
- Página 15 “4”. Per quanto 29,0 riguarda i bulloni nono elencati in tabella, consultare il manuale di servizio. 1. Rimuovere il sedile passeg- Installa- zione gero. 2. Rimuovere la copertura A. 3. Rimuovere il morsetto B dalla copertura A. GENUINE SUZUKI ACCESSORIES...
- Página 16 D. 8. Collegare l’accoppiatore E del Terminale 1 all’accoppiatore del veicolo. 9. Installare il morsetto per la posi- zione originale, rimosso durante il passaggio 3. 10.Installare le parti del veicolo nell’ordine inverso a quello di rimozione. GENUINE SUZUKI ACCESSORIES...
- Página 17 I N S T R U C C I O N E S P A R A E L M O N T A J E Receptáculo CC N°de código: 38850-3181 Descripción: Aplicación: DL1050RQ M0– Tiempo de instalación: 0,2 hr(s) Ref. Descripción Cant. Contenido Terminal Instrucciones de instalación Ref. Descripción Herra- mientas (1) Destornillador + necesa- rias GENUINE SUZUKI ACCESSORIES 99021-06LA0...
- Página 18 6. Proteja cada pieza que haya quitado o que vaya a instalar para que no se raye colocándola primero sobre un paño blando antes de ponerla en el suelo. 7. Tenga cuidado para no causar ningún daño a la carrocería del vehí- culo durante la instalación de un accesorio. GENUINE SUZUKI ACCESSORIES...
- Página 19 1. Desmonte el asiento del acom- Instalación pañante. 2. Retire la cubierta A. 3. Quite la abrazadera B de la cubierta A. GENUINE SUZUKI ACCESSORIES...
- Página 20 8. Conecte el acoplador E del Terminal 1 al acoplador del vehículo. 9. Instale la abrazadera en la posición original que se extrajo en el paso 3. 10.Instale las piezas del vehículo en orden inverso de extracción. GENUINE SUZUKI ACCESSORIES...
- Página 21 GENUINE SUZUKI ACCESSORIES 99021-06LA0...
- Página 22 GENUINE SUZUKI ACCESSORIES...
- Página 23 GENUINE SUZUKI ACCESSORIES...
- Página 24 GENUINE SUZUKI ACCESSORIES...