Tabla de contenido
Publicidad
Idiomas disponibles
Idiomas disponibles
Enlaces rápidos
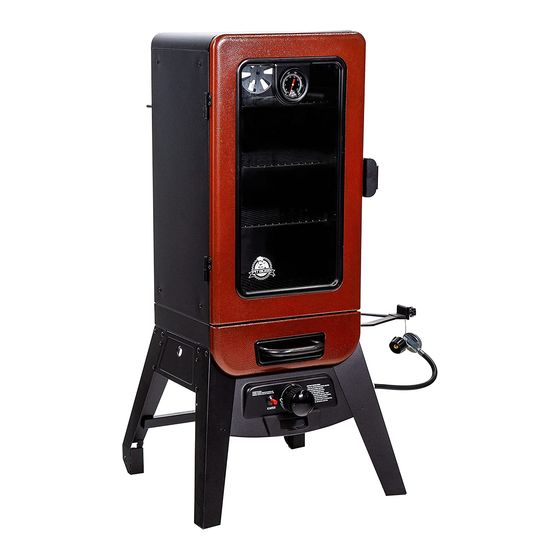
PBV3G1
GAS VERTICAL
SMOKER
IMPORTANT, READ CAREFULLY, RETAIN
FOR FUTURE REFERENCE. MANUAL MUST
BE READ BEFORE OPERATING!
FUMOIR
VERTICAL À GAZ
IMPORTANT, PRENEZ CONNAISSANCE DE CE
DOCUMENT ET CONSERVEZ-LE POUR RÉFÉRENCE
ULTÉRIEURE VOUS DEVEZ LIRE CE GUIDE AVANT
D'UTILISER LE BARBECUE !
AHUMADOR
VERTICAL DE GAS
IMPORTANTE, LEA DETENIDAMENTE, CONSERVE
PARA REFERENCIA FUTURA. ¡DEBE LEER EL
MANUAL ANTES DE LA OPERACIÓN!
ASSEMBLY AND OPERATION | ASSEMBLAGE ET FONCTIONNEMENT | MONTAJE Y OPERACIÓN
WARNING: PLEASE READ THE ENTIRE MANUAL BEFORE INSTALLATION AND USE OF THIS APPLIANCE. FAILURE TO FOLLOW THESE
INSTRUCTIONS COULD RESULT IN PROPERTY DAMAGE, BODILY INJURY OR EVEN DEATH. CONTACT LOCAL BUILDING OR FIRE OFFICIALS
ABOUT RESTRICTIONS AND INSTALLATION INSPECTION REQUIREMENTS IN YOUR AREA.
AVERTISSEMENT : VEUILLEZ LIRE L'INTÉGRALITÉ DU MANUEL AVANT L'INSTALLATION ET L'UTILISATION DE CET APPAREIL. LE NON-
RESPECT DE CES INSTRUCTIONS PEUT ENTRAÎNER DES DOMMAGES AUX BIENS, DES BLESSURES OU MÊME LA MORT. COMMUNIQUEZ
AVEC LES AUTORITÉS LOCALES EN MATIÈRE D'INCENDIE ET DE BÂTIMENT CONCERNANT LES RESTRICTIONS ET LES EXIGENCES
D'INSTALLATION DANS VOTRE RÉGION.
ADVERTENCI: LEA EL MANUAL COMPLETO ANTES DE INSTALAR Y UTILIZAR ESTE APARATO. INCUMPLIR ESTAS INSTRUCCIONES
PODRÍA CAUSAR DAÑOS MATERIALES, LESIONES CORPORALES, E INCLUSO LA MUERTE. CONSULTE A SUS FUNCIONARIOS LOCALES DE
CONSTRUCCIÓN Y CONTROL DE INCENDIOS PARA INFORMARSE SOBRE LAS RESTRICCIONES Y LOS REQUISITOS DE INSPECCIÓN DE
INSTALACIONES EN SU REGIÓN.
MODEL / MODÈLE / MODELO: PBV3G1
PART / PIÈCE / PARTE: 10719, 77435
270525
FOR OUTDOOR AND HOUSEHOLD USE ONLY. NOT FOR COMMERCIAL USE.
RÉSERVÉ À L'USAGE EXTÉRIEUR ET RÉSIDENTIEL UNIQUEMENT. NON DESTINÉ À UN USAGE COMMERCIAL.
SOLO PARA USO EN EXTERIORES Y EN EL HOGAR. NO ES PARA USO COMERCIAL.
Publicidad
Capítulos
Tabla de contenido
Solución de problemas

Manuales relacionados para Pit Boss PBV3G1


Resumen de contenidos para Pit Boss PBV3G1
- Página 1 MODEL / MODÈLE / MODELO: PBV3G1 PART / PIÈCE / PARTE: 10719, 77435 PBV3G1 GAS VERTICAL SMOKER IMPORTANT, READ CAREFULLY, RETAIN FOR FUTURE REFERENCE. MANUAL MUST BE READ BEFORE OPERATING! FUMOIR VERTICAL À GAZ IMPORTANT, PRENEZ CONNAISSANCE DE CE DOCUMENT ET CONSERVEZ-LE POUR RÉFÉRENCE ULTÉRIEURE VOUS DEVEZ LIRE CE GUIDE AVANT...
-
Página 2: Safety Information
SAFETY INFORMATION MAJOR CAUSES OF APPLIANCE FIRES ARE A RESULT OF POOR MAINTENANCE AND A FAILURE TO MAINTAIN REQUIRED CLEARANCE TO COMBUSTIBLE MATERIALS. IT IS OF UTMOST IMPORTANCE THAT THIS PRODUCT BE USED ONLY IN ACCORDANCE WITH THE FOLLOWING INSTRUCTIONS. Please read and understand this entire manual before attempting to assemble, operate or install the product. - Página 3 3. This outdoor smoker is not intended for installation in/on recreation vehicles or boats. Never use this appliance in an enclosed space, such as a camper, tent, car, boat or home. This appliance is not intended for and should never be used as a heater. 4.
- Página 4 In accordance with the procedures and specifications listed in the UL1026 (6th edition) / CSA-22.2 No. 64-10 (R2014) Electric Household Cooking and Food Serving Appliances. Pit Boss® Grills electric cooking appliances have been independently tested and listed by Intertek (an accredited testing laboratory) to ETL, UL, ULC and CSA standards.
-
Página 5: Tabla De Contenido
TABLE OF CONTENTS Safety Information ............2 Operating Instructions Smoker Environment ..............15 Parts & Specs ..............7 Smoker Temperature Ranges........... 16 Preparation For Use - Leak Testing .........17 Assembly Preparation ............8 First Use - Curing & Burn-Off ...........17 Assembly Instructions Lighting Procedure.............. -
Página 6: Parts & Specs
COOKING AREA RANGE 790MM X 1,190MM X 540MM 24.6 KG CUBIC COOKING: 0.07 M / 2.8 FT 38-160°C PBV3G1 12,500 / 31 IN. X 46 IN. X 21 IN. / 54.23 LB TOTAL - 4,640 CM² / 720 IN² / 100-320°F... -
Página 7: Assembly Preparation
If any part is missing or damaged, do not attempt to assemble. Shipping damage is not covered under warranty. Contact your dealer or Pit Boss® Customer Care for parts. -
Página 8: Securing The Support Bar
1 x Lower Smoker Cabinet with 1 x Right Front Leg (#22) 1 x Left Front Leg (#21) 2 x #10-24*1/2”Screw (#C) 2. SECURE CONTROL PANEL TO FRONT SUPPORT LEGS Installation: rews which were Parts Required: pre-assembled on the Control Screw (#C) Cabinet mount Right Front Leg (#22) -
Página 9: Mounting The Bottom Chamber Assembly
Installation: Front Leg (#22) 5. MOUNTING THE BOTTOM CHAMBER ASSEMBLY #10-24*1/2”Screws (#C) as Fig.4 shown. Leg (#21) Parts Required: Assembly (#20) using 4 x #10-24*1/2”Screws (#C) as Fig.4 shown. Bottom Chamber Assembly (#13) Screw (#C) 5. MOUNTING BURNER CHAMBER ASSEMBLY TO THE BOTTOM AREA OF Installation: LOWER SMOKER CABINET ASSEMBLY •... -
Página 10: Assembling The Main Cabinet To The Cabinet Base
Smoker Cabinet Assembly (#2) using 4 x SUPPORT TO THE UPPER SMOKER CABINET ASSEMBLY UPPER SMOKER Parts Required: CABINET ASSEMBLY TO THE LOWER SMOKER CABINET 10. PLACING WATER PAN AND WATER 8. ASSEMBLING THE MAIN CABINET TO THE CABINET BASE ASSEMBLY PAN SUPPORT ONTO THE BOTTOM Parts Required:... -
Página 11: Mounting The Heat Indicator
10. MOUNTING THE HEAT INDICATOR Parts Required: Heat Indicator (#5) Cabinet Door (#9) Installation: • Remove the washer and wing nut from the packaged Heat Indicator. • Insert the Heat Indicator into the mounting hole on the front of the cabinet door, place the washer on the thread pole on the inside of the door, and hand-tighten by hand to secure. -
Página 12: Mounting The Control Knob
the Wood Chip Box Assembly (#12) 1 . PLACI NG CONTROL KNOB INTO THE Parts Required: and slide Wood Chip Box onto the VALVE STEM Wood Chip Box support rails of Lower Smoker Cabinet Assembly (#14) as Fig.16 shown. Parts Required: 13. -
Página 13: Connecting To A Gas Supply
LP GAS CYLINDER (TANK) SPECIFICATIONS: The installation of this appliance must be in accordance with all applicable local codes, or the National Fuel Gas Code ANSI Z223.1 NFPA 54. When purchasing or exchanging a cylinder for your gas smoker, it must be: Transportation (DOT), and CONNECTING TO A GAS SUPPLY 3. -
Página 14: Operating Instructions
With all outdoor appliances, outside weather conditions play a big part in the performance of your smoker and the cooking time needed to perfect your meals. All Pit Boss® units should keep a minimum clearance of 914 mm (36 inches) from combustible constructions, and this clearance must be maintained while the smoker is operational. -
Página 15: Smoker Temperature Ranges
SMOKER TEMPERATURE RANGES All temperatures listed below are approximate and are affected by the following factors: outside ambient temperature, the amount and direction of wind, the quality of wood chips being used, the cabinet door being opened, and the quantity of food being cooked. MEDIUM TEMPERATURE (135-160°C / 275-320°F) •... -
Página 16: Preparation For Use - Leak Testing
PREPARATION FOR USE – LEAK TESTING A leak test is used to determine the integrity of a seal. Before using your gas smoker, perform a leak test on the connection between the regulator and the gas cylinder to reduce the risk of serious bodily injury or death from fire or explosion. A leak test should be performed a minimum of once a season, as well as: •... -
Página 17: Lighting Procedure
LIGHTING PROCEDURE Verify that all control knobs are turned to the OFF position. 2. Connect LP gas cylinder as per instructions. Turn LP gas tank valve to OPEN. 3. Note the indicator marker on the control knob. Push and hold down the control knob on the smoker and turn 90 degrees (or 1/4) counter-clockwise SLOWLY (2 to 3 seconds) to HIGH. -
Página 18: Refilling The Water Pan
REFILLING THE WATER PAN Check the water level periodically during your cooking session and add water if needed. Wearing heat-resistant barbecue mitts, open the cabinet door. 2. Carefully refill the water pan with water or marinade until it is ¾ full. Close the cabinet door. WARNING: Do not fill completely or overfill the water pan, as this could damage your igniter. -
Página 19: Care & Maintenance
CARE AND MAINTENANCE Any Pit Boss® unit will give you many years of flavorful service with minimum cleaning. Follow these cleaning and maintenance tips to service your smoker: 1. INSIDE SURFACES • It is recommended to clean your wood chip tray after every few uses. This will ensure proper smoking of new wood chips and avoid any hard build-up of debris or ash. -
Página 20: Cooking Guidelines
COOKING GUIDELINES Smoking and grilling styles of cooking can give you different results based on time and temperature. For best results, keep a record of what you cooked, at what temperature, how long you cooked for, and the results. Adjust to your taste for the next time. Practice makes perfect. - Página 21 LAMB Size Rare - 54°C / 130°F Medium - 60°C / 140°F Well Done - 71°C / 160°F Roast (fresh) 2.26 - 2.72 kg / 5 - 6 lbs. 5 -6 Hours POULTRY Size Rare - 54°C / 130°F Medium - 60°C / 140°F Well Done - 82°C / 180°F Turkey (whole) 4.53-5.44 kg / 10-12 lbs.
-
Página 22: Tips & Techniques
TIPS & TECHNIQUES Follow these helpful tips and techniques, passed on from Pit Boss owners, our staff, and customers just like you, to become more ® familiar with your grill: 1. FOOD SAFETY • Use different platters and utensils for the cooked meat than the ones you used to prepare or transport the raw meat out to the grill. -
Página 23: Troubleshooting
TROUBLESHOOTING Proper cleaning and maintenance will prevent common operational problems. When your Pit Boss® smoker is operating poorly, or used less frequently, the following troubleshooting tips may be helpful. For FAQ, please visit www.pitboss-grills.com . You may also contact your local Pit Boss® authorized dealer or contact Customer Care for assistance. -
Página 24: Replacement Parts
REPLACEMENT PARTS Part# Description Cooking Grids (x4) Cooking Grid Support Brackets (x8) Damper Vent (x2) Back Handle (x1) Heat Indicator (x1) Cabinet Door Handle Gasket (x1) Cabinet Door Handle (x1) Cabinet Door Latch (x1) Cabinet Door (x1) Main Cabinet (x1) Wood Chip Tray Lid (x1) Wood Chip Tray Assembly (x1) Bottom Chamber Assembly (x1) -
Página 25: Warranty
CONDITIONS All gas vertical smokers by Pit Boss®, manufactured by Dansons, carry a limited warranty from the date of sale by the original owner. The warranty coverage begins on the original date of purchase and proof of date of purchase, or copy of original bill of sale, is required to validate the warranty. -
Página 26: Ordering Replacement Parts
Contact your nearest Pit Boss® dealer for repair or replacement parts. Dansons requires proof of purchase to establish a warranty claim; therefore, retain your original sales receipt or invoice for future reference. The serial and model number of your Pit Boss®... -
Página 27: Recipes
RECIPES SMOKED HALIBUT SMOKED BEEF BRISKET Makes 4 Servings Makes 4 - 6 Servings Suggested Wood Chip Flavor: Hickory / Cherry / Mesquite Suggested Wood Chip Flavor: Hickory / Competition A whole beef brisket weighs 7.25-3.62 kg / 16-18 pounds and has three Ingredients: separate parts: the cap, the point, and the flat. - Página 28 SMOKED PRIME RIB ROAST pull apart with ease your ribs are done; internal temperature of your ribs hould be at 170°F. Makes 6 - 8 Servings Take out of smoker and let stand on serving platter until cool Suggested Wood Chip Flavor: Hickory / Pecan / Competition enough to eat.
- Página 29 SMOKED CHICKEN WHOLE SMOKED TURKEY Makes 2 - 6 Servings Feeds a small army - leftovers are great! Suggested Wood Chip Flavor: Hickory / Apple / Competition Suggested Wood Chip Flavor: Hickory / Cherry / Competition Ingredients: Ingredients: 1 whole Chicken 1 whole Turkey (thawed)
-
Página 30: Informations Concernant La Sécurité
INFORMATIONS CONCERNANT LA SÉCURITÉ LES PRINCIPALES CAUSES D'INCENDIE D'UN APPAREIL SONT UN MAUVAIS ENTRETIEN ET UNE INCAPACITÉ À MAINTENIR L'ESPACEMENT REQUIS ENTRE L'APPAREIL ET LES MATÉRIAUX COMBUSTIBLES. IL EST DE LA PLUS HAUTE IMPORTANCE QUE CE PRODUIT SOIT UNIQUEMENT UTILISÉ CONFORMÉMENT AUX INSTRUCTIONS SUIVANTES. -
Página 31: Avertissements En Matière De Gaz Propane
2. La bouteille d’alimentation de PL (propane liquide) à utiliser doit être construite et marquée conformément aux spécifications concernant les bouteilles de PL du département des Transports des É.-U. (DOT) ou de la Norme nationale du Canada CAN/ CSA-B339 relative aux cylindres, sphères et tubes pour le transport des matières dangereuses; et commission. 3. -
Página 32: Liste De Sécurité
CSA-22.2 No. 64-10 (R2014) appareils électroménagers de cuisson et de service alimentaire. Les appareils de cuisson électriques de Pit Boss® Grills ont été testés indépendamment et classés par Intertek (un laboratoire d'essai accrédité) aux normes ETL, UL, ULC et CSA. Conforme à la norme ANSI Z21.58-2018 / CSA 1.6-2018 Appareils de cuisson extérieurs au gaz. - Página 33 TABLE DES MATIÈRES Informations de sécurité ..........30 Mode d'emploi Environnement du fumoir............42 Pièces et spécifications ..........34 Gammes de température du fumoir ........43 Préparation à l'utilisation – test d’étanchéité ....44 Préparation de l'assemblage ........35 Première utilisation - durcissement et brûlage ....44 Instructions d’assemblage Procédure d'allumage ...............45 Montage des pieds de support sur la base de l'armoire ..
-
Página 34: Pièces Et Spécifications
790MM X 1 190MM X 540MM 24,6 KG CUISSON CUBIQUE: 0,07 M / 2,8 PD 38-160 °C PBV3G1 12 500 / 31 PO. X 46 PO. X 21 PO. / 54,23 LB TOTAL - 4 640 CM² / 720 PO²... -
Página 35: Préparation De L'aSsemblage
Before assembly of product, review all parts and reference the parts list. If any part is missing or damaged, do not attempt to assemble. Shipping damage is not covered under warranty. Contact your dealer or Pit Boss INSTRUCTIONS D’ASSEMBLAGE Customer Service for parts. -
Página 36: Fixer Correctement Le Panneau De Commande Aux Pieds De Support Avant
1 x Lower Smoker Cabinet with 1 x Right Front Leg (#22) 1 x Left Front Leg (#21) 2 x #10-24*1/2”Screw (#C) 2. FIXER CORRECTEMENT LE PANNEAU DE COMMANDE AUX Installation: PIEDS DE SUPPORT AVANT rews which were pre-assembled on the Control Pièces nécessaires : Cabinet mount Right Front Leg (#22) -
Página 37: Montage De La Chambre Inférieure
Installation: Front Leg (#22) 5. MONTAGE DE LA CHAMBRE INFÉRIEURE #10-24*1/2”Screws (#C) as Fig.4 shown. Leg (#21) Pièces nécessaires : Assembly (#20) using 4 x #10-24*1/2”Screws (#C) as Fig.4 shown. Base de l'armoire (#13) Vis (#C) 5. MOUNTING BURNER CHAMBER ASSEMBLY TO THE BOTTOM AREA OF Installation : LOWER SMOKER CABINET ASSEMBLY... -
Página 38: Assemblage De L'aRmoire Principale À La Base De L'aRmoire
Smoker Cabinet Assembly (#2) using 4 x . ASSEMBLING COOKING GRID SUPPORT TO THE UPPER SMOKER UPPER SMOKER CABINET ASSEMBLY CABINET ASSEMBLY TO THE Parts Required: LOWER SMOKER CABINET 8. ASSEMBLAGE DE L'ARMOIRE PRINCIPALE À LA BASE DE ASSEMBLY 10. PLACING WATER PAN AND WATER Parts Required: L'ARMOIRE UPPER SMOKER... -
Página 39: Montage De L'iNdicateur De Chaleur
10. MONTAGE DE L'INDICATEUR DE CHALEUR Pièces nécessaires : Indicateur de chaleur (#5) Porte d’armoire (#9) Installation : • Retirez la rondelle et l'écrou papillon de l'indicateur de chaleur emballée. • Insérez l'indicateur de chaleur dans le trou de montage à l'avant de la porte de l'armoire, placez la rondelle sur le filetage à... -
Página 40: Assemblage Et Installation Du Plateau Pour Copeaux De Bois
1 . PLACI NG CONTROL KNOB INTO THE the Wood Chip Box Assembly (#12) and slide Wood Chip Box onto the VALVE STEM 1 . PLACI NG CONTROL KNOB INTO THE Wood Chip Box support rails of Lower VALVE STEM Smoker Cabinet Assembly (#14) as Parts Required: Fig.16 shown. -
Página 41: Connexion À Une Alimentation Au Gaz
Operating Instructions 20. Assembly of the 3.2 Gas Smoker LP GAS CYLINDER (TANK) SPECIFICATIONS: CONNEXION À UNE ALIMENTATION AU GAZ The installation of this appliance must be in accordance with all applicable local codes, or the National Fuel Gas Code ANSI Z223.1 NFPA 54. When purchasing or exchanging a cylinder for your gas smoker, it must be: EXIGENCES RELATIVES À... -
Página 42: Débrancher Une Bouteille De Gaz
Il convient de conserver une distance minimum de 914 mm (36 pouces) entre toutes les unités Pit Boss® et les matériaux combustibles, et cette distance doit être conservée pendant l'utilisation du fumoir. -
Página 43: Gammes De Température Du Fumoir
3. CUISINER PAR TEMPS CHAUDS À mesure qu'il fait plus chaud à l'extérieur, le temps de cuisson diminue. Une tenue correcte est importante quand il fait vraiment chaud : un short, t-shirt, des chaussures, un chapeau, un tablier et une grosse portion de crème solaire sont recommandés. -
Página 44: Première Utilisation - Durcissement Et Brûlage
PRÉPARATION POUR L’UTILISATION - ESSAI D’ÉTANCHÉITÉ Un essai d’étanchéité est utilisé afin de déterminer l’intégrité du joint. Avant d’utiliser votre grill à gaz, vous devez effectuer un essai d’étanchéité sur le raccord entre le régulateur et la bonbonne de gaz afin de réduire le risque de blessures corporelles graves ou de mort en raison d’un incendie ou d’une explosion. -
Página 45: Procédure D'aLlumage
PROCÉDURE D'ALLUMAGE Vérifiez que tous les boutons de commande sont en position de ARRÊT. 2. Branchez la bouteille de gaz de pétrole liquéfié selon les instructions. Positionnez la vanne de la bouteille de gaz de pétrole liquéfié sur OUVERT. 3. Observez le repère indicateur sur le bouton du brûleur. Appuyez et maintenez enfoncé le bouton du brûleur sur la plaque de cuisson et tournez à... -
Página 46: Remplissage Du Réservoir D'eAu
REMPLISSAGE DU RÉSERVOIR D'EAU Vérifiez régulièrement le niveau d'eau pendant vous cuisinez et ajoutez de l'eau si nécessaire. Ouvrez la porte de l'armoire en prenant soin de porter des gants de cuisinier résistants à la chaleur. 2. Remplissez soigneusement le réservoir d'eau avec de l'eau ou de la marinade jusqu'à ce qu'il soit plein aux trois-quarts. Fermez la porte de l'armoire. -
Página 47: Entretien Et Maintenance
ENTRETIEN ET MAINTENANCE Votre unité Pit Boss® vous servira fidèlement pendant de longues années tout en minimisant les efforts de nettoyage. Suivez ces conseils de nettoyage et d'entretien pour assurer l'entretien de votre fumoir : 1. SURFACE INTERNES • Il est recommandé de nettoyer votre plateau pour copeaux de bois après chaque utilisation. Cela permettra aux copeaux de bois de bien fumer et évitera toute accumulation de débris ou de cendres. -
Página 48: Lignes Directrices Pour La Cuisine
LIGNES DIRECTRICES POUR LA CUISINE Les styles de cuisson de fumage et de grillage peuvent vous donner des résultats différents dépendant du temps et la température. Pour obtenir de meilleurs résultats, conservez un registre de tout ce que vous cuisinez, à quelle température vous le cuisinez, ainsi que les résultats. -
Página 49: Fruits De Mer
PORC TAILLE Réchauffer - 60°C / 140°F A point - 66°C / 150°F Bien cuit- 71°C / 160°F Jambon (cuit) Toutes les tailles 2 - 2¾ heures Jambon (frais) 4.53-5.44 kg / 10-12 lbs. 7 - 8 heures Saucisse (fraîche) Toutes les tailles 4 - 5 heures Loin rôti... -
Página 50: Conseils Et Techniques
CONSEILS ET TECHNIQUES Suivez ces conseils et techniques utiles, transmis par des propriétaires de Pit Boss® Grills, notre personnel et clients comme vous, afin de vous familiariser avec votre gril : 1. SÉCURITÉ ALIMENTAIRE • Garder propre tout ce qui se trouve dans la cuisine et dans la surface de cuisson. Utilisez un plat et des ustensiles différents pour la viande cuite et pour préparer ou transporter la viande crue sur le gril. -
Página 51: Dépannage
Un bon nettoyage et un bon entretien, ainsi que le fait d'utiliser du combustible propre, sec et de qualité aidera à prévenir la plupart des problèmes de fonctionnement du gril. Toutefois, quand votre gril à granulés de bois Pit Boss® ne fonctionne pas bien ou moins fréquemment, les conseils de dépannage suivants peuvent être utiles. -
Página 52: Pièces De Rechange
PIÈCES DE RECHANGE Description des pièces Grilles de cuisson (x4) Supports de la grille de cuisson (x8) Registre de ventilation (x2) Poignée arrière (x1) Indicateur de chaleur (x1) Joint du poignée de porte d’armoire (x1) Poignée de porte d’armoire (x1) Loquet de porte d'armoire (x1) Porte d’armoire (x1) Armoire principale (x1) -
Página 53: Garantie
CONDITIONS Tous les fumoirs à gaz de Pit Boss®, fabriqués par Dansons, contiennent une garantie limitée à partir de la date d'achat par le propriétaire initial. La garantie entre en vigueur à la date d'achat, et une preuve de la date d'achat ou copie de votre achat de vente original est requise pour valider la garantie. -
Página 54: Commande De Pièces De Remplacement
établir une réclamation sous garantie; Conservez donc votre reçu ou facture originale pour référence future. Le numéro de série et de modèle de votre Pit Boss® se trouve à l'arrière de l'unité. Enregistrez les numéros ci-dessous, car l'étiquette peut s'user ou devenir illisible. -
Página 55: Recettes
RECETTES FLÉTAN FUMÉ Comment faire: SAUCE ONCTUEUSE AU POULET Si vous aimez utiliser la graisse et les jus qui se sont écoulés pour 4 portions en faire une sauce onctueuse, alors placez les poules sur une grille Saveur de copeaux de bois suggérée : Caryer / Cerisier / Mesquite à... - Página 56 CÔTES FUMÉ Continuez le processus de cuisson lente jusqu'à ce que la température atteigne 60-66 ° C / 140-150 ° F. Enlevez la poitrine 4 à 6 portions du fumoir. Faites monter la température de l'armoire à 176 Saveur de copeaux de bois suggérée : Caryer / Pommier / °...
- Página 57 FILET DE PORC FARCI FUMÉ Versez l'assaisonnement ou la marinade sur les deux côtés des morceaux de poulet. 4 à 8 portions Placez les morceaux de poulet dans le fumoir. Après 30 minutes, Saveur de copeaux de bois suggérée : Pommier / Caryer / Cerisier retournez les morceaux.
- Página 58 DINDE ENTIÈRE FUMÉE Nourrit une petite armée - les restes sont délicieux! Saveur de copeaux de bois suggérée : Caryer / Cerisier / Compétition Ingrédients : 1 entière dinde (décongelée) 9-11.3 kg / 20-25 lbs 60 ml /4 c. à s assaisonnement ou marinade 5 ml / 1 cc paprika fumé...
-
Página 60: Información De Seguridad
INFORMACIÓN DE SEGURIDAD LAS PRINCIPALES CAUSAS DE INCENDIOS DE APARATOS SON FRUTO DE UN MANTENIMIENTO DEFICIENTE Y DE QUE NO SE MANTENGA EL ESPACIO SUFICIENTE ENTRE EL APARATO Y LOS MATERIALES COMBUSTIBLES. ES DE SUMA IMPORTANCIA QUE ESTE PRODUCTO SE USE EXCLUSIVAMENTE DE ACUERDO CON LAS INSTRUCCIONES SIGUIENTES. -
Página 61: Advertencias Sobre El Gas Propano
2. El tanque de gas licuado (LP) debe estar fabricado y marcado de acuerdo con las especificaciones de tanques de gas licuado del Departamento de transporte (D.O.T.) estadounidense o la Norma nacional de Canadá, CAN/CSA-B339, tanques, esferas y tubos para el transporte de mercancías peligrosas; y Comisión. 3. -
Página 62: Monóxido De Carbono (El "Asesino Silencioso")
4. Los cilindros deben almacenarse al aire libre fuera del alcance de los niños y no deben almacenarse en un edificio, garaje o cualquier otra área cerrada. MONÓXIDO DE CARBONO (el "asesino silencioso") Utilice siempre los aparatos de gas al aire libre en un área abierta con buena ventilación para evitar respirar los gases tóxicos de la combustión o de las fugas de gas. - Página 63 ÍNDICE Información de seguridad ..........60 Instrucciones de operación Entorno del ahumador .............. 72 Partes y especificaciones ..........64 Rangos de temperatura del ahumador ......... 73 Preparación para su uso: comprobación de fugas ....74 Preparación del ensamblaje .........65 Primer uso: curado y quemado ..........74 Instrucciones de ensamblaje Procedimiento de encendido ...........
-
Página 64: Partes Y Especificaciones
ÁREA DE COCCIÓN RANGO 790MM X 1,190MM X 540MM 24.6 KG COCINA CÚBICA: 0.07 M / 2.8 PI 38-160°C PBV3G1 12,500 / 31 PULG. X 46 PULG. X 21 PULG. / 54.23 LB TOTAL - 4,640 CM² / 720 PU² / 100-320°F... -
Página 65: Preparación Del Ensamblaje
Los daños por transporte no están cubiertos por la garantía. Comuníquese con su distribuidor o con Atención al cliente de Pit Boss® Grills para solicitar partes. service@pitboss-grills.com | EE.UU: (480) 923-9630 | CANADA (GRATUITA): 1-877-942-2246 IMPORTANTE: Para facilitar la instalación, es útil (pero no necesario) -
Página 66: Asegurar El Tablero De Control A Las Patas De Apoyo
Parts Required: 1 x Lower Smoker Cabinet with 1 x Right Front Leg (#22) 1 x Left Front Leg (#21) 2. ASEGURAR EL TABLERO DE CONTROL A LAS PATAS DE APOYO 2 x #10-24*1/2”Screw (#C) DELANTERAS Installation: rews which were Partes requeridas: pre-assembled on the Control Cabinet... -
Página 67: Montaje Del Ensamblaje De La Cámara Inferior
Installation: Front Leg (#22) 5. MONTAJE DEL ENSAMBLAJE DE LA CÁMARA INFERIOR #10-24*1/2”Screws (#C) as Fig.4 shown. Leg (#21) Partes requeridas: Assembly (#20) using 4 x #10-24*1/2”Screws (#C) as Fig.4 shown. Conjunto de la cámara inferior (#13) Tornillo (#C) 5. MOUNTING BURNER CHAMBER ASSEMBLY TO THE BOTTOM AREA OF Instalación: LOWER SMOKER CABINET ASSEMBLY... -
Página 68: Montaje De La Manija Posterior
CABINET ASSEMBLY using 2 x #10-24*1/2”Screws (#C), 2 x • Assembly (#10) and set using 2 x #10-24*1/2”Screws (#C), 2 x 2 x #10-24 aside. Mount (#1) to the Parts Required: Lock Nut 2 x #10-24 Upper Smoker Cabinet Assembly (#2) using 2 x #10-24*1/2”Screws (#C), 2 x Lock Nut 2 x #10-24... -
Página 69: Colocación Del Indicador De Calor
10. COLOCACIÓN DEL INDICADOR DE CALOR Partes requeridas: Indicador de calor (#5) Puerta del gabinete (#9) Instalación: • Retire la arandela y la tuerca mariposa del indicador de calor. • Inserte la placa del indicador de calor en el orificio de montaje en la parte delantera de la puerta del armario, coloque la arandela en el tornillo en el interior de la puerta y apriete a mano para asegurarla. -
Página 70: Montaje E Instalación De La Bandeja De Astillas De Madera
the Wood Chip Box Assembly (#12) 1 . PLACI NG CONTROL KNOB INTO THE and slide Wood Chip Box onto the VALVE STEM 1 . PLACI NG CONTROL KNOB INTO THE Wood Chip Box support rails of Lower VALVE STEM Smoker Cabinet Assembly (#14) as Parts Required: Fig.16 shown. -
Página 71: Conexión A Una Fuente De Gas
Operating Instructions 20. Assembly of the 3.2 Gas Smoker LP GAS CYLINDER (TANK) SPECIFICATIONS: The installation of this appliance must be in accordance with all applicable local codes, or the National CONEXIÓN A UNA FUENTE DE GAS Fuel Gas Code ANSI Z223.1 NFPA 54. When purchasing or exchanging a cylinder for your gas smoker, it must be: Transportation (DOT), and REQUISITOS DEL TANQUE DE GAS... -
Página 72: Desconexión Del Tanque De Gas
Con todos los aparatos para exteriores, las condiciones climatológicas externas tendrán un papel importante en el desempeño de su ahumador y en los tiempos de cocción necesarios para perfeccionar sus comidas. Todas las unidades Pit Boss® Grills requieren un espacio libre mínimo de 914 mm (36 pulg.) de separación de materiales combustibles, y este espacio debe mantenerse todo el tiempo que se use el ahumador. -
Página 73: Rangos De Temperatura Del Ahumador
3. COCINA EN CLIMAS CALIENTES Conforme esté más caliente en el exterior, el tiempo de cocción se reducirá. La vestimenta correcta es importante cuando hace mucho calor: es recomendable usar pantalones cortos, franela, zapatos, gorra, delantal y una porción generosa de bloqueador solar. -
Página 74: Preparación Para Su Uso: Comprobación De Fugas
PREPARACIÓN PARA SU USO: COMPROBACIÓN DE FUGAS Para determinar la integridad del precinto se realizará una prueba de fugas. Antes de usar la barbacoa de gas, haga una prueba de fugas en la conexión entre el regulador y el tanque de gas para reducir el riesgo de lesiones corporales graves o incluso la muerte por incendio o explosión. -
Página 75: Procedimiento De Encendido
PROCEDIMIENTO DE ENCENDIDO Verifique que todas las perillas de control estén en la posición OFF (apagado). 2. Conecte el tanque de gas licuado según las instrucciones. Gire la válvula del tanque de gas licuado hasta la posición OPEN (abierto). 3. Observe el marcador indicativo en la perilla de control. Mantenga presionada la perilla de control de la parrilla y gírela 90 grados (o 1/4) en sentido contrario a las agujas del reloj LENTAMENTE (de 2 a 3 segundos) hasta HIGH (temperatura alta). -
Página 76: Rellenar La Bandeja Para El Agua
5. Después de que el quemador se haya incendiado, ¡estará listo para disfrutar de su ahumador a la temperatura deseada! NOTA: Si el quemador no se enciende en 5 segundos, apague la perilla de control, espere cinco minutos y luego repita el proceso. RELLENAR LA BANDEJA PARA EL AGUA Verifique el nivel de agua periódicamente durante la sesión de cocción y añada agua si es necesario. -
Página 77: Cuidado Y Mantenimiento
CUIDADO Y MANTENIMIENTO Todas las unidades Pit Boss® Grills le darán muchos años de delicioso servicio con un mínimo de limpieza. Siga estas indicaciones de mantenimiento y limpieza para dar servicio a su ahumador: 1. SUPERFICIES INTERIORES • Se recomienda limpiar la bandeja de virutas de madera cada pocos usos. Esto asegurará un ahumado adecuado de las astillas de madera nuevas y evitará... -
Página 78: Lineamientos Para Cocinar
LINEAMIENTOS PARA COCINAR Ahumar y asar pueden dar diferentes resultados dependiendo del tiempo y la temperatura. Para obtener los mejores resultados lleve un registro de lo que cocinó, a qué temperatura, por cuánto tiempo, y los resultados. Ajuste a su gusto la próxima vez. La práctica hace al maestro. - Página 79 CERDO Tamaño Recalentar - 60°C / 140°F Medio - 66°C / 150°F Bien cocido - 71°C / 160°F Jamón (cocido) Todos los tamaños 2 horas a 2 horas 45 min Jamón (fresco) 4,53-5,44 kg / 10-12 lbs. 7 horas a 8 horas Salchicha (fresco) Todos los tamaños 4 horas a 5 horas...
-
Página 80: Consejos Y Técnicas
CONSEJOS Y TÉCNICAS Siga estos útiles consejos y técnicas, transmitidos por los dueños de Pit Boss® Grills, nuestro personal y nuestros clientes, como usted, para familiarizarse con su ahumador: 1. SEGURIDAD DE LOS ALIMENTOS • Mantenga limpio todo lo que haya en la cocina y en el área para cocinar. Use platos y utensilios diferentes para la carne cocida que los que utilizó... -
Página 81: Solución De Problemas
RESOLUCIÓN DE PROBLEMAS Una limpieza y mantenimiento adecuados impedirán que surjan los problemas de funcionamiento más comunes. Cuando la barbacoa no funcione bien o se use con menor frecuencia, las siguientes sugerencias de solución de problemas pueden resultar útiles. Consulte las preguntas frecuentes en www.pitboss-grills.com. Si necesita ayuda, también puede ponerse en contacto con su distribuidor local o con el servicio de atención al cliente. -
Página 82: Piezas De Repuesto
PIEZAS DE REPUESTO N° Descripción Rejillas de cocción (x4) Suportes para rejilla de cocción (x8) Compuerta de ventilación (x2) Manija trasera (x1) Indicador de calor (x1) Junta de la manija de la puerta del gabinete (x1) Manija de puerta del gabinete (x1) Pestillo para puerta del gabinete (x1) Puerta del gabinete (x1) Gabinete principal (x1) -
Página 83: Garantía
CONDICIONES Todos los ahumadores de gas de Pit Boss® Grills, fabricados por Dansons, tiene una garantía limitada a partir de la fecha de venta solo para el comprador original. La cobertura de la garantía comienza en la fecha original de compra y es necesario un comprobante de la fecha de la compra o una copia de la factura original de compra para validar la garantía. -
Página 84: Cómo Ordenar Refacciones
Puede ver el número de serie y modelo de su Pit Boss® Grills en el interior de la tapa de la tolva. Escriba los números a continuación, ya que la etiqueta podría desgastarse o quedar ilegible. -
Página 85: Recetas
RECETAS FLETÁN AHUMADO bandeja. Vigile los jugos, ya que quizá necesite añadir más durante el período de cocción. Rinde 4 porciones Sabor sugerido de la viruta de madera: Nogal / Cerezo / Mezquite BRISKET DE RES AHUMADO Ingredientes: 900g / 2 libras Filetes de fletán Rinde 4 - 6 porciones 125 ml / ½... -
Página 86: Asado De Costilla De Primera Ahumada
interna debe llegar a 91 °C / 195 °F. El brisket debe estar firme, Después de una hora, voltee las costillas con el lado del hueso pero debe poder desmenuzar la carne con sus dedos. hacia arriba y cocine durante una hora. Después de 2 y 1/2 horas, dependiendo del color que desee de la costilla, vierta una línea Transfiera la carne a una tabla de cortar y déjela reposar por 10 de una pulgada de ancho de su salsa BBQ favorita a lo largo de... -
Página 87: Pollo Ahumado
POLLO AHUMADO PAVO AHUMADO ENTERO Rinde 2 - 6 porciones Rinde para un pequeño ejército - ¡las sobras son excelentes! Sabor sugerido de la viruta de madera: Nogal / Manzano / Competencia Sabor sugerido de la viruta de madera: Nogal / Cerezo / Competencia Ingredientes: Ingredientes: Pollo entero... - Página 88 IMPORTANT DO NOT RETURN PRODUCT TO STORE For all questions, comments, or inquiries, please contact Dansons directly. Our Customer Care department. USA: (480) 923-9630 CANADA (TOLL FREE): 1-877-942-2246 service@pitboss-grills.com IMPORTANT NE RETOURNEZ PAS LE PRODUIT AU MAGASIN Ne retournez pas le produit au magasin Pour toutes questions, commentaires ou demandes de renseignements, veuillez com- muniquer directement avec Dansons notre service client.