Tabla de contenido
Publicidad
Idiomas disponibles
Idiomas disponibles
Enlaces rápidos
Hinweis:Dieses Produkt ist nur für gut isolierte Räume oder für den gelegentlichen Gebrauch geeignet.
Note: This product is only suitable for well insulated spaces or occasional use.
Nota: Este producto está indicado únicamente en lugares abrigados o para una utilización punctual.
Remarque : Ce produit ne peut être utilisé que dans des locaux bien isolés ou de manière occasionnelle.
Advertencia: Questo prodotto è adatto solo per spazi ben isolati o uso occasionale.
Glasheizung
10032787 10032788 10032789 10032790
All manuals and user guides at all-guides.com
Publicidad
Tabla de contenido

Manuales relacionados para Klarstein 10032787


Resumen de contenidos para Klarstein 10032787
- Página 1 Nota: Este producto está indicado únicamente en lugares abrigados o para una utilización punctual. Remarque : Ce produit ne peut être utilisé que dans des locaux bien isolés ou de manière occasionnelle. Advertencia: Questo prodotto è adatto solo per spazi ben isolati o uso occasionale. Glasheizung 10032787 10032788 10032789 10032790...
-
Página 2: Technische Daten
Ihnen zum Erwerb Ihres Gerätes. Lesen Sie die folgenden Hinweise sorgfältig durch und befolgen Sie diese, um möglichen Schäden vorzubeugen. Für Schäden, die durch Missachtung der Hinweise und unsachgemäßen Gebrauch entstehen, übernehmen wir keine Haftung. Technische Daten Artikelnummer 10032787 10032788 10032789 10032790 Stromversorgung 230 V ~ 50 Hz Leistung... - Página 3 All manuals and user guides at all-guides.com Produktdatenblatt Modellkennung(en) 10032787 10032788 Angabe Symbol Wert Einheit Angabe Einheit Wärmeleistung Nur bei elektrischen Speicher-Einzelraumheizgeräten: Art der Regelung der Wärmezufuhr Nennwärmeleistung Pnom Manuelle Regelung der Wärmezufuhr mit k.A. integriertem Thermostat Mindestwärmeleistung Pmin Manuelle Regelung der Wärmezufuhr k.A.
- Página 4 All manuals and user guides at all-guides.com Modellkennung(en) 10032789 10032790 Angabe Symbol Wert Einheit Angabe Einheit Wärmeleistung Nur bei elektrischen Speicher-Einzelraumheizgeräten: Art der Regelung der Wärmezufuhr Nennwärmeleistung Pnom Manuelle Regelung der Wärmezufuhr mit k.A. integriertem Thermostat Mindestwärmeleistung Pmin Manuelle Regelung der Wärmezufuhr k.A.
-
Página 5: Displayanzeigen
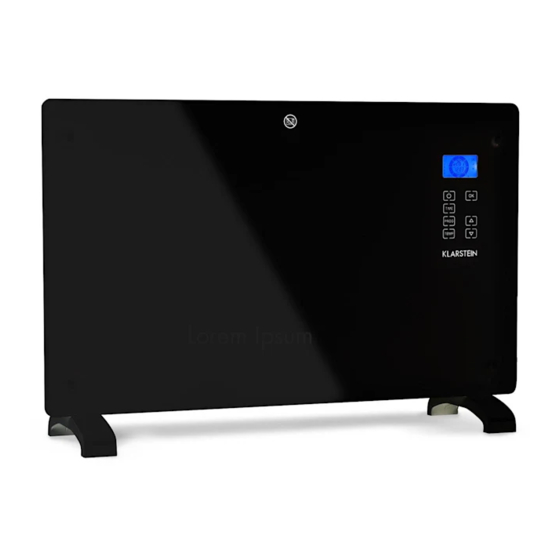
All manuals and user guides at all-guides.com Geräteübersicht 1 Zierblende Glas 2 LCD-Anzeige 3 Bedienfeld 4 Ein-/Aus Schalter 5 Standfuß Displayanzeigen Bedienfeld Standby-Taste: Temperatur- Wert erhöhen Gerät ein/ausschalten. einstellungen Eingabe bestätigen / Uhrzeit einstellen. Wert verringern Menü aufrufen Programmeinstellungen... - Página 6 All manuals and user guides at all-guides.com Montage Standmontage 1. Drehen Sie das Gerät auf den Kopf. Setzen Sie es auf einem weichen Tuch oder Teppich ab. 2. Bringen Sie den Fuß an der richtigen Stelle auf der Unterseite des Geräts an (siehe Bild unten). Verwenden Sie dazu die beiliegenden Schrauben.
- Página 7 All manuals and user guides at all-guides.com 2. Bringen Sie auf der Unterseite des Geräts 2 Halterungen an. 3. Halten Sie das Gerät seitlich. Sehen Sie auf die Position der Bohrungen auf der Gehäuserückseite. Setzen Sie das Gerät auf die Halterungen.
- Página 8 All manuals and user guides at all-guides.com Inbetriebnahme und Bedienung Ein-/Ausschalten 1. Stellen Sie den An/Aus Schalter (4) auf die Position „I”. 2. Drücken Sie die Standby-Taste um den Standby-Modus zu verlassen. Die Anzeige zeigt nun die aktuelle Raumtemperatur und Uhrzeit (Standard 12:00) an. Durch erneutes Drücken dieser Taste wechselt das Gerät zurück in den Standby-Modus.
- Página 9 All manuals and user guides at all-guides.com Programmierter wöchentlicher Heizmodus 1. Die Taste PROG drücken, um in den Wochenheizmodus zu gelangen. Bewegen Sie den Cursor über das Uhrensymbol unten links im Display. 2. Nun blinkt der Cursor bei der Tagesanzeige und der Wochenanzeige (links im Menü). 3.
- Página 10 All manuals and user guides at all-guides.com Verriegelung / Kindersicherung 1. Um die Heizung in den Standby-Modus mit aktivierter Kindersicherung zu schalten, drücken und halten Sie die OK-Taste für 5 Sekunden. Im Display erscheint das Schloss-Symbol. 2. Zum Entsperren halten zuerst „OK“ 5 Sekunden lang gedrückt. Uhrzeit einstellen Drücken Sie zum Stellen der Uhrzeit und die Stunden beginnen zu blinken.
-
Página 11: Reinigung Und Pflege
All manuals and user guides at all-guides.com Reinigung und Pflege Wartung Trennen Sie die Heizung vor jeder Wartung vom Stromnetz und lassen Sie diese vollständig abkühlen. Entfernen Sie mittels eines Staubsaugers Staub und Flusen von den Lüftungsgittern. Reinigen Sie das Gehäuse mit einem feuchten Lappen oder trocknen es anschließend. -
Página 12: Technical Data
Any failure caused by ignoring the mentioned items and cautions mentioned in the instruction manual are not covered by our warranty and any liability. Technical Data Item number 10032787 10032788 10032789 10032790 Power supply 230 V ~ 50 Hz... -
Página 13: Product Data Sheet
All manuals and user guides at all-guides.com Product Data Sheet Model identifier(s): 10032787, 10032788 Item Symbol Value Unit Item Unit Heat output Type of heat input, for electric storage local space heaters only Nominal heat output Pnom manual heat charge control, with integrated... - Página 14 All manuals and user guides at all-guides.com Model identifier(s): 10032789 10032790 Item Symbol Value Unit Item Unit Heat output Type of heat input, for electric storage local space heaters only Nominal heat output Pnom manual heat charge control, with integrated thermostat Minimum heat output Pmin...
-
Página 15: Product Description
All manuals and user guides at all-guides.com Product Description 1 Decoration glass 2 LCD screen 3 Operation board 4 Power ON/OFF switch 5 Foot Display Control Panel Standby key: Switching Setting temperature Adjusting value up. the appliance on/off. level. Confirming an input / Setting the time. -
Página 16: Free-Standing Installation
All manuals and user guides at all-guides.com Installation Free-standing installation 1. Put the product upside down on a soft cotton cloth or carpet. 2. Mount the stand in the corresponding location of the lower part of the product as shown above, and then fix the randomly supplied screw at the bottom of the product with a screwdriver and tighten the screw.. - Página 17 All manuals and user guides at all-guides.com 2. Fix 2 brackets onto the bottom of productst, as depicted in the picture below. 3. Hold the side of the product, look at the position of the wall hole of the rear cover, and slide the wall to the top of the slot, that is, the installation of the wall is completed, as depicted in the picture below.
-
Página 18: Use And Operation
All manuals and user guides at all-guides.com Use and Operation Switching the appliance on/off 1. Set the I/0 switch (4) to the I position. 2. Press the Standby key to exit the standby mode, the LCD display (2) shows current ambient temperature and set time (default 12:00). - Página 19 All manuals and user guides at all-guides.com Programmed weekly heating mode 1. To enter the weekly heating mode press PROG and move the cursor over the clock icon at the bottom left hand side of the LCD screen and press OK. 2.
- Página 20 All manuals and user guides at all-guides.com Child lock function 1. To set the heater to a standby mode and apply the child lock function, simply hold the OK key and wait for 5 seconds. You will see the padlock image lock on the LCD screen. 2.
-
Página 21: Cleaning And Care
All manuals and user guides at all-guides.com Cleaning and Care Maintenance Always disconnect the appliance and let it completely cool before any maintenance. Use a vacuum cleaner to remove dust on grilles. Clean the outside of the unit with a damp cloth and then dry it with a dry cloth. Never immerse the unit in water, nor let water drip into the unit. -
Página 22: Fiche Technique
Le fabricant ne saurait être tenu pour responsable des dommages dus au non-respect des consignes de sécurité et à la mauvaise utilisation de l’appareil. Fiche technique Numéro d'article 10032787 10032788 10032789 10032790 Alimentation 230 V ~ 50 Hz Puissance... -
Página 23: Fiche De Données Produit
All manuals and user guides at all-guides.com FICHE DE DONNÉES PRODUIT Référence (s) du produit 10032787 10032788 Donnée Symbole Valeur Unité Donnée Unité Puissance calorifique Uniquement pour les radiateurs électriques à accumulation : Type de régulation de l'apport de chaleur... - Página 24 All manuals and user guides at all-guides.com Référence (s) du produit 10032789 10032790 Donnée Symbole Valeur Unité Donnée Unité Puissance calorifique Uniquement pour les radiateurs électriques à accumulation : Type de régulation de l'apport de chaleur Puissance calorifique Pnom Régulation manuelle de l'apport de chaleur avec Sans objet nominale thermostat intégré...
-
Página 25: Aperçu De L'aPpareil
All manuals and user guides at all-guides.com Aperçu de l‘appareil 1 Panneau de verre décoratif 2 Écran LCD 3 Panneau de commande 4 Interrupteur de marche/arrêt 5 Pied de support Affichages de l‘écran Echelle de 24 heures (chaque point équivaut à 30 min) Température Verrouillage Température... - Página 26 All manuals and user guides at all-guides.com Montage Montage en pose libre 1. Retournez l‘appareil. Mettez-le sur un chiffon doux ou un tapis. 2. Placez le pied dans la bonne position sur la face inférieure de l‘appareil (voir l‘image ci-dessous). Utilisez les vis fournies.
- Página 27 All manuals and user guides at all-guides.com 2. Fixez 2 supports sous l‘appareil. 3. Tenez l‘appareil de côté. Repérez l‘emplacement des trous à l‘arrière de du boîtier de l‘appareil. Mettez l‘appareil sur les supports.
-
Página 28: Mise En Marche Et Utilisation
All manuals and user guides at all-guides.com Mise en marche et utilisation Marche/arrêt 1. Mettez l‘interrupteur de marche/arrêt (4) sur la position „I“. 2. Appuyez sur la touche Standby pour quitter le mode veille. L‘écran indique maintenant la température et l‘heure actuelles (par défaut 12:00). - Página 29 All manuals and user guides at all-guides.com Mode programme de chauffage hebdomadaire 1. Lorsque vous basculez dans ce mode, le symbole du lundi clignote. Utilisez les touches fléchées pour chan- ger de jour de la semaine. 2. Appuyez sur „PROG“ pour confirmer. 3.
- Página 30 All manuals and user guides at all-guides.com Verrouillage des touches / verrouillage parental 1. Pour mettre le radiateur en mode veille avec le verrouillage parental activé, appuyez sur le bouton OK et maintenez-le enfoncé pendant 5 secondes. 2. Pour déverrouiller, appuyez d‘abord sur „OK“ pendant 5 secondes. Réglage de l'heure Appuyez sur la touche pour régler l'heure, les heures se mettent à...
-
Página 31: Nettoyage Et Entretien
All manuals and user guides at all-guides.com Nettoyage et entretien Entretien Débranchez le chauffage du secteur avant tout entretien et laissez-le refroidir complètement. Utilisez un aspirateur pour enlever la poussière et les peluches des grilles de ventilation. Nettoyez le boîtier avec un chiffon humide et séchez-le ensuite. -
Página 32: Dati Tecnici
Non ci assumiamo alcuna responsabilità per danni scaturiti da una mancata osservazione delle avvertenze di sicurezza e da un uso improprio del dispositivo. Dati tecnici Numero articolo 10032787 10032788 10032789 10032790 Alimentazione 230 V ~ 50 Hz... -
Página 33: Scheda Informativa Del Prodotto
All manuals and user guides at all-guides.com Scheda informativa del prodotto Identificazione del modello (i) 10032787 10032788 Indicazione Simbolo Valore Unità Indicazione Unità Potenza termica Solo per gli apparecchi per il riscaldamento d'ambiente locale elettrici ad accumulo: Tipo di controllo dell´apporto termico... - Página 34 All manuals and user guides at all-guides.com Identificazione del modello (i) 10032789 10032790 Indicazione Simbolo Valore Unità Indicazione Unità Potenza termica Solo per gli apparecchi per il riscaldamento d'ambiente locale elettrici ad accumulo: Tipo di controllo dell´apporto termico Potenza termica nominale Pnom Controllo manuale del carico termico con termostato integrato...
-
Página 35: Descrizione Del Prodotto
All manuals and user guides at all-guides.com Descrizione del prodotto 1 Copertura decorativa in vetro 2 Schermo LCD 3 Pannello di controllo 4 Interruttore on/off 5 Piede d’ a ppoggio Spie del display Scala 24 ore (ogni punto = 30 min.) Température Blocco sicurezza Temperatura... - Página 36 All manuals and user guides at all-guides.com Montaggio Montaggio senza supporto 1. Mettere il dispositivo sottosopra. Poggiarlo su un panno morbido o un tappeto. 2. Montare il piede d’ a ppoggio sul punto corretto (v. immagine sotto). Utilizzare le viti incluse. Stringere le viti saldamente con un cacciavite.
- Página 37 All manuals and user guides at all-guides.com 2. Montare 2 supporti sul lato inferiore del dispositivo 3. Tenere il dispositivo di lato. Cercare la posizione dei fori sul lato posteriore del dispositivo. Poggiare il dispo- sitivo sui supporti.
-
Página 38: Messa In Funzione E Utilizzo
All manuals and user guides at all-guides.com Messa in funzione e utilizzo Accendere/spegnere 1. Posizionare l’interruttore on/off (4) su “I”. 2. Premere il tasto standby per lasciare la modalità standby. Lo schermo indica la temperatura e l’ o ra attuale (standard 12:00). - Página 39 All manuals and user guides at all-guides.com Modalità di riscaldamento settimanale programmato 1. Dopo essere passati in questa modalità, lampeggia il simbolo del lunedì . Utilizzare i tasti freccia per selezionare il giorno della settimana. 2. Premere “PROG” per confermare. 3.
- Página 40 All manuals and user guides at all-guides.com Blocco/sicura per i bambini 1. Per accendere il riscaldatore in modalità standby con la sicura per i bambini attivata, tenere premuto il tasto OK per 5 secondi. 2. Per sbloccare tenere premuto “OK” per 5 secondi. Impostare l’ora Premere per impostare l’...
-
Página 41: Pulizia E Manutenzione
All manuals and user guides at all-guides.com Pulizia e manutenzione Manutenzione Scollegare il dispositivo dalla rete elettrica e lasciarlo raffreddare completamente prima di ogni manutenzione. Rimuovere polvere e peluzzi con un aspirapolvere dalle griglie di ventilazione. Pulire l’alloggiamento con un panno umido e asciugarlo. -
Página 42: Datos Técnicos
La empresa no se responsabiliza de los daños ocasionados por un uso indebido del producto o por haber desatendido las indicaciones de seguridad. Datos técnicos Número de artículo 10032787 10032788 10032789 10032790 Suministro eléctrico 230 V ~ 50 Hz... -
Página 43: Hoja De Datos Del Producto
All manuals and user guides at all-guides.com Hoja de datos del producto Denominación del modelo 10032787 10032788 Dato Símbolo Valor Unidad Dato Unidad Potencia térmica Solo con disposítivos de acumulación de calor eléctricos para abastecimiento local: Tipo de regulación del abastecimiento de calor Potencia térmica nominal... - Página 44 All manuals and user guides at all-guides.com Denominación del modelo 10032789 10032790 Dato Símbolo Valor Unidad Dato Unidad Potencia térmica Solo con disposítivos de acumulación de calor eléctricos para abastecimiento local: Tipo de regulación del abastecimiento de calor Potencia térmica nominal Pnom Regulación manual del abastecimiento de calor con termostato integrado:...
-
Página 45: Descripción Del Aparato
All manuals and user guides at all-guides.com Descripción del aparato • 1 cristal decorativo • 2 Display LCD • 3 Panel de control • 4 Interruptor on/off • 5 Patas Indicadores del display Escala de 24 horas (cada punto = 30 min) Température Bloqueo para Temperatura... -
Página 46: Montaje Independiente
All manuals and user guides at all-guides.com Montaje Montaje independiente 1. Voltee el aparato. Colóquelo sobre un paño o alfombra suave. 2. Monte el soporte en el lugar indicado en la parte inferior del aparato (véase imagen). Para ello, utilice los tornillos incluidos. - Página 47 All manuals and user guides at all-guides.com 2. Monte los 2 soportes en la parte inferior del aparato. 3. Coloque el aparato en posición lateral. Vea la posición de los orificios desde la parte trasera del aparato. Coloque el aparato sobre los soportes.
-
Página 48: Puesta En Marcha Y Uso
All manuals and user guides at all-guides.com Puesta en marcha y uso Encender / apagar 1. Coloque el interruptor on/off (4) en la posición „I“. 2. Pulse el botón Standby para abandonar el modo standby. El indicador muestra la temperatura ambiente actual y la hora (por defecto 12:00). - Página 49 All manuals and user guides at all-guides.com Modo calefacción programable por semana 1. Después de haber cambiado a este modo, el símbolo para lunes . Utilice los botones de flechas para cambiar el día de la semana. 2. Pulse „PROG“ para confirmar 3.
- Página 50 All manuals and user guides at all-guides.com Bloqueo/Bloqueo para niños 1. Para activar el modo standby de la calefacción con el bloqueo para niños, mantenga pulsado el botón OK durante 5 segundos. 2. Para desbloquear, mantenga pulsando el botón „OK“ durante 5 segundos. Ajustar la hora Para ajustar la hora, pulse X y las horas comienzan a parpadear.
-
Página 51: Limpieza Y Cuidado
All manuals and user guides at all-guides.com Limpieza y cuidado Mantenimiento Desconecte el radiador de la red eléctrica antes de realizar labores de mantenimiento y deje que se enfríe por completo. Retire el polvo y las pelusas de las rejillas de ventilación mediante una aspiradora. Limpie la carcasa con un paño húmedo y séquela a continuación. - Página 52 All manuals and user guides at all-guides.com Dear Customer, Congratulations on purchasing this equipment. Please read this manual carefully and take care of the following hints to avoid damages. Any failure caused by ignoring the mentioned items and cautions mentioned in the instruction manual are not covered by our warranty and any liability.
- Página 53 All manuals and user guides at all-guides.com Product Data Sheet Model identifier(s): Item Symbol Value Unit Item Unit Heat output Type of heat input, for electric storage local space heaters only Nominal heat output Pnom manual heat charge control, with integrated thermostat Minimum heat output Pmin...
- Página 54 All manuals and user guides at all-guides.com Model identifier(s): Item Symbol Value Unit Item Unit Heat output Type of heat input, for electric storage local space heaters only Nominal heat output Pnom manual heat charge control, with integrated thermostat Minimum heat output Pmin manual heat charge control with room and/or (indicative)
- Página 55 All manuals and user guides at all-guides.com Product Description 1 Decoration glass 2 LCD screen 3 Operation board 4 Power ON/OFF switch 5 Foot Display Control Panel Standby key: Switching Setting temperature Adjusting value up. the appliance on/off. level. Confirming an input / Setting the time.
- Página 56 All manuals and user guides at all-guides.com Installation Free-standing installation 1. Put the product upside down on a soft cotton cloth or carpet. 2. Mount the stand in the corresponding location of the lower part of the product as shown above, and then fix the randomly supplied screw at the bottom of the product with a screwdriver and tighten the screw..
- Página 57 All manuals and user guides at all-guides.com 2. Fix 2 brackets onto the bottom of productst, as depicted in the picture below. 3. Hold the side of the product, look at the position of the wall hole of the rear cover, and slide the wall to the top of the slot, that is, the installation of the wall is completed, as depicted in the picture below.
- Página 58 All manuals and user guides at all-guides.com Use and Operation Switching the appliance on/off 1. Set the I/0 switch (4) to the I position. 2. Press the Standby key to exit the standby mode, the LCD display (2) shows current ambient temperature and set time (default 12:00).
- Página 59 All manuals and user guides at all-guides.com Programmed weekly heating mode 1. After entering the weekly heating mode and when the Monday icon . is flashing use the up or down key to select the day to be programmed. Each number corresponds to respective day of the week. 2.
- Página 60 All manuals and user guides at all-guides.com Child lock function 1. To set the heater to a standby mode and apply the child lock function, simply hold the OK key and wait for 5 seconds. 2. To unlock, press the OK key for 5 seconds. Setting time To set the time press the TIME key, when the hour digits “12”...
- Página 61 All manuals and user guides at all-guides.com Cleaning and Care Maintenance Always disconnect the appliance and let it completely cool before any maintenance. Use a vacuum cleaner to remove dust on grilles. Clean the outside of the unit with a damp cloth and then dry it with a dry cloth. Never immerse the unit in water, nor let water drip into the unit.