Tabla de contenido
Publicidad
Idiomas disponibles
Idiomas disponibles
Enlaces rápidos
MANUAL DEL PROPIETARIO
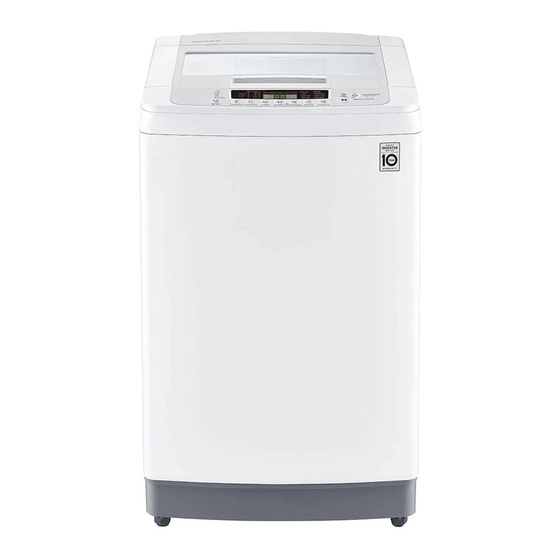
LAVADORA
Antes de empezar la instalación, lea con atención estas
instrucciones. Con ello, la instalación le resultará más sencilla
y se asegurará de que el aparato quede instalado de forma
correcta y segura. Guarde estas instrucciones cerca del
aparato después de la instalación para poder consultarlas en
el futuro.
LS
ESPAÑOL
WT13WPBP / WT13DPBP
MFL68862018
Rev.00_070920
Copyright © 2020 LG Electronics Inc. Todos los derechos reservados
www.lg.com
Publicidad
Capítulos
Tabla de contenido
Solución de problemas

Manuales relacionados para LG WT13WPBP


Resumen de contenidos para LG WT13WPBP
- Página 1 Guarde estas instrucciones cerca del aparato después de la instalación para poder consultarlas en el futuro. ESPAÑOL WT13WPBP / WT13DPBP www.lg.com MFL68862018 Rev.00_070920 Copyright © 2020 LG Electronics Inc. Todos los derechos reservados...
-
Página 2: Tabla De Contenido
Agregado de detergente, suavizantes y blanqueadores......17 Panel de control ....................20 Tabla de programas..................21 Opciones y funciones extra ................23 FUNCIONES INTELIGENTES Aplicación LG ThinQ..................27 Smart Diagnosis ....................27 MANTENIMIENTO Limpieza después de cada lavado ..............28 Limpieza periódica del aparato..............28 SOLUCIÓN DE PROBLEMAS... -
Página 3: Instrucciones De Seguridad
INSTRUCCIONES DE SEGURIDAD INSTRUCCIONES DE SEGURIDAD LEA TODAS LAS INSTRUCCIONES ANTES DE USAR Las siguientes instrucciones de seguridad tienen por objetivo evitar riesgos imprevistos o daños derivados de un funcionamiento poco seguro o incorrecto del aparato. Las instrucciones se dividen en "ADVERTENCIAS" y "PRECAUCIONES", como se describe a continuación. - Página 4 • La presión de entrada del agua debe estar comprendida entre 50 y 800 kPa. Carga Máxima La capacidad máxima en algunos ciclos para el lavado de ropa seca es WT13WPBP WT13DPBP 13 kg 13 kg INSTALACIÓN •...
- Página 5 INSTRUCCIONES DE SEGURIDAD esté sujeta a condiciones climáticas, tales como luz directa del sol, viento o lluvia, ni a temperaturas bajo cero. • Asegúrese de que el enchufe está insertado completamente en el tomacorriente. • No conecte el aparato a tomacorrientes de múltiples conectores o a una extensión del cable de alimentación.
- Página 6 • En caso de una fuga de agua del aparato, desconecte el enchufe de alimentación y comuníquese con el centro de información del cliente de LG Electronics. • Cierre los grifos de agua para aliviar la presión en las mangueras y válvulas y minimizar la fuga si en caso ocurriera una ruptura.
- Página 7 10 segundos, interrumpa inmediatamente el funcionamiento del aparato y comuníquese con su distribuidor o con el centro de servicio de LG Electronics. • No use un tomacorriente, equipo de cableado o cable de extensión de una capacidad eléctrica inferior a la capacidad establecida del electrodoméstico.
- Página 8 • Únicamente personal de servicio autorizado de un centro de servicio LG ELECTRONICS debe desarmar, reparar o modificar el electrodoméstico. Contacte a un centro de información al cliente de LG ELECTRONICS si mueve e instala el electrodoméstico en una ubicación diferente. Eliminación •...
-
Página 9: Instalación
INSTALACIÓN INSTALACIÓN Partes y especificaciones NOTA • El aspecto y las especificaciones pueden cambiar sin previo aviso para mejorar la calidad del electrodoméstico. Vista frontal * Esta característica solo está disponible en algunos modelos. Puerta Entradas de agua caliente y fría Manija Vidrio templado Compartimiento del dispensador de detergente... - Página 10 Mangueras de entrada de agua fría y Cubierta anti-ratas caliente Manguera de Drenaje Tornillo para la cubierta anti-ratas Precinto Especificaciones Modelo WT13WPBP / WT13DPBP Alimentación eléctrica 120 V~ 60 Hz Peso del producto Aprox. 43 kg Dimensiones(mm) D’ H’ 1310...
-
Página 11: Requisitos Del Lugar De Instalación
Las aplicaciones móviles. reparaciones realizadas por personas sin experiencia pueden ocasionar lesiones o averías graves. Contáctese con su técnico de NOTA reparaciones autorizado de LG. • No instale este electrodoméstico sobre una superficie o plataforma alzada, plinto o soporte. -
Página 12: Conexión De Las Mangueras De Entrada De Agua
INSTALACIÓN de la manguera de entrada de agua esté ADVERTENCIA conectado al aparato. • El enchufe de alimentación debe conectarse/en un tomacorriente adecuado, correctamente instalado y que tenga la conexión de/a tierra debida, de conformidad con todos los códigos y las ordenanzas locales. -
Página 13: Instalación De La Manguera De Drenaje
INSTALACIÓN Conexión de la manguera al • Al ajustar la manguera de drenaje correctamente se protege el suelo de daños aparato ocasionados por pérdidas de agua. Enrosque la manguera de entrada de agua a la válvula de entrada de agua en la parte posterior del aparato. - Página 14 INSTALACIÓN Ajuste y nivelación de los pies Tipo plano Inserte el tipo plano de la cubierta anti-rata en la Cuando el electrodoméstico no está totalmente a ranura de montaje desde la parte frontal del nivel, gire las patas de ajuste hasta que el aparato.
-
Página 15: Funcionamiento
FUNCIONAMIENTO FUNCIONAMIENTO Descripción general del • El electrodoméstico se agitará brevemente sin agua para medir el peso de las prendas. funcionamiento • Si el botón START/PAUSE (INICIO/PAUSA) no se presiona dentro de un determinado Uso del electrodoméstico periodo de tiempo, el electrodoméstico se apagará... - Página 16 FUNCIONAMIENTO Verificación de la etiqueta de • Pelusas (productores, colectores de pelusa): lave por separado los tejidos que producen pelusas y cuidado de tejidos los tejidos colectores de pelusa. Los tejidos productores de pelusa pueden provocar bolitas Estas informan acerca del contenido de la ropa y y pelusas en los tejidos colectores.
-
Página 17: Agregado De Detergente, Suavizantes Y Blanqueadores
FUNCIONAMIENTO Agregado de detergente, manera irreparable tanto su electrodoméstico como su ropa. suavizantes y blanqueadores Dosis de detergente • El detergente debe ser seleccionado de acuerdo con el tipo de tejido, color, nivel de suciedad y temperatura de lavado, y debería ser utilizado •... - Página 18 FUNCIONAMIENTO Agregado de suavizante • Diluya detergente líquido en agua, viértalo en el tambor, inicie el ciclo. • Diluya suavizante de telas con agua. El suavizante de telas sin diluír puede dar lugar a PRECAUCIÓN puntos que se ven como manchas de aceite. •...
- Página 19 FUNCIONAMIENTO • Nunca vierta suavizante de telas directamente sobre las prendas. Este puede mancharlas. • No detenga la lavadora durante el primer centrifugado para la dispensación oportuna. • El lavado con opciones no está diseñado para ser usado con el dispensador de suavizante de telas. Añadiendo blanqueadores líquidos •...
-
Página 20: Panel De Control
FUNCIONAMIENTO Panel de control Características del panel de control Botón de POWER (ENCENDIDO/APAGADO) • Presione el botón de POWER (ENCENDIDO/APAGADO) para encender o apagar el electrodoméstico. • El electrodoméstico se apaga automáticamente una vez haya transcurrido cierto tiempo luego de haber completado el lavado. -
Página 21: Tabla De Programas
FUNCIONAMIENTO - Si la pantalla muestra entonces el tiempo se mostrará después de que el sensor de carga haya -:-- detectado el tamaño de las prendas. - El tiempo mostrado solo es una estimación. Diversos factores externos (tamaño de las prendas, temperatura ambiente, temperatura del agua entrante, etc.) pueden afectar al tiempo real. - Página 22 FUNCIONAMIENTO Duvet (Edredones) Descripción Utilice este programa para lavar una sabana o ropa de cama que tengan el signo de lavado a mano en la etiqueta de mantenimiento. • La ropa de cama de casimir; sábanas acrílicas, de hilado mezclado o de lana; relleno (poliéster 101) y sábanas podrían dañarse si se deja que floten.
-
Página 23: Opciones Y Funciones Extra
FUNCIONAMIENTO Pre Wash+Normal (Prelavado+Normal) Descripción Use este programa para tratar previamente la suciedad sin lavar a mano. • Es necesario para la ropa que huela mal si no se lava en el momento adecuado. Quick Wash (Lavado Rápido) Descripción Use este programa para lavar prendas ligeramente sucias durante un periodo corto de tiempo. - Página 24 FUNCIONAMIENTO Presione el botón de POWER (ENCENDIDO/ • Si selecciona un número máximo de enjuagues, APAGADO). entonces esta opción se desactiva. NOTA Presione el botón Air Dry (Secar Con Aire) para seleccionar el Tub Dry. • Esta opción solo está disponible en algunos programas.
- Página 25 FUNCIONAMIENTO • Para cancelar esta función, presione el botón Mantenga presionados los botones Rinse Delay (Reserva) repetidamente hasta que la (Enjuague) y Spin (Centrifugado) reservación se haya cancelado o presione el simultáneamente por 3 segundos para botón POWER (ENCENDIDO/APAGADO) para desactivar esta función.
- Página 26 FUNCIONAMIENTO Lavado Manual Cuando necesite un enjuague y centrifugado, solo centrifugado, solo enjuague o únicamente ciclo de lavado, puede configurarlo manualmente. Enjuague y Solo Centrifugado Solo Enjuague Solo Lavado Centrifugado Presione el botón de POWER (ENCENDIDO/APAGADO). Presione el botón de Presione el botón de Presione el botón de Presione el botón de...
-
Página 27: Funciones Inteligentes
Siga las instrucciones que aparece debajo para usar el método de diagnóstico audible. Características de la aplicación • Ejecute la aplicacón LG ThinQ y seleccione la LG ThinQ función Smart Diagnosis en el menú. Siga las instrucciones para el diagnóstico audible que se Smart Diagnosis proporcionan en la aplicación LG ThinQ. -
Página 28: Mantenimiento
MANTENIMIENTO MANTENIMIENTO ADVERTENCIA • Desenchufe el electrodoméstico antes de limpiarlo para evitar el riesgo de descarga eléctrica. Si no se cumple con esta advertencia, se pueden producir lesiones graves, incendios, descargas eléctricas o la muerte. • Nunca utilice químicos fuertes, limpiadores abrasivos ni solventes para limpiar el electrodoméstico. Pueden dañar la terminación. - Página 29 MANTENIMIENTO • Si el mensaje se muestra en el ADVERTENCIA electrodoméstico, o si se selecciona luego de completar 30 ciclos de lavado, el tiempo de • Deje la puerta abierta para que se seque el ejecución aumentará hasta a 12 horas debido al interior del tambor pero solo si es seguro y los tiempo de remojo agregado.
- Página 30 MANTENIMIENTO Limpiando el filtro de pelusa Limpie el filtro. El filtro es un elemento importante para obtener resultados de rendimiento de lavado eficientes, por lo que debe prestar atención especial. Limpie el filtro regularmente. PRECAUCIÓN • Limpie el filtro de pelusa después de al menos 2 - 3 lavados.
- Página 31 MANTENIMIENTO Gire la tapa en la parte posterior del electrodoméstico hacia la izquierda y retírela. Saque todo objeto extraño y pelusas que pueda haber dentro del tambor y en el filtro. Inserte el filtro por las costillas de la guía dentro de la carcasa de la bomba y gire la tapa hacia la derecha para reajustar la tapa.
-
Página 32: Solución De Problemas
Puede solucionar la mayoría de los problemas por sí mismo, ahorrando tiempo y dinero, ya que no tendrá la necesidad de llamar al Centro de Servicio de LG Electronics. La siguiente tabla debería ayudarlo a resolver problemas. - Página 33 SOLUCIÓN DE PROBLEMAS Síntomas Causa posible y solución Objetos extraños, como monedas, pines, pinzas, etc., están atrapados entre el pulsador y el tambor interior. ERROR OBJETOS EXTRAÑOS • Apague el electrodoméstico y luego presione el botón POWER (ENCENDIDO/APAGADO). Presione el botón Spin (Centrifugado) sin seleccionar un ciclo para drenar y luego centrifugar la ropa.
- Página 34 SOLUCIÓN DE PROBLEMAS Síntomas Causa posible y solución El programa ha funcionado más de 30 veces. ALARMA DE LIMPIEZA • Ejecute la función Tub Clean (Limpieza de Tina). DE TINA El sensor de detección de prendas está defectuoso. ERROR SENSOR •...
- Página 35 SOLUCIÓN DE PROBLEMAS Síntomas Causa posible y solución Ruido de vibración Los materiales de empaque no han sido removidos. • Remueva los materiales de empaque. Las prendas podrían estar distribuidas desigualmente en el tambor. • Pause el ciclo y redistribuya las prendas luego de que la puerta se haya desbloqueado.
- Página 36 SOLUCIÓN DE PROBLEMAS Funcionamiento Síntomas Causa posible y solución El electrodoméstico no El panel de control se ha apagado debido a la inactividad. funcionará. • Esto es normal. Presione el botón de POWER (ENCENDIDO/APAGADO) para encender el electrodoméstico. El electrodoméstico está desenchufado. •...
- Página 37 SOLUCIÓN DE PROBLEMAS Síntomas Causa posible y solución El detergente no se Se está usando demasiado detergente. dispensa • Siga las pautas proporcionadas por el fabricante del detergente. completamente o no se dispensa en absoluto. Fuga de agua La conexión de manguera de entrada de agua está suelta en parte de la tapa o el electrodoméstico.
- Página 38 SOLUCIÓN DE PROBLEMAS Síntomas Causa posible y solución El tiempo del ciclo es La carga es muy pequeña. superior al habitual. • Agregue más artículos para dejar que el electrodoméstico equilibre las prendas. Los elementos pesados están mezclados con artículos más ligeros. •...
- Página 39 SOLUCIÓN DE PROBLEMAS Síntomas Causa posible y solución Arrugas El electrodoméstico no se descargó en su momento. • Retire siempre los artículos del electrodoméstico tan pronto como el ciclo finalice. El electrodoméstico está sobrecargado. • El electrodoméstico puede estar completamente cargado, pero el tambor no debería estar abarrotado de artículos.
- Página 40 SOLUCIÓN DE PROBLEMAS Síntomas Causa posible y solución Arrugas El electrodoméstico no se descargó en su momento. • Retire siempre los artículos del electrodoméstico tan pronto como el ciclo finalice. El electrodoméstico está sobrecargado. • El electrodoméstico puede estar completamente cargado, pero el tambor no debería estar abarrotado de artículos.
- Página 41 Before beginning installation, read these instructions carefully. This will simplify installation and ensure that the product is installed correctly and safely. Leave these instructions near the product after installation for future reference. www.lg.com Copyright © 2020 LG Electronics Inc. All Rights Reserved.
- Página 42 Preparing Laundry ...................14 Adding Detergents, Softeners and Bleaches..........16 Control Panel ....................18 Programme Table ....................19 Extra Options and Functions ................21 SMART FUNCTIONS LG ThinQ Application ..................25 Smart Diagnosis ....................25 MAINTENANCE Cleaning after Every Wash ................26 Cleaning the Appliance Periodically ..............26 TROUBLESHOOTING...
-
Página 43: Safety Instructions
SAFETY INSTRUCTIONS SAFETY INSTRUCTIONS READ ALL INSTRUCTIONS BEFORE USE The following safety guidelines are intended to prevent unforeseen risks or damage from unsafe or incorrect operation of the appliance. The guidelines are separated into ‘WARNING’ and ‘CAUTION’ as described below. Safety Messages This symbol is displayed to indicate matters and operations that can cause risk. - Página 44 • The inlet water pressure must be between 50 and 800 kPa. Maximum Capacity The maximum capacity in some cycles for dry clothes to be washed is: WT13WPBP WT13DPBP 13 kg 13 kg Installation •...
- Página 45 SAFETY INSTRUCTIONS • Do not modify the power plug provided with the appliance. If it does not fit the power outlet, have a proper outlet installed by a qualified electrician. • This appliance must be grounded. In the event of malfunction or breakdown, grounding will reduce the risk of electric shock by providing a path of least resistance for electric current.
- Página 46 • Make sure that drainage is working properly. If water is not drained properly, your floor may get flooded. • If, during spinning, opening the door does not stop the drum within about 10 seconds, immediately discontinue operating the appliance and contact your dealer or LG Electronics service centre.
- Página 47 • Only qualified service personnel from LG Electronics service centre should disassemble, repair, or modify the appliance. Contact an LG Electronics customer information centre if you move and install the appliance in a different location.
-
Página 48: Installation
INSTALLATION INSTALLATION Parts and Specifications NOTE • Appearance and specifications may change without notice to improve the quality of the appliance. Front View * This feature is only available on some models. Door Handle Tempered Glass Detergent Dispenser Drawer Fabric Softener Dispenser Bleach Dispenser Drum Levelling Feet... - Página 49 INSTALLATION Accessories *1 The included accessories vary depending on the model you purchased. *2 This accessory is not included in the product, but you can purchase it from the LG service centre. Cold and Hot Water Inlet Hoses Anti-Rat Cover...
-
Página 50: Installation Place Requirements
Contact your local WARNING authorised LG repairer. • The power plug must be plugged into an • This appliance must only be used for domestic appropriate outlet socket that is installed and... -
Página 51: Connecting The Water Inlet Hoses
INSTALLATION Connecting the Water Inlet Connecting the Hose to the Water Tap Hoses Connecting Screw-Type Hose to Tap with Thread Before connecting the water inlet hose to the water Screw the hose connector onto the water supply tap, check the hose fitting type and then choose tap. -
Página 52: Installing The Drain Hose
INSTALLATION NOTE NOTE • After completing connection, if water leaks from • The discharge height should be approximately the hose, repeat the same steps. Use the most 90 - 120 cm from the floor. conventional type of tap for the water supply. In case that the tap is square or too big, remove the guide plate before inserting the tap into the adaptor. - Página 53 INSTALLATION • Do not install the appliance on any elevated surface or platform, as it may become unstable and cause serious injury and damage. • If the appliance is installed on a uneven, weak or tilted floor causing excessive vibration, spin failure or error can occur.
-
Página 54: Operation
OPERATION OPERATION Operation Overview End of cycle. • When the cycle is finished, a melody will sound. Immediately remove your clothing Using the Appliance from the appliance to reduce wrinkling. Before the first wash, select the Normal programme and add a half amount of detergent. NOTE Start the appliance without laundry. - Página 55 OPERATION Checking the Fabric Care Label cause irreparable damage to both your appliance and clothes. This will tell you about the fabric content of your clothes and how it should be washed. Symbols on the Care Labels Symbol Wash / Fabric type •...
-
Página 56: Adding Detergents, Softeners And Bleaches
OPERATION Adding Detergents, CAUTION Softeners and Bleaches • Using liquid detergent without diluting, or leaving laundry for a long time after pouring Detergent Dosage diluted liquid detergent into the drum might cause the clothes to be damaged, bleached, • Detergent should be selected according to fabric discoloured. - Página 57 OPERATION Adding Fabric Softeners • Option washing is not designed to be used with fabric softener dispenser. • Dilute fabric softener with water. Undiluted fabric softener may result in spots that look like oil stain. Adding Liquid Bleaches • Measure and add the recommended amount of fabric softener into the compartment marked with the symbol on the top tub.
-
Página 58: Control Panel
OPERATION Control Panel Control Panel Features POWER Button • Press the POWER button to turn on or off the appliance. • The appliance automatically turns off once a certain time has passed after the wash has completed. START/PAUSE Button • Press the START/PAUSE button to start or pause a wash cycle. •... -
Página 59: Programme Table
OPERATION - The time shown is only an estimate. Several external factors (laundry size, room temperature, incoming water temperature, etc.) can affect the actual time. • : This icon turns on when the Delay button is pressed to set a time delay. •... - Página 60 OPERATION Duvet Description Use this programme to wash a blanket or bedclothes that have the hand wash sign on the care label. • Cashmere bedclothes, acrylic blanket, mixed spinning blanket, woollen blanket, infilling (polyester 101), and bed sheets might be damaged if they are allowed to float.
-
Página 61: Extra Options And Functions
OPERATION Quick Wash Description Use this programme to wash lightly soiled clothes for a short time. • This programme's recommended laundry amount is under 2 kg. Extra Clean Description Use this programme to increase rinsing performance. • This programme is recommended for underwear and baby clothes. •... - Página 62 OPERATION • When you select a wash programme, the water NOTE level will be shown on the control panel. • When water level is automatically detected, it • This function is the time to the end of the may differ depending on the amount of laundry programme, not the start.
- Página 63 OPERATION Press and hold the Rinse and Spin buttons simultaneously for 3 seconds to activate this function. Unlocking the Control Panel Turn on the power. Press and hold the Rinse and Spin buttons simultaneously for 3 seconds to deactivate this function.
- Página 64 OPERATION Manual Washing When you need a rinse and spin, spin only, rinse only or wash only cycle, these can be set manually. Rinse and Spin Spin only Rinse only Wash only Press the POWER button. Press the Rinse Press the Spin Press the Rinse Press the Wash button.
-
Página 65: Smart Functions
SMART FUNCTIONS SMART FUNCTIONS LG ThinQ Application • Launch the LG ThinQ application and select the Smart Diagnosis feature in the menu. Follow the instructions for audible diagnosis provided The LG ThinQ application allows you to in the LG ThinQ application. -
Página 66: Maintenance
MAINTENANCE MAINTENANCE WARNING • Unplug the appliance before cleaning to avoid the risk of electric shock. Failure to follow this warning may result in serious injury, fire, electric shock, or death. • Never use harsh chemicals, abrasive cleaners, or solvents to clean the appliance. They may damage the finish. - Página 67 MAINTENANCE • For models without a lint filter, the lint is holiday), especially if there is no floor drain discharged when the water drains during (gully) in the immediate vicinity. washing. • error message will be displayed on the control panel when water is not entering the detergent drawer.
- Página 68 MAINTENANCE Close the lid and then insert the lower part of CAUTION the filter into the wash drum. Press the top of the filter until you hear a click sound. • If the mesh hole of the lint filter is clogged, foreign objects in the laundry may not be filtered.
- Página 69 MAINTENANCE Remove any foreign objects and fluff inside pump casing and from the filter. Insert the filter along the guide ribs inside the pump casing and turn the cap clockwise to refit the cap. • Securely turn the cap clockwise until it is tight.
-
Página 70: Troubleshooting
You can remedy most of the problems by yourself, consequently save time and money, since you do not need to call LG Electronics service centre. The following table should assist you by troubleshooting. - Página 71 TROUBLESHOOTING Symptoms Possible Cause & Solution Foreign objects, such as coins, pins, clips, etc.,are caught between the pulsator and the inner drum. FOREIGN OBJECTS ERROR • Turn off the appliance and then press the POWER button. Press the Spin button without selecting a cycle to drain and spin the laundry. When the spin is complete, remove the clothes and then find and remove any objects caught in the pulsator gap.
- Página 72 TROUBLESHOOTING Symptoms Possible Cause & Solution Sensor for clothes-sensing is defective. CLOTHES SENSING • Manually redistribute the laundry if laundry have become tangled. ERROR Motor’s revolution is too low. Contact-point of Connector is defective. • Unplug the appliance and wait 60 seconds. Reconnect power and try again.
- Página 73 TROUBLESHOOTING Operation Symptoms Possible Cause & Solution Appliance will not Control panel has powered off due to inactivity. operate. • This is normal. Press the POWER button to turn on the appliance. Appliance is unplugged. • Make sure that the cord is plugged securely into a working outlet. Water supply is turned off.
- Página 74 TROUBLESHOOTING Symptoms Possible Cause & Solution Water leaking Water inlet hose connection is loose at tap or appliance. • Check hoses for leaks, cracks and splits. • Tighten hose connections. House drain pipes are clogged. • The appliance pumps out water very rapidly. Check for water backing up out of the drain pipe during drain.
- Página 75 TROUBLESHOOTING Performance Symptoms Possible Cause & Solution Poor stain removal Proper options are not selected. • Heavier soils and tougher stains may require extra cleaning power. Select the Soak option to boost the cleaning power of the selected cycle. Previously set stains. •...
- Página 76 TROUBLESHOOTING Performance Symptoms Possible Cause & Solution Incomplete or no Too much detergent is used. dispensing of • Follow the guidelines provided by the detergent manufacturer. detergent Poor stain removal Previously set stains. • Items that have previously been washed may have stains that have been set.
- Página 77 Memo...
- Página 78 Memo...
- Página 79 Memo...