
Manuales relacionados para Kicker KXM.8 Serie


Resumen de contenidos para Kicker KXM.8 Serie
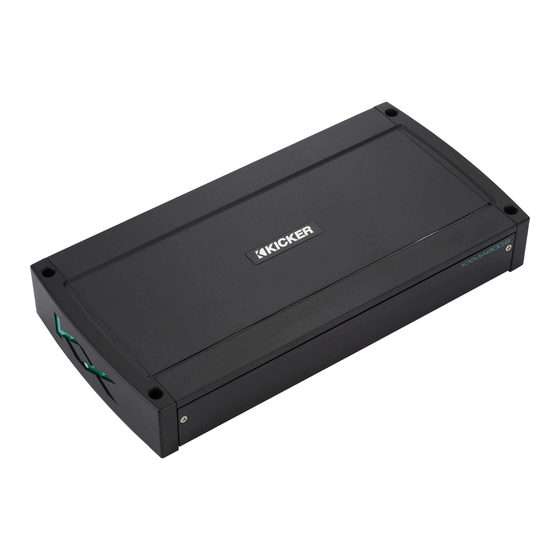
- Página 1 AMPLIFIERS Owner’s Manual 2017 KXM 8-CH Amp Rev D.indd 1 2017 KXM 8-CH Amp Rev D.indd 1 10/7/2019 2:21:06 PM 10/7/2019 2:21:06 PM...
-
Página 2: Important Safety Warning
A high-level signal can be run from the source unit’s speaker outputs to the stereo RCA input on the end panel of the amplifi er using the KICKER KISL as shown. Alternatively, the signal can be delivered to the amplifi er using the low-level RCA outputs on the source unit. Keep the audio signal cable away from factory wiring harnesses and other power wiring. -
Página 3: Power Wiring
KICKER KISL (optional) to amplifi er core conductor source unit high-level speaker outputs – to amplifi er shield from source unit high- level speaker outputs Install a fuse within 7” (18cm) of the battery and in-line with the power cable connected to your amplifi er. - Página 4 The new extended warranty applies only to KICKER amplifi ers and accessories sold to consumers by Authorized KICKER Dealers in the United States of America or its possessions. It also only applies to the original purchaser of KICKER amplifi ers and accessories.
- Página 5 EIGHT CHANNEL OPERATION minimum impedance of 2 ohm AMP3 AMP1 BRIDGED BRIDGED POWER AUTO AMP1 AMP2 AMP3 AMP4 +12V TURN-ON AMP1 AMP3 AMP2 AMP4 12V/DC/AUDIO RADIO RADIO AMP1/AMP2 AMP2/AMP3 AMP3/AMP4 DETECT DETECT FADER FADER FADER AMP2 BRIDGED AMP4 BRIDGED OFF/ON OFF/ON BRIDGED OPERATION minimum impedance of 4 ohms AMP3...
- Página 6 OPERATION Mini-USB for internal use only; do NOT remove or tamper. KICKER is not responsible for any damage to equipment resulting from connections made to this port. AMP1 AMP2 AMP3 AMP4 OFF/HP/LP/BP OFF/HP/LP/BP OFF/HP/LP OFF/HP/LP 1X/10X 1X/10X 1X/10X 1X/10X RANGE...
- Página 7 In any audio system, the goal is to reach maximum input and output levels without distortion or clipping. The engineers at KICKER have taken the guesswork, and hassle, out of matching the output voltage of your source unit to the amplifi er with the Gain Matching feature. To begin, you’ll need to download the KICKER test tones from www.kicker.com/test-tones.
- Página 8 There is a Protection (PRT) LED on the side panel of your Kicker KXM series amplifi er. Depending on the state of the amplifi er and the vehicle’s charging system, the LED will either glow red or be off.
-
Página 9: Rendimiento
RCA del estéreo en el panel inferior del amplifi cador utilizando el KICKER KISL, como se muestra en la imagen. Alternativamente, la señal se puede transmitir hacia el amplifi cador utilizando las salidas RCA de bajo nivel en la unidad fuente. Mantenga el cable de señal de audio lejos de los arneses de cableado de fábrica y de otros cables eléctricos. -
Página 10: Cableado De Alimentación
KICKER KISL Hacia el amplifi cador cable central Cable de salida de altavoz de alto nivel Hacia el amplifi cador – Conexión a tierra o blindaje Cable de salida de altavoz de alto nivel Instale un fusible a menos de 7 plg. (18 cm) de la batería y en línea con el cable de alimentación conectado al amplifi... - Página 11 Para varias instalaciones de amplifi cadores donde se utilizan bloques de distribución, cada amplifi cador debe poseer su fusible de grado apropiado, o interruptor, instalado entre el amplifi cador y el bloque de distribución a siete pulgadas del bloque, o sobre el bloque de distribución si admite fusibles. El principal cable de alimentación también debe fusionarse entre la batería y el bloque de distribución, a siete pulgadas del terminal B+ de la batería, con un fusible o interruptor con una clasifi...
-
Página 12: Funcionamiento Por Ocho Canales (Estereofónico)
FUNCIONAMIENTO POR OCHO CANALES (ESTEREOFÓNICO) impedancia mínima de 2 ohmio por canal en estereofónico AMP3 AMP1 BRIDGED BRIDGED POWER AUTO AMP1 AMP2 AMP3 AMP4 +12V TURN-ON AMP1 AMP3 AMP2 AMP4 12V/DC/AUDIO RADIO RADIO AMP1/AMP2 AMP2/AMP3 AMP3/AMP4 DETECT DETECT FADER FADER FADER AMP2 BRIDGED AMP4 BRIDGED... -
Página 13: Funcionamiento
fi jado correctamente. Detección de radio: Las entradas RCA de los amplifi cadores KICKER KXM pueden recibir señales de alto o bajo nivel desde la unidad fuente. Si usa entradas de alto nivel, pero su unidad fuente no puede detectar un sistema de audio presente o rechaza la reproducción de audio en uno o más altavoces, es probable que deba activar la... -
Página 14: Sincronización De Ganancia
En un sistema de audio, el objetivo es lograr los niveles máximos de entrada y salida sin distorsión ni recortes. Con la función “Sincronización de ganancia”, los ingenieros de KICKER lograron que no sea necesario hacer conjeturas ni complicarse a la hora de sincronizar el voltaje de salida de su unidad de alimentación con el amplifi... -
Página 15: Resolución De Problemas
Si su amplifi cador parece no estar funcionando, revise lo obvio primero: fusibles quemados, conexiones malas o incorrectas, posición incorrecta de los selectores de crossover y amplifi cación, etc. Su amplifi cador modelo KXM de KICKER cuenta con los LED de protección (PRT) y de encendido (PWR) en el panel de alimentación lateral. Dependiendo del estado del amplifi... - Página 16 Il est possible de connecter les sorties des haut-parleurs de l’autoradio à l’entrée stéréo RCA sur le panneau latéral de l’amplifi cateur à l’aide du câble KICKER KISL, comme illustré. Une autre option consiste à connecter le signal à l’amplifi cateur en utilisant les sorties RCA de bas niveau sur l’autoradio.
- Página 17 Installez un fusible dans un rayon de 18 cm (7 po) de la batterie directement sur le câble d’alimentation raccordé à votre amplifi cateur. Modèle Fusible Externe Fil de Masse / KICKER Kit de câblage (non inclus) Alimentation KXMA800.8 1 x 120 Ampères...
- Página 18 Pour des installations à plusieurs amplifi cateurs où des répartiteurs sont mis en œuvre, chaque amplifi cateur doit avoir son propre fusible correctement calibré, ou un coupe-circuit, installé entre l’amplifi cateur et le répartiteur à moins de 18 cm du répartiteur ou sur le répartiteur lui-même s’il sert de fusible.
- Página 19 FONCTIONNEMENT À HUIT CANAUX impédance minimum de 2 ohms par canal AMP3 AMP1 BRIDGED BRIDGED POWER AUTO AMP1 AMP2 AMP3 AMP4 +12V TURN-ON AMP1 AMP3 AMP4 AMP2 12V/DC/AUDIO RADIO RADIO AMP1/AMP2 AMP2/AMP3 AMP3/AMP4 DETECT DETECT FADER FADER FADER AMP4 BRIDGED AMP2 BRIDGED OFF/ON OFF/ON FONCTIONNEMENT PONTÉ...
- Página 20 Détection radio : les entrées RCA des amplifi cateurs KICKER KXM peuvent recevoir des signaux de niveau haut ou bas en provenance de votre source sonore. Si vous utilisez des entrées de niveau haut, mais si votre appareil source ne peut pas détecter la présence d’un système audio ou refuse de jouer...
-
Página 21: Correspondance De Gain
L’objectif de tout système audio est d’atteindre les niveaux d’entrée et de sortie maximaux sans distorsion ni écrêtement. Les ingénieurs de KICKER ont éliminé les hasards et les soucis de faire correspondre la tension de sortie de votre unité source avec l’amplifi cateur grâce à la fonction de correspondance de gain. -
Página 22: En Cas De Difficulté
également des DEL d’alimentation (PWR) et de protection (PRT) sur le panneau d’alimentation latéral de votre amplifi cateur KICKER de série KXM. Selon l’état de l’amplifi cateur et le système de charge du véhicule, les DEL clignotent en vert ou rouge. Lorsque la DEL vert est allumée, cela indique que l’amplifi cateur est en marche et qu’il n’y a pas de problème. - Página 23 0–18dB @ 40Hz INSTALLATION Befestigung: Wählen Sie für die Installation des KICKER-Verstärkers eine strukturell stabile Stelle. Vergewissern Sie sich, dass sich hinter der Einschraubposition der Schrauben nichts befi ndet. Wählen Sie eine Stelle, die mindestens 10 cm Lüftungsfreiraum für den Verstärker bietet. Installieren Sie, wenn möglich, den Verstärker im klimatisierten Fahrgastraum.
- Página 24 Hochpegel- Zum Verstärker KICKER KISL Kabelseele Lautsprecherausgangskabel ODER Zum Verstärker – Erdung oder Abschirmung Hochpegel- Lautsprecherausgangskabel Installieren Sie in maximal 18 cm Entfernung von der Batterie eine Sicherung in Reihe mit dem Stromkabel zum Verstärker. Modell Externe Sicherung Massekabel KICKER...
- Página 25 Beim Einbau mehrerer Verstärker unter Verwendung von Verteilerblöcken sollte jeder Verstärker eine ordnungsgemäß zugelassene Sicherung oder Stromunterbrechung haben, die zwischen Verstärker und Verteilerblock angebracht wird, in einer Entfernung von 18 cm (7 Zoll) vom Block bzw. auf dem Verteilerblock, falls dieser Platz für Überstromschutz bietet. Das Hauptstromkabel sollte ebenfalls zwischen Batterie und Verteilerblock gesichert werden, und zwar mit einem Abstand von 18 cm (7 Zoll) zum Pluspol der Batterie mit einer Sicherung oder Stromunterbrechung, die mindestens für die Summe der Sicherungswerte der einzelnen Verstärker zugelassen ist, jedoch die Summe der...
- Página 26 VIERKANALBETRIEB Minimalimpedanz von 2 Ohm pro Kanal AMP3 AMP1 BRIDGED BRIDGED POWER AUTO AMP1 AMP2 AMP3 AMP4 +12V TURN-ON AMP1 AMP3 AMP2 AMP4 12V/DC/AUDIO RADIO RADIO AMP1/AMP2 AMP2/AMP3 AMP3/AMP4 DETECT DETECT FADER FADER FADER AMP4 BRIDGED AMP2 BRIDGED OFF/ON OFF/ON BRÜCKENBETRIEB (MONO) Minimalimpedanz von 4 Ohm AMP3...
- Página 27 Verstärker automatisch einschaltet. Diese Einschaltmethode funktioniert nur dann ordnungsgemäß, wenn die Eingangslautstärkeregelung entsprechend eingestellt ist. Funkerkennung: Die Cinch-Eingänge der KICKER KXM-Verstärker sind in der Lage, entweder Hoch- oder Niederpegelsignale von Ihrem Quellgerät zu empfangen. Sollten Sie Eingänge mit hohem Pegel verwenden, aber Ihr Quellgerät kein vorhandenes Audiosystem erkennt oder die Wiedergabe von Audio...
- Página 28 Verzerrung oder Clipping zu erreichen. Dank dem Gain Matching Feature konnten sich die Techniker von KICKER bei der Anpassung der Ausgangsleistung Ihres Quellgeräts an den Verstärker jede Menge Rätselraten und Ärger ersparen. Zunächst müssen Sie sich die KICKER-Testtöne von www.kicker.com/test-tones herunterladen.
- Página 29 Falsche Anschlüsse können zu einem Durchbrennen der Verstärkersicherung und einem Ausfall anderer wichtiger Systeme im Fahrzeug führen. Wenn Sie weitere Fragen zur Installation oder zum Betrieb Ihres neuen KICKER-Produkts haben, setzen Sie sich bitte mit Ihrem autorisierten KICKER-Fachhändler in Verbindung. Weitere Installationshinweise fi nden Sie, indem Sie auf der KICKER-Startseite (www.KICKER.com) auf die Registerkarte SUPPORT klicken.
-
Página 30: What Is Not Covered
ELECTRONICS LIMITED WARRANTY When purchased from an Authorized KICKER Dealer, KICKER warrants this product to be free from defects in material and workmanship under normal use for a period of TWO (2) YEARS from date of original purchase with receipt. If this product is identifi... -
Página 31: International Warranty
Sea precavido cuando controle el volumen. La frase “combustible para vivir la vida Livin’ Loud™ a todo volumen” se refi ere al entusiasmo por la vida que la marca KICKER de estéreos de automóvil representa y a la recomendación a nuestros clientes de que vivan lo mejor posible (“a todo volumen”) en todo sentido. - Página 32 ©2016 Stillwater Designs 2017 KXM 8-CH Amp Rev D.indd 32 2017 KXM 8-CH Amp Rev D.indd 32 10/7/2019 2:21:35 PM 10/7/2019 2:21:35 PM...