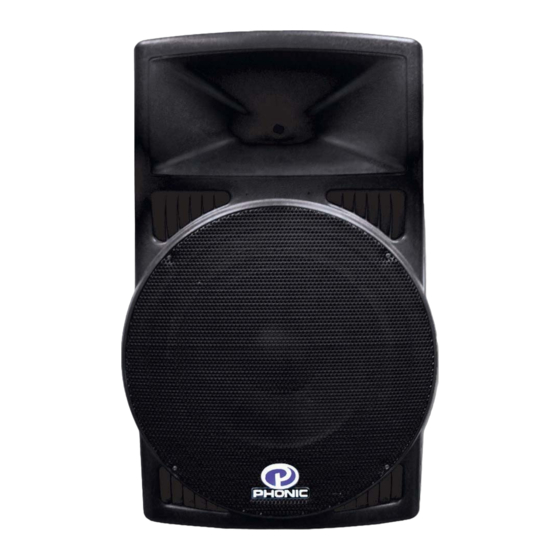
Resumen de contenidos para Phonic NEXUS 540
- Página 1 NEXUS 540 400W 15" ACTIVE SPEAKER 400W 15" ALTAVOZ ACTIVO 400W 15" 有源音箱 User’s Manual Manual del Usuario 使用手册...
-
Página 2: Tabla De Contenido
DIAGRAMA DE CONEXIÓN.....14 DIMENSIONES........19 Phonic preserves the right to improve or alter any information within this document without prior notice Phonic se reserva el derecho de mejorar o alterar cualquier información provista dentro de este documento sin previo aviso PHONIC保留不预先通知即可更新本文件的权利 V1.0 12/04/2009... -
Página 3: Important Safety Instructions
IMPORTANT SAFETY INSTRUCTIONS The apparatus shall not be exposed to dripping or splashing and that no objects with liquids, such as vases, shall be placed on the apparatus. The MAINS plug is used as the disconnect device, the disconnect device shall remain readily operable. -
Página 4: Introduction
Congratulations on your purchase of the NEXUS 540 professional audio speaker. NEXUS series speakers have an attractive yet impact-resistant design. The angled molded enclosure is made of highly durable polypropylene and is designed for use as a stage monitor, standmounted speaker or permanent installation. -
Página 5: Quick Start
Switch on the NEXUS power switch(down). Slowly turn up the level control on the NEXUS until you achieve the desired volume. Make sure that If there is no sound, first turn the NEXUS level control all the way down before investigating. When you NEXUS 540... -
Página 6: Rear Panel Description
(I) position. To turn the NEXUS off, set the switch to the off position (o). Make sure the volume control is turned down all the way before you turn the power on or off. or the NEXUS. NEXUS 540... -
Página 7: Specifications
13. Thermal Indicator This female XLR-type connector can accept mic or The thermal LED will light up when the Nexus 540 line-level signals, depending on the position of the overheats and the thermal protection circuitry is Line/Mic Button. activated. be used to daisy chain multipe NEXUS active 12. -
Página 8: Hookup Diagrams
Note: The NEXUS active speaker does not have phantom power, so you will Note: You must use the 1/4” phone connectors on the NEXUS active speaker Mixer with stereo left and right mic-level output divided to left- and right-side speakers. The NEXUS NEXUS 540... -
Página 10: Introduccion
INTRODUCCIÓN Felicitaciones por su compra de altavoz de audio profesional NEXUS 540. Los altavoces de la Serie NEXUS tienen un diseño atractivo y resistente. La bocina moldeado angulado está hecho de polipropileno altamente durable y es diseñado como un monitor de escenario, altavoz montado en stand o para instalación permanente. -
Página 11: Inicio Rápido
9. Si no hay sonido, primero baje el control de nivel de NEXUS antes de investigar. Cuando usted cree que el problema está resuelto, repita el paso 8 nuevamente. Siga el paso 9 hasta que resuelva el problema. NEXUS 540... -
Página 12: Descripción De Panel
Está bien que el indicador de PICO se ilumine muy rara vez, pero si se ilumina muy frecuentemente, debe bajar el nivel de volumen de la fuente de señal o de NEXUS. NEXUS 540... -
Página 13: Indicador Termal
10. Conector de ENTRADA 13. INDICADOR TERMAL Este conector hembra tipo XLR puede aceptar El LED termal se encenderá cuando Nexus 540 se sobrecalienta y el circuito de la protección térmico señales de nivel de línea o mic, dependiendo de la es activado. -
Página 14: Diagrama De Conexión
MICRÓFONO DINÁMICO MEZCLADORA 3) Mezcladora con salida de nivel de micrófono estéreo izquierdo y derecho dividido en altavoces de lado izquierdo y derecho. Los altavoces activos NEXUS están encadenados juntos usando LINK OUT. MEZCLADORA NEXUS 540... - Página 15 CAUTION RISK OF ELECTRIC SHOCK DO NOT OPEN PHONIC CORPORATION...
-
Página 16: 快速入门
简介 快速入门 感 谢 您 购 买 Phonic的 专 业 音 箱 NEXUS 540。 1、请务必确保关闭POWER电源开关,LOW CUT高 通滤波器和CONTOUR轮廓开关。并将两个音量 NEXUS系列音箱外观精美且防震,成角模制外箱是 由高耐磨塑胶制成,可用做舞台监听音箱,或用做 控制调节至最低位置(逆时针方向旋转)。 支架永久安装型音箱。 2、将信号声源(Mic麦克风或Line高电平声源信号)的 有源音箱技术 输出连接至XLR母座输入插孔 。NEXUS可接收 来自动圈式麦克风,调音台,前置放大器,CD播 有源音箱技术意味着NEXUS音箱拥有更强的功率和 放器,磁带录音机等设备的平衡式或非平衡式麦 更好的音质。就传统的功放音箱而言,功放的输出信 克风或高电平信号。 号通常是先输往音箱的无源分频器分离为高频和低频 信号,然后再传送至变频器。无源分频器简单的构造 注意:NEXUS只接收具备自身电源供给的电容式 决定了它将高频信号传送至驱动器的性能比较差,在 麦克风所传输的输入信号。 该过程中将损失高达30%的功率。 3、将VOLTAGE SELECTOR电压选择拨动开关设置 有源音箱的不同之处则在于分频器。NEXUS 有源音... - Página 17 源,然后缓慢地调高音量控制直至音量达到理想的水 拥有一个内建功放,您必须将其连接至AC电源,否 平将是个不错的办法(但是不是直到LED灯变亮)。 则将不会有任何信号。 9、峰值LED指示灯 注意:如果您不慎将电源连接线遗失在装备车上,请不用 功放的输出信号达到峰值时该LED灯将变亮。峰值 担心,因为圆头的3芯插头在许多办事处和电脑卖场都有 LED频繁的闪亮并无大碍,但是该LED灯若是经常 出售。 的闪亮或者持续亮着,您就应该关小NEXUS任一声 源信号的音量控制。 3、电源开关 将电源开关设置于(I)位置,即可开启NEXUS有源音 10、输入连接器 箱。将电源开关设置于(o)位置,即可关闭NEXUS有 根据Line/Mic按钮的设置情况,这个母座XLR连接插 源音箱。开启或关闭电源开关前请务必确保将音量 孔可接收麦克风或高电平信号。 控制调节至最低位置。 11、LINK OUT链接输出连接器 4、高通滤波器 这个母座XLR型连接器可连接多个NEXUS有源音 此开关可开启(按下)或关闭(弹出)高通滤波器。高通 箱,输出与连接任一两个输入插孔一样的信号。但 滤波器可切除低于75Hz的频率,可消除多余的舞台 是,如果将MIC/LINE音量控制调至刻度盘上2点以后 噪音,砰砰声和风噪声。将NEXUS音箱用做舞台监 的位置,NEXUS音箱将对信号进行+6dB的增强,有 听音箱时,开启此开关将会是不错的选择。 效地增强较弱的信号并提升整个音质。 12、电源指示灯 机器开启时该指示灯会变亮。 13、过热指示灯 当Nexus 540过热时该指示灯将变亮,此时过热保护 电路开启。 NEXUS 540...
-
Página 18: 连接示意图
连接示意图 NEXUS有源音箱有多种可能的连线方式,以下列举了NEXUS最有可能进行的几种连接安装。 1) 使用LINK OUT将带动圈式麦克风的两个NEXUS音箱连接在一起。 注意: NEXUS有源音箱无幻象电源,所以不可以与电容式麦克风连用,除非该麦克 风可进行自身电源供给。 2) 调音台立体声左右麦克风输出信号分离至左右音箱。 注意:如果您想使用高电平输入信号,则必须使用NEXUS有源音箱上的1/4”Phone ”Phone插孔。 动圈式麦克风 调音台 3) 调音台立体声左右麦克风输出信号分离至左右音箱。使用LINK OUT将两个NEXUS音箱连接在一起。 更多 更多 调音台 NEXUS 540... -
Página 19: Dimensions
连接输出 外箱设计 模制塑胶梯形外箱 尺寸 (H x W x D) 693 x 442 x 342mm (27.3” x 17.4” x 13.5”) 重量 21.5 kg DIMENSIONS DIMENSIONES 尺寸 Measurements are shown in mm/inches Todas las medidas están mostradas en mm/pulgadas. 尺寸是以毫米mm/英寸inch表示。 NEXUS 540... - Página 20 Phonic visite nuestra página Phonic distributor. For a list of Phonic web en www.phonic.com y entre a la sección Get www.phonic.com Get Gear distributors please visit our website at Gear. También, puede ponerse en contacto directa- www.phonic.com and click on Get Gear.

