Sauder whisker Manual Del Usuario
Ocultar thumbs
Ver también para whisker:
- Manual del usuario (48 páginas) ,
- Instrucciones de montaje (32 páginas)
Tabla de contenido
Publicidad
Enlaces rápidos
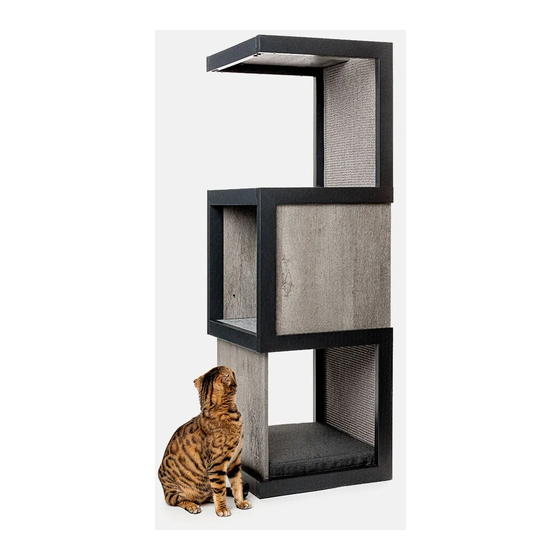
WHISKER CAT TOWER - GREY
support@whisker.com | 1.877.250.7729 | Mon-Fri, 9am-5:30pm EST
If you have assembly questions or need a replacement part, please contact Sauder directly at
www.sauder.com or 800-445-1527.
Customer Service is available Monday-Friday - 9 a.m. to 5:30 p.m. EST (except holidays)
Publicidad
Tabla de contenido

Manuales relacionados para Sauder whisker


Resumen de contenidos para Sauder whisker
- Página 1 WHISKER CAT TOWER - GREY support@whisker.com | 1.877.250.7729 | Mon-Fri, 9am-5:30pm EST If you have assembly questions or need a replacement part, please contact Sauder directly at www.sauder.com or 800-445-1527. Customer Service is available Monday-Friday - 9 a.m. to 5:30 p.m. EST (except holidays)
- Página 2 THANK YOU FOR PURCHASING THE WHISKER CAT TOWER! I am thrilled that Whisker and Sauder furniture have partnered together to bring you the highest-quality pet furniture. At Whisker, we design and deliver refi ned pet accessories that delight both pets and people. Whisker and Sauder products...
-
Página 3: Part Identifi Cation
Now you know Part Identifi cation our ABCs. å While not all parts are labeled, some of the parts will have a label or an inked letter on the edge to help distinguish similar parts from each other. Use this part identifi cation to help identify similar parts. LEFT END (1) BRACE (4) BOTTOM SHELF (1) -
Página 4: Tabla De Contenido
Hardware Identifi cation å Screws are shown actual size. You may receive extra hardware with your unit. CAM SCREW - 2 HIDDEN CAM - 2 WOOD DOWEL - 8 L-WRENCH - 1 1/2" PAN HEAD SCREW - 14 1-9/16" PAN HEAD SCREW - 1 1/2"... -
Página 5: Cam Screw
Hardware Usage Guide HOW TO USE A HIDDEN CAM & CAM SCREW OR CAM DOWEL NOTE: Various CAM SCREWS or a CAM DOWEL may be used. Turn the CAM SCREW or gently tap the CAM DOWEL until the shoulder is against the surface of the part. - Página 6 Step 1 View our assembly video at www.whisker.com/support Assemble your unit on a carpeted fl oor or on the empty å carton to avoid scratching your unit or the fl oor. Insert four WOOD DOWELS (3) into the ENDS (A and B).
- Página 7 Step 2 Insert the WOOD DOWELS in the RIGHT END (B) å into the RIGHT FRAME (D) as shown. Thinking outside Insert the WOOD DOWELS in the LEFT END (A) å the litter box. into the LEFT FRAME (C). The single tab must be here.
- Página 8 Step 3 Fasten the ENDS (A and B) to the FRAMES (C å and D). Use four 2-3/4" FLAT HEAD SCREWS (8). NOTE: You should start each SCREW a few turns å before completely tightening any of them. 2-3/4" FLAT HEAD SCREW (4 used in this step) whiskersupport.com Page 8...
-
Página 9: 1/2" Hex Head Screw
Step 4 Fasten the BRACES (E) to the RIGHT å FRAME (D). Tighten eight 1/2" HEX HEAD SCREWS (7) using the L-WRENCH (4). The single tab must be here. 1/2" HEX HEAD SCREW (8 used in this step) whiskersupport.com 427589 Page 9... -
Página 10: Hidden Cam
Step 5 Push two HIDDEN CAMS (2) into the BACK (F). å Fasten the BACK (F) to the RIGHT END (B). å Tighten one HIDDEN CAM. Arrow Arrow This hole must be here. r f a w i t I D D whiskersupport.com Page 10 427589... - Página 11 Step 6 Fasten the BACK (F) to the RIGHT FRAME (D). å Tighten four 1/2" HEX HEAD SCREWS (7) using the L-WRENCH (4). 1/2" HEX HEAD SCREW (4 used in this step) whiskersupport.com 427589 Page 11...
- Página 12 Step 7 NOTE: This step shows a diff erent view. å Fasten the BOTTOM (G) to the tabs on å the RIGHT FRAME (D). Use two 1/2" PAN HEAD SCREWS (5). r f a w i t l e s The holes on this surface are closer to this edge.
- Página 13 Step 8 Insert two WOOD DOWELS (3) into å the BOTTOM (G). Place the FRONT (H) onto the WOOD å DOWELS in the BOTTOM (G). whiskersupport.com 427589 Page 13...
- Página 14 Step 9 Insert two WOOD DOWELS (3) into the FRONT (H). å Fasten the BOTTOM SHELF (J) to the tabs on the å RIGHT FRAME (D). Use two 1/2" PAN HEAD SCREWS (5). NOTE: Be sure the WOOD DOWELS in the FRONT insert å...
- Página 15 Step 10 Fasten the LEFT FRAME (C) to the BRACES (E). å Tighten eight 1/2" HEX HEAD SCREWS (7) using the L-WRENCH (4). 1/2" HEX HEAD SCREW (8 used in this step) The tabs must be here. whiskersupport.com 427589 Page 15...
- Página 16 Step 11 Fasten the tabs on the LEFT FRAME (C) to the å BOTTOM (G) and BOTTOM SHELF (J). Use four 1/2" PAN HEAD SCREWS (5). 1/2" PAN HEAD SCREW (4 used in this step) whiskersupport.com Page 16 427589...
- Página 17 Step 12 NOTE: This step shows a diff erent view. å Fasten the RIGHT END (A) to the BACK (F). å Go on, spoil 'em a little. Tighten one HIDDEN CAM. Fasten the LEFT FRAME (C) to the BACK (F). å...
- Página 18 Step 13 NOTE: This step shows a diff erent view. å Fasten the MIDDLE SHELF (K) to the tabs on å the FRAMES (C and D). Use three 1/2" PAN HEAD SCREWS (5). 1/2" PAN HEAD SCREW (3 used in this step) whiskersupport.com Page 18 427589...
- Página 19 Step 14 Fasten the TOP SHELF (L) to the tabs on å the FRAMES (C and D). Use three 1/2" PAN HEAD SCREWS (5) 1/2" PAN HEAD SCREW (3 used in this step) whiskersupport.com 427589 Page 19...
-
Página 20: 1-9/16" Pan Head Screw
Step 15 NOTE: This step shows a diff erent view. å Fasten the TOP SHELF (L) to the BACK (F). Use å one 1-9/16" PAN HEAD SCREW (6). Use the FURNITURE TIPPING RESTRAINT KIT (96) å for added stability. Fasten the SAFETY STRAP to the BACK (F) using the SHORT SCREW. - Página 21 Step 16 Carefully stand your unit upright against the wall in its fi nal location. å The following instructions show your unit being fastened to a wall stud. If you are not å fastening your unit to a wall stud, go to the next step now. - Locate the center of a stud in your wall near your unit and mark it with a pencil.
- Página 22 Step 17 - With your pencil, strike a mark through the center of the hole in the SAFETY STRAP. å - Drill a 3/8" hole on the mark. å - While you squeeze the wings together, gently tap the WALL ANCHOR from the FURNITURE å...
- Página 23 NOTE: Please read the back pages of the instruction booklet for important safety information. å This completes assembly. Clean with a damp cloth. Wipe dry. å And to celebrate, why not share your success story at whisker.com or whiskersupport.com 427589 Page 23...
-
Página 24: Tour De Chat - Grise
REFERENCE DESCRIPTION QUANTITÉ conserver le livret pour future référence. EXTRÉMITÉ GAUCHE ....1 VIS D'EXCENTRIQUE ....2 Pour contacter Sauder en ce qui concerne EXTRÉMITÉ DROITE ....1 EXCENTRIQUE ESCAMOTABLE 2 cet élément, faire CADRE GAUCHE ......1 CHEVILLE EN BOIS ....8 référence au numéro de lot et numéro de... - Página 25 Guide d'utilisation de la visserie ÉTAPE 5 UTILISATION DE LA EXCENTRIQUE ESCAMOTABLE Enfoncer deux EXCENTRIQUES ESCAMOTABLES (2) ET DE LA VIS D'EXCENTRIQUE OU DE LA CHEVILLE dans l'ARRIÈRE (F). D’EXCENTRIQUE Fixer l'ARRIÈRE (F) à l'EXTRÉMITÉ DROITE (B). Serrer 1. REMARQUE : Plusieurs VIS D'EXCENTRIQUE ou une un EXCENTRIQUE ESCAMOTABLE.
- Página 26 ÉTAPE 11 ÉTAPE 16 Fixer les pattes sur le CADRE GAUCHE (C) au Relever, avec précaution, l'élément dans sa DESSOUS (G) et à la TABLETTE INFÉRIEURE (J). position verticale et placer l'élément dans son Utiliser quatre VIS TÊTE GOUTTE DE SUIF 13 mm (5). emplacement fi...
-
Página 27: Torre De Gatos - Gris
Si necesita EXTREMO DERECHO ....1 EXCÉNTRICO ESCONDIDO ..2 ponerse en contacto MARCO IZQUIERDO ....1 PASADOR DE MADERA .....8 con Sauder en cuanto a esta unidad, MARCO DERECHO ......1 LLAVE EN L .........1 refi érase al número RIOSTRA ........4 TORNILLO DE CABEZA de lote y al número... - Página 28 Guía de uso de herrajes PASO 4 CÓMO UTILIZAR EL EXCÉNTRICO ESCONDIDO Y LA Fije las RIOSTRAS (E) al MARCO DERECHO (D). BIELA DE EXCÉNTRICO O PASADOR DE EXCÉNTRICO Apriete los ocho TORNILLOS DE CABEZA HEXAGONAL de 13 mm (7) utilizando la LLAVE EN L (4). 1..
- Página 29 PASO 11 PASO 16 Fije las lengüetas sobre el MARCO IZQUIERDO (C) al Cuidadosamente ponga la unidad en posición FONDO (G) y al ESTANTE INFERIOR (J). Utilice cuatro vertical contra la pared en su posición fi nal. TORNILLOS DE CABEZA REDONDA de 13 mm (5). Las siguientes instrucciones muestran que su unidad está...
- Página 30 WARNING Please use your furniture correctly and safely. Improper use can cause safety hazards, or damage to your furniture or household items. Carefully read the following chart. Look out for: What can happen: How to avoid the problem: • Children climbing on furniture. •...
-
Página 31: Garantía Limitada De 1 Año
“as is”, at a distress or going-out-of business sale, or from a liquidator. whichever is shorter. Some states do not allow limitations on how long an 3. As the exclusive remedy under this Warranty, Sauder will (at its sole implied Warranty lasts, so the above limitation may not apply to you. - Página 32 IF YOU NEED ASSISTANCE, PLEASE CONTACT OUR MICHIGAN-BASED CUSTOMER SERVICE TEAM support@whisker.com | 1.877.250.7729 | Mon-Fri, 9am-5:30pm EST (except holidays) WHISKERSUPPORT.COM General Conformity Certifi cate 1. This certifi cate applies to the Sauder Global Sourcing Product identifi ed by this Instruction Book.