Publicidad
Enlaces rápidos
Record Your Model Number Here For Future Reference
Anote Aquí Número del Modelo Comprado Para Referencia Futura
Inscrivez le numéro de modèle ici pour pouvoir le retrouver.
ASSEMBLY PARTS LIST
LISTA DE PIEZAS PARA LA INSTALACIÓN
LISTE DES PIЀCES
Description
Descripción
Description
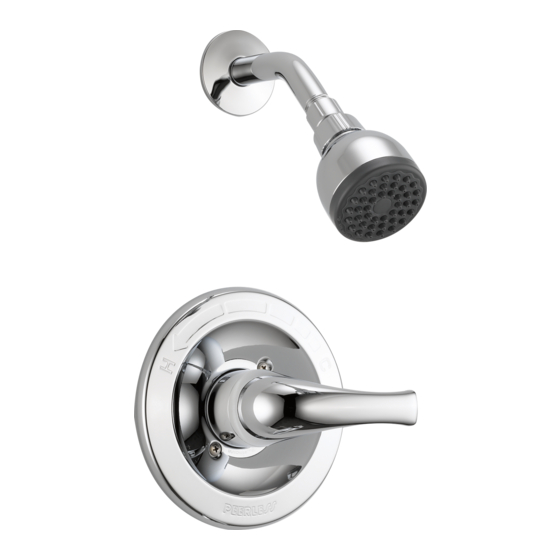
Showerhead
Cabeza de Regadera
Pomme de douche
Shower Arm & Flange
Brazo de Regadera y Brida
Pomme de douche et collerette
Trim Sleeve
Manguito
Manchon de Finition
Valve Body & Cartridge Assembly
Cuerpo de la Válvula y Ensamble
del Casquete
Corps de robinet et Cartouche
Tub Spout (Diverter)
Tubo de Salida para Bañera
(Desviador)
Bec de baignoire avec dérivation
Lever Handle w/Screw
Palanca con Tornillo
Manette avec vis
Escutcheon
Chapetón
Boîtier
Escutcheon Screws
Tornillos para chapetón
Vis pour boîtier
Spacer
Separadores
Piéce D'espacement
The Peerless
Installation Helpline
1-800-438-6673
www.peerlessfaucet.com
Instruction Manual Printed in China
Manual de Instrucciones Impreso en China
Manuel d'instructions Imprimé en Chine
8/26/15
SINGLE HANDLE WASHERLESS PRESSURE
BALANCED TUB & SHOWER VALVES
MODEL PTT188763 & PTT188773
VÁLVULAS DE REGADRA Y BAÑERA DE PRESIÓN
BALANCEADA SIN ARANDELAS
MODELO PTT188763 Y PTT188773
ROBINET DE BAIGNOIRE / DOUCHE MONOCOMMANDE
À ÉQUILIBRAGE DE PRESSION
MODÈLE PTT188763 ET PTT188773
Quantity
Calidad
Quantité
1
1
1
1
1
1
Estimated Time For Assembly
The estimated time to install this tub and shower valve is 85 minutes.
N/A
N/A
These estimates do not include removing the old shower system.
Tiempo Estimado para Instalar
El tiempo estimado para instalar esta válvula de bañera y regadera es
1
N/A
85 minutos. Estos estimados no incluyen el tiempo que tomaría quitar el
sistema viejo de regadera.
Durée d'installation estimée
1
1
Le temps requis pour l'installation du robinet de baignoire-douche est
estimé à 85 minutes. L'estimation n'inclut pas la dépose de la vieille
robinetterie de douche.
1
1
Hole Dimensions
2
2
(minimum and maximum
hole size in wall for valve
installation)
1
1
Las Dimensiones
de los Hoyos
(el tamaño del hoyo mínimo
y máximo en la pared para
la instalación de la válvula)
Dimension du trou
(dimensions minimales et
maximales du trou dans la
paroi pour l'installation de la
soupape)
1
You may need
Usted puede necesitar
Articles dont vous pouvez avoir besoin:
Plumber tape:
(NOT PROVIDED)
For use on threaded connections.
Cinta para plomero:
(NO PROPORCIONADAS)
Para uso con conexiones enroscadas.
Ruban de plomberie:
(NON FOURNI)
Pour application sur le filetage des raccords.
Wrench(es) and Screwdriver:
(NOT PROVIDED)
For faucet removal/installation.
Llave(s) y Destornillador:
(NO PROPORCIONADAS)
Para quitar/instalación de fregaderos.
Clé(s) et Tournevis:
(NON FOURNIS)
Pour pose et dépose de robinet
3 1/2"-5"
(89 mm-127mm)
69247 Rev D
Publicidad

Manuales relacionados para Peerless Faucet PTT188763


Resumen de contenidos para Peerless Faucet PTT188763
- Página 1 SINGLE HANDLE WASHERLESS PRESSURE BALANCED TUB & SHOWER VALVES MODEL PTT188763 & PTT188773 VÁLVULAS DE REGADRA Y BAÑERA DE PRESIÓN BALANCEADA SIN ARANDELAS MODELO PTT188763 Y PTT188773 ROBINET DE BAIGNOIRE / DOUCHE MONOCOMMANDE Record Your Model Number Here For Future Reference À...
- Página 2 SHUT OFF WATER SUPPLIES Study recommended valve configurations on stringers or framing: (A) Remove old valve. Install new valve so that the arrows on the bracket (1) point Tub/Shower, (B) Shower Only. upward. For shower only installation, plug bottom valve outlet with pipe plug (2) (not supplied).
- Página 3 3 7/8" (98 mm) - 4"(102 mm) Apply plumber tape Aplique cinta para plomero Appliquez ruban de plomberie SHOWERHEAD AND TUB SPOUT INSTALLATION FOR SHOWERHEAD INSTALLATION: Connect top outlet (1) to shower arm (2) with proper fittings. To prevent damage to finish on shower arm, insert wall end of shower arm into shower flange (3) before screwing arm into riser connection.
- Página 4 FLUSH SYSTEM / CHECK FOR LEAKS. Place handle on valve stem and turn handle to full on mixed position. Turn on hot and cold water lines to full open for one minute each. Check for leaks. Shut off water at faucet. Remove handle (1).
- Página 5 Hotter Caliente Plus chaude Disc Disco Disque 1st Position Stem Posición Primera Unidad del Vástago 1ère Position Obturateurs Rotational Limit Stop Tope de Limite de Girar Butée anti-échaudage ADJUSTING THE ROTATIONAL LIMIT STOP: • Turn on water so that cold water is as cold as it will get and hot water is as hot as it will get. Place handle back on stem and rotate fully counterclockwise to the hottest position.
-
Página 6: Mantenimiento
▲ Specify Finish Valve Body Brackets Especifíque el Acabado Cuerpo de la Válvula Abrazaderas Précisez le Fini Corps de robinet Supports RP46074 Valve Cartridge Válvula de Cartucho Cartouche RP6025 ▲ Flange Brida RP6023 ▲ Collerette Shower Arm Brazo de Regadera Pomme de douche RP14414 Seats &... - Página 7 CAUTION: This system/device must be set by the installer to insure safe, maximum WARNING: This pressure balanced bath valve is designed to minimize the effects of temperature. Any change in the setting may raise the discharge temperature above outlet water temperature changes due to inlet pressure changes commonly caused the limit considered safe and may lead to hot water burns.
- Página 8 & repair. This warranty excludes all industrial, commercial, and business usage Peerless Faucet Company will replace, FREE OF CHARGE, during the warranty period, (including but not limited to use in multi-family housing), whose purchasers any part or finish that proves defective in material and/or workmanship under normal are hereby extended a five-year limited warranty from the date of purchase, installation, use &...