Tabla de contenido
Publicidad
Enlaces rápidos
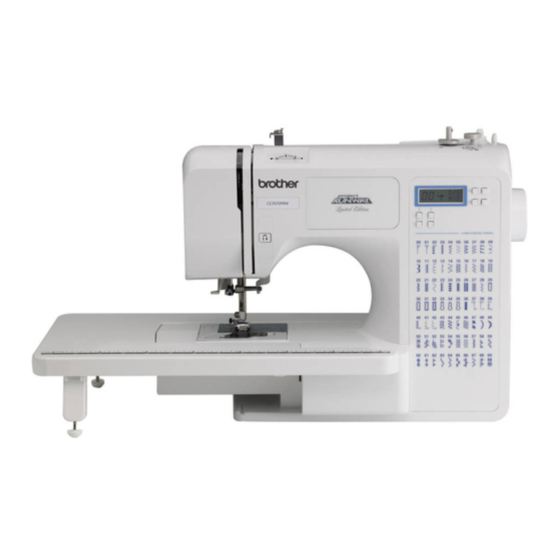
Máquina de Coser Computerizada
Manual de
Instrucciones
Product Code ( Código de producto ):
885-V60/V61/V62/V63/V64/V65
Visítenos en http:/ /solutions.brother.com donde hallará consejos para la solución de
problemas así como la lista de preguntas y respuestas más frecuentes.
CONOZCA SU
MÁQUINA DE COSER
FUNCIONES DE
COSTURA BÁSICAS
PUNTADAS CON
APLICACIONES
ANEXO
Publicidad
Tabla de contenido

Manuales relacionados para Brother 885-V60


Resumen de contenidos para Brother 885-V60
- Página 1 Manual de FUNCIONES DE COSTURA BÁSICAS Instrucciones PUNTADAS CON APLICACIONES Product Code ( Código de producto ): 885-V60/V61/V62/V63/V64/V65 ANEXO Visítenos en http:/ /solutions.brother.com donde hallará consejos para la solución de problemas así como la lista de preguntas y respuestas más frecuentes.
-
Página 3: Instrucciones De Seguridad Importantes
— — — — — — — — — — — — — — — — — — — — — — — — — — — — — — — — — — — — — — — — — — — — — — — — — — — — — — — — — — — — — — — — — — — — — — — — — — — — — — — — — — — — — — — — — — — — — — — — — — — — — — — — — — — — — — — — — — — — — — — INSTRUCCIONES DE SEGURIDAD IMPORTANTES Lea estas instrucciones de seguridad antes de utilizar la máquina. - Página 4 — — — — — — — — — — — — — — — — — — — — — — — — — — — — — — — — — — — — — — — — — — — — — — — — — — — — — — — — — — — — — — — — — — — — — — — — — — — — — — — — — — — — — — — — — — — — — — — — — — — — — — — — — — — — — — — — — — — — — — Mantenga siempre limpia la zona de trabajo: •...
-
Página 5: Sólo Para Los Usuarios Del Reino Unido, Irlanda, Malta Y Chipre
El contenido de este manual y las especificaciones de este producto están sujetos a cambios sin previo aviso. Si desea obtener información adicional del producto, visite nuestro sitio web en www.brother.com CONSERVE ESTAS INSTRUCCIONES Esta máquina de coser está diseñada para el uso doméstico. -
Página 6: Tabla De Contenido
— — — — — — — — — — — — — — — — — — — — — — — — — — — — — — — — — — — — — — — — — — — — — — — — — — — — — — — — — — — — — — — — — — — — — — — — — — — — — — — — — — — — — — — — — — — — — — — — — — — — — — — — — — — — — — — — — — — — — — CONTENIDO INSTRUCCIONES DE SEGURIDAD IMPORTANTES ............1 1. - Página 7 — — — — — — — — — — — — — — — — — — — — — — — — — — — — — — — — — — — — — — — — — — — — — — — — — — — — — — — — — — — — — — — — — — — — — — — — — — — — — — — — — — — — — — — — — — — — — — — — — — — — — — — — — — — — — — — — — — — — — — — 3.
-
Página 8: Conozca Su Máquina De Coser
Nota Pedal: Modelo T Este pedal puede utilizarse con máquinas que tengan el código de producto 885-V60/V61/V62/V63/ V64/V65. Este código se indica en la placa de características de la máquina. Puede obtener el tornillo del soporte del pie prensatela a través de su distribuidor autorizado. -
Página 9: Accesorios Opcionales
— — — — — — — — — — — — — — — — — — — — — — — — — — — — — — — — — — — — — — — — — — — — — — — — — — — — — — — — — — — — — — — — — — — — — — — — — — — — — — — — — — — — — — — — — — — — — — — — — — — — — — — — — — — — — — — — — — — — — — — Accesorios opcionales Código de la pieza Código de la pieza... -
Página 10: Nombres Y Funciones De Las Piezas De La Máquina
CONOZCA SU MÁQUINA DE COSER — — — — — — — — — — — — — — — — — — — — — — — — — — — — — — — — — — — — — — — — — — — — — — — — — — — — — — — — — — — — — — — — — — — — — — — — — — — — — — — — — — — — NOMBRES Y FUNCIONES DE LAS PIEZAS DE LA MÁQUINA Las ilustraciones de este manual de instrucciones pueden ser diferentes a las de la máquina utilizada. -
Página 11: Sección De Aguja Y Pie Prensatela
— — — — — — — — — — — — — — — — — — — — — — — — — — — — — — — — — — — — — — — — — — — — — — — — — — — — — — — — — — — — — — — — — — — — — — — — — — — — — — — — — — — — — — — — — — — — — — — — — — — — — — — — — — — — — — — — — — — — — — — Sección de aguja y pie prensatela e Pie prensatela Durante la costura, el pie prensatela ejerce una presión... -
Página 12: Panel De Operaciones
CONOZCA SU MÁQUINA DE COSER — — — — — — — — — — — — — — — — — — — — — — — — — — — — — — — — — — — — — — — — — — — — — — — — — — — — — — — — — — — — — — — — — — — — — — — — — — — — — — — — — — — — Panel de operaciones Portacarrete El panel de operaciones, situado en la parte... -
Página 13: Almacenamiento Del Portacarrete
— — — — — — — — — — — — — — — — — — — — — — — — — — — — — — — — — — — — — — — — — — — — — — — — — — — — — — — — — — — — — — — — — — — — — — — — — — — — — — — — — — — — — — — — — — — — — — — — — — — — — — — — — — — — — — — — — — — — — — — Almacenamiento del portacarrete Colocación del portacarrete Cuando vaya a colocar la tapa en la máquina de... -
Página 14: Uso De La Máquina De Coser
CONOZCA SU MÁQUINA DE COSER — — — — — — — — — — — — — — — — — — — — — — — — — — — — — — — — — — — — — — — — — — — — — — — — — — — — — — — — — — — — — — — — — — — — — — — — — — — — — — — — — — — — USO DE LA MÁQUINA DE COSER Medidas de precaución con la corriente eléctrica Asegúrese de que cumple las siguientes medidas de precaución relacionadas con la corriente eléctrica. -
Página 15: Corriente Eléctrica
— — — — — — — — — — — — — — — — — — — — — — — — — — — — — — — — — — — — — — — — — — — — — — — — — — — — — — — — — — — — — — — — — — — — — — — — — — — — — — — — — — — — — — — — — — — — — — — — — — — — — — — — — — — — — — — — — — — — — — — Corriente eléctrica Pedal Introduzca la clavija del pedal en la conexión... -
Página 16: Control De Velocidad Manual (Para Los Modelos Equipados Con El Botón De Inicio/Parar)
CONOZCA SU MÁQUINA DE COSER — — — — — — — — — — — — — — — — — — — — — — — — — — — — — — — — — — — — — — — — — — — — — — — — — — — — — — — — — — — — — — — — — — — — — — — — — — — — — — — — — — — — Control de velocidad manual Cambio de la posición de parada (para los modelos equipados... -
Página 17: Enhebrado De La Máquina
— — — — — — — — — — — — — — — — — — — — — — — — — — — — — — — — — — — — — — — — — — — — — — — — — — — — — — — — — — — — — — — — — — — — — — — — — — — — — — — — — — — — — — — — — — — — — — — — — — — — — — — — — — — — — — — — — — — — — — — ENHEBRADO DE LA MÁQUINA Devanado de la bobina En esta sección se describe el proceso para enrollar el hilo en la bobina. - Página 18 CONOZCA SU MÁQUINA DE COSER — — — — — — — — — — — — — — — — — — — — — — — — — — — — — — — — — — — — — — — — — — — — — — — — — — — — — — — — — — — — — — — — — — — — — — — — — — — — — — — — — — — — Inserte totalmente el carrete de hilo en el Recuerde portacarrete.
- Página 19 — — — — — — — — — — — — — — — — — — — — — — — — — — — — — — — — — — — — — — — — — — — — — — — — — — — — — — — — — — — — — — — — — — — — — — — — — — — — — — — — — — — — — — — — — — — — — — — — — — — — — — — — — — — — — — — — — — — — — — — Tire del hilo hacia la derecha, páselo por debajo del ganchillo en la guía de devanado PRECAUCIÓN...
- Página 20 CONOZCA SU MÁQUINA DE COSER — — — — — — — — — — — — — — — — — — — — — — — — — — — — — — — — — — — — — — — — — — — — — — — — — — — — — — — — — — — — — — — — — — — — — — — — — — — — — — — — — — — — Gire el control de velocidad manual hacia la PRECAUCIÓN derecha (para establecer una velocidad...
- Página 21 — — — — — — — — — — — — — — — — — — — — — — — — — — — — — — — — — — — — — — — — — — — — — — — — — — — — — — — — — — — — — — — — — — — — — — — — — — — — — — — — — — — — — — — — — — — — — — — — — — — — — — — — — — — — — — — — — — — — — — — Tire del hilo hacia la derecha y páselo por la Corte el hilo, mueva el eje de la devanadora ranura de la base de la devanadora de bobina.
-
Página 22: Enhebrado Del Hilo Inferior
CONOZCA SU MÁQUINA DE COSER — — — — — — — — — — — — — — — — — — — — — — — — — — — — — — — — — — — — — — — — — — — — — — — — — — — — — — — — — — — — — — — — — — — — — — — — — — — — — — — — — — — — Suba la aguja a la posición más alta girando la Enhebrado del hilo inferior rueda hacia usted (hacia la izquierda) o pulse... - Página 23 — — — — — — — — — — — — — — — — — — — — — — — — — — — — — — — — — — — — — — — — — — — — — — — — — — — — — — — — — — — — — — — — — — — — — — — — — — — — — — — — — — — — — — — — — — — — — — — — — — — — — — — — — — — — — — — — — — — — — — — Sujete el extremo del hilo, empuje hacia abajo Suba la aguja a la posición más alta girando la la bobina con un dedo y pase el hilo por la...
- Página 24 CONOZCA SU MÁQUINA DE COSER — — — — — — — — — — — — — — — — — — — — — — — — — — — — — — — — — — — — — — — — — — — — — — — — — — — — — — — — — — — — — — — — — — — — — — — — — — — — — — — — — — — — Mientras mantiene presionada ligeramente la Vuelva a colocar la tapa de la bobina.
-
Página 25: Enhebrado Del Hilo Superior
— — — — — — — — — — — — — — — — — — — — — — — — — — — — — — — — — — — — — — — — — — — — — — — — — — — — — — — — — — — — — — — — — — — — — — — — — — — — — — — — — — — — — — — — — — — — — — — — — — — — — — — — — — — — — — — — — — — — — — — Enhebrado del hilo superior Ajuste el hilo superior y enhebre la aguja. - Página 26 CONOZCA SU MÁQUINA DE COSER — — — — — — — — — — — — — — — — — — — — — — — — — — — — — — — — — — — — — — — — — — — — — — — — — — — — — — — — — — — — — — — — — — — — — — — — — — — — — — — — — — — — Como se indica, empuje la palanca del Inserte totalmente el carrete del hilo superior portacarrete con el dedo.
- Página 27 — — — — — — — — — — — — — — — — — — — — — — — — — — — — — — — — — — — — — — — — — — — — — — — — — — — — — — — — — — — — — — — — — — — — — — — — — — — — — — — — — — — — — — — — — — — — — — — — — — — — — — — — — — — — — — — — — — — — — — — Pase el hilo superior como se indica en la Recuerde siguiente ilustración.
-
Página 28: Uso Del Enhebrador De Aguja (Para Los Modelos Equipados Con El Enhebrador De Aguja)
CONOZCA SU MÁQUINA DE COSER — — — — — — — — — — — — — — — — — — — — — — — — — — — — — — — — — — — — — — — — — — — — — — — — — — — — — — — — — — — — — — — — — — — — — — — — — — — — — — — — — — — — Pase el hilo por detrás de la guía del hilo de la Uso del enhebrador de aguja (para los varilla de la aguja, por encima de la aguja. - Página 29 — — — — — — — — — — — — — — — — — — — — — — — — — — — — — — — — — — — — — — — — — — — — — — — — — — — — — — — — — — — — — — — — — — — — — — — — — — — — — — — — — — — — — — — — — — — — — — — — — — — — — — — — — — — — — — — — — — — — — — — Baje completamente la palanca del Tire del lazo del hilo pasado a través del ojo enhebrador de aguja.
-
Página 30: Procedimiento Para Tirar Del Hilo Inferior
CONOZCA SU MÁQUINA DE COSER — — — — — — — — — — — — — — — — — — — — — — — — — — — — — — — — — — — — — — — — — — — — — — — — — — — — — — — — — — — — — — — — — — — — — — — — — — — — — — — — — — — — Procedimiento para tirar del hilo inferior Sujete suavemente el extremo del hilo Tire de los dos hilos unos 10 cm (4 pulgadas) y... -
Página 31: Cambio De La Aguja
— — — — — — — — — — — — — — — — — — — — — — — — — — — — — — — — — — — — — — — — — — — — — — — — — — — — — — — — — — — — — — — — — — — — — — — — — — — — — — — — — — — — — — — — — — — — — — — — — — — — — — — — — — — — — — — — — — — — — — — CAMBIO DE LA AGUJA En esta sección encontrará... -
Página 32: Comprobación De La Aguja
CONOZCA SU MÁQUINA DE COSER — — — — — — — — — — — — — — — — — — — — — — — — — — — — — — — — — — — — — — — — — — — — — — — — — — — — — — — — — — — — — — — — — — — — — — — — — — — — — — — — — — — — Aguja de punta redonda Aguja incorrecta Utilice la aguja de punta redonda para coser telas... - Página 33 — — — — — — — — — — — — — — — — — — — — — — — — — — — — — — — — — — — — — — — — — — — — — — — — — — — — — — — — — — — — — — — — — — — — — — — — — — — — — — — — — — — — — — — — — — — — — — — — — — — — — — — — — — — — — — — — — — — — — — — Baje la palanca del pie prensatela.
-
Página 34: Costura Con Aguja Gemela
CONOZCA SU MÁQUINA DE COSER — — — — — — — — — — — — — — — — — — — — — — — — — — — — — — — — — — — — — — — — — — — — — — — — — — — — — — — — — — — — — — — — — — — — — — — — — — — — — — — — — — — — Costura con aguja gemela La máquina está... - Página 35 — — — — — — — — — — — — — — — — — — — — — — — — — — — — — — — — — — — — — — — — — — — — — — — — — — — — — — — — — — — — — — — — — — — — — — — — — — — — — — — — — — — — — — — — — — — — — — — — — — — — — — — — — — — — — — — — — — — — — — — Enhebre el hilo superior del lado derecho de Seleccione un tipo de puntada.
-
Página 36: Cambio Del Pie Prensatela
CONOZCA SU MÁQUINA DE COSER — — — — — — — — — — — — — — — — — — — — — — — — — — — — — — — — — — — — — — — — — — — — — — — — — — — — — — — — — — — — — — — — — — — — — — — — — — — — — — — — — — — — CAMBIO DEL PIE PRENSATELA PRECAUCIÓN Antes de cambiar el pie prensatela, apague la máquina. -
Página 37: Extracción Del Soporte Del Pie Prensatela
— — — — — — — — — — — — — — — — — — — — — — — — — — — — — — — — — — — — — — — — — — — — — — — — — — — — — — — — — — — — — — — — — — — — — — — — — — — — — — — — — — — — — — — — — — — — — — — — — — — — — — — — — — — — — — — — — — — — — — — Baje lentamente la palanca del pie prensatela Extracción del soporte del de manera que la patilla del pie se ajuste en la... - Página 38 CONOZCA SU MÁQUINA DE COSER — — — — — — — — — — — — — — — — — — — — — — — — — — — — — — — — — — — — — — — — — — — — — — — — — — — — — — — — — — — — — — — — — — — — — — — — — — — — — — — — — — — — Mantenga el soporte del pie prensatela en su lugar con la mano derecha y, a continuación, apriete el tornillo con la mano izquierda...
-
Página 39: Funciones De Costura Básicas
— — — — — — — — — — — — — — — — — — — — — — — — — — — — — — — — — — — — — — — — — — — — — — — — — — — — — — — — — — — — — — — — — — — — — — — — — — — — — — — — — — — — — — — — — — — — — — — — — — — — — — — — — — — — — — — — — — — — — — — FUNCIONES DE COSTURA BÁSICAS COSTURA A continuación se describen las funciones de costura básicas. -
Página 40: Selección De Puntadas
FUNCIONES DE COSTURA BÁSICAS — — — — — — — — — — — — — — — — — — — — — — — — — — — — — — — — — — — — — — — — — — — — — — — — — — — — — — — — — — — — — — — — — — — — — — — — — — — — — — — — — — — — — Coloque el pie prensatela que se indica en la Selección de puntadas pantalla de LCD. -
Página 41: Ajuste De La Longitud Y La Anchura De La Puntada
— — — — — — — — — — — — — — — — — — — — — — — — — — — — — — — — — — — — — — — — — — — — — — — — — — — — — — — — — — — — — — — — — — — — — — — — — — — — — — — — — — — — — — — — — — — — — — — — — — — — — — — — — — — — — — — — — — — — — — — Pulse el lado “+”... -
Página 42: Inicio De La Costura
FUNCIONES DE COSTURA BÁSICAS — — — — — — — — — — — — — — — — — — — — — — — — — — — — — — — — — — — — — — — — — — — — — — — — — — — — — — — — — — — — — — — — — — — — — — — — — — — — — — — — — — — — — Mientras sujeta el extremo del hilo y la tela Inicio de la costura con la mano izquierda, gire la rueda hacia... - Página 43 — — — — — — — — — — — — — — — — — — — — — — — — — — — — — — — — — — — — — — — — — — — — — — — — — — — — — — — — — — — — — — — — — — — — — — — — — — — — — — — — — — — — — — — — — — — — — — — — — — — — — — — — — — — — — — — — — — — — — — — Deje de pisar el pedal o pulse (botón de Costura de puntadas de refuerzo...
-
Página 44: Tensión Del Hilo
FUNCIONES DE COSTURA BÁSICAS — — — — — — — — — — — — — — — — — — — — — — — — — — — — — — — — — — — — — — — — — — — — — — — — — — — — — — — — — — — — — — — — — — — — — — — — — — — — — — — — — — — — — Recuerde Tensión del hilo Cuando haya terminado la costura, retire la... -
Página 45: Consejos Útiles De Costura
— — — — — — — — — — — — — — — — — — — — — — — — — — — — — — — — — — — — — — — — — — — — — — — — — — — — — — — — — — — — — — — — — — — — — — — — — — — — — — — — — — — — — — — — — — — — — — — — — — — — — — — — — — — — — — — — — — — — — — — CONSEJOS ÚTILES DE COSTURA A continuación se describen varias maneras de mejorar los resultados de la costura. -
Página 46: Costura De Cierres De Velcro
FUNCIONES DE COSTURA BÁSICAS — — — — — — — — — — — — — — — — — — — — — — — — — — — — — — — — — — — — — — — — — — — — — — — — — — — — — — — — — — — — — — — — — — — — — — — — — — — — — — — — — — — — — Si las costuras son gruesas y la tela no avanza al principio de la costura PRECAUCIÓN... -
Página 47: Costura De Telas Finas
— — — — — — — — — — — — — — — — — — — — — — — — — — — — — — — — — — — — — — — — — — — — — — — — — — — — — — — — — — — — — — — — — — — — — — — — — — — — — — — — — — — — — — — — — — — — — — — — — — — — — — — — — — — — — — — — — — — — — — — Costura de telas finas Costura de piezas cilíndricas Al coser telas finas, es posible que la costura no... -
Página 48: Puntadas Con Aplicaciones
PUNTADAS CON APLICACIONES — — — — — — — — — — — — — — — — — — — — — — — — — — — — — — — — — — — — — — — — — — — — — — — — — — — — — — — — — — — — — — — — — — — — — — — — — — — — — — — — — — — — — — — PUNTADAS CON APLICACIONES PUNTADAS DE SOBREHILADO Las puntadas de sobrehilado permiten unir costuras y terminarlas en una sola operación. -
Página 49: Uso Del Pie Para Sobrehilado
— — — — — — — — — — — — — — — — — — — — — — — — — — — — — — — — — — — — — — — — — — — — — — — — — — — — — — — — — — — — — — — — — — — — — — — — — — — — — — — — — — — — — — — — — — — — — — — — — — — — — — — — — — — — — — — — — — — — — — — Uso del pie para sobrehilado Coloque el pie para sobrehilado “G”. -
Página 50: Costura Básica
PUNTADAS CON APLICACIONES — — — — — — — — — — — — — — — — — — — — — — — — — — — — — — — — — — — — — — — — — — — — — — — — — — — — — — — — — — — — — — — — — — — — — — — — — — — — — — — — — — — — — — — COSTURA BÁSICA Las puntadas rectas se utilizan para las costuras básicas. -
Página 51: Costura Invisible Para Dobladillo
— — — — — — — — — — — — — — — — — — — — — — — — — — — — — — — — — — — — — — — — — — — — — — — — — — — — — — — — — — — — — — — — — — — — — — — — — — — — — — — — — — — — — — — — — — — — — — — — — — — — — — — — — — — — — — — — — — — — — — — COSTURA INVISIBLE PARA DOBLADILLO La costura invisible para dobladillo puede utilizarse para terminar el borde de una labor de costura, como el dobladillo de unos pantalones, sin que se vea la puntada. - Página 52 PUNTADAS CON APLICACIONES — — — — — — — — — — — — — — — — — — — — — — — — — — — — — — — — — — — — — — — — — — — — — — — — — — — — — — — — — — — — — — — — — — — — — — — — — — — — — — — — — — — — — — — Con un trozo de tiza, marque en la tela a unos Desdoble el borde de la tela y coloque la tela con el revés hacia arriba.
- Página 53 — — — — — — — — — — — — — — — — — — — — — — — — — — — — — — — — — — — — — — — — — — — — — — — — — — — — — — — — — — — — — — — — — — — — — — — — — — — — — — — — — — — — — — — — — — — — — — — — — — — — — — — — — — — — — — — — — — — — — — — Ajuste la anchura de la puntada hasta que la Si la aguja no llega al doblez del dobladillo aguja llegue ligeramente al doblez del...
-
Página 54: Costura De Ojales
PUNTADAS CON APLICACIONES — — — — — — — — — — — — — — — — — — — — — — — — — — — — — — — — — — — — — — — — — — — — — — — — — — — — — — — — — — — — — — — — — — — — — — — — — — — — — — — — — — — — — — — COSTURA DE OJALES Se pueden coser los ojales y después los botones sobre ellos. - Página 55 — — — — — — — — — — — — — — — — — — — — — — — — — — — — — — — — — — — — — — — — — — — — — — — — — — — — — — — — — — — — — — — — — — — — — — — — — — — — — — — — — — — — — — — — — — — — — — — — — — — — — — — — — — — — — — — — — — — — — — — A continuación se indican los nombres de las piezas Si el botón no cabe en la placa de guía del del pie para ojales “A”, que se utiliza para la costura...
- Página 56 PUNTADAS CON APLICACIONES — — — — — — — — — — — — — — — — — — — — — — — — — — — — — — — — — — — — — — — — — — — — — — — — — — — — — — — — — — — — — — — — — — — — — — — — — — — — — — — — — — — — — — — Coloque la tela de modo que la parte frontal Sujete suavemente el extremo del hilo de la marca del ojal coincida con las marcas...
- Página 57 — — — — — — — — — — — — — — — — — — — — — — — — — — — — — — — — — — — — — — — — — — — — — — — — — — — — — — — — — — — — — — — — — — — — — — — — — — — — — — — — — — — — — — — — — — — — — — — — — — — — — — — — — — — — — — — — — — — — — — — Inserte un alfiler en el extremo del pespunte Costura de ojales en telas elásticas del ojal para evitar que el pespunte se corte y,...
-
Página 58: Costura De Botón
PUNTADAS CON APLICACIONES — — — — — — — — — — — — — — — — — — — — — — — — — — — — — — — — — — — — — — — — — — — — — — — — — — — — — — — — — — — — — — — — — — — — — — — — — — — — — — — — — — — — — — — Coloque un botón entre el pie prensatela y la Costura de botón tela. - Página 59 — — — — — — — — — — — — — — — — — — — — — — — — — — — — — — — — — — — — — — — — — — — — — — — — — — — — — — — — — — — — — — — — — — — — — — — — — — — — — — — — — — — — — — — — — — — — — — — — — — — — — — — — — — — — — — — — — — — — — — — Gire la rueda hacia usted (hacia la izquierda) para comprobar que la aguja penetra correctamente en los dos orificios del botón.
-
Página 60: Costura De Cremalleras
PUNTADAS CON APLICACIONES — — — — — — — — — — — — — — — — — — — — — — — — — — — — — — — — — — — — — — — — — — — — — — — — — — — — — — — — — — — — — — — — — — — — — — — — — — — — — — — — — — — — — — — COSTURA DE CREMALLERAS El pie para cremalleras puede utilizarse para coser diferentes tipos de cremalleras y se puede colocar fácilmente a la derecha o a la izquierda de la aguja. - Página 61 — — — — — — — — — — — — — — — — — — — — — — — — — — — — — — — — — — — — — — — — — — — — — — — — — — — — — — — — — — — — — — — — — — — — — — — — — — — — — — — — — — — — — — — — — — — — — — — — — — — — — — — — — — — — — — — — — — — — — — — Coloque el soporte del pie prensatela a la PRECAUCIÓN derecha de la patilla del pie para cremalleras...
-
Página 62: Costura De Telas Elásticas Y Gomas
PUNTADAS CON APLICACIONES — — — — — — — — — — — — — — — — — — — — — — — — — — — — — — — — — — — — — — — — — — — — — — — — — — — — — — — — — — — — — — — — — — — — — — — — — — — — — — — — — — — — — — — COSTURA DE TELAS ELÁSTICAS Y GOMAS Con esta máquina puede coser telas elásticas y colocar gomas. - Página 63 — — — — — — — — — — — — — — — — — — — — — — — — — — — — — — — — — — — — — — — — — — — — — — — — — — — — — — — — — — — — — — — — — — — — — — — — — — — — — — — — — — — — — — — — — — — — — — — — — — — — — — — — — — — — — — — — — — — — — — — Estire la goma para coserla a la tela de forma que alcance la misma longitud que la tela.
-
Página 64: Aplicaciones, Patchwork Y Acolchados
PUNTADAS CON APLICACIONES — — — — — — — — — — — — — — — — — — — — — — — — — — — — — — — — — — — — — — — — — — — — — — — — — — — — — — — — — — — — — — — — — — — — — — — — — — — — — — — — — — — — — — — APLICACIONES, PATCHWORK Y ACOLCHADOS A continuación se describen las puntadas para coser aplicaciones, patchwork y acolchados. -
Página 65: Aplicaciones
— — — — — — — — — — — — — — — — — — — — — — — — — — — — — — — — — — — — — — — — — — — — — — — — — — — — — — — — — — — — — — — — — — — — — — — — — — — — — — — — — — — — — — — — — — — — — — — — — — — — — — — — — — — — — — — — — — — — — — — Quite el hilvanado, si fuera necesario. -
Página 66: Acolchado
PUNTADAS CON APLICACIONES — — — — — — — — — — — — — — — — — — — — — — — — — — — — — — — — — — — — — — — — — — — — — — — — — — — — — — — — — — — — — — — — — — — — — — — — — — — — — — — — — — — — — — — Cosa alineando el lado del pie prensatela con Retire el pie prensatela y su soporte. -
Página 67: Acolchado Libre
— — — — — — — — — — — — — — — — — — — — — — — — — — — — — — — — — — — — — — — — — — — — — — — — — — — — — — — — — — — — — — — — — — — — — — — — — — — — — — — — — — — — — — — — — — — — — — — — — — — — — — — — — — — — — — — — — — — — — — — Uso de la guía de acolchados opcional Retire el pie prensatela y su soporte. - Página 68 PUNTADAS CON APLICACIONES — — — — — — — — — — — — — — — — — — — — — — — — — — — — — — — — — — — — — — — — — — — — — — — — — — — — — — — — — — — — — — — — — — — — — — — — — — — — — — — — — — — — — — — Mueva la palanca de posición de dientes de Cuando haya terminado la costura, mueva la arrastre (situada en la base de la parte trasera...
-
Página 69: Costura De Remate
— — — — — — — — — — — — — — — — — — — — — — — — — — — — — — — — — — — — — — — — — — — — — — — — — — — — — — — — — — — — — — — — — — — — — — — — — — — — — — — — — — — — — — — — — — — — — — — — — — — — — — — — — — — — — — — — — — — — — — — COSTURA DE REMATE Refuerce los puntos que vayan a sufrir más tirantez, como las mangas, la entrepierna y las juntas de los bolsillos. - Página 70 PUNTADAS CON APLICACIONES — — — — — — — — — — — — — — — — — — — — — — — — — — — — — — — — — — — — — — — — — — — — — — — — — — — — — — — — — — — — — — — — — — — — — — — — — — — — — — — — — — — — — — — Coloque la tela con la abertura del bolsillo Baje al máximo la palanca para ojales.
-
Página 71: Puntada Decorativa
— — — — — — — — — — — — — — — — — — — — — — — — — — — — — — — — — — — — — — — — — — — — — — — — — — — — — — — — — — — — — — — — — — — — — — — — — — — — — — — — — — — — — — — — — — — — — — — — — — — — — — — — — — — — — — — — — — — — — — — PUNTADA DECORATIVA Con esta máquina se pueden coser varios tipos de puntadas decorativas. -
Página 72: Vainicas
PUNTADAS CON APLICACIONES — — — — — — — — — — — — — — — — — — — — — — — — — — — — — — — — — — — — — — — — — — — — — — — — — — — — — — — — — — — — — — — — — — — — — — — — — — — — — — — — — — — — — — — Anchura de la Longitud de la Nº... -
Página 73: Puntada De Festón
— — — — — — — — — — — — — — — — — — — — — — — — — — — — — — — — — — — — — — — — — — — — — — — — — — — — — — — — — — — — — — — — — — — — — — — — — — — — — — — — — — — — — — — — — — — — — — — — — — — — — — — — — — — — — — — — — — — — — — — Cosa puntadas paralelas a intervalos de Puntada de festón 10 mm (3/8 pulgadas). -
Página 74: Puntada De Concha
PUNTADAS CON APLICACIONES — — — — — — — — — — — — — — — — — — — — — — — — — — — — — — — — — — — — — — — — — — — — — — — — — — — — — — — — — — — — — — — — — — — — — — — — — — — — — — — — — — — — — — — Puntada de concha Costura de unión Las “conchas”... -
Página 75: Costura De Broches Y Adornos
— — — — — — — — — — — — — — — — — — — — — — — — — — — — — — — — — — — — — — — — — — — — — — — — — — — — — — — — — — — — — — — — — — — — — — — — — — — — — — — — — — — — — — — — — — — — — — — — — — — — — — — — — — — — — — — — — — — — — — — Costura de broches y adornos Al coser con la aguja bastidor, la aguja hace orificios más grandes, creando una puntada decorativa... -
Página 76: Anexo
ANEXO — — — — — — — — — — — — — — — — — — — — — — — — — — — — — — — — — — — — — — — — — — — — — — — — — — — — — — — — — — — — — — — — — — — — — — — — — — — — — — — — — — — — — — — — — — — — — — — — — — — — — — — — — — — — — — — ANEXO AJUSTES DE PUNTADAS En la siguiente tabla se indican las aplicaciones, la longitud y la anchura de la puntada, y si se puede o no... - Página 77 — — — — — — — — — — — — — — — — — — — — — — — — — — — — — — — — — — — — — — — — — — — — — — — — — — — — — — — — — — — — — — — — — — — — — — — — — — — — — — — — — — — — — — — — — — — — — — — — — — — — — — — — — — — — — — — — — — — — — — — Anchura de la Longitud de la Nº...
- Página 78 ANEXO — — — — — — — — — — — — — — — — — — — — — — — — — — — — — — — — — — — — — — — — — — — — — — — — — — — — — — — — — — — — — — — — — — — — — — — — — — — — — — — — — — — — — — — — — — — — — — — — — — — — — — — — — — — — — — — Anchura de la Longitud de la Nº...
- Página 79 — — — — — — — — — — — — — — — — — — — — — — — — — — — — — — — — — — — — — — — — — — — — — — — — — — — — — — — — — — — — — — — — — — — — — — — — — — — — — — — — — — — — — — — — — — — — — — — — — — — — — — — — — — — — — — — — — — — — — — — Anchura de la Longitud de la Nº...
- Página 80 ANEXO — — — — — — — — — — — — — — — — — — — — — — — — — — — — — — — — — — — — — — — — — — — — — — — — — — — — — — — — — — — — — — — — — — — — — — — — — — — — — — — — — — — — — — — — — — — — — — — — — — — — — — — — — — — — — — — Anchura de la Longitud de la Nº...
-
Página 81: Mantenimiento
— — — — — — — — — — — — — — — — — — — — — — — — — — — — — — — — — — — — — — — — — — — — — — — — — — — — — — — — — — — — — — — — — — — — — — — — — — — — — — — — — — — — — — — — — — — — — — — — — — — — — — — — — — — — — — — — — — — — — — — MANTENIMIENTO A continuación encontrará... - Página 82 ANEXO — — — — — — — — — — — — — — — — — — — — — — — — — — — — — — — — — — — — — — — — — — — — — — — — — — — — — — — — — — — — — — — — — — — — — — — — — — — — — — — — — — — — — — — — — — — — — — — — — — — — — — — — — — — — — — — Coloque la caja de la bobina de manera que Según se muestra, inserte la pestaña de la su marca...
- Página 83 — — — — — — — — — — — — — — — — — — — — — — — — — — — — — — — — — — — — — — — — — — — — — — — — — — — — — — — — — — — — — — — — — — — — — — — — — — — — — — — — — — — — — — — — — — — — — — — — — — — — — — — — — — — — — — — — — — — — — — — Desde la parte delantera, vuelva a deslizar la cubierta de la placa de la aguja para colocarla en su posición.
-
Página 84: Solución De Problemas
Si la máquina deja de funcionar correctamente, compruebe los posibles problemas siguientes antes de solicitar su reparación. Usted puede resolver la mayoría de los problemas por sí mismo. Si necesitara ayuda adicional, Brother Solutions Center ofrece las preguntas más frecuentes y consejos para la solución de problemas más actualizados. -
Página 85: Hilo Enganchado En El Revés De La Tela
— — — — — — — — — — — — — — — — — — — — — — — — — — — — — — — — — — — — — — — — — — — — — — — — — — — — — — — — — — — — — — — — — — — — — — — — — — — — — — — — — — — — — — — — — — — — — — — — — — — — — — — — — — — — — — — — — — — — — — — Mientras sujeta la bobina en su posición con Hilo enganchado en el el dedo, pase el hilo por la ranura de la placa... - Página 86 ANEXO — — — — — — — — — — — — — — — — — — — — — — — — — — — — — — — — — — — — — — — — — — — — — — — — — — — — — — — — — — — — — — — — — — — — — — — — — — — — — — — — — — — — — — — — — — — — — — — — — — — — — — — — — — — — — — — Suba el pie prensatela con la palanca.
- Página 87 — — — — — — — — — — — — — — — — — — — — — — — — — — — — — — — — — — — — — — — — — — — — — — — — — — — — — — — — — — — — — — — — — — — — — — — — — — — — — — — — — — — — — — — — — — — — — — — — — — — — — — — — — — — — — — — — — — — — — — — Asegúrese de guiar el hilo de derecha a izquierda por el tirahilo.
-
Página 88: Tensión Del Hilo Incorrecta
ANEXO — — — — — — — — — — — — — — — — — — — — — — — — — — — — — — — — — — — — — — — — — — — — — — — — — — — — — — — — — — — — — — — — — — — — — — — — — — — — — — — — — — — — — — — — — — — — — — — — — — — — — — — — — — — — — — — Tensión del hilo incorrecta Síntomas •... -
Página 89: La Tela Queda Enganchada En La Máquina Y No Se Puede Extraer
— — — — — — — — — — — — — — — — — — — — — — — — — — — — — — — — — — — — — — — — — — — — — — — — — — — — — — — — — — — — — — — — — — — — — — — — — — — — — — — — — — — — — — — — — — — — — — — — — — — — — — — — — — — — — — — — — — — — — — — Corte los hilos enganchados y, a continuación, La tela queda enganchada extraiga la bobina. - Página 90 ANEXO — — — — — — — — — — — — — — — — — — — — — — — — — — — — — — — — — — — — — — — — — — — — — — — — — — — — — — — — — — — — — — — — — — — — — — — — — — — — — — — — — — — — — — — — — — — — — — — — — — — — — — — — — — — — — — — Utilice el destornillador en forma de disco Apriete ligeramente con los dedos el tornillo suministrado para aflojar los dos tornillos de...
- Página 91 — — — — — — — — — — — — — — — — — — — — — — — — — — — — — — — — — — — — — — — — — — — — — — — — — — — — — — — — — — — — — — — — — — — — — — — — — — — — — — — — — — — — — — — — — — — — — — — — — — — — — — — — — — — — — — — — — — — — — — — Coloque la caja de la bobina de manera que Compruebe el estado de la aguja y colóquela.
- Página 92 ANEXO — — — — — — — — — — — — — — — — — — — — — — — — — — — — — — — — — — — — — — — — — — — — — — — — — — — — — — — — — — — — — — — — — — — — — — — — — — — — — — — — — — — — — — — — — — — — — — — — — — — — — — — — — — — — — — — Gire lentamente la rueda hacia usted (hacia la Haga una costura de prueba con tela normal.
-
Página 93: Lista De Síntomas
— — — — — — — — — — — — — — — — — — — — — — — — — — — — — — — — — — — — — — — — — — — — — — — — — — — — — — — — — — — — — — — — — — — — — — — — — — — — — — — — — — — — — — — — — — — — — — — — — — — — — — — — — — — — — — — — — — — — — — — Lista de síntomas Antes de coser Síntoma... - Página 94 ANEXO — — — — — — — — — — — — — — — — — — — — — — — — — — — — — — — — — — — — — — — — — — — — — — — — — — — — — — — — — — — — — — — — — — — — — — — — — — — — — — — — — — — — — — — — — — — — — — — — — — — — — — — — — — — — — — — Durante la costura Síntoma Causa posible...
- Página 95 — — — — — — — — — — — — — — — — — — — — — — — — — — — — — — — — — — — — — — — — — — — — — — — — — — — — — — — — — — — — — — — — — — — — — — — — — — — — — — — — — — — — — — — — — — — — — — — — — — — — — — — — — — — — — — — — — — — — — — — Síntoma Causa posible Solución...
- Página 96 ANEXO — — — — — — — — — — — — — — — — — — — — — — — — — — — — — — — — — — — — — — — — — — — — — — — — — — — — — — — — — — — — — — — — — — — — — — — — — — — — — — — — — — — — — — — — — — — — — — — — — — — — — — — — — — — — — — — Síntoma Causa posible Solución...
- Página 97 — — — — — — — — — — — — — — — — — — — — — — — — — — — — — — — — — — — — — — — — — — — — — — — — — — — — — — — — — — — — — — — — — — — — — — — — — — — — — — — — — — — — — — — — — — — — — — — — — — — — — — — — — — — — — — — — — — — — — — — Síntoma Causa posible Solución...
-
Página 98: Mensajes De Error
ANEXO — — — — — — — — — — — — — — — — — — — — — — — — — — — — — — — — — — — — — — — — — — — — — — — — — — — — — — — — — — — — — — — — — — — — — — — — — — — — — — — — — — — — — — — — — — — — — — — — — — — — — — — — — — — — — — — MENSAJES DE ERROR Si se realiza una operación de forma incorrecta antes de que la máquina de coser esté... -
Página 99: Índice
— — — — — — — — — — — — — — — — — — — — — — — — — — — — — — — — — — — — — — — — — — — — — — — — — — — — — — — — — — — — — — — — — — — — — — — — — — — — — — — — — — — — — — — — — — — — — — — — — — — — — — — — — — — — — — — — — — — — — — — ÍNDICE aberturas ................67 hilo superior.............. - Página 100 ANEXO — — — — — — — — — — — — — — — — — — — — — — — — — — — — — — — — — — — — — — — — — — — — — — — — — — — — — — — — — — — — — — — — — — — — — — — — — — — — — — — — — — — — — — — — — — — — — — — — — — — — — — — — — — — — — — — telas elásticas ..............45 telas finas ...............45 telas gruesas ..............43...
- Página 104 Spanish 885-V60/V61/V62/V63/V64/V65 XE8760-001 Printed in China...