Publicidad
Idiomas disponibles
Idiomas disponibles
EN
Support de fixation inclinable
FR
pour panneaux photovoltaïques
signalisation
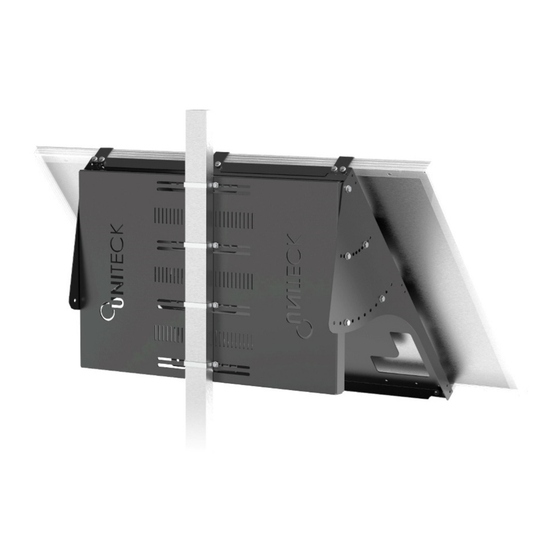
Tilting mounting bracket for solar
EN
panels – road sign
Soporte de fijación para paneles
ES
solares - señalización
Supporto inclinabile per pannelli
IT
fotovoltaici - segnaletica
UNIFIX
300 S
www.uniteck.fr
p.2 – 7
p.8 – 13
p.14 – 19
www.uniteck.fr
CO00XXX
16/09/2022
Publicidad
Tabla de contenido

Resumen de contenidos para Uniteck UNIFIX 300 S
- Página 1 – 7 pour panneaux photovoltaïques signalisation p.8 – 13 Tilting mounting bracket for solar panels – road sign Soporte de fijación para paneles p.14 – 19 solares - señalización Supporto inclinabile per pannelli www.uniteck.fr fotovoltaici - segnaletica CO00XXX www.uniteck.fr 16/09/2022...
- Página 2 Cher client, nous vous remercions pour votre achat de l'un de nos produits Uniteck. Veuillez lire avec attention toutes les instructions avant d'utiliser le produit. DESCRIPTION Les supports Unifix ont été conçus spécialement pour fixer vos panneaux photovoltaïques Unisun 300.12M.
-
Página 3: Consignes De Sécurité
À la fin des travaux et dans les 72h suivantes, vérifiez que vos supports et panneaux soient bien fixés. • Dans le cas d’une fixation par collage, respectez les consignes liées au temps de séchage du fabricant de la colle. www.uniteck.fr... - Página 4 UNIFIX 300 S – MONTAGE Liste des pièces : N°1 N°2 N°3 N°4 N°5 N°6 N°7 N°8 N°9 M10 x 25 M8 x 20 • Fixez le repère N°1 sur votre poteau à l’aide d’étriers adaptés. Exemple avec notre option de bride pour poteau de diamètre 130-190mm, référence 2662 (non fournie).
- Página 5 UNIFIX 300 S– MONTAGE • Positionnez le repère N°2 sur l’angle souhaité (angle de 30° à 60° réglable par tranche de 5°). Puis vissez l’ensemble. N°2 N°4 M10 x 25 N°5 N°6 • Positionnez et vissez le panneau en portrait ou paysage (exemple en portrait).
- Página 6 UNIFIX 300 S– MONTAGE • Plaquez les repères N°3 contre le panneau puis vissez-les. N°7 N°8 N°9 M8 x 20 À la fin du montage, assurez-vous que support de fixation et votre panneau photovoltaïque soient fixés correctement. www.uniteck.fr...
- Página 7 Attention : notre SAV n’accepte pas les retours en port dû. Après la garantie, notre SAV assure les réparations après acceptation d’un devis. Contact SAV : UNITECK 1 Avenue de Rome Zae Via Europa - bâtiment Cassis 34350 Vendres -France...
- Página 8 Dear customer, thank you for purchasing one of our UNITECK products. Please read carefully all the instructions before using the product. DESCRIPTION Unifix brackets have been specially designed to fix your Unisun 300.12M photovoltaic panels. Easy to install, they can be mounted on : •...
-
Página 9: Safety Instructions
UNIFIX 300 S RECOMMENDATIONS Mount Unifix brackets only on surfaces with sufficient bearing capacity. Consider the additional load with the panel: Mount Panel Unifix 300S = 19,8 kg Unisun 300.12m =15,5 kg Fastening: to prevent large quantities of snow from accumulating behind the sensor, install appropriate barrier grids. - Página 10 UNIFIX 300 S – ASSEMBLY Spare parts list : N°1 N°2 N°3 N°4 N°5 N°6 N°7 N°8 N°9 M10 x 25 M8 x 20 • Fix part N°1 on your mast thanks to adapted U-bolts. Example with our flanges for 130-190mm diamter masts, ref.
- Página 11 UNIFIX 300 S– ASSEMBLY • Place part N°2 to reach the angle wanted (from 30° to 60° by 5°). Screw all the parts together. N°2 N°4 M10 x 25 N°5 N°6 • Place and screw the panel in portrait or landscape orientation (example in portrait).
- Página 12 UNIFIX 300 S– ASSEMBLY • Place parts N°3 against the panel and screw them. N°7 N°8 N°9 M8 x 20 At the end of assembly, please ensure that the mounting brackets and your panel are properly fixed. www.uniteck.fr...
- Página 13 Caution: Our after-sales service does not accept carriage forward/ collected returns. After the warranty, our after-sales service ensures repairs after acceptance of a quotation After-sales service contact : UNITECK 1 Avenue de Rome Zae Via Europa - bâtiment Cassis 34350 Vendres -France...
-
Página 14: Descripción
Estimado cliente, gracias por comprar nuestro producto Uniteck. Por favor lea con cuidado todas las instrucciones antes de usar el producto DESCRIPCIÓN Los soportes UNIFIX han sido concebidos especialmente para fijar sus paneles fotovoltaicos UNISUN 300.12M. Fáciles de instalar, se fijan : •... -
Página 15: Consignas De Seguridad
Si el soporte y equipamiento de montaje están expuestos a los rayos del sol durante una larga duración, hay un riesgo de quemadura. Protéjase. • En fin de los trabajos, verifique que sus soportes y paneles están bien fijados. www.uniteck.fr... - Página 16 UNIFIX 300 S – MONTAJE Lista de piezas : N°1 N°2 N°3 N°4 N°5 N°6 N°7 N°8 N°9 M10 x 25 M8 x 20 • Fije la pieza N°1 sobre el mástil con estribos adaptados. Ejemplo con nuestras bridas para mástil de diámetro 130-190mm referencia 2662 (no incluídas).
- Página 17 UNIFIX 300 S– MONTAJE • Posicione la pieza N°2 en el ángulo deseado (de 30° a 60° por cada 5°). Atornille el conjunto. N°2 N°4 M10 x 25 N°5 N°6 • Posicione y atornille el panel en retrato o paisaje (ejemplo en retrato).
- Página 18 UNIFIX 300 S– MONTAJE • Posicione las partes N°3 contra el panel y atorníllelas. N°7 N°8 N°9 M8 x 20 Al finalizar el montaje, asegúrese de que el soporte y el panel estén fijados correctamente. www.uniteck.fr...
-
Página 19: Garantía
Cuidado: nuestro Servicio Postventa no acepta devoluciones con porte debido. Después la garantía, nuestro Servicio Postventa asegura las reparaciones después aceptación de un presupuesto. Contacto Servicio Post venta : UNITECK SARL 1 avenue de Rome ZAE Via Europa 34350 Vendres...


