Tabla de contenido
Publicidad
Idiomas disponibles
Idiomas disponibles
Publicidad
Capítulos
Tabla de contenido

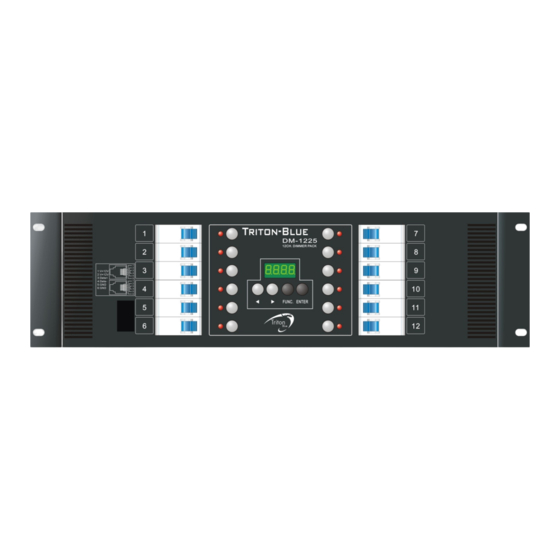
Resumen de contenidos para Triton Blue DM-1225
- Página 1 DM-1225 MANUAL DE INSTRUCCIONES DM-1225 USER MANUAL ,www.triton-blue.com...
-
Página 2: Tabla De Contenido
INDICE Seguridad....................3 Capitulo 1. Introducción DM-1225............. 3 1-1 Características................. 3 1-2 Especificaciones..............4 1-3 Introducción al panel frontal............ 4 1-4 Introducción al panel trasero........... 4 1-5 Diagrama de conexiones............5 Capitulo 2 . Uso..................5 2-1 Señal DMX 512..............5 2-2 Direccionamiento señal DMX.......... -
Página 3: Seguridad
1 Si el DM-1225 es instalado en rack, asegurese que este tenga una buena refrigeración. El dimmer necesita una buena refrigeración para que sus funciones no esten limitadas. 2 La máxima salida del DM-1225 es de 20 A por canal para hacer funciones de test con un máximo de 30 minutos de funcionamiento. -
Página 4: Especificaciones
ESPECIFICACIONES Alimentación AC100-240v, 45---63Hz Salida Salida maxima 20 A(remítase a seguridad en este manual) Protocolo DMX 512 Conectores de señal XLR 5 pin (Macho x 1 , Hembra x 1 ) 2 6p4c phone jack Dimensiones 482(W) x 132(H) x 312(D)mm Unidades de rack 19”... -
Página 5: Diagrama De Conexiones
: mueve un número hacia abajo. Subir hasta el canal 512 El DM-1225 es un dimmer de 12 canales. Si se configura como d.001 las salidas de canales son del 1 al 12 Si se configura como d.0013 las salidas de canales son del 13 al 24... -
Página 6: Visualización De Salidas
VISUALIZACION DE SALIDAS PASO 1: Entrar en estado DMX y presionar el botón ENTER. PASO 2: Presionar para verlo. Canal 4 = 100% Full TEST DE SALIDA PASO 1: Presionar el botón del canal para comprobar su nivel PASO 2: Presionar el botón del canal para apagarlo. FUNCION DIMMER / INTERRUTOR PASO 1: Entrar en el estado DMX y presionar ENTER PASO 2: Presionar el botón FUNC y el display se coloca como abajo... -
Página 7: Precalentamiento De Canales (0
PASO 5: Presionar para elegir si el canal es dimmer o interruptor. Canal 1 = Interruptorl PRECALENTAMIENTO PASO 1: Presionar el botón FUNC hasta que en el display se ponga como abajo PASO 2: Presionar para ajustar el nivel deseado. Todos los canales estan al 6% LIMITACION DE SALIDA PASO 1: Presionar el botón FUNC hasta que en el display se ponga como abajo... - Página 8 CONTENTS Safety Introdution..................9 Chapter 1 Introdution of DM-1225 ............9 1-1 Feature..................9 1-2 Specification................10 1-3 Operation Panel Function Introducing........10 1-4 Output Rear Panel Introducing..........10 1-5 Wiring Diagram..............Chapter 2 . Operation................2-1 Standard DMX 512 Signal............
-
Página 9: Safety Introdution
Otherwise the machine will become over-heat and result in the mis-fuction. 2 DM-1225 The max output of each channel is 20A : For testing (do not over 30 minutes) 3 DM-1225 The max output of each channel is 16A: For several hours use. -
Página 10: Specification
SPECIFICATION Power AC100-240v, 45---63Hz Output Maximal outputs is 20A per channel (Please refer to the safety Introduction) Protocol DMX 512 Signal Connector XLR 5 pin (Male x 1 , Female x 1 ) 2 6p4c phone jack Dimension 482(W) x 132(H) x 312(D)mm Location 19î... -
Página 11: Wiring Diagram
: move 1 number backward. Up to 512 Channel DM-1225 is 12 channels dimmer pack so when setting this units: 1. As the start channel is d.001, the output is from channel 1 to channel 12 2. As the start channel is d.007, the output is from channel 7 to channel 19... -
Página 12: Channel Output Status Preview
CHANNEL OUTPUT STATUS PREVIEW STEP 1: Enter to DMX status and press ENTER button. STEP 2: Press to preview. Channel 4 = 100% Full OUTPUT TESTING STEP1: Press channel button for full load output. STEP 2: Press channel Buton again for turn off output.. DIMMING / SWITCHING SETTING Enter to DMX status and press ENTER button STEP... -
Página 13: Warn - Up Setting (0
STEP 5: Press to choose the channel is dimming or switching.. Channel 1 = Switching WARN - UP SETTING STEP 1: Press FUNC button untill the LCD displays as below STEP 2: Press to adjust. All channels are set on 6% for warm OUTPUT LIMIT SETTING STEP 1: Press FUNC button untill the LCD displays as below... - Página 14 ,www.triton-blue.com...
